

themacguy
-
Posts
36 -
Joined
-
Last visited
themacguy's Achievements
Neophyte (2/11)
0
Reputation
-
I'm having trouble getting anywhere with anything other than the voxel-room, and render-room.... Anything much more complex than a simple cube just hangs/freezes the program, and I have to force-quit, or even reboot my MacPro to get going again. Still having ongoing problems with the SPHERE primitive, which only work for very very small spheres---larger ones have huge gaps in the polygonal "skin" when the sphere is released from the sphere-primitive-Gizmo.... So... Now working with a simple (?) cube primitive. Creates okay, "Releases" okay... I finally found the "retopo" command in the voxel-tree, by right-clicking on the object in the vox-tree. So... NOW what? Playing around---or I should probably say MESSING around in the paint-room, the few times that anything has even shown up in the paint-room (usually it, and the UV room and the sculpt room are completely BLANK... I get very very SLOPPY results when I try to colour the 6 sides of the cube, in anything like an approximation of "sharp accurate edges"---take well over an HOUR to do this, and it looks HORRIBLE... I am seemingly unable to make any clean, sharp edged selections... Practically impossible to colour each cubeface with a different flat colour. IE: a very straightforward (?) basic "working with a defined selection" sort of task.. So, what is the correct method/workflow, to make and select a defined, sharp-edged selection of the faces of a cube?, Colour each a different colour, And then......??? I'm running out of conceptual language that I UNDERSTAND, at this point---next step, I THINK, is to "peel the skin off" of the coloured cube. to create a "UV Map"....... I'm still not entirely clear just what a UV map is... A separate image for each cube face? I would THINK I should end up with something resembling THIS (see attached JPEG) But I'm not getting anything that looks remotely like this... I can construct this "peeled cube" image in Photoshop in about 3 minutes... Why is it so difficult/impossible to do in 3DC??? Until I get this working, my next desired step, which is to create ACCURATELY bevelled edges, and have them assigned a different material...is still a long way away!... :-/ I guess I'm still at the "playing in the sand-box with my toy blocks" stage of the game---and not even getting THAT right..! ;-}} :-// Please advise! :-)
-
This INSTANCING tool looks marvelous! I will bet that it saves a LOT of system-resources (eg. RAM) to have ONE model, and a "zillion" instances, instead of a "zillion" separate (but identically shaped) models in the same scene! Now.. (imitating CLINT EASTWOOD's snarl, in DIRTY HARRY... ;-) "WHERE IS THE MACINTOSH VERSION OF THIS??? ;0/ Please advise! :-) I'm hoping the next Mac version of 3D-Coat has some major "bug-fixes" as well (first!!) :-) --still having trouble with program stability, especially when using the "Primitive" tool!!
-

SYSTEM CRASH ON MAC
themacguy replied to robotbob's topic in SOS! If you need urgent help for 3DCoat
Hello Andrew! Thanks for having a look at my "Mac" 3D-Coat problem.... It's **STILL** happening--worse now than before! :-/ Reboot my system, then launch 3D-coat Click on Voxel "cube" icon Tap space-bar to bring up floating commands-menu window Select "Primitives" and "sphere" "Gizmo" appears, with sphere inside Tap "enter" or "return" or click on "Apply" on floating Primitives-menu-window to "Release" sphere as a voxel object Sizes below Radius = 100 are usually okay... Sizes larger than that progressively lose more and more surface as the sphere size increases! Similar behaviour with CUBE, but NOT with the other primitive shapes. I have purged my system and re-installed 3D-Coat "from scratch" several times, but the problem keeps on happening --assorted other "frozen" sessions after creating a fairly "low-poly" blob object, with "out of memory" errors, and I have to force-quit the program Using the Unix "Terminal.app" to do so! (ie: it's REALLY frozen!!) Is this something I am doing wrong? Or is this a program "bug"? Thank-you for any advice! :-) --------------- System Details: Mac Pro tower with "Snow Leopard" 10.6.6 (a "clean" install!!!) Single 6-core Westmere 3.33Ghz 64-bit Xeon chip, foactory installed 3 GB (3 x 1) RAM, factory installed. Graphics Card: ATI Radeon HD 5770: Chipset Model: ATI Radeon HD 5770 Type: GPU Bus: PCIe Slot: Slot-1 PCIe Lane Width: x16 VRAM (Total): 1024 MB Vendor: ATI (0x1002) Device ID: 0x68b8 Revision ID: 0x0000 ROM Revision: 113-C0160C-155 EFI Driver Version: 01.00.436 Software: 3D-Coat Ver.3.5.05B(GL)(educational) --------- -
Greg's "Make-A-Rat" tutorial series is WONDERFUL--just the right amount of "granular" detail to really get the message across--without getting confused with too MUCH detail! I'm now working with 3d-Coat, after viewing the tutorials---but just how the various "rooms" link together---for UV's texture-maps, Retopo, Sculpt and Paint--is still something of a mystery to me, because the tutorials don't quite have enough of the "WHY" explained. Without the "why" and the "what" and the "how" all explained in granular detail "in parallel" it's VERY difficult to establish a conceptual FRAMEWORK of "understanding" to hang other, and more advanced "steps" onto in a way that makes sense...In some areas of the workflow, I think LOTS more detailed tutorials are needed... PERHAPS what's needed is to interpolate a few more video tutorial sub-sections into the "Rat Project"?!?!) Info on UV's and "baking" settings, the editing of "maps" generally needs LOTS more explanation of the "HOW" and "WHY" these map edits need to be done... ---the details of "peeling the skin off" of a model are still very confusing to me... I see that (in Javis Jones series of videos) they DO cover a heck of a lot of this "UV" stuff---but at what, for me, feels like a "machine-gun" pace--and in a manner that assumes that I already have a clear conceptual framework--a solid grasp of "WHY the pieces of the workflow fit together".... Presently I do NOT have that grasp--the WHY of various steps in the UV manipulation/editing workflow is missing... ---so all that's left is (at best), is my attempts to perform a rote repetition of steps, with almost NO understanding of really what's going on.. And I'm just not getting anything like the results in the "Build a Rat" project tutorials... (a lot of system-crashes and software-freezes on my Mac....hmm....) Example: Javis' tutorial on UV maps: rotating them with the "Manipulator" tool for flipping, or resizing, or smoothing.... --Well,,, what does this MEAN? WHY do I do this? Not enough of it is conceptually spelled out, to allow the formation of a coherent "understanding" of the workflow. ----and it's nearly impossible to follow along, without FIRST having that conceptual understanding... Again, I'm not expecting such a fully-developed series to be FREE---We all have to make a living somehow, right? :-) but the details---conceptual and practical---and a breakdown of the ENTIRE workflow at a sufficient level of "granularity" ie: the tutorial sequence has to "not skip over the obvious"...because it is NOT obvious to a beginner, learning about "3D stuff" and who is working with this program, for the first time... A complete mystery (to me) is precisely HOW to name files correctly so that they'll "reload" correctly while I'm (attempting to) build something with several objects, with different shader/texture settings on each section/face/part.... --and using various texture maps, bump maps, shaders et al... And, above all---HOW TO NAME/ORGANIZE them correctly??? How to "package" a 3D-Coat project so *everything* it need fit into a SENSIBLE export package.... THAT is a tutorial all "Newbies" would like to see...I'm sure! It is also a FEATURE REQUEST--I would LOVE to have a simple button called "EXPORT ENTIRE PROJECT" (if there *is* one, I haven't found it yet!) A few more conceptual lessons on "workflow details" working with (I'll suggest it yet again!) Use a REALLY REALLY SIMPLE model, to demonstrate the PROCESS.... Say, a cube with each side coloured/textured differently!! Then follow it through the PROCESS, with lots of fine-detail--both conceptually and practically. ---retopo-paint-sculpt-render "rooms"---with attention to the (for newbies) the "arcane" details of these rooms, and the conceptual toolkit that makes each room work... --UV (ultra-violet?) maps, "skinning the carcass" etc... I'll bet I'm not the only newbie going "W.T.F." and scratching their head! Javis very fast overview of UV techniques is probably very good for more advanced users...who can fill in any gaps from their OWN conceptual framework... ---but it is just NOT "granular" or "expository" enough (for me) and/or for people who do NOT know ANY of this stuff already! It's all "getting there", but there are still a few gaps in the "flow" of the tutorial series.. :-) Hell of a lot of excellent effort, tho' A++ to ALL concerned, for that! :-) As always... <Rant Mode/OFF> ;-}
-
I too have invested in a licensed copy of Octane Render... However, my wait for results is a bit longer, as I'm STILL waiting for NVIDIA to come up with an AFFORDABLE card, with suitable drivers for Macintosh.. However, the various render samples on Octane's Gallery page are just STUNNING....Worth waiting for... However in advance of a fully proofed bridge between the two programs---If somebody can detail EXACTLY how to specify "parts" of an object built in 3DC, so that their textures can be "given more oomph" using Octane Render's nodal texture window... I'd love to know just how that (is supposed to?) work properly! LIkewise the management of UV's image maps, shaders, textures and "all of that stuff", so that a project can all be nicely "packaged" for storage, or export to another platform or workstation, without "missing something" needed in the package (BOTH the 3DC components, AND the "tweaked" textures and lighting coming in from Octane Render!) ----Everybody talks about "workflow", but there don't seem to be any DEAD SIMPLE, "start-to-finish" EXAMPLES for newbies to get up-to-speed with the wider aspects of that process... Say, take a CUBE primitive, all the way through the steps in 3DC, then into Octane, then to the render itself! Be that as it may---on GENERAL principles, just from what I've seen so far.... I'd LOVE to see a well-integrated "plug-in" for 3DC that would call up an Octane Render window, ---with the nodal textures all ready to go onto the 3DC model, to do final "tweaking" of textures and then a final render!
-
SYSTEM CRASH ON MAC
themacguy replied to robotbob's topic in SOS! If you need urgent help for 3DCoat
I seem to be having pretty much the same problem with the latest build of 3DC on Mac, and the one previious to it... very odd intermittent problems with scaling up voxel primatives (in 3.5.05), and now TOTAL in 3.507(GL Educational) for Mac --every time I do this, now, I get an "out of memory, save your work" error. and the program "hangs" at that point (switch to the Mac Desktop/Finder, and bring up info on the running programs, and 3DC is "not responding" flagged in RED... Have to FORCE_QUIT the program, but usuall y do NOT have to reboot the system itself... (although a good idea, to defragment "used" RAM partitions) I'm running on a brand-new 6-core Mac Pro, Westmere (Intel server) chip, with a paltry 3GB of RAM.... I can pull up a system "crash-log", that I assume will have the detailed process information needed to diagnose//FIX!! this problem, and perhaps move the Mac "build" forward toward the 64-bit objective! :-) Here's a selection from the tail-end of my system-log (recent activity being a crash-test of 3DC---well, it DID crash! :-// This is a read-out from the "CONSOLE.app" utility... lists all the various "threads" of CPU and RAM activity... (so they tell me... it's mostly "greek" to me!) -=-=-=-=-=-=-=-=-=-=-=-=-=-=-=-=-=-=-=-=-=-=-=-=- 10-12-27 2:50:19 PM [0x0-0x6ee6ee].com.yourcompany.3D-Coat[41222] 3D-Coat(41222,0xb0b1c000) malloc: *** mmap(size=749568) failed (error code=12) 10-12-27 2:50:19 PM [0x0-0x6ee6ee].com.yourcompany.3D-Coat[41222] *** error: can't allocate region 10-12-27 2:50:19 PM [0x0-0x6ee6ee].com.yourcompany.3D-Coat[41222] *** set a breakpoint in malloc_error_break to debug 10-12-27 2:50:19 PM [0x0-0x6ee6ee].com.yourcompany.3D-Coat[41222] 3D-Coat(41222,0xb0b1c000) malloc: *** mmap(size=770048) failed (error code=12) 10-12-27 2:50:19 PM [0x0-0x6ee6ee].com.yourcompany.3D-Coat[41222] *** error: can't allocate region 10-12-27 2:50:19 PM [0x0-0x6ee6ee].com.yourcompany.3D-Coat[41222] *** set a breakpoint in malloc_error_break to debug 10-12-27 2:50:21 PM [0x0-0x6ee6ee].com.yourcompany.3D-Coat[41222] 3D-Coat(41222,0xb0b1c000) malloc: *** mmap(size=13791232) failed (error code=12) 10-12-27 2:50:21 PM [0x0-0x6ee6ee].com.yourcompany.3D-Coat[41222] *** error: can't allocate region 10-12-27 2:50:21 PM [0x0-0x6ee6ee].com.yourcompany.3D-Coat[41222] *** set a breakpoint in malloc_error_break to debug 10-12-27 2:50:21 PM [0x0-0x6ee6ee].com.yourcompany.3D-Coat[41222] 3D-Coat(41222,0xb0b1c000) malloc: *** mmap(size=13811712) failed (error code=12) 10-12-27 2:50:21 PM [0x0-0x6ee6ee].com.yourcompany.3D-Coat[41222] *** error: can't allocate region 10-12-27 2:50:21 PM [0x0-0x6ee6ee].com.yourcompany.3D-Coat[41222] *** set a breakpoint in malloc_error_break to debug -=-=-=-=-=-=-=-=-=-=-=-=-=-=-=-=-=-=-=-=-=-=-=-=- Attached, find a few more lengthy sections of my "crash-log" that SEEM to tie into this.... I've Zipped them for easier handling Let me know (somebody!! :-) what this all means, and how to make 3DC work properly on my Mac!... CrashLog-Archive.zip -
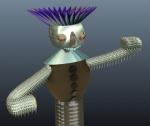
Well... Thanks to lots of friendly input in the Forums, and a reasonable amount of time mucking about... Here's my first semi-decent, well-thought-out-in-ADVANCE piece of modelling... The basic modelling is okay--proportions are a bit "off" I think, but the components are scalable... The textures are impossibly too clean and smooth... I still havent gotten ANY "subtle" results (after figuring out the AUTOPRO button, when right-clicking on a layer in the model layer window... ---any "painting" I do on the mesh, comes across like I've vomited 20 gallons of lumpy latex goo all over the "mesh"... How do you get "just enough but not too much" of simulated "wear and tear" without having to chuck it, and start over from scratch... (which I've had to do many times... I don't think I have enough system RAM to load some of these meshed objects... 3DC freezes up on me about every 15 minutes or so.. I think you'll recognize the model.... a passing resemblance, for now... Comments and constructive tips WELCOME! :-)
-
Switching preferences on a Connexion Space Navigator mouse
themacguy replied to themacguy's topic in General 3DCoat
Here's a tip for any other SpaceNavigator 3d mouse users.... I was getting really frustrated with the "Lathe tutorial" (mentioned earlier in this thread!), because the setting of the "locked down" settings needed to turn the "y axis spin" into a SOLID, NON-MOVING lathe platform were not working--there was always a bit (or a hell of a Lot, sometimes!) of "wobble"..... I finally traced it down the CAMERA settings on the main menu-bar---you have to be CERTAIN that the camera setting is set to "Rotate around world centre"--then the lathe "turntable" is a solid, reliable platform with no "wobble" ---I had had it (somehow) set to "revolve around last pick-point"---hence the wobbly behaviour! -
Custom Shaders-BumpMaps and general How to...?
themacguy replied to themacguy's topic in General 3DCoat
Hi Tom... Thanks for your reply! I'm STILL missing something in the translation.. :-? I create an object ,starting with a primative cube, sphere or whatever. "release" it from the Gizmo by hitting ENTER or RETURN... Sometimes this works, and sometimes, when I then reselect the released object with the "Pick" tool, it just vanishes---the Gizmo is acting a bit "flaky" for me... even after several "trash everything and Re-Install" tries... Anyhow. assuming I have an edited block of Voxels, and have selected a Shader (say, shiny Red Plastic for this example) The object DOES show up in the Render Room, but NOT in ANY of Retopo, UV, Sculpt or Paint room... When I go back to the Voxels room, the edited block of Voxels--my "object" DOES show up there.... So... EXACTLY, COMPLETELY SPELLED OUT, IN GREAT DETAIL....(in words of one syllable, or less!!!... ;-}}} **How** do I get my voxel object to show up in these other rooms... and where do I switch on (????) this purple-sphere..??? And what do I do with it, then? Thanks for (hopefully...) a much amplified, point-by-point response.... It would be SO nice to have a highly detailed "workflow" video, with detailed audio commentary, SPELLING EVERYTHING OUT.... Step by step by step, using a very simple "object" like a cube, with a few minor edits---and "take through all the steps in the workflow....." ---but I haven't found it yet! :-/ -
I dunno.... I keep hacking away at trying to figure out how to make a "custom shader" from Scratch... And get some very interesting results---but NOT anything like the finished works shown in the Gallery.. (I'm NOT talking about models... just the texturing of "stuff"...) Specifically, How do you construct a bump-map and specularity-map, etc... so that a particular image you are using for the MAIN texture image will have a nice, suitably "raised" appearance? ---also, does this sort of bumped texture ACTUALLY change the shape it's applied to, (during the render) so that the mesh-geometry being renders is REALLY displaced "out from the surface"? NOTHING I've tried has given that effect, or even the "2-D" simulation of that effect... I believe there's something called "Z-displacement" that SOME shaders have, that DOES do this... Such that, if you applied a "pebbly" texture to a smooth sphere, and cranked up the Z-axis displacement, the rendered sphere would have a "bumpy" silhouette, indicating REAL deformation of the mesh... I've tried working with a 1024 x 1024 TGA image---a matrix of black polka-dots on a white background (and a "negative" version of this, white dots on a BLACK background---and worked with filling the dots in with various colours, to see if/how that would affect the results.... I'm really just bashing around in the dark, I don't know what "technically" I'm SUPPOSED to be doing.... or even if it's "do-able" in 3D-Coat... Here's a link to my current "shader trial" project---I'm serving it off my webserver, so I don't waste storage here on the Forum...: http://www.ihelpmac.dyndns.org/3dcoatstuff/ --Help yourself... (help ME!!) if there's something "obvious" I'm overlooking, let me know...
-
Macintosh Menus and default folders and preferences
themacguy replied to themacguy's topic in Feature requests
Hi Tom... Thanks for your reply! I must be doing something wrong.... I've TRIED putting my "RenderedImages" folder in my documents folder (ie: NOT "within" the 3d-Coat folder in the application's folder) and also any custom shaders, and saved object.3b files I've made... but when I boot up 3D-Coat, it doesn't LOAD any of those custom shaders, and when I open up one of the .3b files, I get all sorts of "shader files missing" error messages.... Any ideas how to remedy this? Thanks! (in advance... :-) -
Hi Everybody (and all you other users out in "Mac land.." ;-} I just had 3DC jam up on me for no apparent reason---so I quit the program, trashed the 3DC folder in my Applications directory ( /Applications/3d-Coat/.... ) and did a complete re-install.... THEN I find out that my assorted trials, models, textures, and rendered output had ALL been trashed... ---I'd forgotten that they are AT PRESENT, stored in SUB-directories--essentially "inside" of 3D-Coat's home directory, inside my Applications directory... This is NOT where the normal Apple/Mac file-storage conventions would put them.... ---the default location for "end-user" created files is normally somewhere in that user's HOME directory folder--separate from the application!!! So----Is there some way to set up 3D-Coat on a Mac (running OS-X 10.6.5) so that ALL of the end-user files, and all added "third party" custom shaders, models, maps and "whatnot" are all stored in a folder of MY choosing?? --inside my "Home" folder--so that trashing the program to re-install it, or an update, will not--in the future--wipe out my files? Another small point---In nearly every Mac program, the default keyboard shortcut for bringing up the PREFERENCES screen for that program is "Command + Comma" and that Preferences drop-down menu is ALWAYS listed under the Application name (left-most clickable bit of text on the main/top menubar--next to the "Apple Logo") Is it possible to adjust 3D-Coat to follow these two conventions, for the next version? MEANWHILE..... what SHOULD I be backing up MANUALLY/SEPARATELY----so that another "trashing of the program" does NOT wipe out my personal work files?? Hopefully this will be something the end-user can specify the "where" (outside the program) that ALL these files are stored... Thanks for any advise, or news of any program update that addresses these items! :-)
-
I've managed to get through the "Lathe Tutorial" for "Space Navigator" joystick users, in one piece---as previously mentioned in the New User forum to work...HOWEVER... ;-) I have another question.... Is there an "elegant" way of switching from "Lathe Mode" back/forth to "6-axis free" (normal) mode in 3D-Coat? It's a realy pain-in-the-XXX to have to MANUALLY re-configure the settings every time I want to use "lathe mode" (and then MANUALLY switch all the settings back again, when I'm finished...) Even better would be some way of pre-programming that toggle-switch from Lathe to Normal ONTO THE MOUSE, using one of the (only two) buttons on the Space Navigator... There is a "Macro" screen in the "Advanced" part of the 3D-Mouse driver-config. ControlPanel I'm on Mac OSX 10.6.5---but I have NO idea how to write a macro for this situation... ---and there are NO instructions or hintsl about it on the www.3dconnexion.com website, that I can find... Any advice would be very helpful! :-)
-
Hi Greg! I agree,,, now please tell me WHERE is this "Tip Hall of Fame" located??? ;-}} ((I need all the help I can get! )) Thanks! :-)
-
HI Tom... Thanks for the tip---seems to work okay! I'm still having trouble getthing the Lather tutorial to give me results that match what happens in the tutorial... There seems to be a problem with the smoothness of the "Carve" results---no matter what brush I use, hard or soft circle, large or small, or the 256x256 square "lathe" brush used in the tutorial ALL of these seem to generate rather "rough" results---as if all the brushes have "nicks" in the blade, so that any carving done with them gives a flawed results... Any idea how this happened, and how to prevent it? I have the "lathe" locked off, so that it is a VERY solid "turntable", and the cylindrical object I'm working on is PRECISELY centred in world-space oriented along the Y-axis... However I get rough edged results, no matter what brush settings or brush size that I use.... It's also rough when I use the "Invert Tool Action" button, so that I'm ADDING voxels instead of carving them... Have a look at the attached... <sigh>