philnolan3d Posted February 2, 2011 Report Share Posted February 2, 2011 So I bought this magazine and saw this illustration in it. I said "I really want to do that character in 3D". And so I started going about doing just that. The body was started with Make Human, then adjusted in LightWave to better match the anime proportions. The shirt was started in Marvelous Designer. Both were brought into 3DC voxels and adjusted. The pants were done from scratch in voxels. I was going to redo the head from scratch in anime style, but deiced to just try tweaking the head I had and I think it's working. Still lots more work to do! http://3d-coat.com/turntableID=129663219268 Quote Link to comment Share on other sites More sharing options...
Advanced Member Sandro Borg Posted February 3, 2011 Advanced Member Report Share Posted February 3, 2011 great start phil! excellent concept.(excellent magazine too btw,i've been buying it since issue 1-it is a treasure trove of advice and ideas) I'd like to do some anime characters too when I get the chance. keep at it. look forward to seeing your progress. Quote Link to comment Share on other sites More sharing options...
philnolan3d Posted February 3, 2011 Author Report Share Posted February 3, 2011 Thanks unfortunately just today I started a job that will be keeping me busy all month, that always seems to happen right when I start an interesting personal project. Oh well, gotta pay the bills. Maybe I'll find some free time. Quote Link to comment Share on other sites More sharing options...
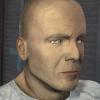
philnolan3d Posted April 10, 2011 Author Report Share Posted April 10, 2011 I have some free time so I got back to this character. Just some touch ups on the head, I think it looks less like an infant now. Quote Link to comment Share on other sites More sharing options...
Advanced Member michalis Posted April 10, 2011 Advanced Member Report Share Posted April 10, 2011 I like the cloths. Never a friend of make human. Great start in any case. About the shirt, can you retopo this phil? I have some bad experience on this. I could probably retopo one side only and give thickness in blender or elsewhere. Quote Link to comment Share on other sites More sharing options...
philnolan3d Posted April 10, 2011 Author Report Share Posted April 10, 2011 Thanks. If you haven't tried Make Human recently it has changed a lot since earlier versions. It's still not the easiest thing in the world to use but I don't know of anything else that does the job like it does (especially for free). The shirt doesn't seem to be a problem with retopo. Though yes I would probably do the outside and then thicken the inside in LightWave just because it's faster. Quote Link to comment Share on other sites More sharing options...
Contributor LJB Posted April 14, 2011 Contributor Report Share Posted April 14, 2011 Pants look V' good! stress and folds in the right places . But the folds in the shirt are a little unconvincing. Too much movement with nothing to support them. Keep going. Quote Link to comment Share on other sites More sharing options...
philnolan3d Posted April 14, 2011 Author Report Share Posted April 14, 2011 Thanks, Unfortunately if it's not one thing it's another, my desktop monitor just died and I'm still waiting for the payment from my 3D World tutorial before I can buy a new one, so for now I'm stuck using my laptop, which can't really handle a voxel model this big. Maybe I'll try to see if I can do something with it. Quote Link to comment Share on other sites More sharing options...
philnolan3d Posted April 21, 2011 Author Report Share Posted April 21, 2011 Monitor replaced Woo! Back to work. Quote Link to comment Share on other sites More sharing options...
philnolan3d Posted April 26, 2011 Author Report Share Posted April 26, 2011 Some more work on the glove: Quote Link to comment Share on other sites More sharing options...
Advanced Member ghib Posted April 26, 2011 Advanced Member Report Share Posted April 26, 2011 Hey Phil, Kudos for tackling a pretty Anime-style female. Probably one of the hardest things to get right in 3d I think. It's looking good so far and I look forward to seeing where you take her. If you don't mind I did a quick paintover & some suggested proportion changes to the head. I find that getting the hair and eyebrows in as soon as possible really helps move a sculpt forward, even if it's just placeholder geometry to get an idea for the shape of the head. I think the eyes could do with being a bit bigger, more Almond shaped, tilted slightly upwards on the outsides & slightly further apart. To get that real Anime look. Cheekbones more defined - I think they need to sweep upwards for that petite pixie appeal. Nose less defined and nostrils pulled up ever so slightly. You can barely make them out in the concept. The face feels a little too much 'on the front'. It's a hard thing to explain (and get right) but I always refer to the 'Planes if the head' model for quick reference while roughing out a sculpt. All of this is really subtle work because she's a stylised anime character the lines will be really smooth and sweeping but with tucked tight detail areas. Good luck with this model Quote Link to comment Share on other sites More sharing options...
philnolan3d Posted April 26, 2011 Author Report Share Posted April 26, 2011 Thanks for the tips, I think I was going to get on with the hair next. The head was not actually started from scratch it was a normal human head that I mushed around with the move tool until it looked pretty much like this, plus a few tweaks. I wasn't too concerned with it looking 100% like this character's face, but I'll have a look at it and see what I can do. Quote Link to comment Share on other sites More sharing options...
philnolan3d Posted April 27, 2011 Author Report Share Posted April 27, 2011 Here are some head edits as well as a start on the hair. I've always had trouble with hair. Unlike a face there's no specific thing it's supposed to look like. http://3d-coat.com/turntableID=130388535375 Quote Link to comment Share on other sites More sharing options...
Contributor Greg Posted April 27, 2011 Contributor Report Share Posted April 27, 2011 Lookin' good Phil! Nice work on the zipper/glove too. Looking forward to seeing the finished model. Greg Quote Link to comment Share on other sites More sharing options...
philnolan3d Posted April 28, 2011 Author Report Share Posted April 28, 2011 Thanks, the zipper part is always fun. Quote Link to comment Share on other sites More sharing options...
Member ImperfectLink Posted April 29, 2011 Member Report Share Posted April 29, 2011 Hi there Phil. Just thought I'd drop a quick comment. I think the body is looking pretty decent, but there is something about the eyes I dont care for. It seems as thought the eyes are discs instead of spherical. Also, the side of the forehead needs to be less square so it's less jarring to the viewer. Keep it up man, I know you can polish this gem. Quote Link to comment Share on other sites More sharing options...
philnolan3d Posted April 29, 2011 Author Report Share Posted April 29, 2011 Funny thing is that the head was less square until I changed it due to ghib's advice above. And yes the eyes are discs, because it's an anime character an spheres don't work in eyes of this shape / size. Edit: Tried spheres, in this case it works, I don't really see a whole lot of difference though. Quote Link to comment Share on other sites More sharing options...
Advanced Member Garagarape Posted April 30, 2011 Advanced Member Report Share Posted April 30, 2011 Nice work here! Just only one crit: Considering the neck axis, I think her head should be moved a little bit towards rear area. That's a very clean model. Makes me want to have a try at Make Human. Quote Link to comment Share on other sites More sharing options...
philnolan3d Posted April 30, 2011 Author Report Share Posted April 30, 2011 Thanks I'll look at the head location. Should be easier to move when we have "Through All Volumes". Make Human is great though the model does need some small adjusting for voxel use. I closed the holes in the mesh, just eyes and mouth I think, then had to delete some details like eyelash polys. While in LightWave I also adjusted the dimensions of the model to match the anime proportions. It feels very beta, the UI mainly, but it's a free download so it's certainly worth checking out. http://www.makehuman.org/ Quote Link to comment Share on other sites More sharing options...
Advanced Member Scott Padbury Posted May 5, 2011 Advanced Member Report Share Posted May 5, 2011 Some more work on the glove: Nice detail on the zipper great start.. Quote Link to comment Share on other sites More sharing options...
philnolan3d Posted May 5, 2011 Author Report Share Posted May 5, 2011 Thanks, I'm working on that hair right now, but it's slow going trying to remove all the little lumps. The only method I know is to retopo the whole thing, then use the retopo mesh with the Merge tool to rebuild the hair. Subdividing a few times will smooth the mesh out evenly. Especially annoying since I'm not even sure I like this hair. Quote Link to comment Share on other sites More sharing options...
philnolan3d Posted June 20, 2011 Author Report Share Posted June 20, 2011 Working on retopo and the question of these zipper teeth comes up. What to do, retopo each tooth? I think that would take an awful long time. Another thought is something basic, but not too basic, like this: Quote Link to comment Share on other sites More sharing options...
Contributor BeatKitano Posted June 20, 2011 Contributor Report Share Posted June 20, 2011 game model ? If so you could probably even go with a simple alpha mapped plane, it wont be visible at game resolution. Unless you plan to make extreme close up on those parts Quote Link to comment Share on other sites More sharing options...
philnolan3d Posted June 20, 2011 Author Report Share Posted June 20, 2011 No I was thinking more like a high res model like you might see for animation. Like this level, although my character isn't quite as detailed: http://forums.cgsociety.org/showthread.php?f=132&t=969731 Edit: I actually have the original model I made the voxel teeth with. Maybe I could just reduce the res on that quite a bit and just drop that in in place of the high res. Or use it as retopo mesh. Quote Link to comment Share on other sites More sharing options...
Contributor BeatKitano Posted June 21, 2011 Contributor Report Share Posted June 21, 2011 I'm still not convinced it's worth the trouble, you'd have to render at 4k to begin to see the difference between actual geo and a polyplane. PLus if you do offline render you'll get a MASSIVE render time increase with all the light interaction between the teeth. Quote Link to comment Share on other sites More sharing options...
philnolan3d Posted July 4, 2011 Author Report Share Posted July 4, 2011 Finally got this merged to the Paint room. Unfortunately there are problems with the mesh and I can't figure out how to resolve them. I actually can clean up the spikes pretty nicely in the Sculpt room, but as soon as I switch back to Paint they reappear, usually not as bad, but still bad. Quote Link to comment Share on other sites More sharing options...
Advanced Member Spiraloid Posted July 4, 2011 Advanced Member Report Share Posted July 4, 2011 Working on retopo and the question of these zipper teeth comes up. What to do, retopo each tooth? I think that would take an awful long time. Another thought is something basic, but not too basic, like this: this is a great example of the weaknesses of the current 3DC topology shortcomings. Quote Link to comment Share on other sites More sharing options...
Contributor BeatKitano Posted July 4, 2011 Contributor Report Share Posted July 4, 2011 I don't know if this qualify as a 3dc shortcoming and more like "industry relying too much and too long on polygons only".... hopefully this is gonna chance in not too long. Quote Link to comment Share on other sites More sharing options...
Contributor LJB Posted July 4, 2011 Contributor Report Share Posted July 4, 2011 its your merging into paint room, to clarify hide the inital paint layer with the included normal map and it should go away. Try merging with PTEX and turning off the option to snap subdivided mesh to surface. Or you could turn off sub division on merge to eliminate the problem completely. also use additional extrusion as the volume is quite thin. Quote Link to comment Share on other sites More sharing options...
philnolan3d Posted July 4, 2011 Author Report Share Posted July 4, 2011 OK yes I can hide the Layer 1 in the paint room and most of the problems are solved. But I need that layer, it has all of my depth info on it. Ptex is one option, but I don't want to use Ptex as I'd like to have a normal UV map. I'll try turning off subdivision and on addition extrusion, though it seems like sub-d is something I need as well. Quote Link to comment Share on other sites More sharing options...

Recommended Posts
Join the conversation
You can post now and register later. If you have an account, sign in now to post with your account.
Note: Your post will require moderator approval before it will be visible.