


AbnRanger
-
Posts
8,216 -
Joined
-
Last visited
Content Type
Forums
Calendar
Gallery
Posts posted by AbnRanger
-
-
17 hours ago, Elemeno said:
retopo tools arent working properly?
if you zoom in close ... they just dont work... so many variables with this software...
Some of this has to do with scale, and I had the very same issue in 3ds Max, for the longest time. Models of very small scale have camera clipping issues. I had this exact problem on a recent model I imported from 3DS Max and after scaling the entire scene up considerably, the problem pretty much went away.
-
On 7/8/2023 at 12:57 AM, DustyShinigami said:
Hi
Is it possible to merge a ring of edges/vertices together instead of having to manually move each one until they snap? Like these two edges...?
Thanks
Yes, you can. However, you first need to switch to vertex mode > RMB over the model (or pick the tool from the Tool Panel) and choose WELD VERTICES. This will let you weld selected vertices to others that are within the range you specify in the Tool Options panel, while this tool is active.
-
 1
1
-
-
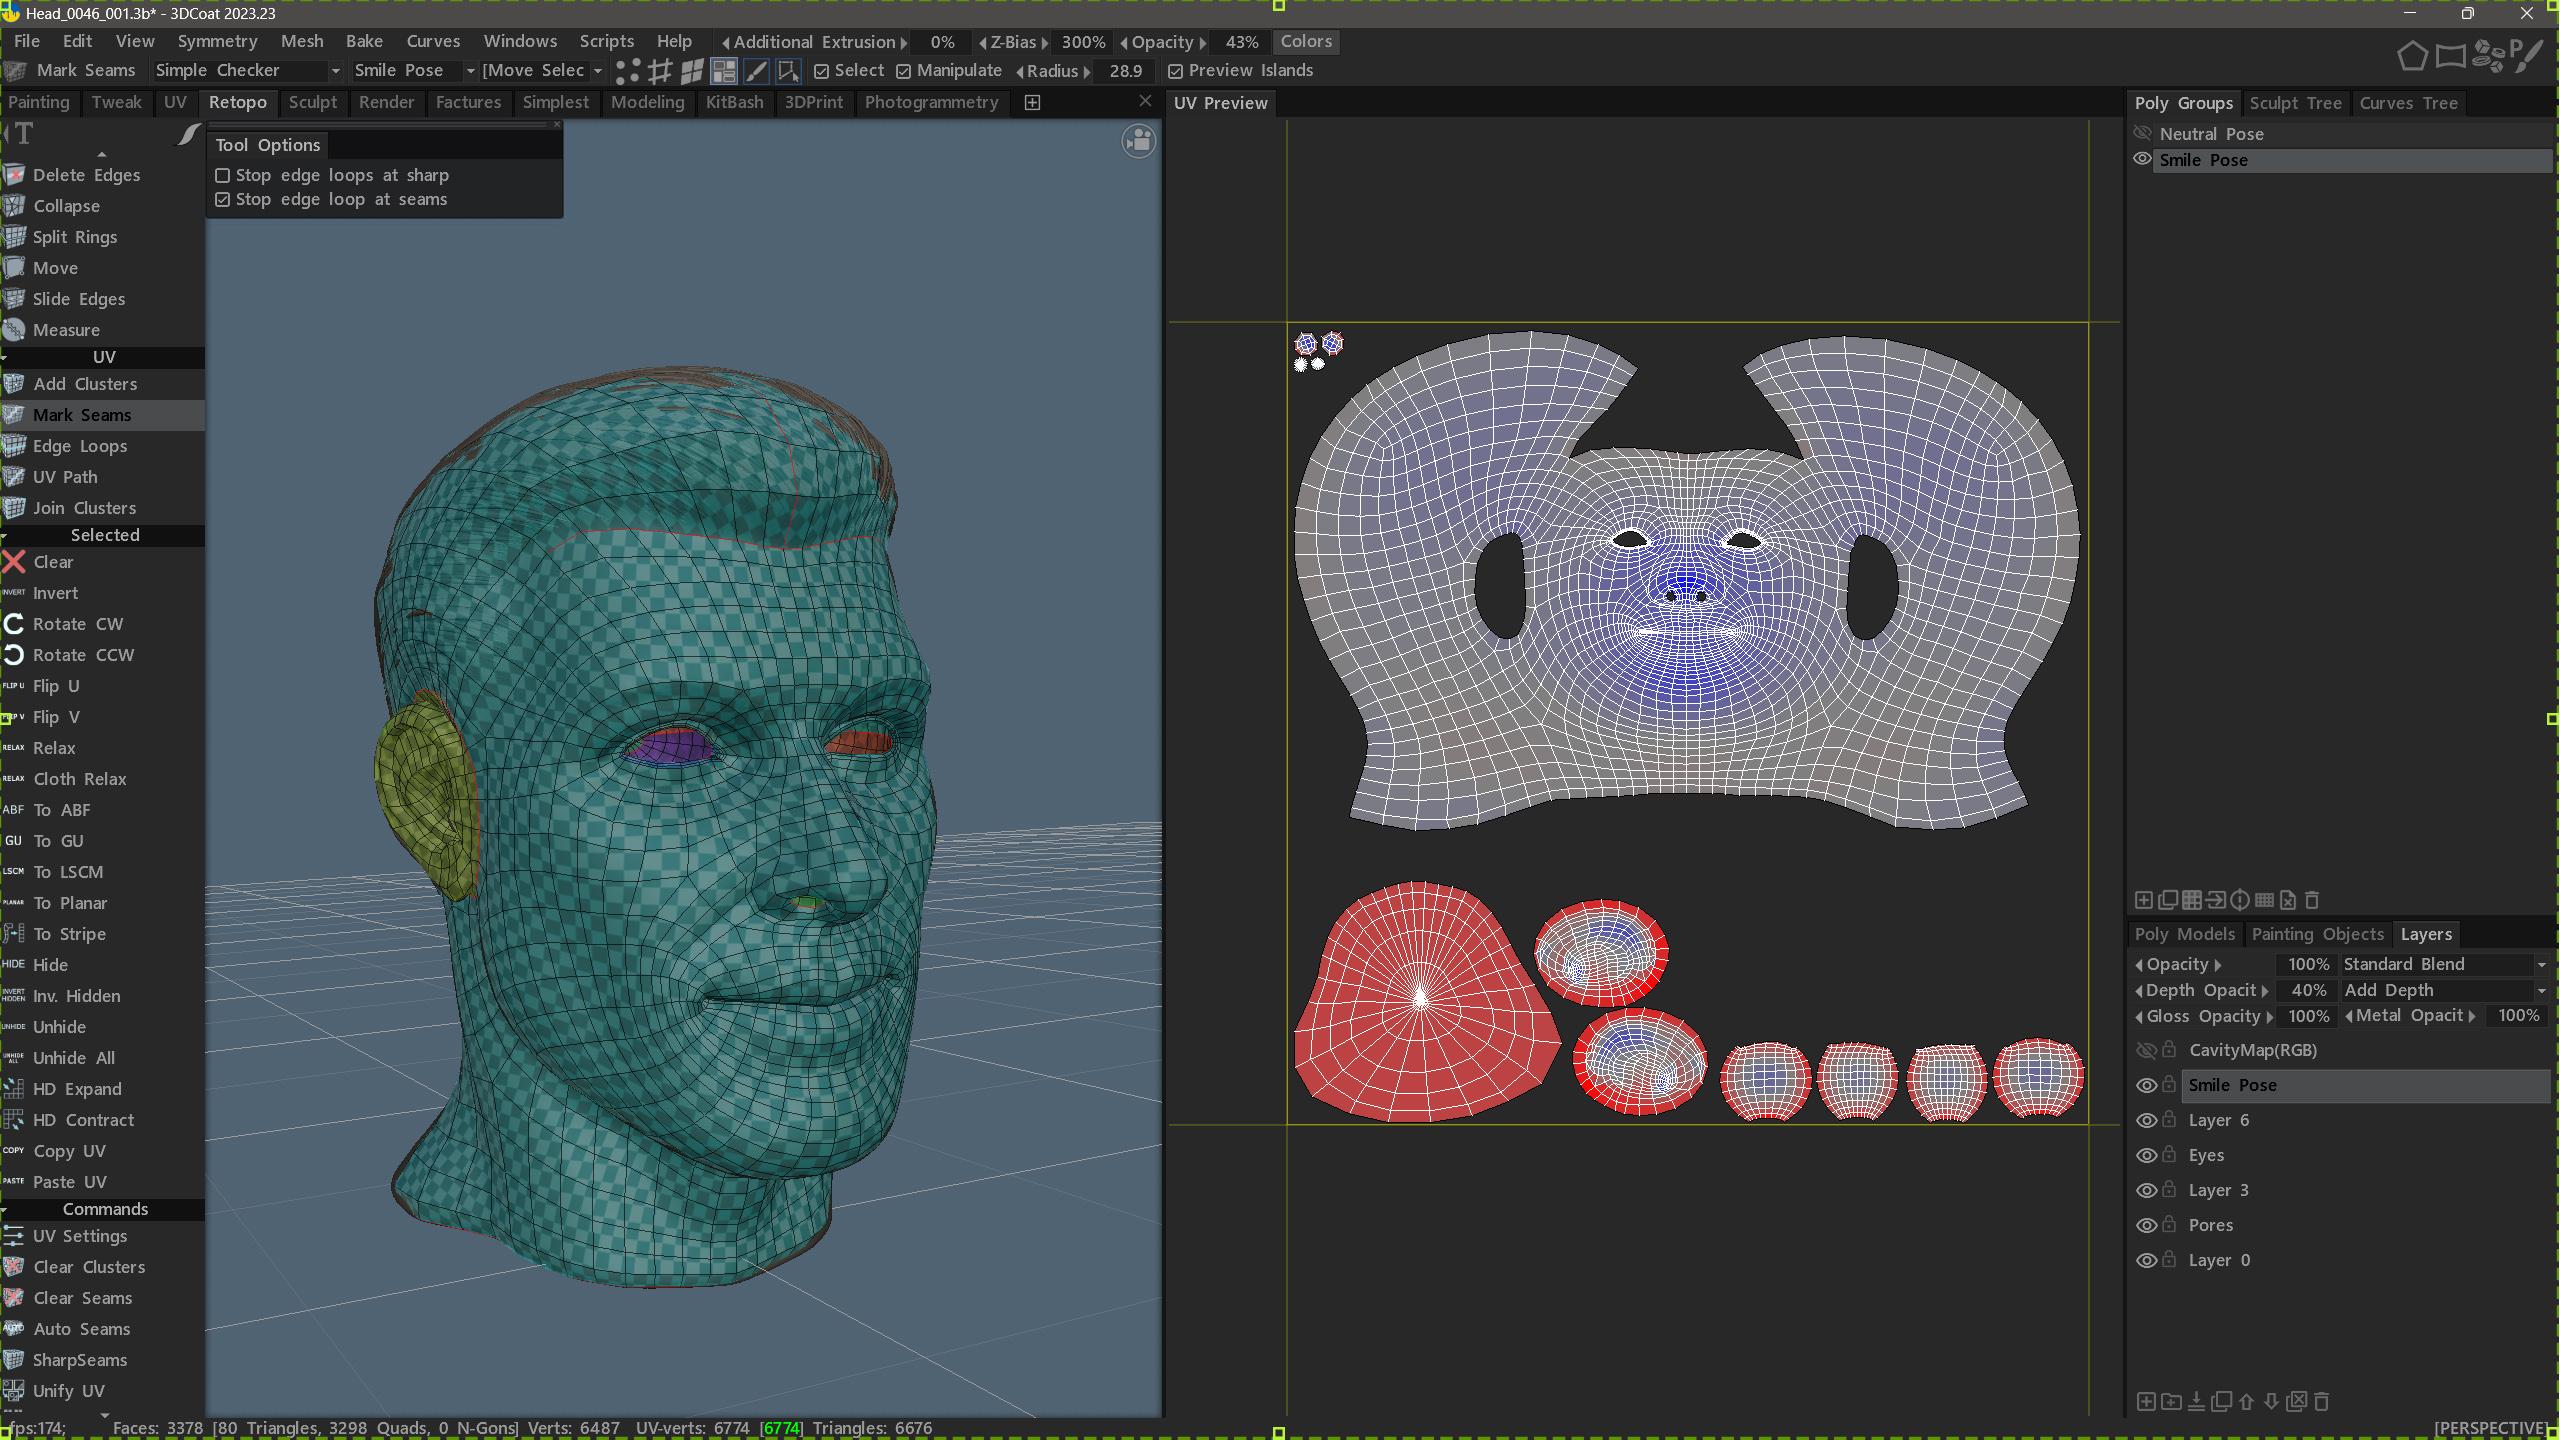
7 hours ago, Laticis said:
Hi AbnRanger,
Thank you very much for the feedback.
So, it was the density of the base mesh that's causing the issues. I have a new one to do that covers more of the body so I will keep that in mind.
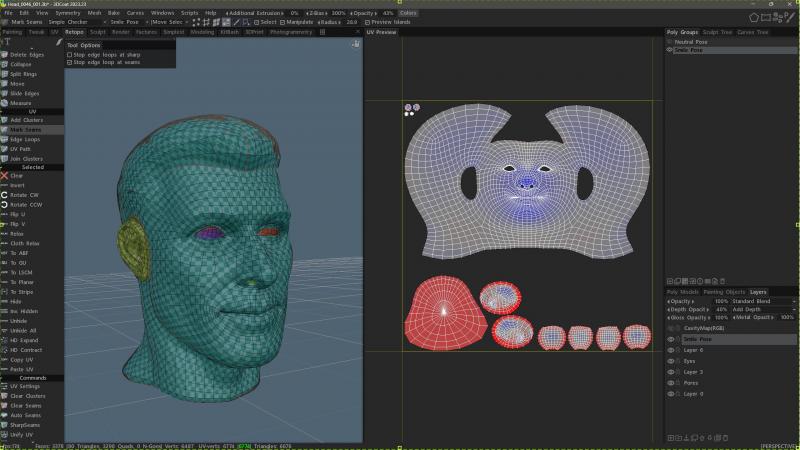
It seems like you had a pretty good result, but need to use the Tweak mode to clean up the few trouble spots. It is not uncommon in any UV editing toolset, to have some issues with the corners of the mouth, eyes and even the ears, from time to time.
-
When a retopo mesh is relatively low poly (the head model in this one appears to have been subdivided once or twice), then UV unwrapping is relatively easy, clean and trouble free. The more polys you have, the more difficult it is for the algorithm to give you a perfect result, so some tweaking will be necessary. I did a little test earlier today with a head mesh that is considerably lower in its poly count, and the result was clean.
-
1 hour ago, MJonathan said:
To mantein the mask, you can uncheck this option in your brush settings. But I hope the freeze tool can work by default in voxel mode.
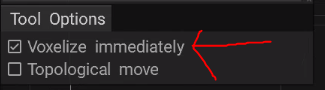
As Elemeno said, you cannot freeze/mask Voxels....yet. Andrew said he planned to look at ways it can be implemented, especially now that Voxel Paint has been developed. So, if it is important to you, make sure to send your feature request for true Freeze masking in Voxels to support@pilgway.com
-
 1
1
-
 1
1
-
-
20 hours ago, Elemeno said:
sorry for using zbrush as an example.. im not comparing btw
No worries. It helps to use ZB as a reference if that is the app we want to use to compare a specific feature. In this case, I don't think there is a direct equivalent, so if anyone really finds this useful in their work, make sure to send a feature request for it to support@pilgway.com. To try and replicate this in 3DCoat, I would either try:
1) to use the FFD lattice deformer in the POSE tool (to do it manually) or
2) drag the model (Sculpt Tree layer) into the Sculpt Models Pallet (remember the folder it was placed in) and in the Brush Alpha panel...in the preferred brush folder, click the "+" icon at the bottom of the panel, to add a new alpha. It will prompt you with options. Choose "Using 3D Model." It will bring up a panel to create a 3D Brush alpha from it. You can increase the depth accordingly and resolution to 2k. When this brush is created, you can then use it with tools like the EXTRUDE or ABSOLUTE brush, to extrude the shape from the mesh (you wanted to project the shape onto).
Yes, this takes more steps to do and that is why it is worth asking Andrew if he could replicate this kind of tool, in 3DCoat. But, a user could do this task...just with a bit more effort and more clicks than in ZB.
-
1
-
-
8 minutes ago, Elemeno said:
@AbnRanger ok .. next question... i cant find it myself but can you project a flat surface onto a sphere.. ??
That depends. Can you show an example of what you would want the result to be?
-
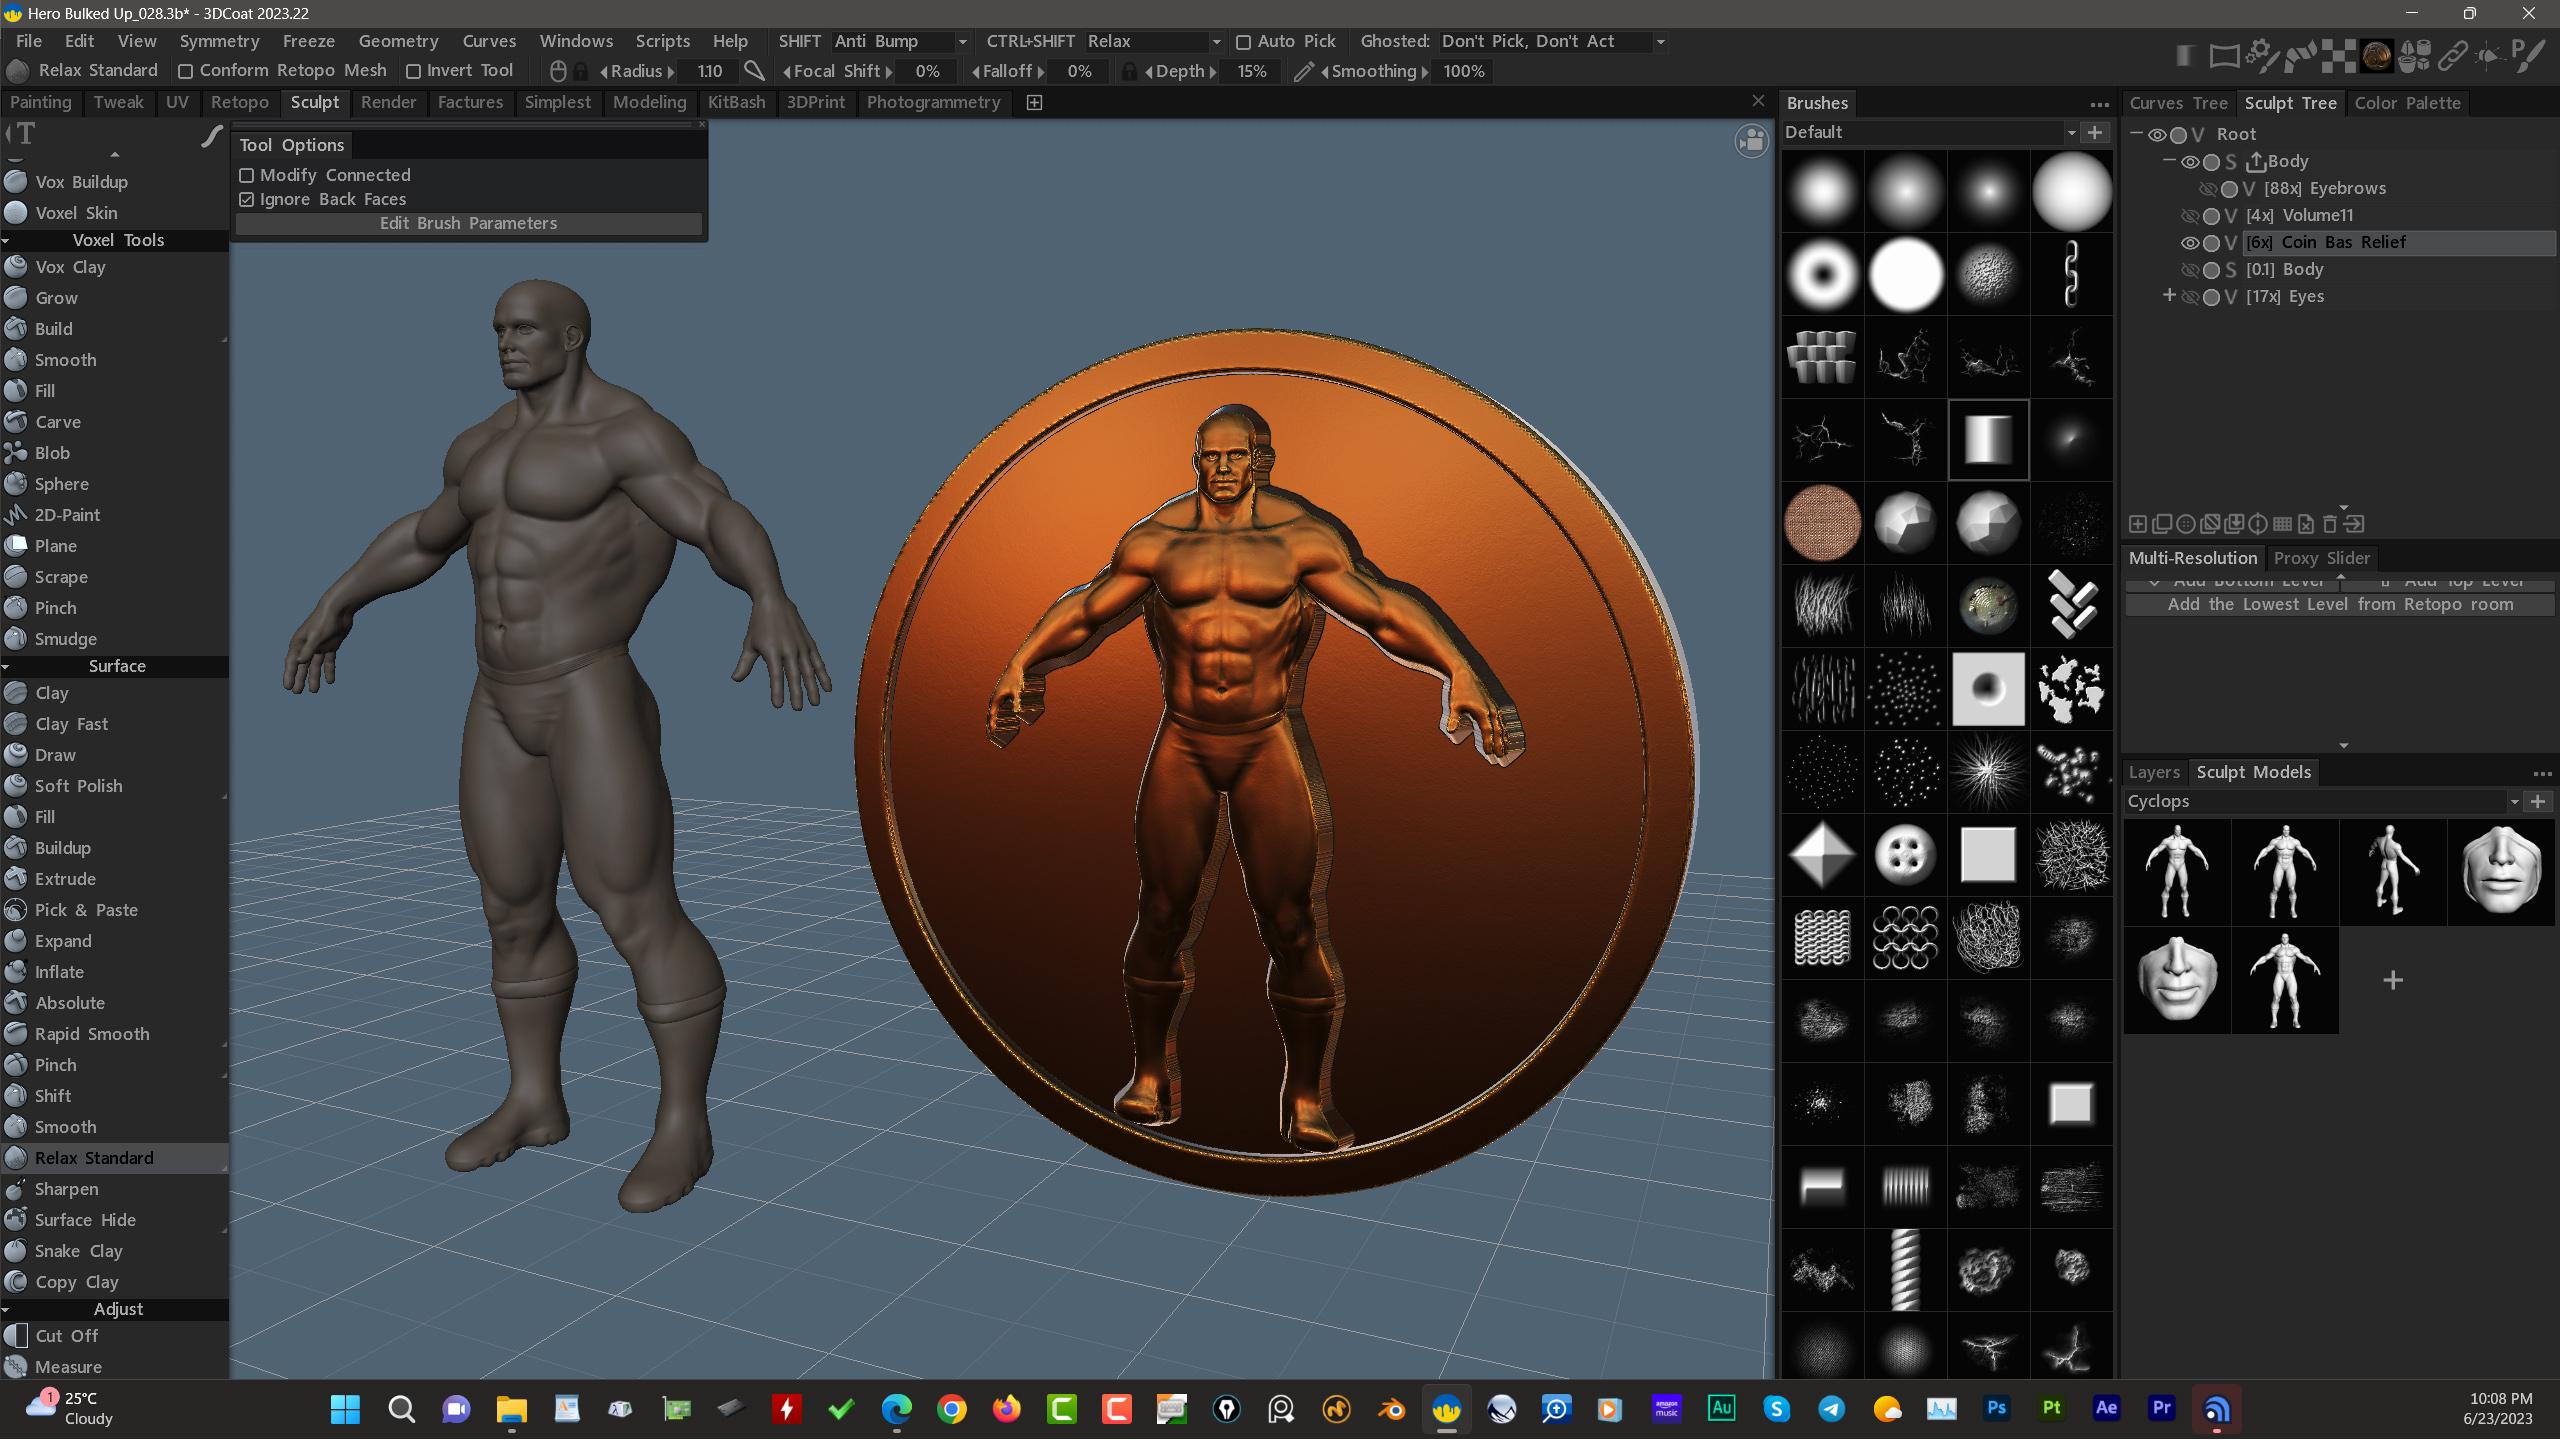
On 5/23/2023 at 7:14 AM, graham said:
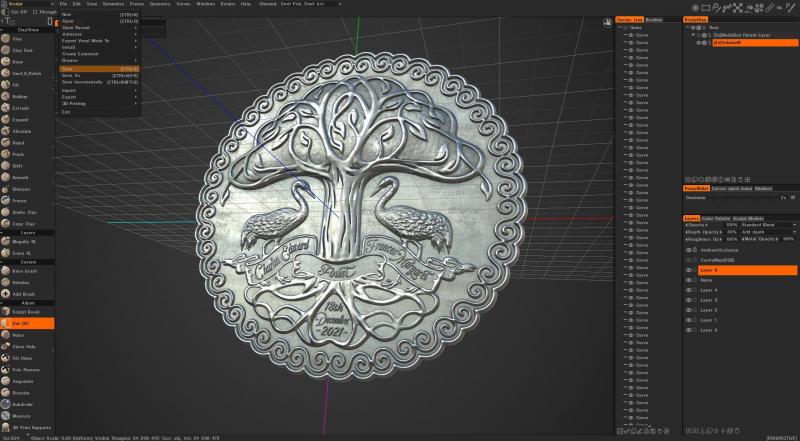
Hi folks. I noticed a product prototyping choice when selecting a new file, How does that work? What I'm trying to do is, with a 3d model or a full scene is to create a bas-relief to carve on a cnc router. wondering if there's a way that is like the new feature in zbrush that turns any 3d model into a bas-relief. My goal is to turn a scene like a forest with animals and such into a carving.
Thank you
Graham
Here are some examples I made. It takes a few more steps I think, in 3DCoat, than ZBrush, and perhaps Andrew could improve the Bas Relief tool further. Nevertheless, it is very capable of doing this kind of work, in my opinion. The client I made a Bas Relief coin for, was very happy with the result...and it was all done in 3DCoat.

-
On 6/23/2023 at 2:47 PM, Elemeno said:
why is it called bas relief tool ?
Because it does Bas (Low) Relief. ZBrush's implementation is just better, currently. This is because they use a technique that helps flatten the entire model more, before extruding the center point toward the background onto which it will be fused or connected with. Like a Coin, for example. I made a Bas Relief for a client, not long ago, using curves similar to this technique.
But, I could have used this technique, using 3DCoat's Bas Relief for at least part of it.
Zbrush essentially creates a 3D alpha from a projection (camera?) and then uses that alpha to essentially use like an extrude brush. I am currently testing this in 3DCoat, by dragging a model to the Sculpt Models pallet > Creating a brush alpha (2k) from it via the "Create from 3D Model" option.
EDIT: The author uses a clever trick around the 21 minute mark of the 2nd video, to use this Bust in the creation of Bas Relief. But he uses a few other tools, along with Bas Relief, to get the desired results. The Split and Transform tool are those additional tools.
-
18 hours ago, Elemeno said:
I think he means a lattice tool to use a simple mesh to manipulate the high poly sculpt
Ahhh, okay. I thought the idea was something like GBall's request to use a low poly mesh to drive the high poly (deformations), especially now that the Retopo/Modeling room has soft selection.
-
On 6/17/2023 at 10:08 AM, zf3d said:
Although there are currently agents and similar FFD lattice adjustments, sometimes I still think of using polygons to adjust the model. If low modes are used to drive high modes, and low modes are automatically generated, it would be great because sometimes, mobile tools, FFD, and agents cannot achieve efficient large-scale object movement,
Relatively speaking, I hope to learn from the advantages of polygons and implement methods similar to point deformation in Houdini. I believe in the strength of implementing 3dcoat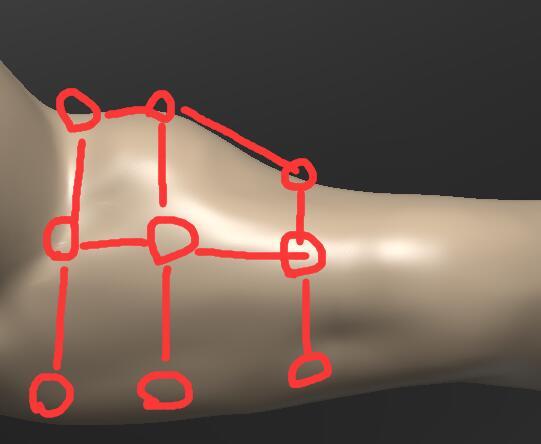
There already exists something a bit like this in 3DCoat. It is in the Retopo/Modeling Room, called LIVE SMOOTH. It is somewhat like the reverse of the "Conform Retopo Mesh" feature in the Sculpt workspace, where 3DCoat conforms changes done in one room, to the mesh in the other one. It works quite well, actually, but unfortunately, it doesn't work both ways...not yet. I asked Andrew if he would enable this functionality.
-
This video demonstrates the ways to assign a Parent layer and to be honest, I think it's quicker to just drag a layer onto the one you want to make the parent. Even faster than hitting a hotkey > and picking in the viewport, although I think the Pick by Click option for Change Parent should be allowed to invoke with a hotkey.
-
3 hours ago, artistmitch said:
Wow thanks for the video tutorial it helps alot. i will take what you suggested but i think i’ll work on pieces separately and once its detailed and complete, then ill merge just to be safe. I also wasnt aware of 3Dcoat having an actual mannequin so thank you for showing that.
You are very welcome. I hope it is a good solution for you.
-
2 hours ago, artistmitch said:
So i dont currently have 3dcoat at the moment, ive been using nomad sculpt on the ipad and i ran into an issue that i was wondering if its an issue with all sculpting programs and specifically if 3dcoat has it.
So i like to have an already posed singular base mesh to a similar style to zspheres. And basically using it as a skeleton to then build up the main body shapes.
But when the meshes used for limbs like arms are close to other parts of the body like the torso. It becomes hard to sculpt without affecting both unintentionally, like with dragging parts and building up It will distort the areas that are too close.
So im just wondering if 3dcoat has that problem and how to solve it if i wanted to sculpt for a specific pose that has body parts close together but without touching?
What you would probably want to do in such a situation, is to keep the individual limbs on their own layer, so that the torso or hips are not affected when you are sculpting your forms. Later, when you have completed your early block out/rough forms stage and maybe even the intermediate form stage, then you could merge the limbs with the torso and head. 3DCoat has a Mannequin available to use for this very purpose.
-
1
-
-
36 minutes ago, Oleg_Shapo said:
I sent the developer a description of this problem. Hope it gets fixed. Thank you!
I don't know that it is a bug. Why not? Because when you RMB click the Sculpt Tree layer, to bring up the menu, you have a decision to make when you choose the CHANGE PARENT (or other options in that section of the list menu). Do you want to select from a 2nd list (containing a list of all the Sculpt Tree layers) or use the Pick by Click method. You have to click the icon for the latter. Andrew perhaps thought it wasn't an option where a hotkey assignment made sense, for this reason.
I often choose this RMB option and was thinking just the other day, about how it could be made easier to access. For one thing, I think it is too frequently used to have to RMB click and move the cursor all the way to the bottom of a long list menu. It's not very efficient, that way. Maybe re-locate that section further up the list, to the 3rd or 4th section...so these boolean options are close to your cursor = fast selection.
-
18 hours ago, jammer42777 said:
Do you mean that the ON PLANE option, did not work when using the Vox Hide tool? It should. If it didn't then perhaps there is a bug. I will test and see if I can confirm it.
-
On 6/11/2023 at 5:04 AM, Elemeno said:
3dcoat uses voxels ... you wont be able to keep your uvs... the topology is constantly changing but thats not a bad thing... thats what makes 3DC amazing
This is partially true. When importing a model into the Sculpt Room, yes, topology and UV's are discarded, however, as you recall in my posts about this topic, it is preserved by importing a copy into the Retopo workspace before the sculpting process begins > Enable CONFORM RETOPO MESH in the toolbar of the Sculpt Room.
-
1
-
-
On 6/11/2023 at 3:13 PM, Tieguaili3D said:
no, in zbrush you always have your topology and UVs preserved on import until you destroy them with dynamesh, which should be how it works in coat as well, but as you seem to keep missing the point.....when you're working in subdivisions on a pre-made basemesh you do not use dynamesh/sculptris, there is no benefit to it in any way at that point in your workflow so saying "well dynamesh breaks your topology and UVs anyway so why would you ever bother having them?" is pointless.
I'm not missing your point, as I have repeatedly said from the beginning that a low poly, UV mapped mesh imported into ZB would lose it's UV's and topology anyway....IF/WHEN Dynamesh or Sculptris Pro were used (because they are Re-Meshing toolsets, after all). I never even implied that you lose it immediately on import. Where we differ is in the workflow once such a model is imported. Will it need significant deformation or proportional changes? If so, then Dynamesh or Sculptris Pro will probably get utilized in many if not most cases (to avoid nasty polygonal stretching issues). Using a base human(oid) model can and is often used to sculpt something very different. Why start from ZSpheres or a simple sphere, when you have a base mesh that gets you more than halfway there, and you have a tight deadline, just as the Flipped Normals guys state?
If a 3DCoat artist were to use this basic workflow (import a decent base mesh with UV's already applied), they would NOT need to Retopo and UV this model, as the author mentions Zbrush users would need to do, at this point in the video. I think this is a HUGE timesaver and Conform Retopo Mesh is a very underappreciated toolset. It lets the artist use whatever they want for the Sculpt Mesh, while preserving the UVs and Topology of the original. Nevertheless, Andrew implemented the Subdivision Level toolset that was asked for here, except for the Quad mesh. That may come, too, sooner or later.
-
On a side note, regarding the current Python scripting integration in 3DCoat, I wonder if ChatGPT could be used to help users create their own scripts in 3DCoat?
-
6 hours ago, rubeos said:
Being able to more precisely control the depth of cuts and extrusions would be great. The option to choose 3 points is complicated.
Sometimes I've thought it would be enough to just rotate the view a little bit, and click at a point on the geometry you want the cut to come to, then go back to the plane of view you want to perform the cut on and proceed. Basically it's a quick visual and intuitive approach to the command.
When I try voxel hide I miss a simple command that creates new voxels geometry.
It could be that, with voxel brush activated, by pressing shift+ctrl, for example, you could add geometry, so that two essential functions are merged into one brush.
This function is present in many software when it comes to tools that need to remove/cut/add. If default option is cutting, with a sub-key you can reverse the function.If there is an "On Plane" option in the tool, you can use that to visually walk the cutting plane away or towards the camera using the "+" or "-" key (Num pad)
-
2
-
-
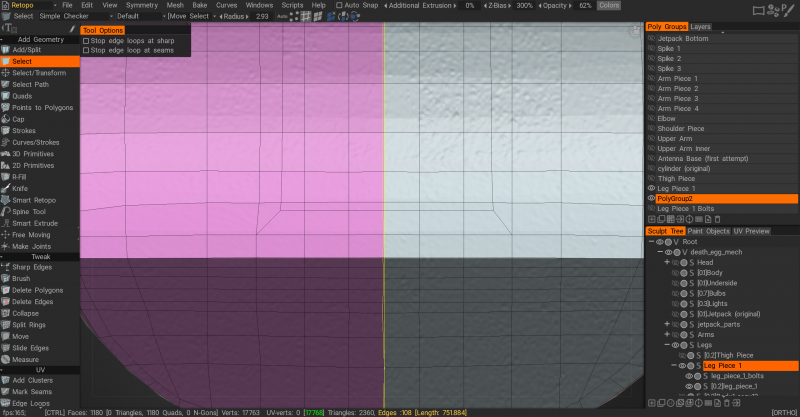
On 8/27/2022 at 6:28 AM, Tieguaili3D said:
in the first video you can see the lumpy surface you get when subdividing a low poly mesh, that makes sculpting cleanly an issue, you can also see the random distortions in the "conformed" low poly when smoothing, and the fact that you can't control where the low poly goes when you're working on the high poly. Last part of the video you can see the absolute mess you end up with when using the decimate and reduce functions to get something "low res" to work on, and you can also see that even at 64x decimation the result is both less detailed and higher resolution than the proper low poly mesh (this is also why it's completely pointless trying to bring in a pre-subdivided mesh from another program).
In the second video you once again see how the auto-triangulation makes an unusable mess of your high poly when subdivided, and shows how if you don't want a distracting and obstructive hologram of your low poly on top of your work the low poly no longer conforms, so you're stuck working with the UV shells and wireframe obstructing your view.
Third video is just a comparison with zbrush, it's faster to start working since you can just import and get working rather than import your low poly as a retopo mesh, move into the sculpt room, copy your retopo mesh into the sculpt room, then start to work. It also shows how using a proper multires system allows for the export of displacement and normal maps from those subdivision levels.
Using 3d coat you have 2 otpions for "multires" sculpting and 0 options for effective multires sculpting:
1) you can import your low poly as a retopo mesh, go to sculpt room, copy your retopo mesh into the sculpt room, start working with a horrible mess caused by the decimation that doesn't even get you close to the detail preservation or resolution that you get from an actual low poly.2) subdivide your low poly in blender, export, import your low poly to 3d coat as a retopo mesh, go to sculpt room and import your high poly as a sculpt mesh, start working with a horrible mess caused by the decimation that doesn't even get you close to the detail preservation or resolution that you get from an actual low poly.
using blender or zbrush you have 1 option for effective multires sculpting:
blender: import your low poly, add multires modifier, sculpt, generate normal and displacement maps from your subdivsion levels.
zbrush: import your low poly, sculpt, generate normal and displacement maps from subdivision levels.
@AbnRangerhopefully this makes it clear as to why we need proper subdivision levels and quad meshes rather than a hacky workaround.
"@AbnRangerhopefully this makes it clear as to why we need proper subdivision levels and quad meshes rather than a hacky workaround."
Let's revisit these examples, and discuss them one by one.
Video Example 1:
The Sculpt Object (Proxy Mesh) is decimated way too much. The Proxy mesh was not designed to be used this way. Decimating that low is just to reduce the polycount to make the scene lighter. It's of no help whatsoever, if you want to make adjustments to the mesh. It's too extreme...like trying to use a Chain saw to sand a piece of furniture. Just decimating 4-8x was more than sufficient to provide the performance benefit you are seeking. Many times, you don't even need to step down to a lower level of resolution, to get good performance while using tools like Pose, Transform, or Move.
Video Example 2:
CONFORM RETOPO MESH is unchecked (disabled), therefore it cannot do its job. If you have to disable the Retopo Wireframe for some reason, you can do that in the list menu (Retopo Room) right above the Tool Panel, in the Tool Bar. That lets the user choose how the Retopo mesh is displayed. But, you cannot simply turn it off and expect it to work after you have made your sculpting edits. It simply will not work that way.
Video example 3:
When using Large scale Edit tools like Move, Transform, or Pose, the performance is actually quite good also. Especially if you use the Proxy or new Multi-Level Resolution system, to step down a bit in resolution. The only "lag" one might notice is when Conform Retopo is used. It performs a secondary, follow-on calculation to snap the retopo mesh to the sculpt mesh. It's not a performance killer by any stretch of the imagination, as it is barely noticeable in most cases, as you can see in the sample video below. FWIW, the video is in real time. Not sped up, so viewers can see the actual performance when using these tools.
-
41 minutes ago, Hickz said:
Heya! Let me chime in: when you’re using a base mesh with uvs, you simply are not in a position where you need to use either dynamesh or sculptris pro. Those are used in the concept phase, where you’re still figuring out the form and general design, proportions etc. Base mesh has that established already. Your point of not being able to use dynamesh and sculptris is valid, yes, but inapplicable in the case of using a base mesh with proper uvs and topology (in which case you’d simply subdivide the base mesh with multi res levels for a denser mesh)
Okay, understood. This is making my point for me, actually. I am saying that it is an unfair complaint to say that 3DCoat cannot keep a base model's topology, when it absolutely can. Then the complaint morphs into, "well, it doesn't work very well (when Conform Retopo Mesh is used), even after multiple tutorials demonstrate that it in fact does work well. In 3DCoat you CAN use a low poly, UV mapped base mesh, to start sculpting with and keep it all the way through the sculpting project. You cannot do this in ZBrush, unless you try to go without using Dynamesh and Sculptris Pro. The truth is a user has to jump through a lot more workflow hoops than 3DCoat does. This is why I asked Andrew to add this Conform Retopo feature. You never have to worry about scrapping your original, UV mapped base mesh and building another one (ZRemesher/Auto Retopo) to replace it. In Zbrush you do.
-
On 6/5/2023 at 6:56 PM, Tieguaili3D said:
as i've explained countless times....the point at which you're dynameshing and the point at which you want your clean topology are very different parts of the workflow, dynameshing is for the sketching phase when you don't know the overall form of the model, and what 3d coat currently has is fantastic for that loose sketchy clay feel, personally i agree that coat's voxels are better than dynamesh in zbrush. Subdivision on your pre-UVed basemesh is for blendshapes and making a character that fits your basemesh but isn't just a minor detail alteration, the whole point is to be working within the framework of the basemesh's capabilities, you're not suoopsed to suddenly go "oh what if i add another arm and put some holes in the chest and make the head into a dragon instead of a human" that isn't what it's for. Conform does not allow smooth working for either of the jobs you need from your basemesh and working with a clean quad basemesh lets you do everything conform allows without any of the ballache of the conform tool constantly ****** up forcing you to go over to the retopo room to fix it.
I understand your point, but I think you are missing something, still. One of the issues you raised was that one cannot import their base mesh (into 3DCoat's Sculpt Workspace) with UV's, and preserve the topology & UV's. I am saying that would also be the case in ZBrush when you use Dynamesh or Sculptris Pro. In both situations and in both applications, you are using that UV mapped mesh as the starting point....correct?
We clearly disagree about "Conform Retopo Mesh" and some of this is because you used it improperly in the video examples you showed on the first page of this thread. Please, instead of continuing to debate about its usefulness, watch the videos and then do some more testing. I think it really could change your views about it.
-
8 hours ago, poeboi said:
Python scripting (have not tested with CoreAPI)
Slight issue with getting the Sculpt Models panel to update with new occurrence of object after invoking "Save to Meshes Panel" from script
import coat

# Select Sculpt Models folder titled "Working" as active
coat.ui.cmd("$FOLD_UserPrefs/Models/SculptModels/Working")

# Use "Save To Meshes Panel" cmd (id is $ExportPatternForMerge) with callback to save immediately without decimation in modal
coat.ui.cmd("$ExportPatternForMerge", fn=lambda: coat.ui.cmd("$DialogButton#2"))
via file explorer in my UserPrefs/Models/SculptModels/Working the new .obj will be there
but it does not appear in UI until 3DCoat restartI had the same problem with the Retopo Models pallet, and reported it also. Hopefully Andrew will fix it in the next build.
-
1
-


3DCoat 2024 development thread
in New Releases, Bugs Reports & Development Discussion
Posted
I agree, totally. I never use my mouse in a 3D application or Photoshop.