


The Candy-floss Kid
-
Posts
698 -
Joined
-
Last visited
Content Type
Forums
Calendar
Gallery
Everything posted by The Candy-floss Kid
-
@haikalle Many thanks for your reply. I loaded a clean new OS on an external HD - my current one does not run Blender 2.9. This gives me a totally fresh load of both Blender 2.9 and 3DCoat 4.9.62. Sadly I didn't get it too work but here is the report error that appeared which will hopefuly be of help with regard tracking the issue.
-
Any advice on my predicament gratefully recieved . Blender 2.83.9 (Same Results with Blender 2.8 In Testing) Having no luck with the 3D-Coat Applink on my Mac and have been trying for hours to resolve things with no luck. If I press send Per-Pixel Painting to 3DCoat 4.9.62 nothing happens. If I press send Per-Pixel Painting to 3DCoat 4.9.02 It lets me proceed to begin painting a texture When I’ve painted a texture and press Open In Original App I see no texture applied in Blender in Rendered or Material Preview. I can find no imported image applied as a texture on my uv’ed mesh but I do see a strange node arrangement. When I press cntrl + T on the Principled BDSF Shader I can also find no available list of texture maps. As a btw there is a Blender Cycles option but no option for Blender Applink in the 'Open In Original App' drop down - nor is there a Get Back Button in Blender - just a Send Option.
-

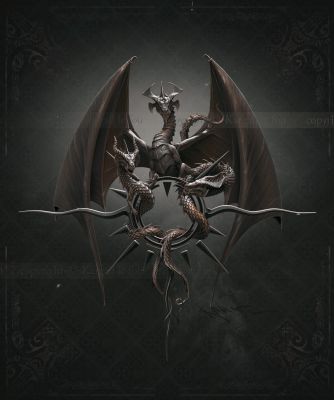
From the album: Floss's Bag O' Candy
Image created and rendered in 3DC V3.7 after the introduction of vertex painting and was originally posted in the old 'finished work' forum from that time. Created in voxel sculpting mode, painted in surface mode. -

From the album: Floss's Bag O' Candy
Image created and rendered in 3DC V3.7 after the introduction of vertex painting and was originally posted in the old 'finished work' forum from that time. Test for using the stamp tool as well as painting with stencils. -

Benefits of voxels/ Surface control (Polygroups etc.)
The Candy-floss Kid replied to Dobby's topic in General 3DCoat
Hi Dobby, try upping your rez high enough for surface details then switch to surface mode >voxels >decimate > now use your surface brushes to apply mesh polygon detail where required. In other words your working with a dynamic tessellation where detail is required but not subdividing globally. V4.5 is slow on my system - curious if you ran a 4.1instead version whether you would report better speeds for sculpting. The voxel workspace is equivalent to working in a permanent state of dynamesh (as Carlosan points out) and shadowbox combined. This makes 3DCoat a very fast method of blocking out form and also testing whether ideas and even scenes will work in 3d early on. In that sense 3DCoat is liberating at this stage and will inspire designs that perhaps may not be reached with ZBrush so intuitively. Beyond this stage - there is no advantage with regard sculpting, merely personal preference over tool responses. Throwing your work over to ZBrush for final design adjustments, posing adjustments and the advantages of a polygonal work flow would be recommended with regard time saved. Sculpting wise 3DCoat's weak spot with regard fluidity and speed relates to posing. Intuitively it has nothing that touches the intuition of the transpose tool nor zsphere rigging. ZBrush's whole modus operandi is based around a polygonal and polygroup workflow based on your cpu - making it superb for these advantages - there is no direct comparison and therefore a transition per se is not wholly equivalent. -
Bas Relief Coefficient Andrew, since V4 the coefficient setting in the bas relief tool that previously worked with v3 has no effect. I noticed that in V4.5 you have introduced a taper facility - this however is not the same as using the taper facility when setting the coefficient higher than 1 as it once worked in v3. I would appreciated it when new features are added that you ensure that previous feature functionality is also maintained. Could you please take a look at the coefficient control in v3 and bring it back. Many thanks.
-
Michael, I know you to speak with the best intentions. I shall experiment with 4.5 and see what comes of it.
-
Fear not Michael, Myself and Mr Smith are merely lying down to die. You go on ahead.
-
Michaelgdrs , I have no doubt that the site will improve. As for opinions on progress? Opinions as they say are like belly buttons. We philosophize not criticize , the vagaries of the day nor the whims of the tide shall sway our belly buttons from holding opinion. To continue….. After playing tonight with V4.5 for the first time since stopping at V4.1 It appeared that I got better results in 4.5 If I used a slower more definite stroke. It was more accurate than 4.1 at this tempo but felt very different to use by comparison . Sculpting wise I had to slow down - somewhere between Largo and Adagio - the response did not seem to favor the frivolous passions of an Allegro. Could it be, ( aside from new features ) that the change in the tools responses are affecting your emotional response to the application? That the response of the tools themselves enforce a tempo of creativity that feels more Bauhaus than Bohemian ?
-
You ain't kiddin' Brother!! S'why I still use version 4.1 Condensing and perfecting the core functionality of what is required to create art? You can do it musically with 3 strings and a tambourine . Yours monastically , Brother Floss
-
Mac OS X [4.5.40]: Crashes when switching from surface to voxel mode when vertex painted or with pbr materials. Repeatable/ Consistent osx 10.8.5 NVIDIA GeForce 9400 p.s any application setting advise for older macs ? Performance on screen become instantly laggy when vertex paint is applied. 4.1 works like a dream on 10.6.8
-
Here's 3 great videos on digital sculpting techniques for setting up the face. Understanding form and anatomy is one thing but applying a pragmatic system for success is another. Combining the techniques demonstrated in these 3 videos will help you set up structure faster. Whilst the software used is ZBrush, the techniques are just as applicable to 3DCoat. Open House Webinar with Gio Napkil, Mold3D TV start at 24.10 for face set up by quickly scoring lines for the main planes Dylan Ekren, How to approach creating a 2D character in ZBrush Pt.2 Mold3D TV start at 2.12 secs for quick overall face proportion set up. Ryan Kingslien - Sculpting Form vs Line or Proportions. Lines of separations to set up overlaps. Hope it helps.
-
 Wonderful work Kargall - love it!!
 -
 Thanks for that update Gabriel. The Keyshot for ZBrush / R7 Bridge imports polypaint (vertex color) from ZBrush so I had assumed that the full Keyshot also accepted vertex color. The moral of the story - never assume. For a render engine when I need more control than 3DCoat's renderer I have moved over to Blender Cycles which does accept Vertex Color.http://blender.stackexchange.com/questions/19459/how-can-vertex-paint-be-rendered. 3DCoat is very good at decimating vertex painted objects whilst allowing you to judge any degradation of color detail as you lower the mesh resolution in readiness for exporting to Blender. I made a video sometime back when researching the topic where I compared using both ZBrush and 3DCoat for working with vertex color exports to Blender Cycles https://vimeo.com/128022529. A little experimentation will quickly tell you how low you can decimate meshes whilst still maintaining vertex color information for export to scene. For Block-Ins and paint overs the first pass color fills and generic details from vertex color decimated exports is a great start and will save you lots of time avoiding retopo and uv's. It's far quicker to adjust final color detail in Photoshop in relation to the scene than getting lost exceeding detail required on a uv texture in isolation - in the sense that you can get distracted in the artistry of the painted texture map itself without seeing it in scene in relation to other elements , mood and context. Yes splitting objects in to layers will simplify the task with regard auto-retopo. As an aside I found this last night - Famous Matte Painters http://bigerboat.com/indexfx/?cat=25
 -
 Wonderful.
 -
Thank you Gabriel for your reply - loving your posts!! To manually retopo and uv suggest a familiarity with 3D technology. To export decimated .obj meshes from the sculpt room with vertex paint is a quick method for a Matte or Concept Artist who wishes to avoid the labor time of manual retopo and uv's all together - this leaves Keyshot to hook up the vertex colors painted in 3DC (I'm guessing that Keyshot can utilize vertex color?), to add materials to your decimated mesh groupings , match your lighting and then merely photobash all required decals on to your forms using perspective for final compositing in photoshop. The issue being with vertex paint of course that sharp decals would require a mesh density that may grind when importing to rendering engines but a decent decimation will allow for a good mid level of painted detail perfect for mid to far shot or for final completion in the compositing environment in relation to all other other photographic and painted assets. Should also add that splitting a 3DC sculpt in to simpler components and running auto-retopo and auto uv's is another route for any one new to 3DC reading this who wishes to minimize work and get their work reading for texture map painting and out of 3DC quickly and in to a rendering engine for Matte work. Splitting forms up into simpler components just helps auto-retopo simplify the task.
-
Out of interest 1,if you select the both the polygonal object's retopo/ mesh group + it's uv group then scale it smaller in the work space does the issue disappear with the render camera? or 2, Does the issue vanish if you subdivide the mesh, i.e is it perhaps a face smoothing issue with low polygons?
-
apollo_starship_tin_toy_masudaya_mantra_front
The Candy-floss Kid commented on ajz3d's gallery image in Finished Works
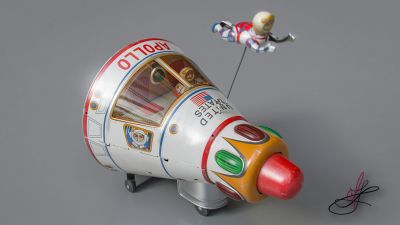 Fabulous result.
 -
Gabriel ,fabulous to see 3DCoat used to such great effect for Matte Painting. May I ask - are the models texture painted mapped and retopo meshes from 3DC sculpts or are you exporting decimated meshes with vertex color?
-
A great challenge with fantastic results folks. Thanks to all involved , particularly for communicating the technical issues and explanations in the process of bringing your work to completion.
-
CTRL+UP to create camera shortcut, CTRL-+LEFT/RIGHT to recall and CTRL+DOWN to delete last shortcut. All shortcuts are stored in the saved file.
-
Not exactly what you're asking for but useful nonetheless
-
Smooth subdividing to make a high res mesh?
The Candy-floss Kid replied to CognizanCe's topic in General 3DCoat
Import without voxelization -
Or you may have accidentally held down the shift key (or is it cntrl) which will also move the gizmo.
-
Have you imported your mesh using the 'flat subdivision' option? This subdivides the mesh but keeps edges hard by offering supporting edges - equivalent to subdividing in ZBrush with smt off
