


popwfx
-
Posts
467 -
Joined
-
Last visited
Content Type
Forums
Calendar
Gallery
Posts posted by popwfx
-
-
On 2/10/2021 at 6:15 AM, Carlosan said:
Never do any work on Layer "0". It is reserved for 3DC use only for operations with textures.
It would be good not to depend on Layer0 to handle transparencies and that it remains directly hidden.
A layer and mask system that works the same as Photoshop has long been in the todolist.
So should I always lock Layer 0? Can it be hidden?
I also don't touch Curvature or AO layers that get created by using some Smart Materials - I don't fully get where those layers need to be in the layer stack either - it puts them at the top and then where should new layers i add after that go? Above or below those special layers?
it would be great if these system/special layers are visually different/colored and potentially locked with tooltips explaining what they are and how to use them or how not to use them.... They are a source of confusion for me.
-
 1
1
-
-
On 2/9/2021 at 11:57 AM, Mystical said:
Thanks that is indeed a workaround solution. Since its not the same corrupted layer I can finally erase that junk and repair that small section.
In the future if layer 0 being partially erased was the culprit I'll just make sure the layer is locked from now on. I usually save often and in-between big changes but didn't think being able to not erase normal map data would ever be possible but now I know 3d coat can break that way so to look out for it and not save the file if I see that occur again. Carlosan also being able to get a strip to be corrupted until unwrapping the model is worrying too. You could be 90% done through a perfectly fine model and if the only solution is to start over/re-unwrap that doesn't sound good.
Sorry for intruding on this thread - but can someone please explain how these tiny little holes appear in the first place? Is it accidental erasure on layer 0 with the eraser tool? I've seen these before, but in general I've been able to paint over them on other higher layers. While you're at it, I thought Layer 0 (in Paint Room) was just a convenience/grey layer to be able to see the object - does Layer 0 have any importance? I mean assuming I fully fill another layer (or even if I don't if I want transparency) then it doesn't matter if Layer 0 is messed up or even deleted, assuming the object looks fine with all the other layers? I mean there's no like significant vertex map data that has to be there on Layer 0 is there? And are these holes you experience related to this issue?
Thanks for explaining - you could clear up a potential fundamental 3DC tidbit for me if I've got it all wrong.
-
Please please please, if there's one addition to 2021, please add proper multi-monitor support (not just side by side monitor support but any 2 monitors - including up and down mounted ones) with dockable, collapsible tabs like Affinity Photo has. It lets you access panels and collapse them away super easily
-
4
-
-
Just wondering why frequency of posts and updates here has slowed? Are things ok with devs? Is this still actively being developed or on hiatus? Just wondering as we're eagerly awaiting v2021.
-
On 1/7/2021 at 3:05 AM, tokikake said:
I suppose those tools may work well for many case (paint on smooth surfaces as convex) , but maybe OP case (path need to align with concave, or large angle curve, it may need to change almost 90 degree in 2 point (eg paint around cube with use those curve paint tools)
I experienced strange issue before.. so I hoped if 3d spline tool will work for paint room too. maybe attach problem scene can help to test by Carlosan.

I will try to make a video of it or attach a stripped down file
-
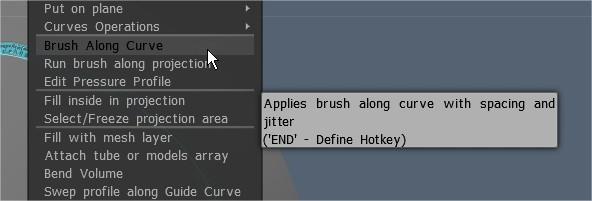
2 hours ago, Carlosan said:
I am testing Curves Beta on Paint Room
3Dspline stroke is working fine
Brush Along Stroke using Strips is working fine
Could you please give a try ?
Thx
Thank you for replying! Could you elaborate a little how to do that? It looks like the 3d spline is grayed out for you too in the paint room? Thanks!
-
I have asked in a few posts but haven't received an answer - I'm really keen to know before the sale ends!
-
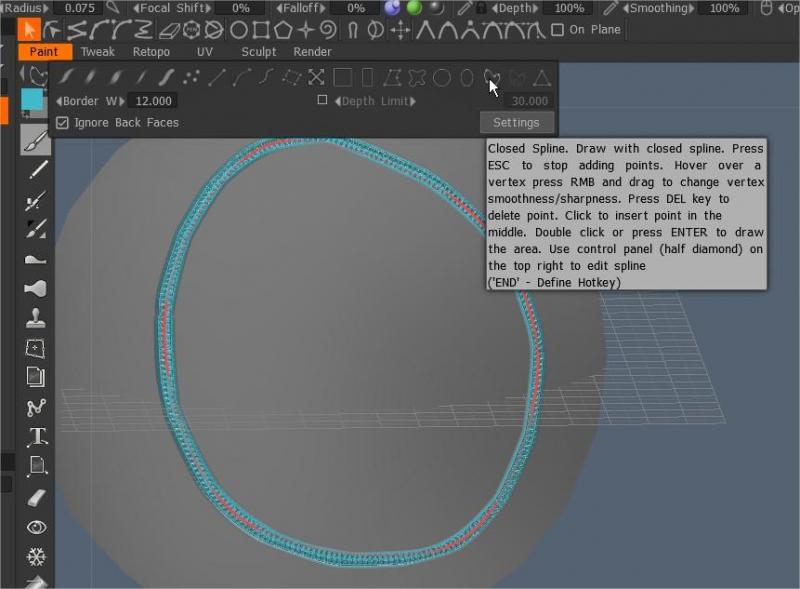
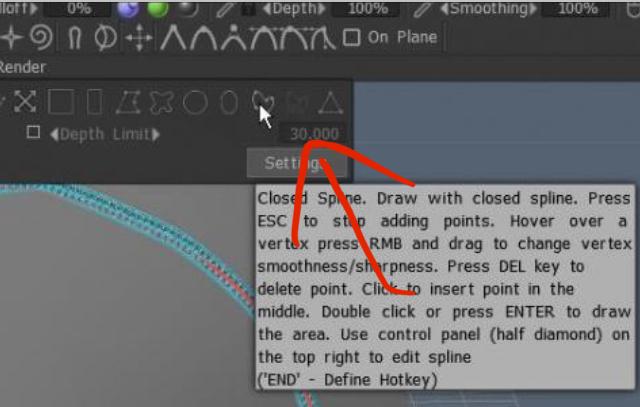
I think I figured out some of it. I thought the spline tool paints on the normal projection of the 3D topology of the surface. It does not in the Paint room it paints only from camera projection. Which means you can't easily paint around fingers or large stitches and seams on rounded or organic objects. I noticed there was a 3D spline tool in the Paint room but it is greyed out. Is it only available in Sculpt? how do we paint with it? This is a very important feature for painting - Not all of us use sculpting, sometimes we just need to paint on imported models. Any help would be greatly appreciated to do this. thanks!
-
1
-
-
Can you please let me know what the upgrade price is from v4.9 PRO to the latest 2021 version? I can't find it on the links and had read that this would be announced. I really would like to get the new version while the sale is on. I'm a long time 3DCoat user - but I can't see where on the buy page is for me. There is an upgrade to v4, but no upgrade from v4 to 2021??
Is there an automated page where you enter your serial and it tells you what the new price for the latest 2021 is? Really excited to upgrade!
Thanks!!
-
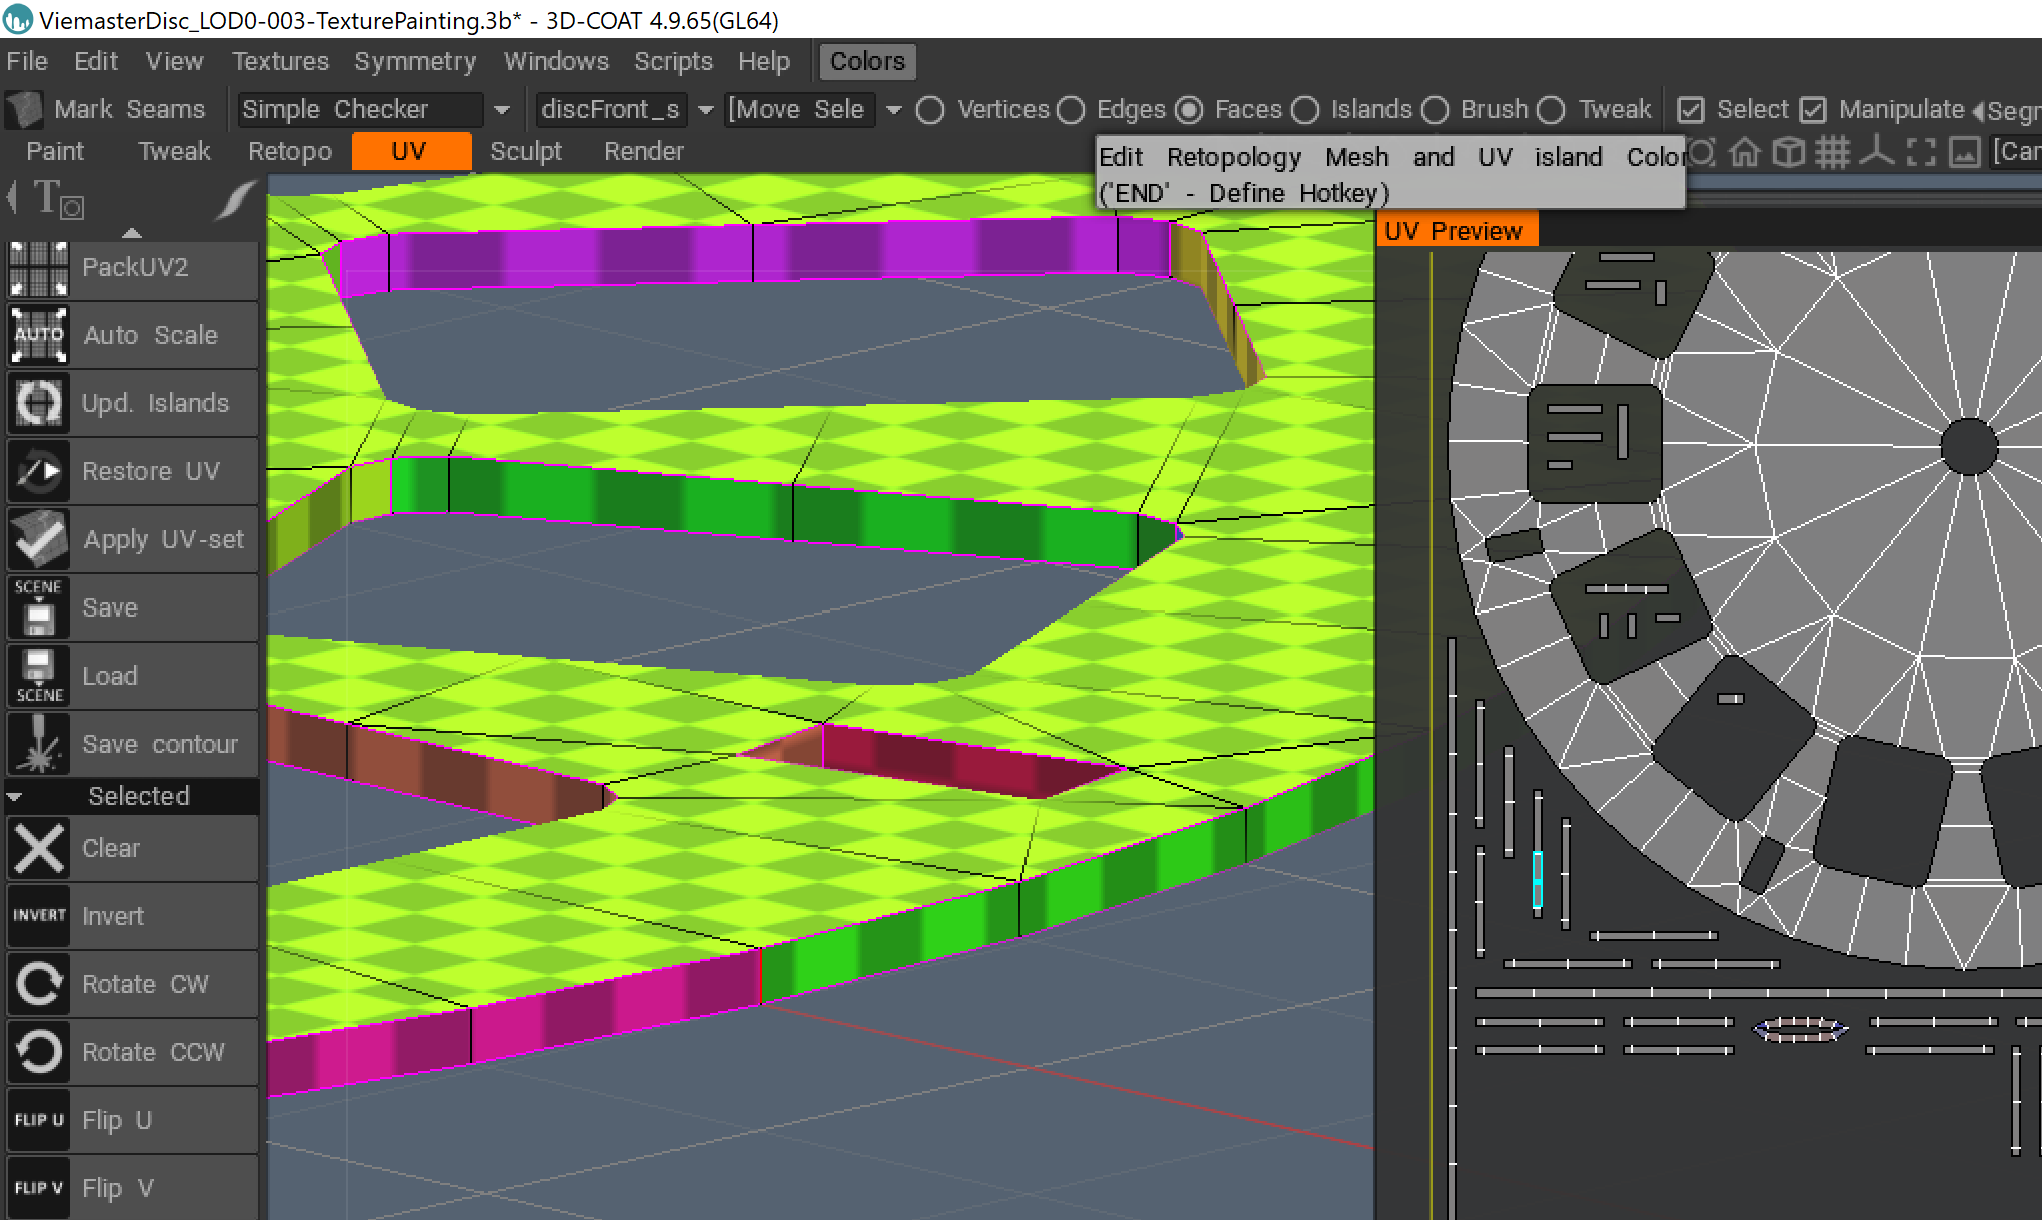
Yes - this is on a GTX 1060 with latest Geforce drivers at time of screenshot...
-
I was using the Spline in the brush tool. But I also used the Spline tool which has an icon that looks like a bike chain. Both seem to exhibit this weirdness - regardless of Symmetry setting and regardless of "Ignore Back Faces" so I'm stumped - this has been happening on and off with this type of painting for many versions and many types of objects (all clean - I usually double check that there is clean geometry and no extra vertices etc first).
The bug is definitely related to camera view - can you please confirm that both spline tools work like I expect - i mean that the stroke is to be painted/filled at the normal direction of the spline on the surface and has nothing to do with the viewport camera when applied? (Unless you are using Camera mappiing in a Smart Material)
thanks!
-
Thanks - does that mean this is a known bug? This is a very clean lowpoly model with a 4K texture but I have this sort of thing happening a lot with spline painting on any model. Is this something that is or can be fixed by Andrew?
-
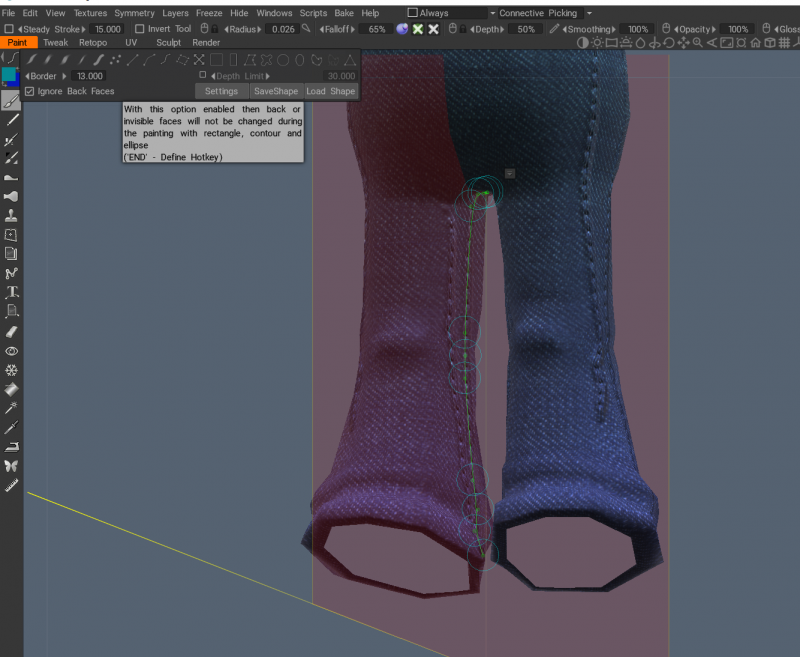
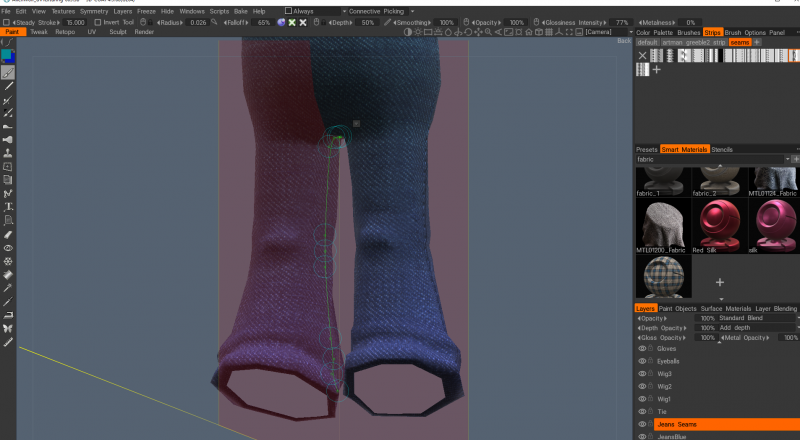
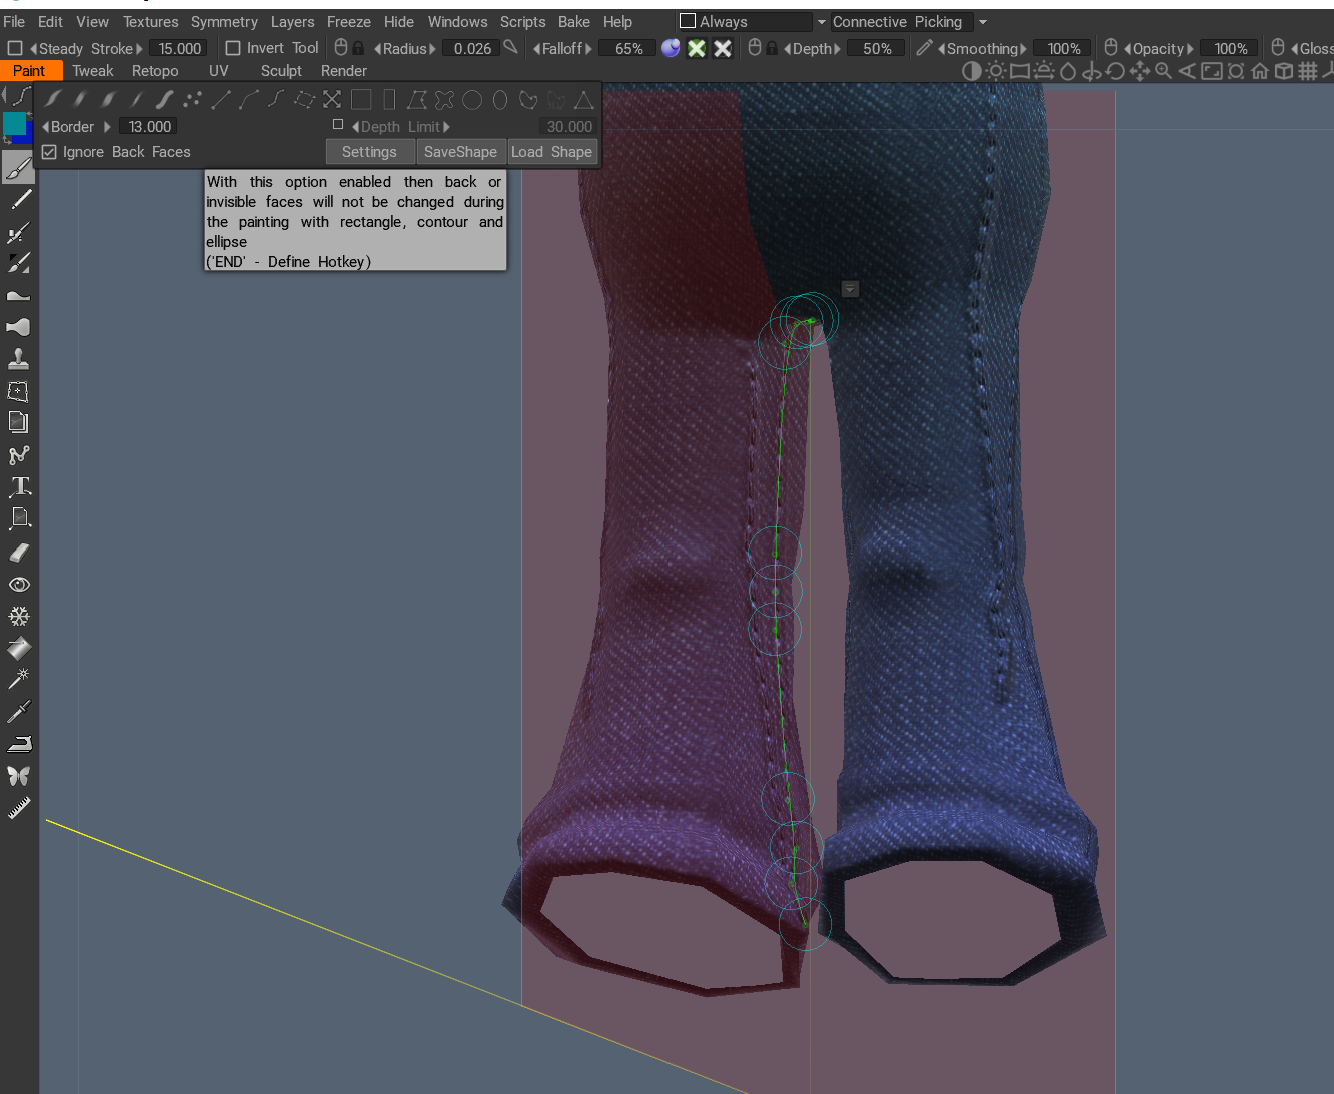
I'm having trouble painting splines and having them go on the correct faces - I don't fully understand the difference between the Spline tool and the Brush tool using Shapes/Splines to paint.
Most of the time it works and I can get things to paint in the way I expect. But sometimes when wrapping a closed shape around a wrist or in this case, trying to paint inseams in the inner leg for jeans, I get unexpected errored results - see the attached pics please:
I use "Ignore Back Faces" on and that doesn't seem to make a difference. These errors seem to happen based on the camera view - I thought the brush would be applied onto the surface based on the spline regardless of where the viewport camera was??? What am I doing wrong or is this a bug? thanks!
-
5 hours ago, pickers said:
If the curvature can bake them down, the smart material would be able to make sense of it.
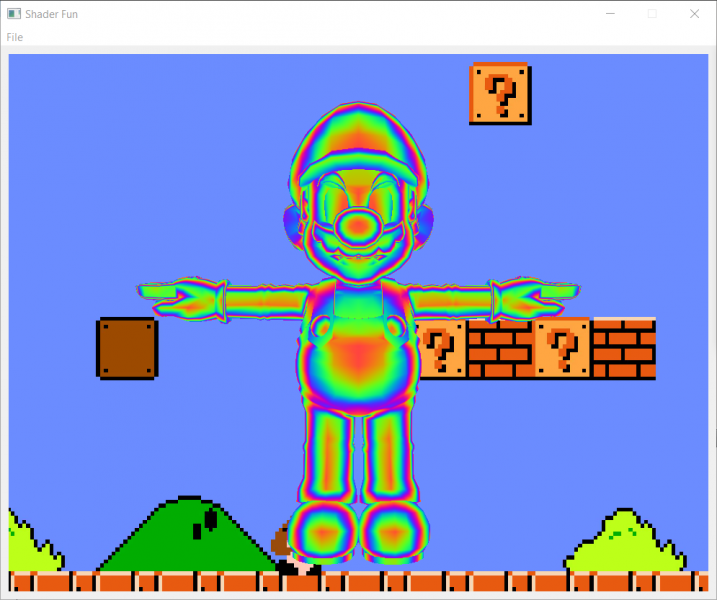
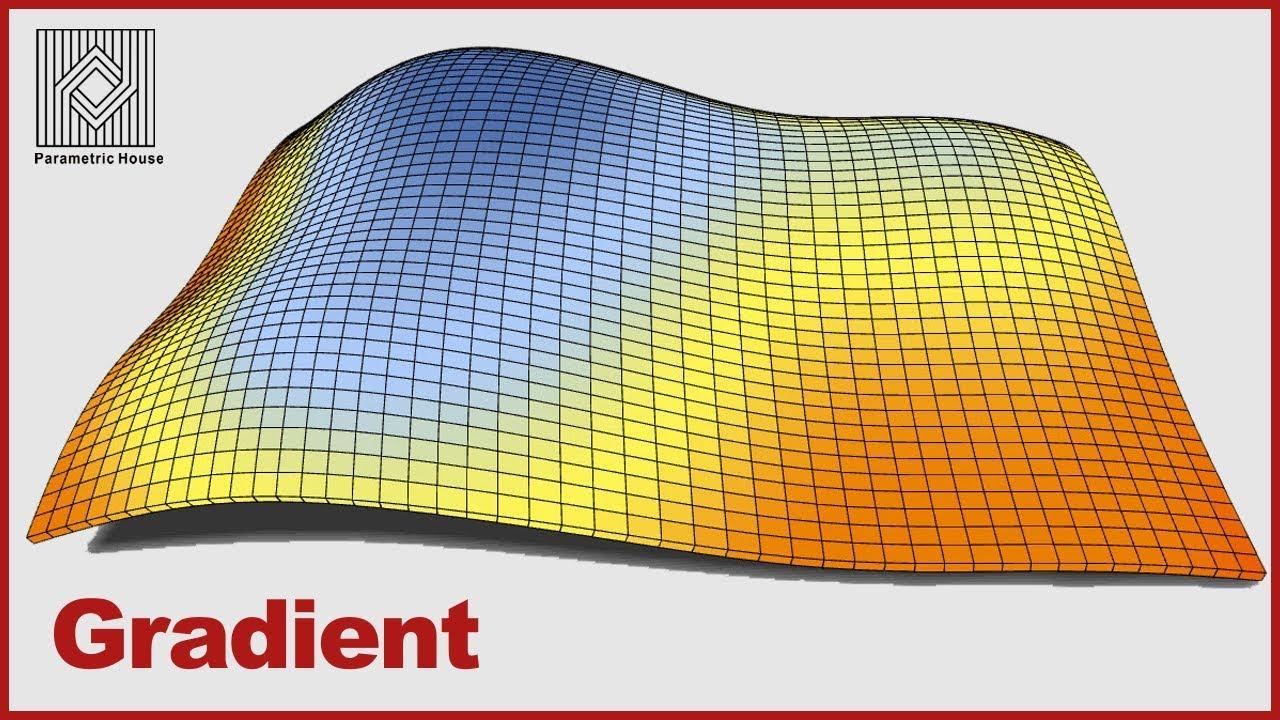
Thanks, but could you elaborate please? I'm not sure what you mean. I can generate a curvature map yes. But then how do I tell a smart material to say paint white up to say a 30deg slop and then green below it etc. ? In other 3d Apps you can specify a gradient and a slope and it shades the surface appropriately like this: It seems a trivial thing for 3dcoat to let you paint like this - so I assumed it is a feature? How do you do this with Smart Materials?
-
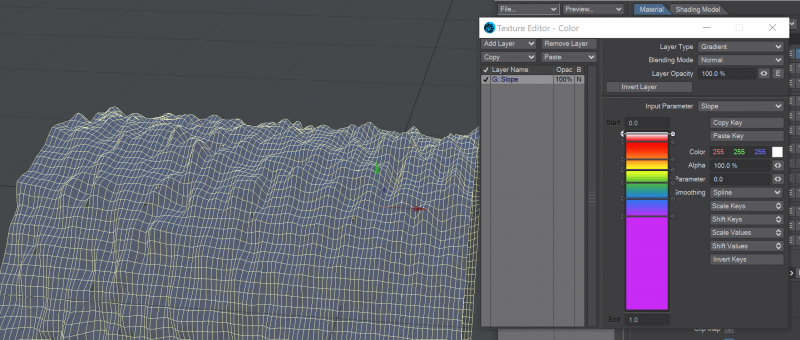
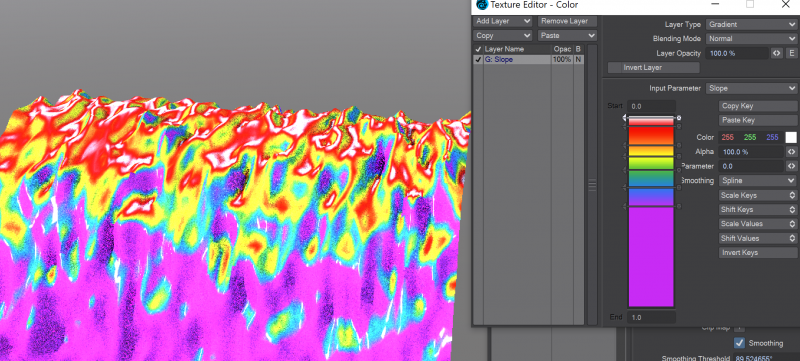
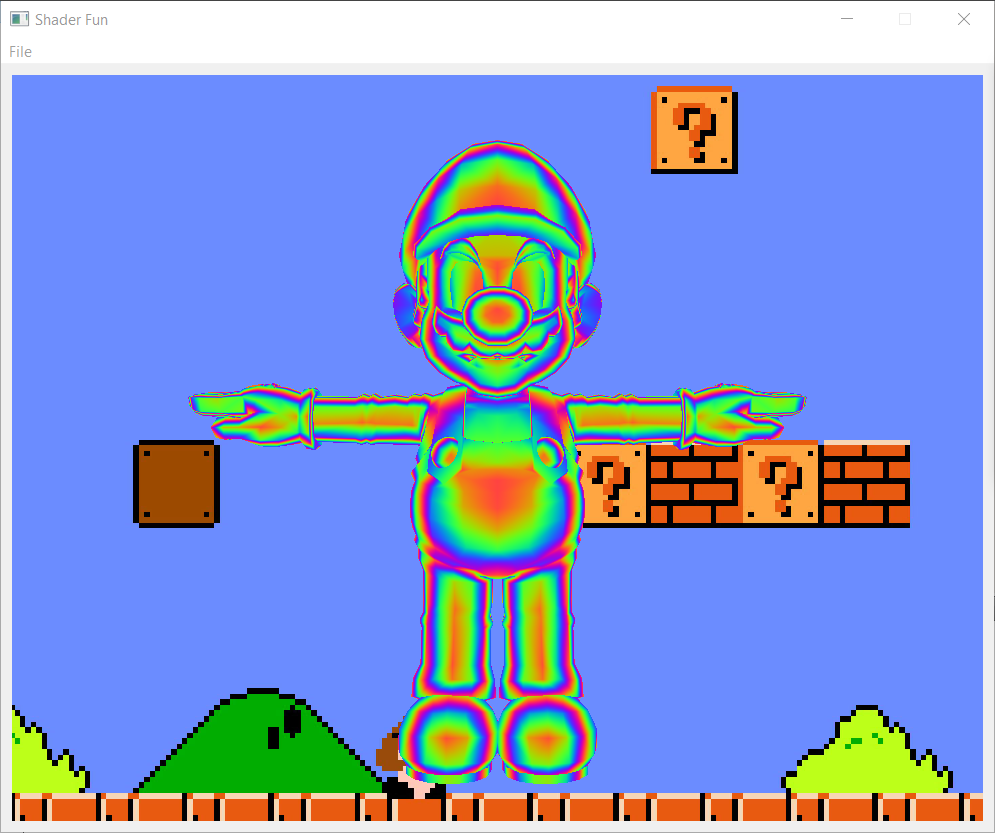
Thanks - but no, not quite a real light bake, just a gradient fill where the color changes based on the slope of the shape from an axis. Like these:
I think it can but maybe I don't know how to use the fill well enough?

-
I looked in the Fill tool patterns but didn't see it there. Surely I'm missing something. Is there a way to Fill paint a gradient (or a gradient with one of the patterns) onto a surfaces or paint objects in a Fresnel way? Like painting between the two colors based on the slope or concavity of the shape of the object? With some kind of a range scale of it? thanks!
-
Hi No one answered this when I asked before, but since there's 57mins left on the sale, do existing 4.9.67 pro users get 2021 for free? If not which is the right upgrade to do?
thanks
-
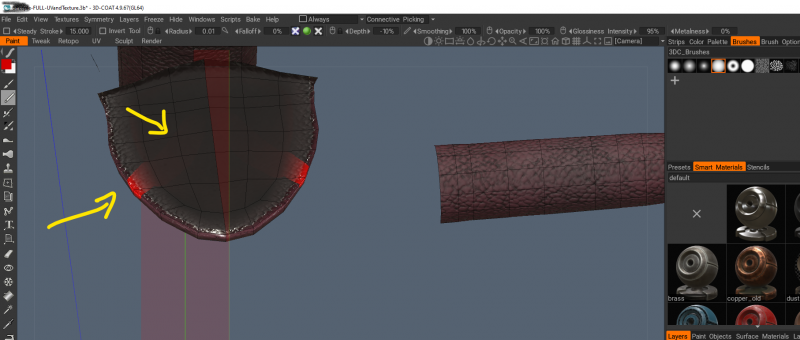
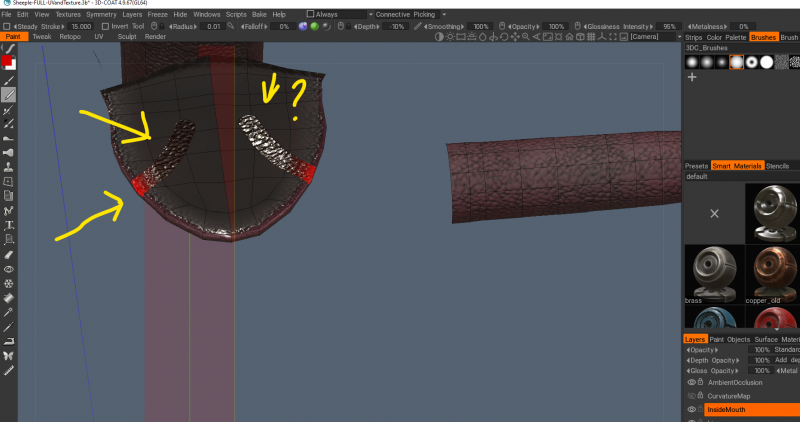
Normally I have mulltiple meshes (paint objects) that I can hide in order to properly paint everything separately. This time I have one mesh - and it is an animal with a snout. So I want to paint the inside of its mouth. It's modelled in a neutral mouth closed position with a little gap between top & bottom snout. So I hide the top half of the snout exposing the bottom jaw and bottom inside of the mouth expecting to paint the tongue etc in there.
So that doesn't work and the color doesn't seem to show up - depth and gloss show up - but the depth acts weird like it's taking the top of the snout's skin and doing that pattern inside the mouth. Where's that skin pattern coming from? I have another layer beneath the one I'm painting on - but I expected the depth to be smoothed when I stroke because I'm using a flat circle brush.
I then notice color does work but ever so slightly. The Color is ON and the Opacity is set to 100. Then I notice that as I paint close the edge of the inside mouth the red color becomes brighter.
It's almost as if the hidden top half of the snout was casting a dark shadow on the bottom inside of the mouth?? Is that right? I assume if I hide part of the top that it will expose the cavity of the mouth so i can paint inside it properly with proper lighting so I can see what I'm painting?
What's going on and how can I fix it?
-
Thanks - I'll look for andrew's email in the forum and email him. Does the cut and paste work for mirrored islands too?
-
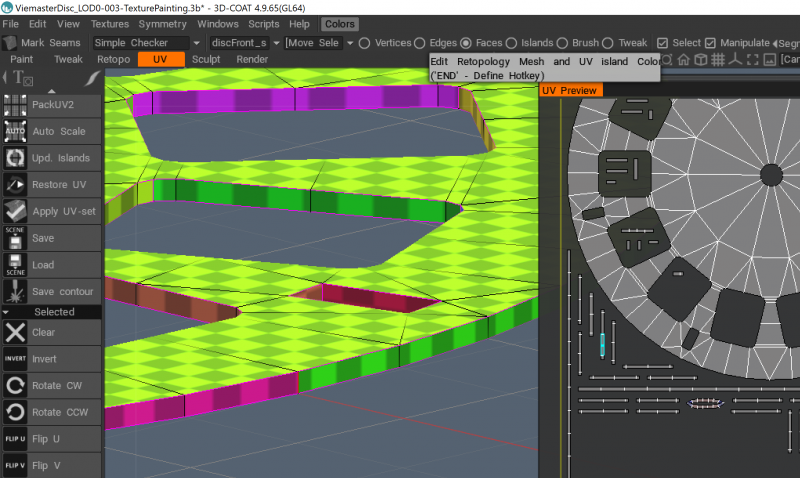
1) Maybe beginner question here, but I was hoping there was an easy way to "weight" (and I don't mean weight mapping) specific islands to be a particular size ratio compared to the other islands?
For example, I might have a big model and want to "spend" more texture size on the face or hands but less on some other areas (like the inside of a hat) or something. It would be great if I could select an island - have it tell me the rough percentage it would be with a standard UV unwrap with my seams, and then let me set a relative percentage to the other islands so that this island can be more or less prominent in the unwrap.
This would enable me to save a bunch of time manually resizing islands and re-doing packing. Can this be automatically done in 3DC?
2) Is there a way to tell 3DCoat to automatically overlap (exactly or close) a mirrored set of islands when packing? Or do I have to do this all manually by resizing and moving islands?
thanks for your help!!
-
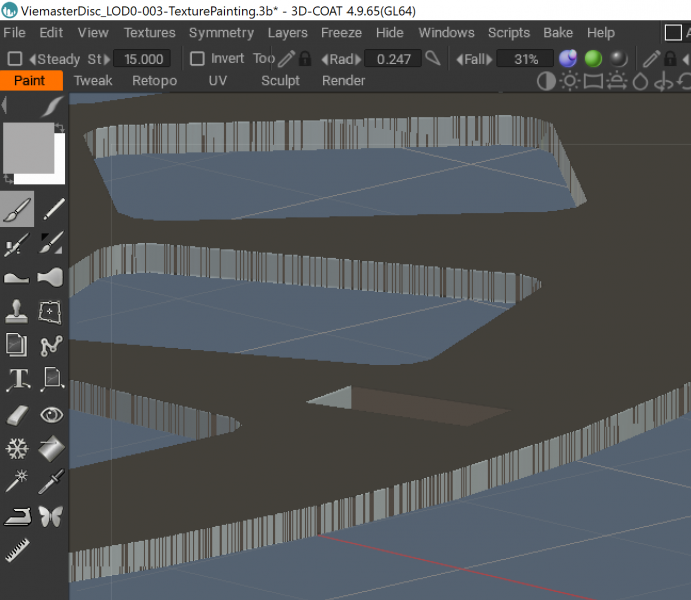
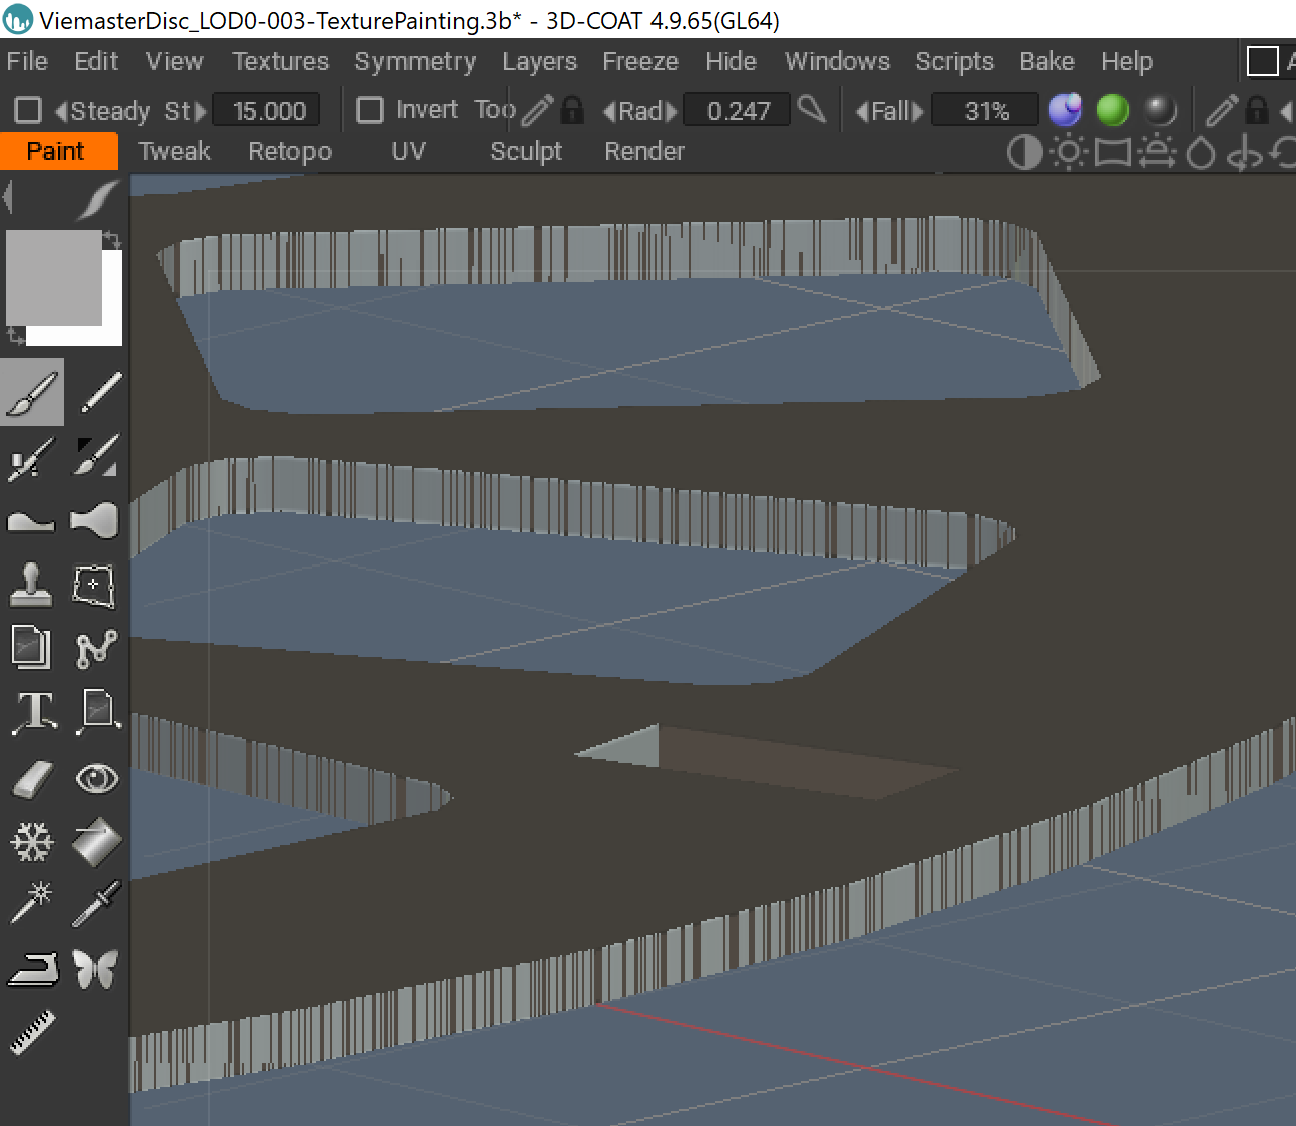
I'm pretty sure my geometry is clean and the uv map is perfect.
But these flickering vertical lines appear in the GL version of 4.9.65 on the edges of my disc... what is that and how can I fix it?
-
Hi -
3DCoat badly needs proper multi-monitor support. Currently there is no way to handle a common situation which is you have a high end laptop and a vertically stacked 2nd screen when docked at your desk. So Windows has the 2 desktops vertically stacked. You can't move texture or UV windows on to the second screen - nor can you move any panels. Such a small change to 3DC would increase productivity ALOT.
Please consider this feature request seriously and vote it up if you agree. Thanks!
Please see this thread with the suggested workaround:
-
5
-
-
On 10/25/2020 at 2:58 AM, Silas Merlin said:
...
I do use TGA on a regular basis because it has a proper channel for alpha which doesn't require erasing the data in the RGB channels, because I do need RGB info on the whole texture. And alpha in addition as opposed to *instead of*, and it so happens that either png doesn't allow that or the software I use doesn't.
If you happen to have a prejudice against TGA there is nothing I can say to help you, you have to live with your file format bigotry or ageism and lose functionality because of it, that is all. Cheers.So my main question (despite trying to add a touch of humor which seems misheard/misplaced) was why or how exactly PNG differs from TGA from a functionality in the format as opposed to how 3DC is using it currently, and as far as I knew, both formats have the same alpha functionality, just PNG is smaller and also lossless and more apps support the format nowadays. So why wouldn't PNG be supported fully in 3DC by Andrew? Or am I not understanding the problem fully? Are you saying TGA supports an alpha per channel, while PNG only gives you 1 alpha in the whole file? And that means TGA has more data to work with? thanks for clarifying - I couldn't tell if the format is superior (functionality-wise) or if it was an oversight in 3DC implementation for smart materials.
Also how does EXR work for smart materials? Is it ultimately the best format for this purpose? Thanks
-
@Silas Merlin Are you saying that PNGs with transparencies don't work in 3DCoat? I haven't used TGA since 1985 and I was born in the 90s.
 Does anyone use TGA that isn't in broadcast from decades ago? Any reason PNG isn't fully supported?


3DCoat 2021 Open Beta test !
in New Releases, Bugs Reports & Development Discussion
Posted
How?? doesn't for me if they're different resolutions and stacked vertically.