


wolfiboy
-
Posts
22 -
Joined
-
Last visited
Content Type
Forums
Calendar
Gallery
Posts posted by wolfiboy
-
-
Hello digman and thank you!
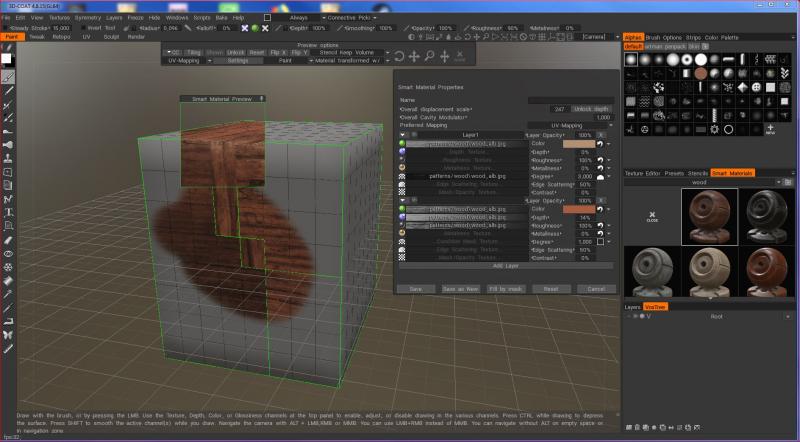
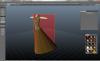
Well, I think I don't need to attach my object because I made a test with a simple box and I get the same result (see attachment): First I used Auto-Mapping and then I changed the UV a little bit to have some seams on one area. Back in the paint-room I selcted the first wood-material. I opened the smart material editor and changed the mapping to UV. To be sure it's not a normal-map error I disabled depth and only enabled color. Now when I put the material preview over the seam or when I paint over it the same effect happens.
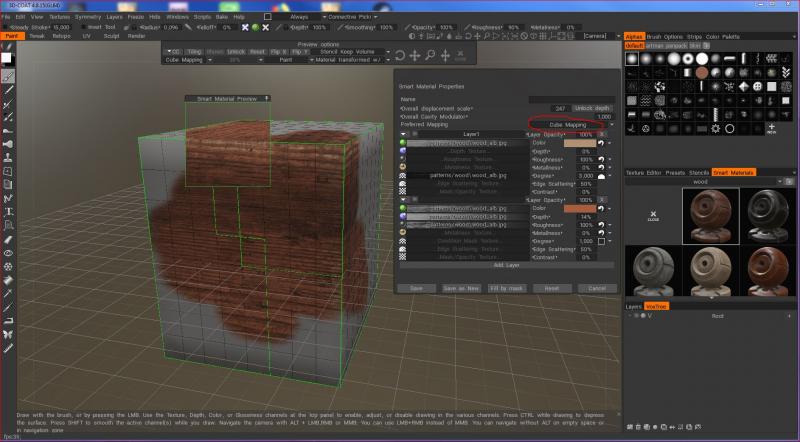
When I use cubic-mapping it's okay (see second attachment).Does this mean UV-Mapping is not possible? Or what did I wrong?
Or maybe I have a wrong understanding of UV-mapping?
For example I would need this kind of mapping to draw a wall-structure over an opening in a wall like a window or a niche. When I use the other mappings like cube or spherical I will get some distortion in the texture.But anyhow, I will send you the modell of the arch and the material by a PM for forther analyses.
Thank you!
-
Hi!
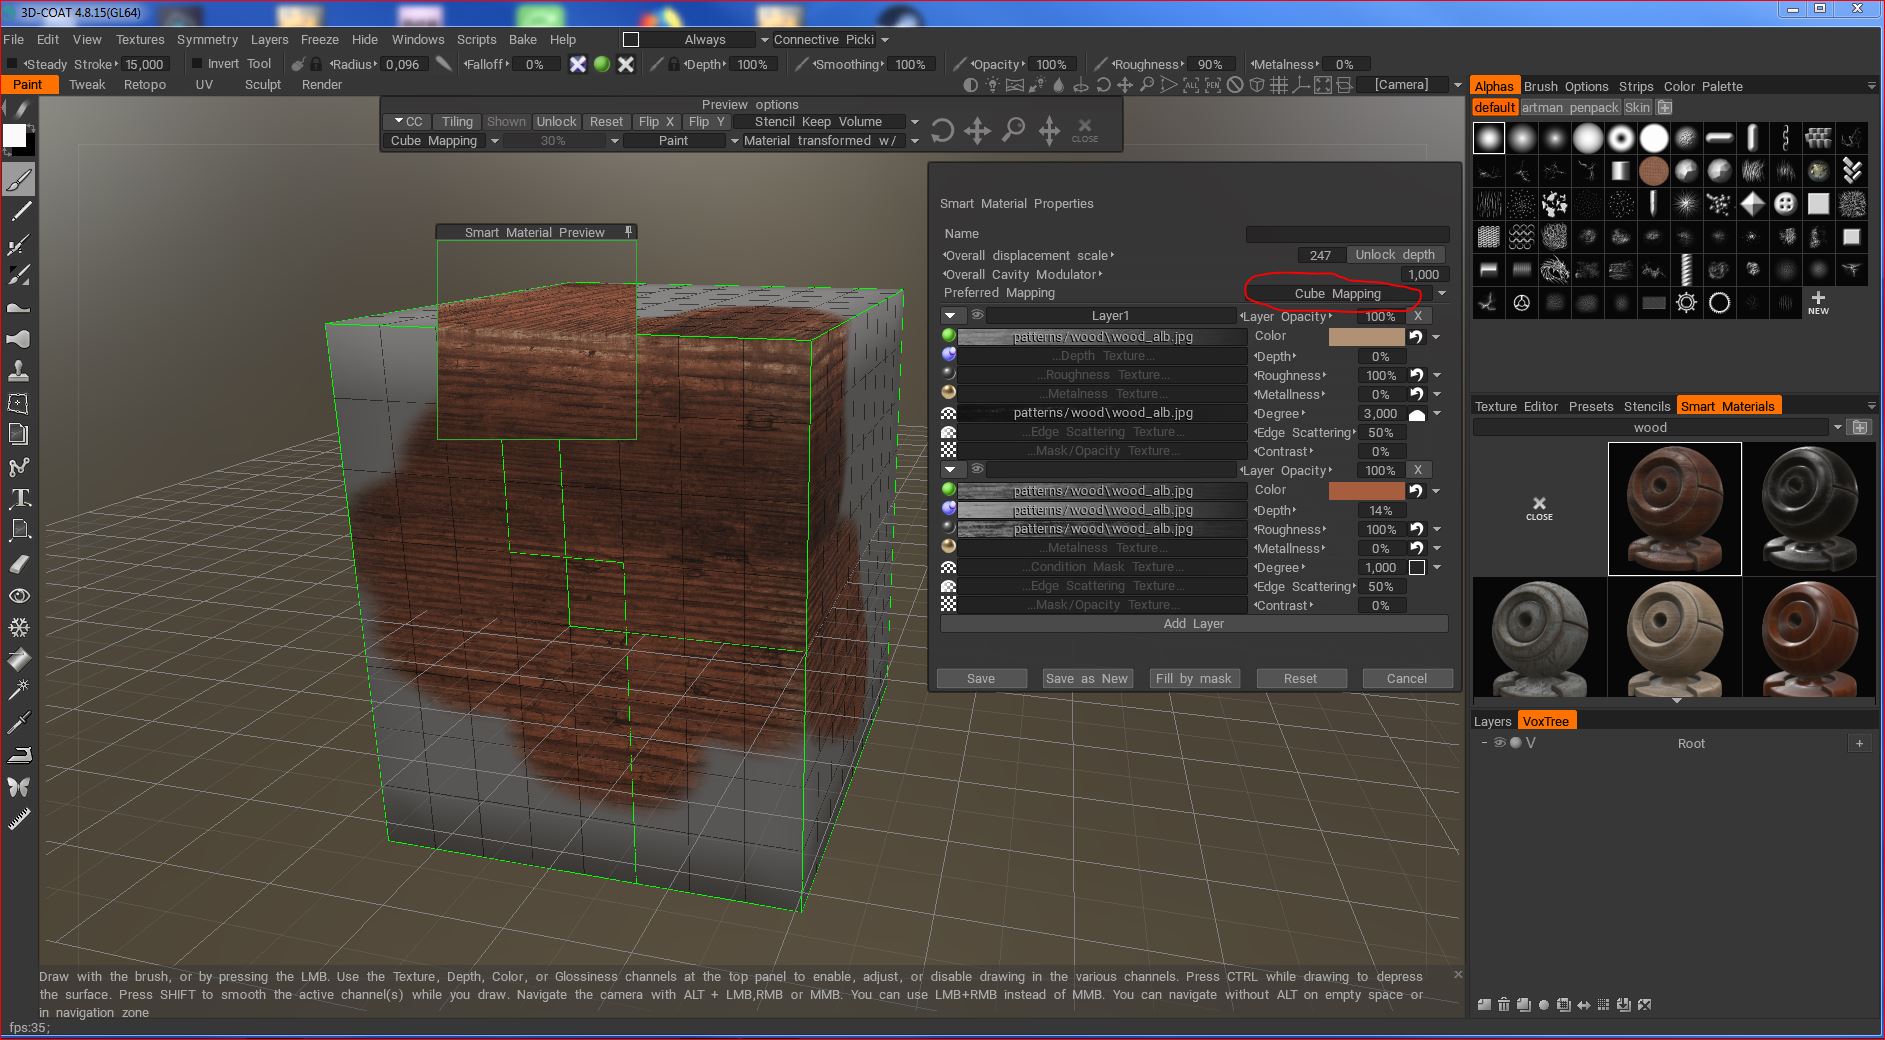
I'm working with 3D-Coat 4.8.15 and when I'm applying a smart material in UV-projection I get some unwanted seams in the texture. I tried to delete the seams in the UV-section and build new ones, but with the same result. This does not happen when I change the material to e.g. cube mapping, but then it is not applied correctly. For the material I used a tiled texture from textures.com and I don't think it's a problem on the texture-side.
What I noticed: When I look on the UV-Map in the UV-section you can see, that near the problematic seams the color changes to blue on the UV-Preview. Does this has something to do with the problem?Thanks for your help.


-
Hi chingchong,
just found your forum by searching for christian game development and saw that you made some investigations in this field already. I'm a christian 3D-artist and would like to participate in a project. I'm more the modeler although I did some animation, working with Lightwave 3D, ZBrush, Vue, 3D-Coat and most recently with Houdini (still learning). Although I'm working on my own I think I should share my skills with others. I would not request for money but it should be a serious project and not only a 'let's try something' - if you know what I mean. I have been searching for years but gave it up and started my own project. But as a team-worker, this is no fun. So it seems you have more insight.
And therefore my question: Do you know a serious project where I could participate in?Thank you,
Wolfgang
Homepage: http://www.free-d.at
(Wir können auch in Deutsch schreiben, wenn das einfacher ist)
-
Thank you again, digman!
-
Wow, digman, that's great!
Thank you very much for this detailed kind of tutorial!
I tried the version with copy/transform and then selcting the wanted area with the spline-settings of the brush. It works perfect with straight lines, not so good (picture is unsharp - maybe recalculated different) with the kind of bezier-splines. But that's okay, I can life with it. The whole procedure seems to be a not wanted side-effect ;-) A little bit complicated - but it works.
Of course it would be great to import png-files with an alpha-channel by the copy/transform tool.
Thank you again, this was a great help for me!
-
I'm in the process of modeling a little town with simple models (because it will be seen from far) but I would like to add some detail by kind of stamping some texture-details on the models, such as doors and windows. These doors and windows I got by cutting them off from the original photos. So I would like to use them as kind of elements or modules to build the final texture of the models.
I know that I could use the photos as materials, but in this case I would need to place and scale the material correctly over the model. Even if I would use the polygon-mode (to paint faster) the sorrounding walls of the e.g. windows would be seen and would interfere with the wall-color of the building. So in this case I would need to use an alpha mask so that only the window would be painted.
To make a brush seemed to be the solution, but when I tried it (in stamp-mode and default-color switched off) it was very unsharp and pale.
Is there another methode or maybe some settings?
I'm using version 3.5.19A
Thank you!
-
Yes, you're right. With 'Use CUDA' unchecked it works.
Thank you very much.
-
For example you could merge the object from the retopo-room to the paint-room (Main-Menu 'Retopo - merge to per pixel with NM'), create a new material with your texture-file and paint the texture on the object. Now, when you export the object from the paint room, you will get a new texture-file that is conform to your new UV. Or maybe you need to render the object first in your rendering-software from specific positions and use theses files as materials in the paint-room. I do this when I have some nice procedural textures from Ligthwave and I need to export my character into .obj-format.
-
Well, I think I fixed it on my own:
I started 3D-Coat, worked on an other model, saved it and opend the 'problem-file' without closing the application. And it worked!
Now I split the area I want to detail into another layer, downgraded the other parts and could work again.
For me it seems to be a graphic-card-driver-problem, because my screen flickers when I activate the brush and the holes appear. When I try to downgrade the model in this status 3D-Coat finally crashes. In my opinion it has to do with high-res-objects (15 000 000 triangles). And I had the impression that the application worked slower with this reloaded object then yesterday with the fresh, non-reloaded object.
Never mind! But maybe somebody else had the same problem and this post could help.
-
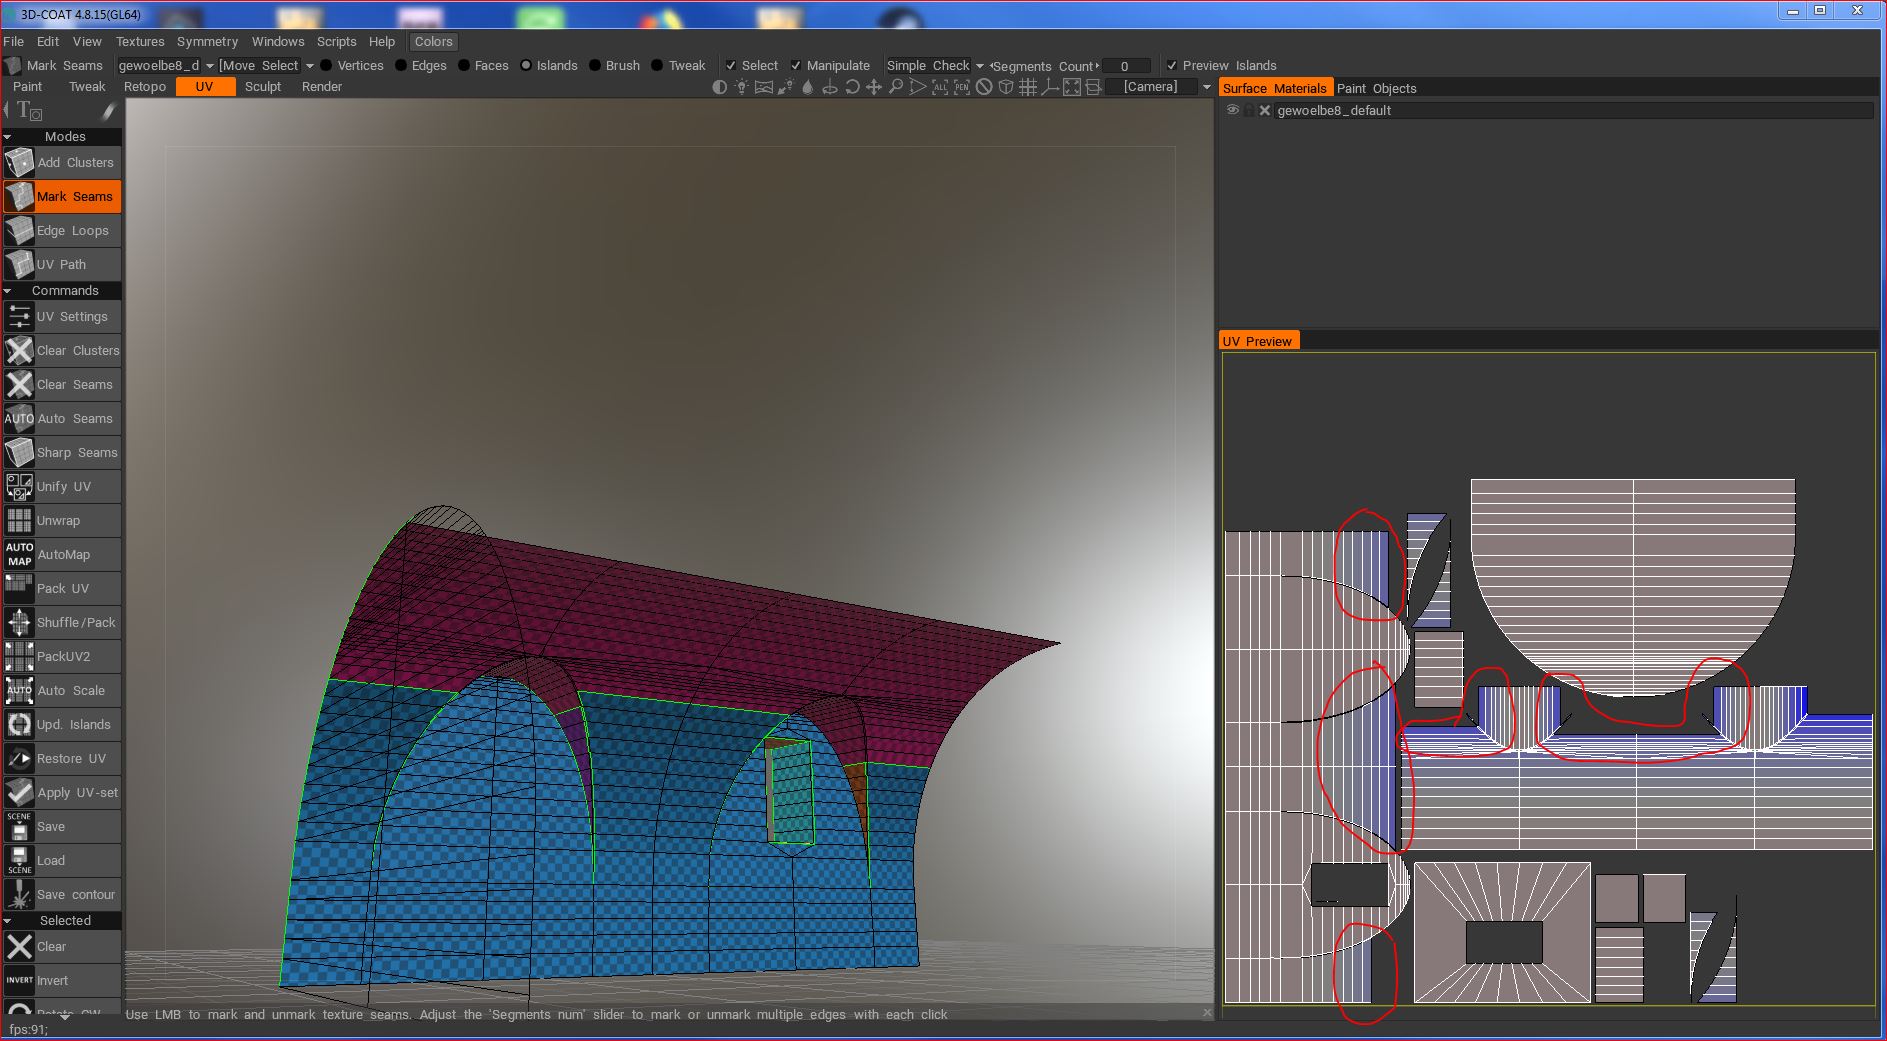
I reloaded a file of a detailed character I sculpted in voxel-room yesterday, but when I want to paint holes appear (see attached file). So I can't go on with sculpting!!!
I installed the newest graphic-card drivers for my nvidia quadro FX580 (267.05) and installed the latest version of 3D-Coat (3.5.13A). I run it as CUDA-Version with OpenGL on a Windows 7 64 bit.
Okay, the file is not so small (98 MB) but it worked fine to sculpt the object yesterday. Today is the first time I tried to load it from disk.
Could somebody help me?
-
Thank you AbnRanger,
I will study UVs in 3D-Coat a little bit deeper in the next time. Thank you for helping me and for the links!
So far my problem is solved with the workaround.
-
I'm not sure when the multiple UV sets feature was implemented, but go to the 3.5 updates thread and download + install 3.5.11. It should work. With that said, though, I recently encountered a few bugs that I've reported to Andrew. They are a bit irritating, but you can still get the job done. Just use the drag select tool most of the time, when selecting Islands.
The 3.5.11 Update brought me the pull-down-menu for the UVs in Retopo-room, but the seperate UVs are still mixed.
To be sure that I didn't make a mistake I imported the object for pixel-paint. There, in the UV-room, I can select the seperate UVs with their correct name. So the object seams to be correct (I discovered, that in Lightwave you need to apply to seperate surfaces this seperate UVs; it is possible to create UVs without applying them to surfaces, but then 3D-Coat doesn't recognize them at import.)
But I found a work-around: I will just use one UV, merge into Paint-room with normal map and export the object to .lwo-format (normal map included). In Lightwave I load the object, define two different surfaces (e.g. 'head' and 'body') and in the Surface Editor I only apply the normal map to the 'head'-surface (with the UV map, that is the same for both surfaces). So only the head will be influenced by the normal map.
I don't know if this can be done in the same way in Maya. I will check it out, just downloaded the 30 day tryout.
But anyway - I couldn't reproduce the effect of your video. Maybe it is dependent where the object is modelled?
-
Thank you AbnRanger,
I saw your video before but it doesn't work for me. Because in difference to your video I can't select the two UVs in the Retopo-room because the pull-down-menu in the upper left corner is missing. I do the exact same thing as in your video: import the mesh with the two UVs in Voxel-room, do the snaping, go to Retopo-room, click on 'Mark seams' but the UVs are mixed together. And I don't have this pull-down-menu in the most left upper corner as in your video where I could select the UVs. There's nothing.
I think I have the newest version 3.5.05A .
I attached a link to youtube where I recorded my problem for better explanation what I mean.
Thank you.
-
Hello,
I'm new in this forum but have used 3D-Coat for some modeling already. Now I want to apply a normal-map from the detailed character. I detailed the face of my character in the voxel-room and now I want to use this as a normal map. Before that I made a UV map on the charactes mesh and now I import this already UV-ed mesh into the retopo-room and merge all together with normal map into the paint-room.
The problem is, that only the head has detail, the rest of the body has some bad artefacts from merging the orginal mesh into voxel-room. I dont want to have this on my normal map.
Question: A)Is it possible to limit the UV-map only to the head? When I try this in UV-room the rest of the body appears as crazy, long-drawn out UV-mesh.
B)Is it possible to delete this UV-island?
C) Could I make two different UV-maps for this character - One for the head, the other for the rest of the body? (Because then I wouldn't apply the normal map for the second UV in the rendering-application.) And how to do that?
Thank you in advance!
-
Hi Greg,
thank you for the quick answer.
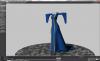
Hm, I see. So I will export it from Retopo to Lightwave or directly to the paint-room, then work on it in the UV-section and then export it to LW. The problem with the cloth-simulation in Lightwave is, that it doesn't look so 'romantic', it is just straight technical correct.(image attached)

By the way, to merge only the mesh to the paint-room I used 'Retopo - Merge patch (per-pixel)'. Otherwise the result is a kind of boolean subtraction of the mesh and the body, i.e. the figure is to detailed and doesn't really represent the mesh.
Anyway, thank you very much for the very fast reply and the info about symmetrie.
I will go on with testing.
Cheers,
Wolfgang
-
Hello!
I'm new to 3D-Coat and I love it! I'm really impressed by Andrew's story and Pilgway's 'voice'. Praise the Lord!
At the moment I'm using it mostly for adding some details for objects I created in Lightwave and creating cloth. And therefore my question is following: I'm creating a dress for a female medieval figure. The dress should be quite wide and fall in several foldings. The cloth has an ornamentation if form of a vertical golden line. This line should follow properly with the foldings. So I thought following: I create the dress in Retopo, bring it to the paint-room where I paint the line, bring it to Voxels for the cloth-simulation and then bring it back to Retopo from where I will export it as a mesh to work with it in Lightwave.
Now my questions:
1) Are all this steps possible in 3D-Coat without export/import? I haven't found a way to bring the Retopo-mesh to paint and then to voxel again in order to do a cloth simulation, because in the paint-room the mesh is converted into a voxel-object and therefore can't be used for the cloth-simulation. A way could be to export it after painting as a .lwo-object and import it in the voxel-room as an external cloth-mesh?
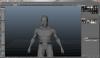
2) I did the retopo in symmetry mode. When I send it to the paint-room with 'Retopo - Merge for per-pixel painting with normalmap' it shows only one half of the model. How must this be done to get both sides of the model?
I attached a screenshot of the retopo-room.
Any ideas are welcome! Thank you!
Wolfgang alias wolfiboy
-
Vielen Dank für die schnelle Antwort!
Ich habe ein bisschen herumprobiert und habe mir noch ein paar Tutorials angesehen und bin zu dem Resultat gekommen, dass ich wahrscheinlich nicht auf eine Normalmap verzichten kann.
Import nach Voxel funktioniert leider nicht so gut, zumindest bei meinem Modell. Ich muss es in einem sehr hohen Subdivision-Level importieren, damit es seine Form bewahrt. Und auch dann ist es nicht genau und müsste mühsam nachbearbeitet werden. Bei kleineren Sub-Levels sind Löcher vorhanden.
Mit Sculpten würde ich zwar die Geometrie verändern ,aber auch hier brauche ich eine höhere Auflösung, um Details hinzuzufügen. Da ist es besser, ich erhöhe die Auflösung direkt in Lightwave nur dort, wo sie gebraucht wird und füge eine kleine Änderung per Hand hinzu.
Bleibt nur noch das Malen. Das funktioniert recht gut, auch mit low-poly-Modellen. Das Wichtigste ist mir vor allem, dass der poly-flow des Gesichtes erhalten bleibt bzw. nicht zu detailreich wird, da sonst das Erzeugen von Morphs eher schwierig wird.
Man muss also abwägen, ob man die Details wirklich in der Geometrie braucht, ob es sich auch in LW machen lässt, oder ob man bei sehr vielen und kleinen Details eben zu einer Normal-Map als 'state of the art' greift. Da mein Partner allerdings nur die einfache Animationsoftware Animation-Master verwendet, bezweifle ich, ob die Normal-Maps einbinden kann. Mal sehen.
Vielen Dank jedenfalls nochmals für die Hilfe!
-
Hallo,
ich bin neu in diesem Forum und probiere gerade die Trial-Version von 3DC 3.5 aus. Ich arbeite seit ca. 2 Jahren mit Lightwave und möchte 3DC vorerst einmal dazu verwenden, um kleine Details in der Geometrie zu erstellen. Ich möchte aber keine Normalmaps und auch keine Displacement-Maps verwenden, da ich die Modelle für einen Kunden nach .obj exportiere. Die Details sollten also in der Geometrie eingebunden sein. Eine Bumpmap wäre zwar auch eine Lösung, geht aber nicht in allen Fällen.
Konkrete Aufgabenstellung: Einem Kopf im low-poly-Format sollen einige Falten hinzugefügt werden.
Folgendes habe ich probiert: Ich habe das Modell in 3DC geöffnet (kann ja wunderbar .lwo lesen) und konnte es ersteinmal nur 'bemalen' bzw. sculpten. Dadurch wurde zwar eine Veränderung in der Geometrie geschaffen, leider wurde aber das gesamt Modell in ein mid-poly-Modell bzw. high-poly-Modell verändert. Das will ich aber nicht, ich möchte wenn möglich nur an der Stelle den poly-count erhöhen, den es betrifft (also z.B. Augenpartie oder Stirn). Auch ist die Veränderung nicht so detailliert wie ich sie gerne hätte. Sebst wenn ich das Modell mit über 2 Mio. Polygonen importiere, kann ich z.B. noch keine 'scharfe' Stirnfalte erzeugen.
Frage 1: Wie geht ihr in so einem Fall vor?
Frage 2: Wenn man ein Modell importiert und skulptet: Kann man die Auflösung auch nur in bestimmten Bereichen (z.b. Stirn) erhöhen, oder geht das nur für das gesamte Modell?
Frage 3: Ist es in 3DC auch möglich, ein low-poly .lwo-Modell im Voxel-Modus zu erweitern bzw. zu verändern? Und wenn ja, wie bringe ich es wieder zurück nach LW? Re-Topologize?
Vielen Dank im Voraus!


[Solved] Correcting visible seams
in General 3DCoat
Posted
Hi guys,
thank you for your help!
@Carlosan: Yes, the default is as you recommend.
@digman: I subdivided the model to get more polygones with about the same size. And yes, cube mapping works better now.
So the solution is: When you use cube mapping the model should not have to big differences in the size of the polygones, or the distribution should be more smooth. My model was construted on a boolean basis, so the distribution of polygon-sizes is not quite texturing-friendly.
And UV-mapping with smart materials is just as painting on the UV-map. Of course rotation and seams will occur.
My problem is solved, thank you!