


L'Ancien Regime
-
Posts
2,188 -
Joined
-
Last visited
Content Type
Forums
Calendar
Gallery
Posts posted by L'Ancien Regime
-
-
1 hour ago, Dmitry Bedrik said:
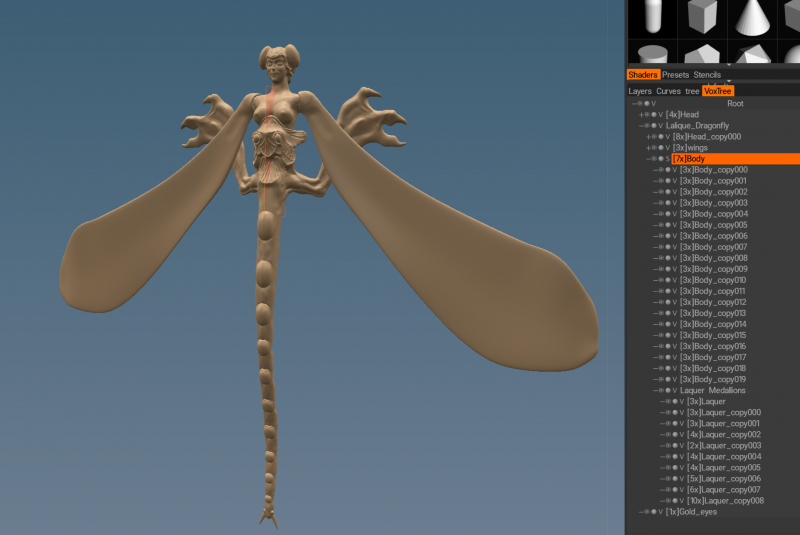
Why mock the program, trying to do such simple things (I mean - the edge of the wings and other "straight" things) using retopology, when it is faster and easier to make them polygons, and then export to 3Dcoat?
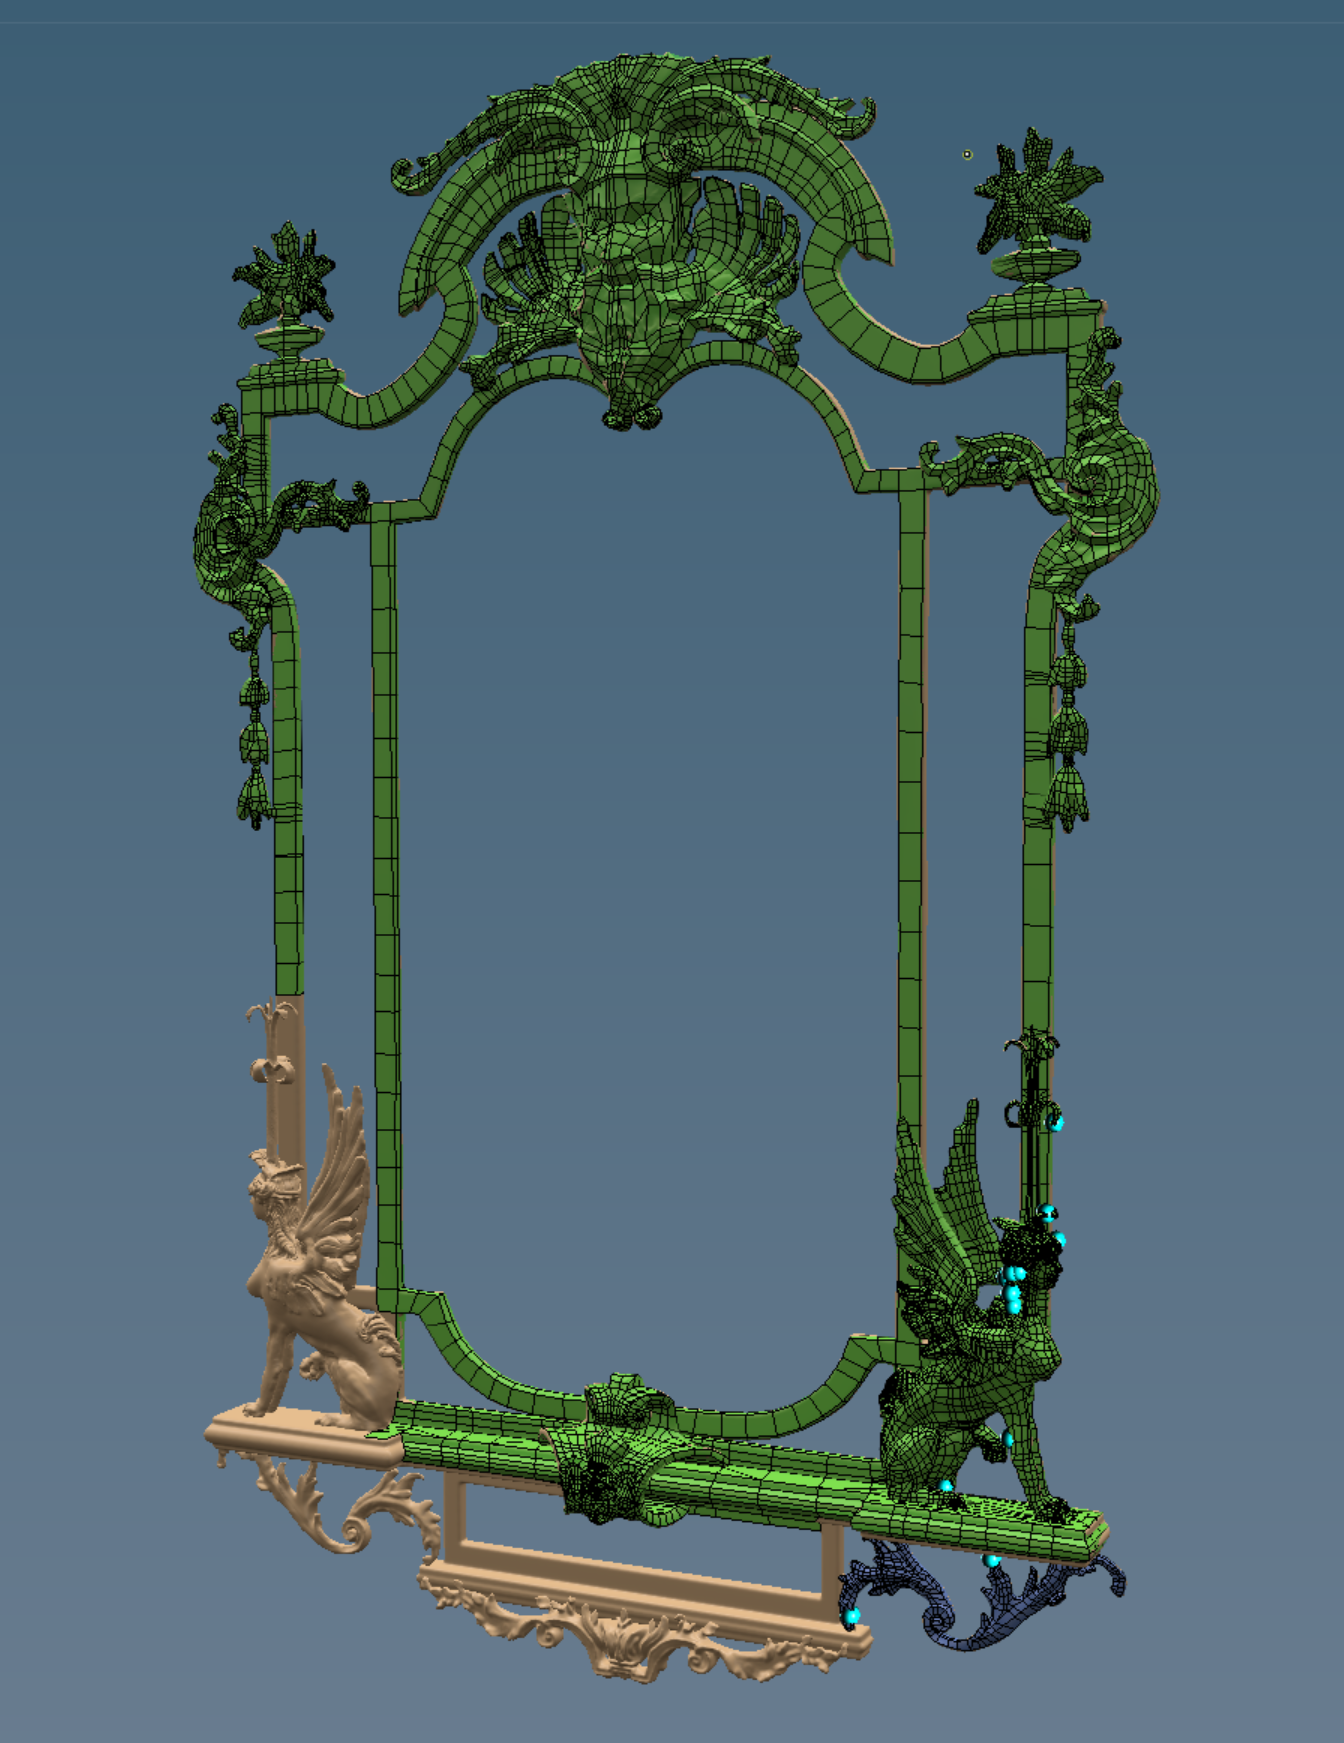
It's not mocking the program whatsoever. That wing autoretopo is just a test for a much more complex retopo job that would be a pain in the ass to do otherwise. It passed the test with flying colors. This is going to be a job that requires a good autoretopology program, not otherwise. I'm looking forward to some extremely satisfying renders with all that gold, enamel, pearls and cut crystals in it. I'm doing it in 3D Coat. It's got all the tools I'll need outide of the render engine which will probably be Renderman or maybe AMD's ProRender.
-
 1
1
-
-
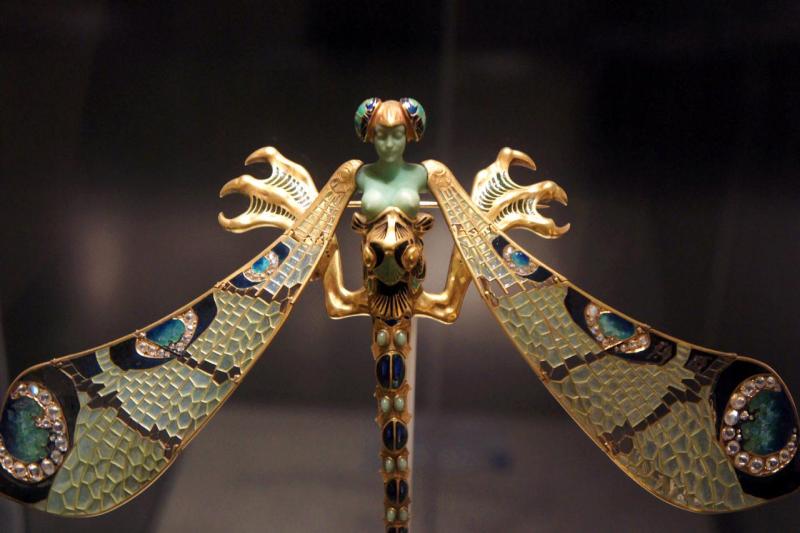
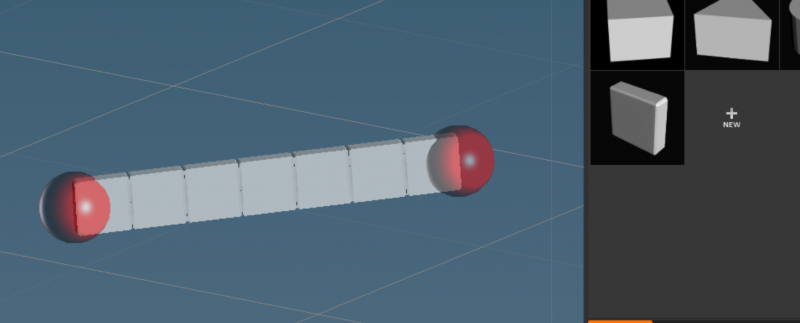
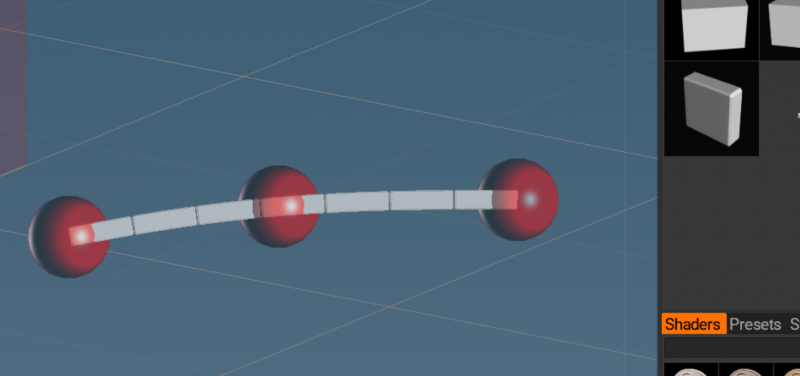
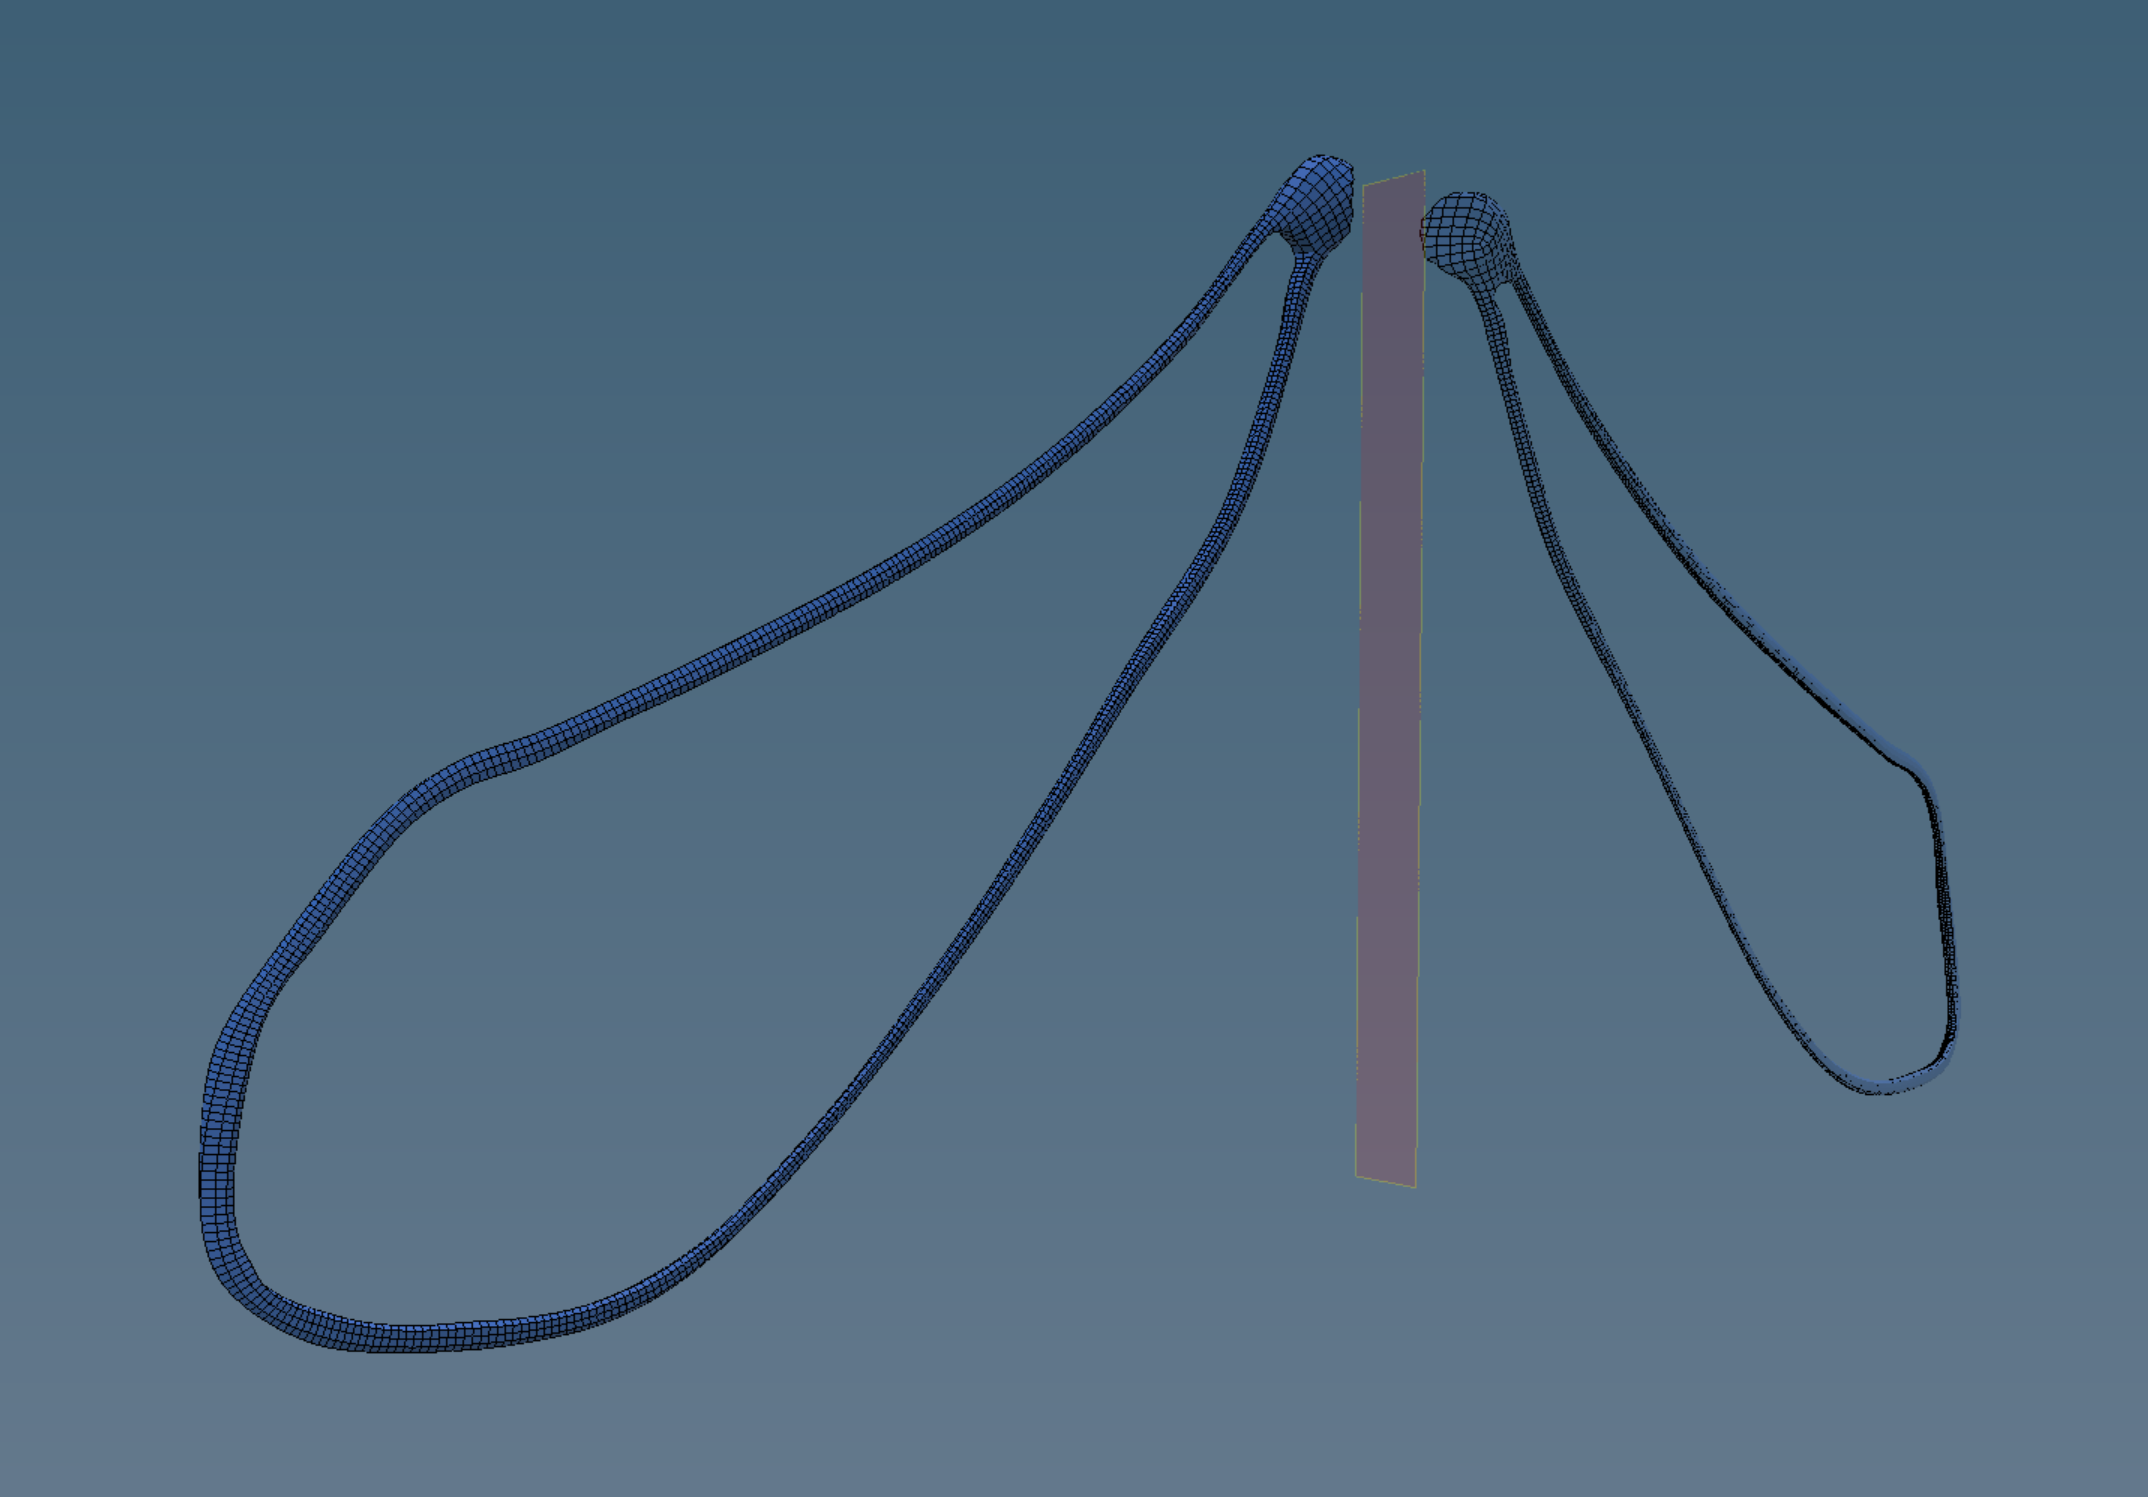
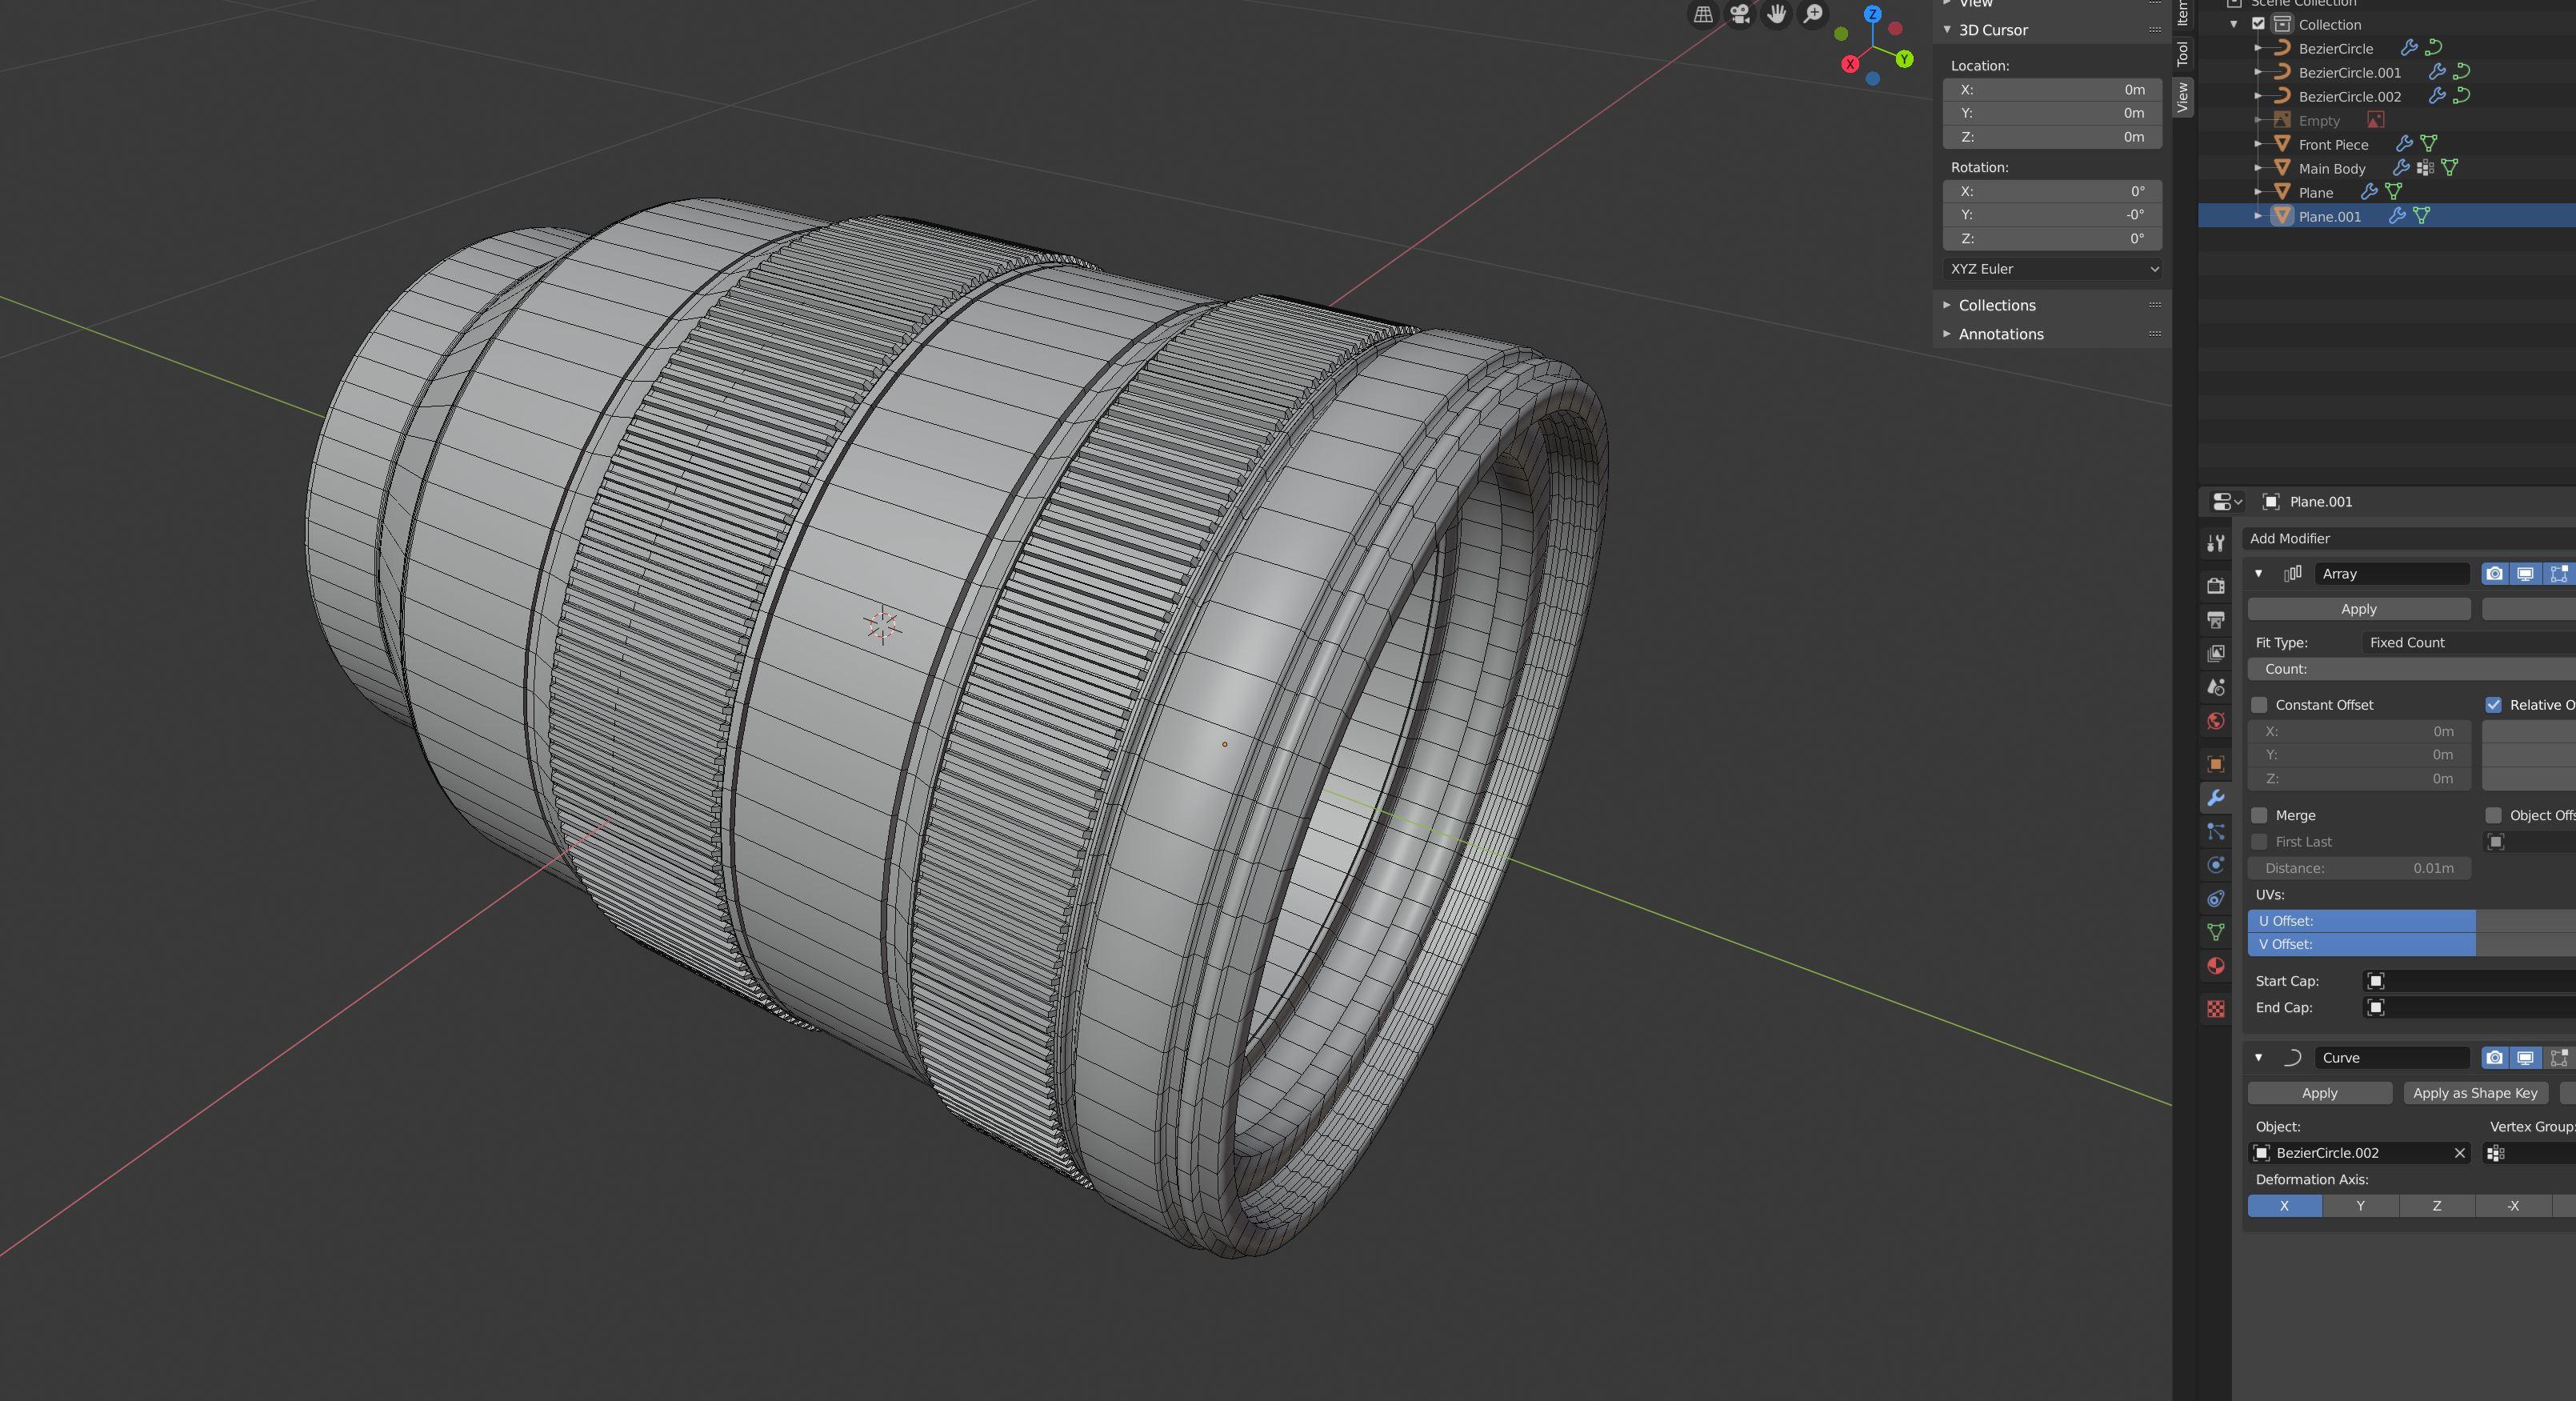
I just did this test for a much more complex retopo job for a 3 year old project I'm reviving. It took several tries but just straight up Autopo with no painted weight maps or contour splines added gave me this adequate result with a final setting of 10,000 polygons. 15000 was too much and 7500 not enough; the retopo just crumbled at the outermost fine extremities of the topography. Two or three years ago there's no way Autopo could have given a result like this. This is such a relief. I hate doing big complex retopo jobs by hand. The retopo took far more time than the initial voxel model to sculpt. I spent an entire month going crazy on one retopo job. It was crazy.

I went as mad as a march hare trying to do this by hand. It was like solving some insane calculus problem that wouldn't work out no matter how you tried to solve it.
-
2
-
-
2 minutes ago, yoohasz said:
Cool experiments. I had a retopo session last night. Hmmm yummy, and I really enjow solving topo problems (perv) I started out with autopo and did a manual pass after that it speeds up so much of the work! I think 3Dcoat is unmatched in manual or auto retopology.
Post em. Let us see.
I'm particularly impressed with the way it automatically detects and works out flow lines. Andrew or whoever worked on this should come in here and tell us as much as he (they) (zhe?) can without giving out trade secrets.
-
1
-
-
On 8/28/2019 at 6:30 AM, AbnRanger said:
In a lot of situations, it does a really good job. It requires some finessing when the object has complex shapes, but still very useful. I like using it on secondary objects, like teeth, tongue, belts, buttons, etc. Those could eat up a lot of time doing it by hand, and they don't have to have perfect topology.
It royally kicks ass.

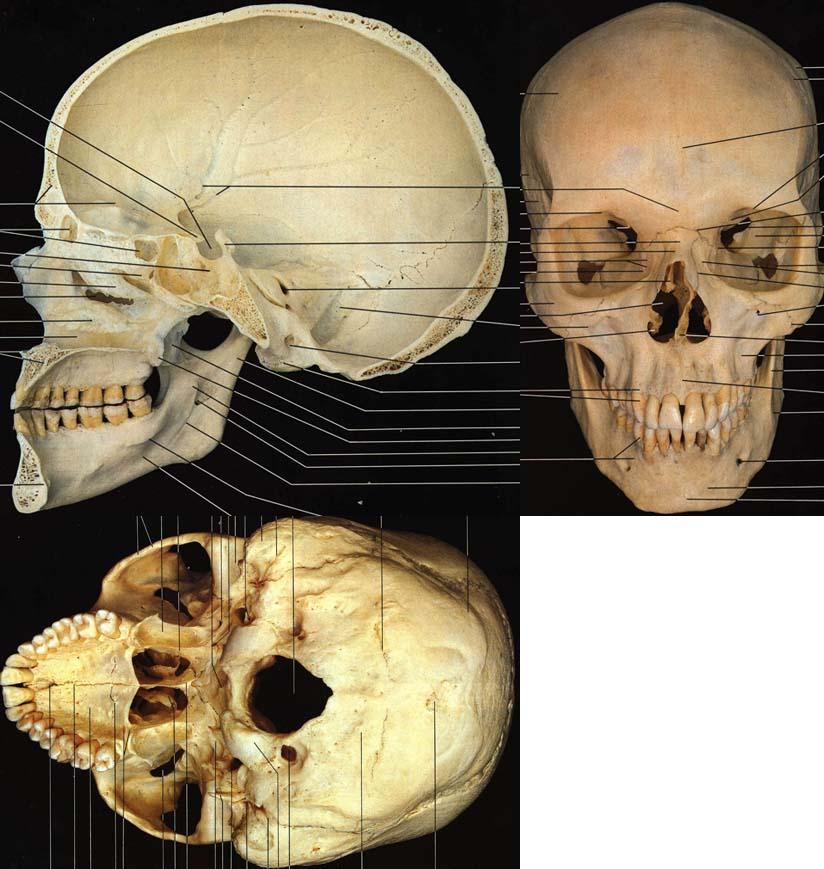
I remember the bad old days. This is amazing and complex as hell with that nasal sinus area above the palate and those eye sockets are not simple at all; they're thin semi spherical membranes and not a single tangled mesh or uneven mess in sight. And FAST.
As good if not better than Zremesher.

15000 polys with no splines or painted weight maps.
-
2
-
-
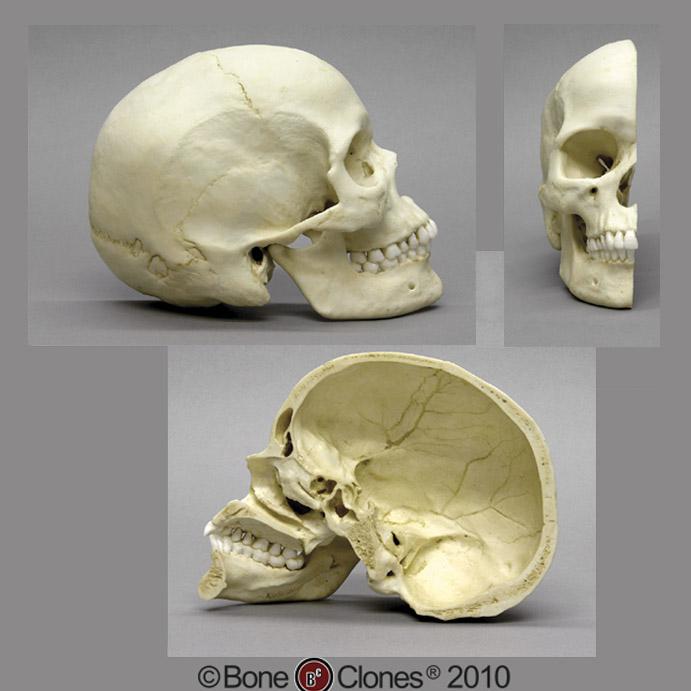
I don't have any philosophical explanations for it. Creationism, Darwinism...it's almost irrelevant when you start looking closely at how in one spot you find incredible gossamer thin bone tissues and in other places a network of thick buttresses or in the case of the skull, a thick helmet with an almost spongy porous interior to protect that precious computer from shocks. Its hard not to be seduced into thinking there's some meta intelligence dictating the formation of these complex structures to its purpose. It's a sublime miracle. It's an absurd contraption.

-
1
-
-
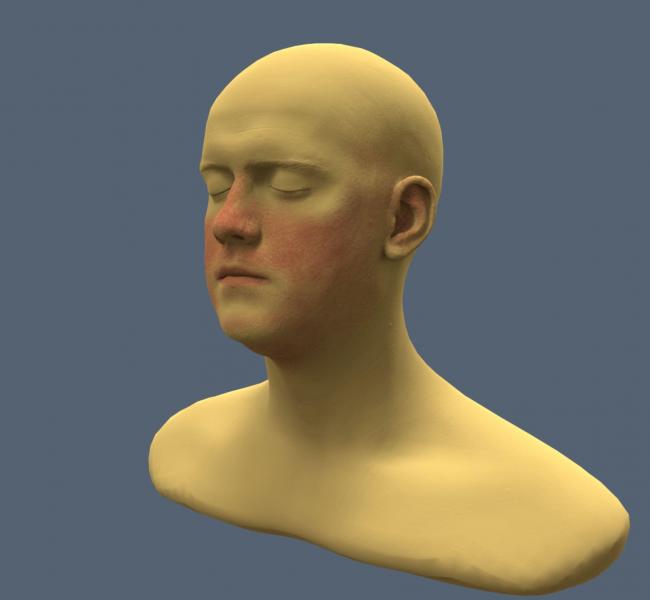
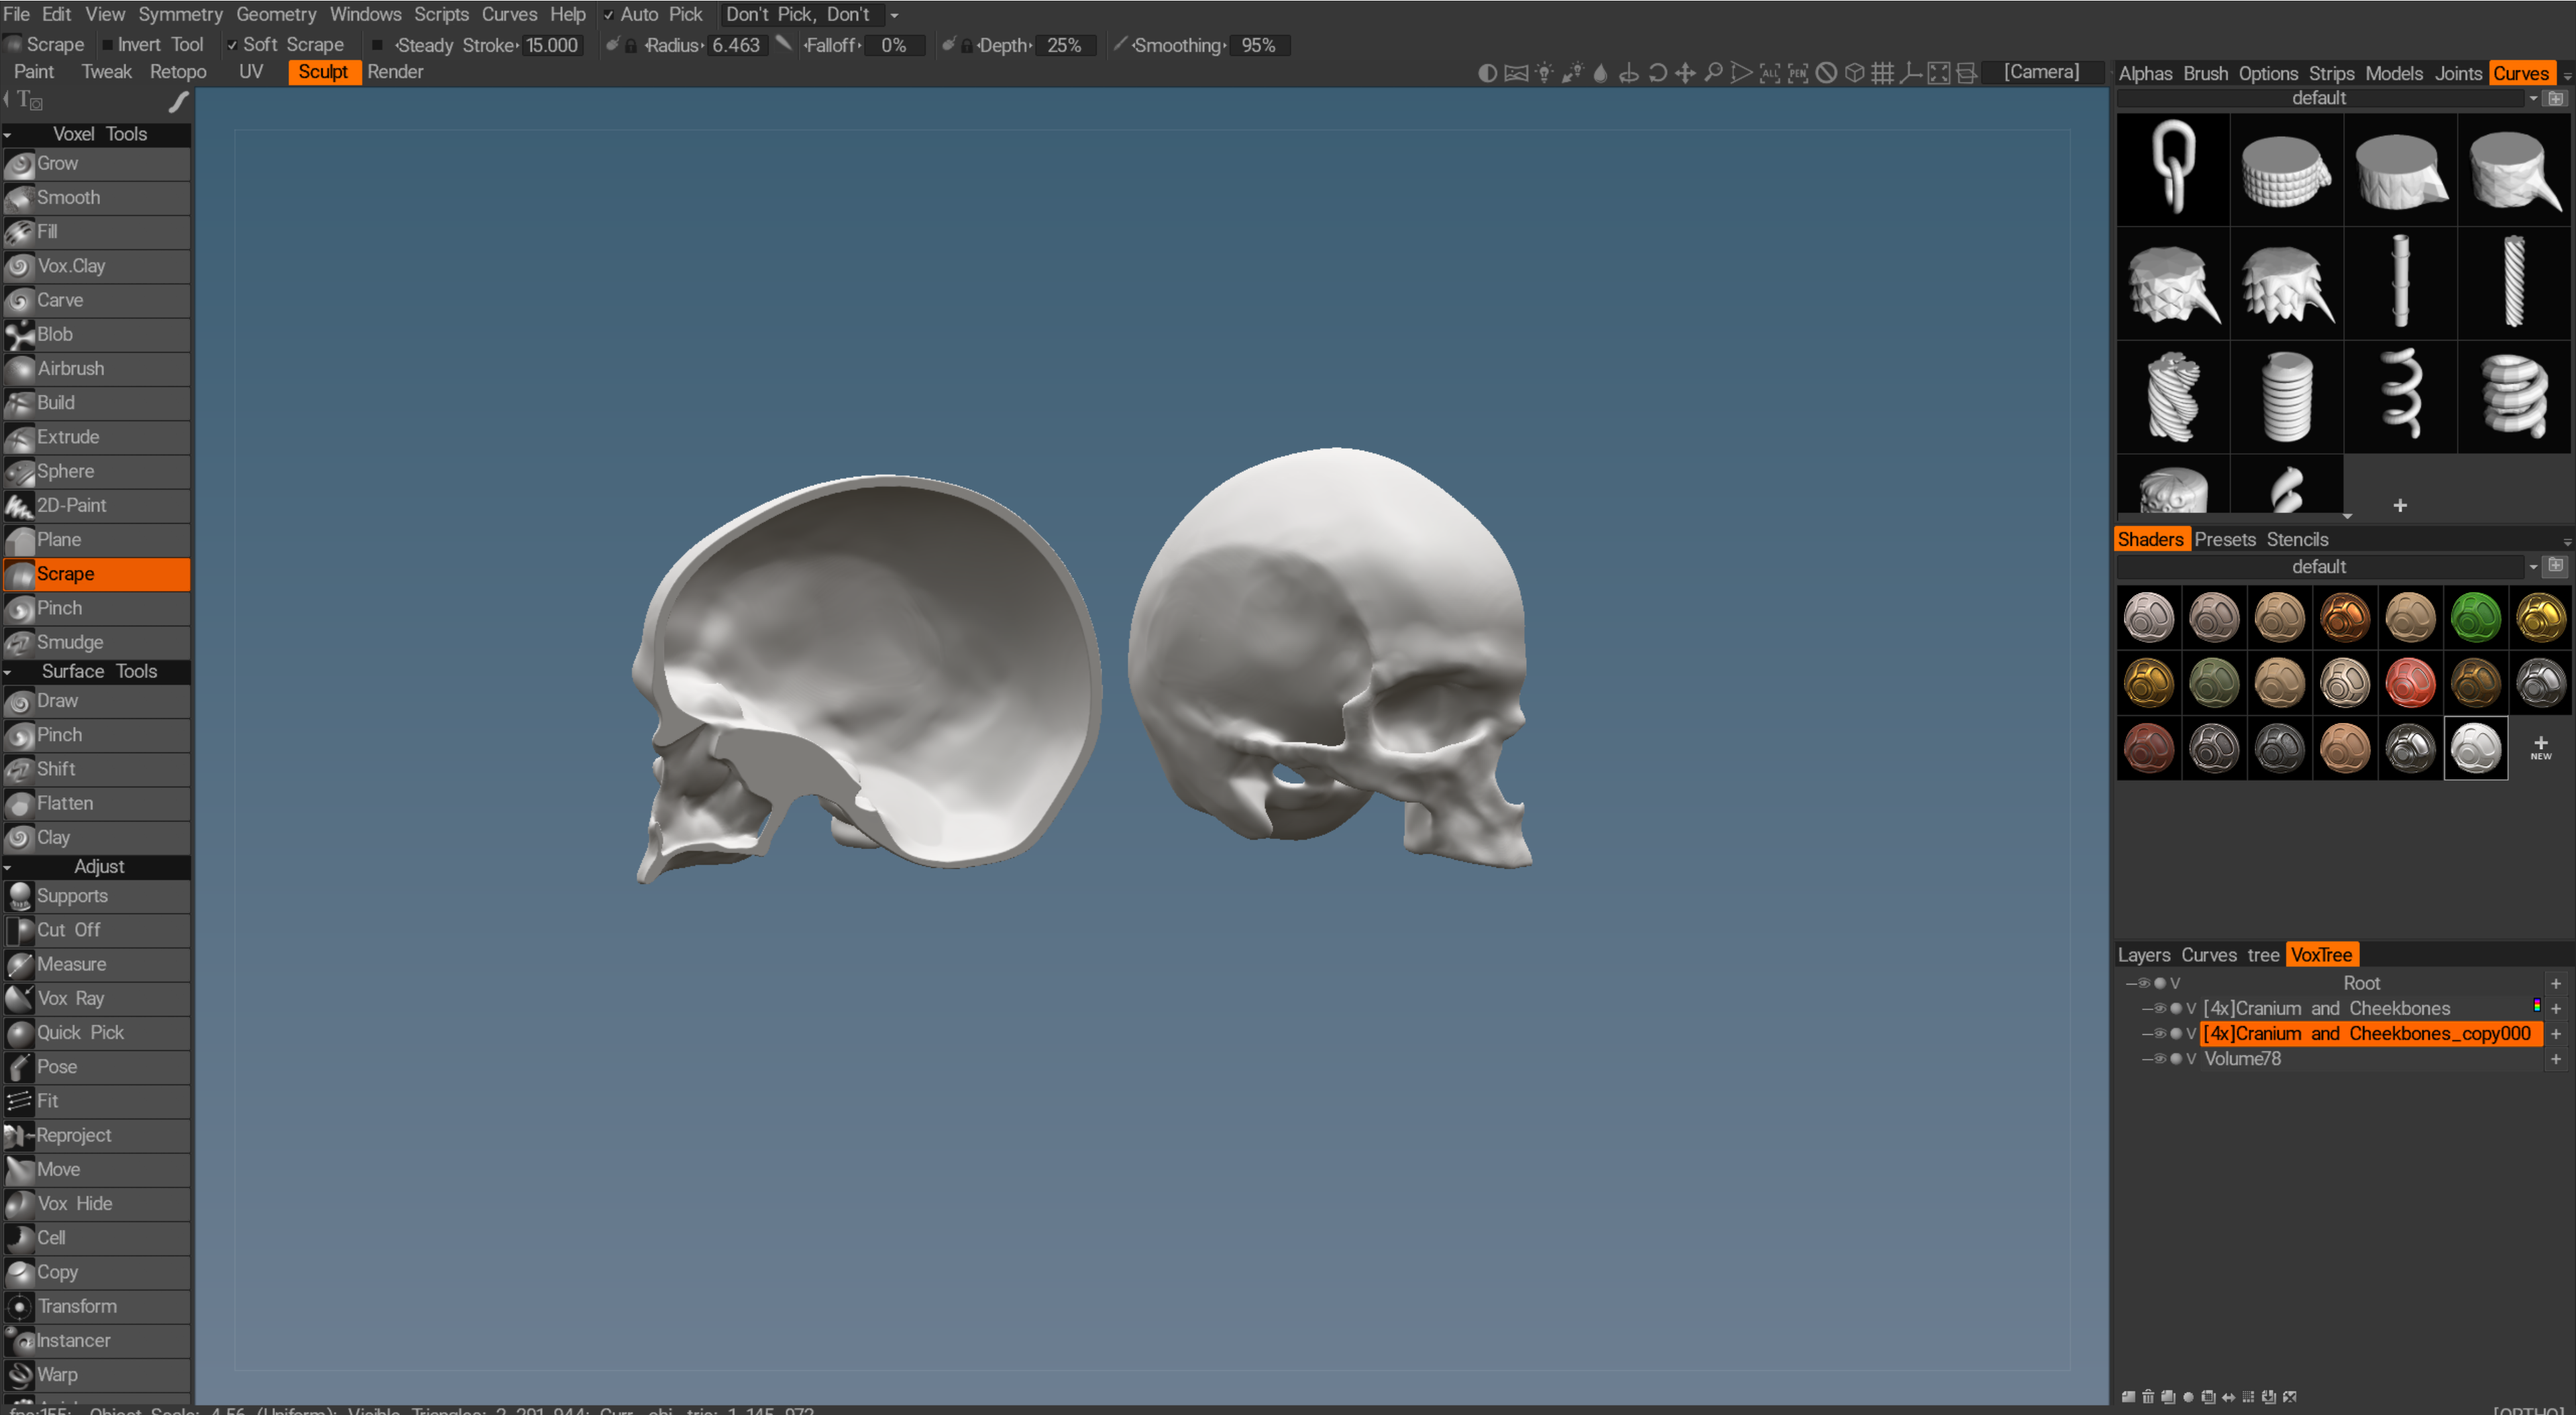
Well the time has come with my new Threadripper and Radeon VII finally up and running to fire this thread up again. Seriously anatomy is so much fun and as someone said to me here once, perhaps in this thread, that it's wrong to do a hybrid approach with Maya or some other subd polygon program to start out a body part. They were right and frankly working in 3D Coat, purely with voxels and then going over to surface mode solves so many problems in working with complex body parts. With that I think I'm finally going to go over to Vertex Painting too; it's a challenge with a lot to learn there but I think that's the price to pay to take advantage of some seriously powerful tools.
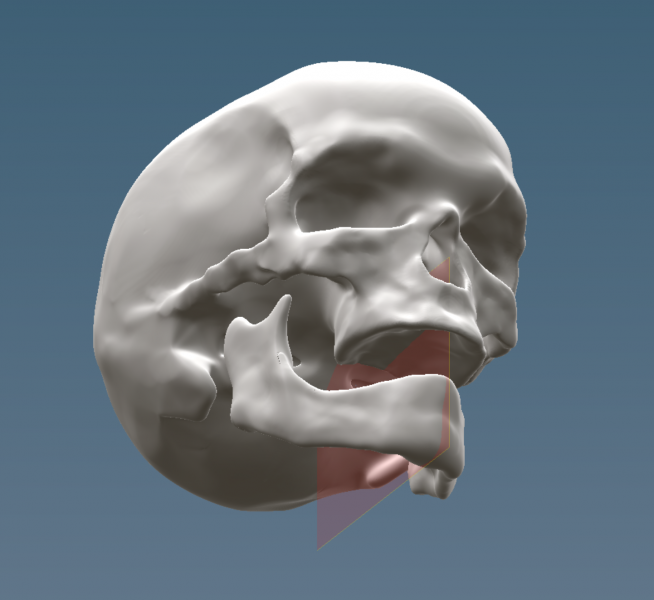
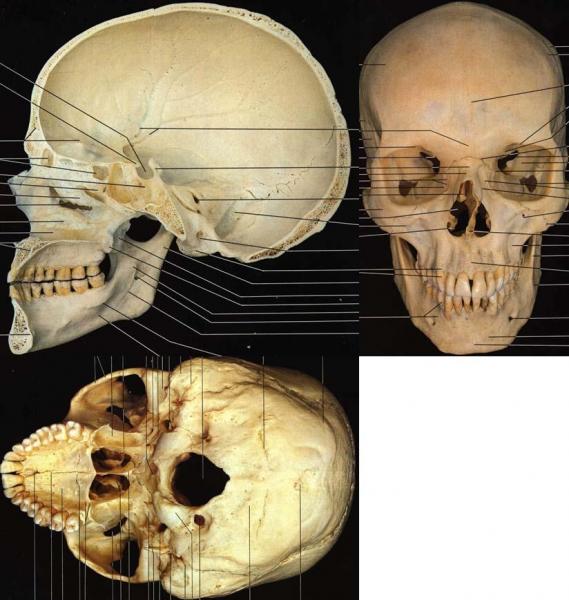
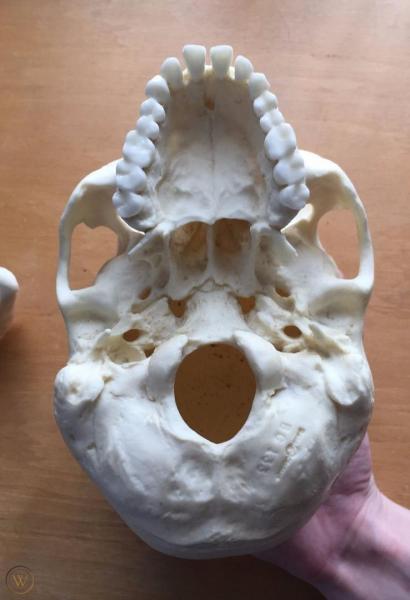
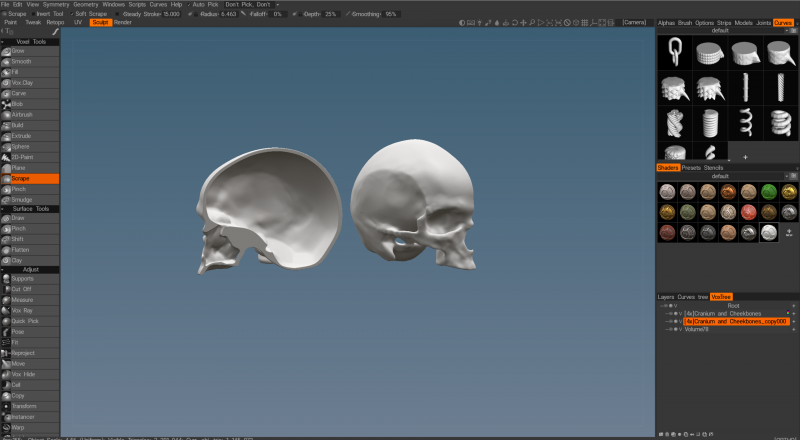
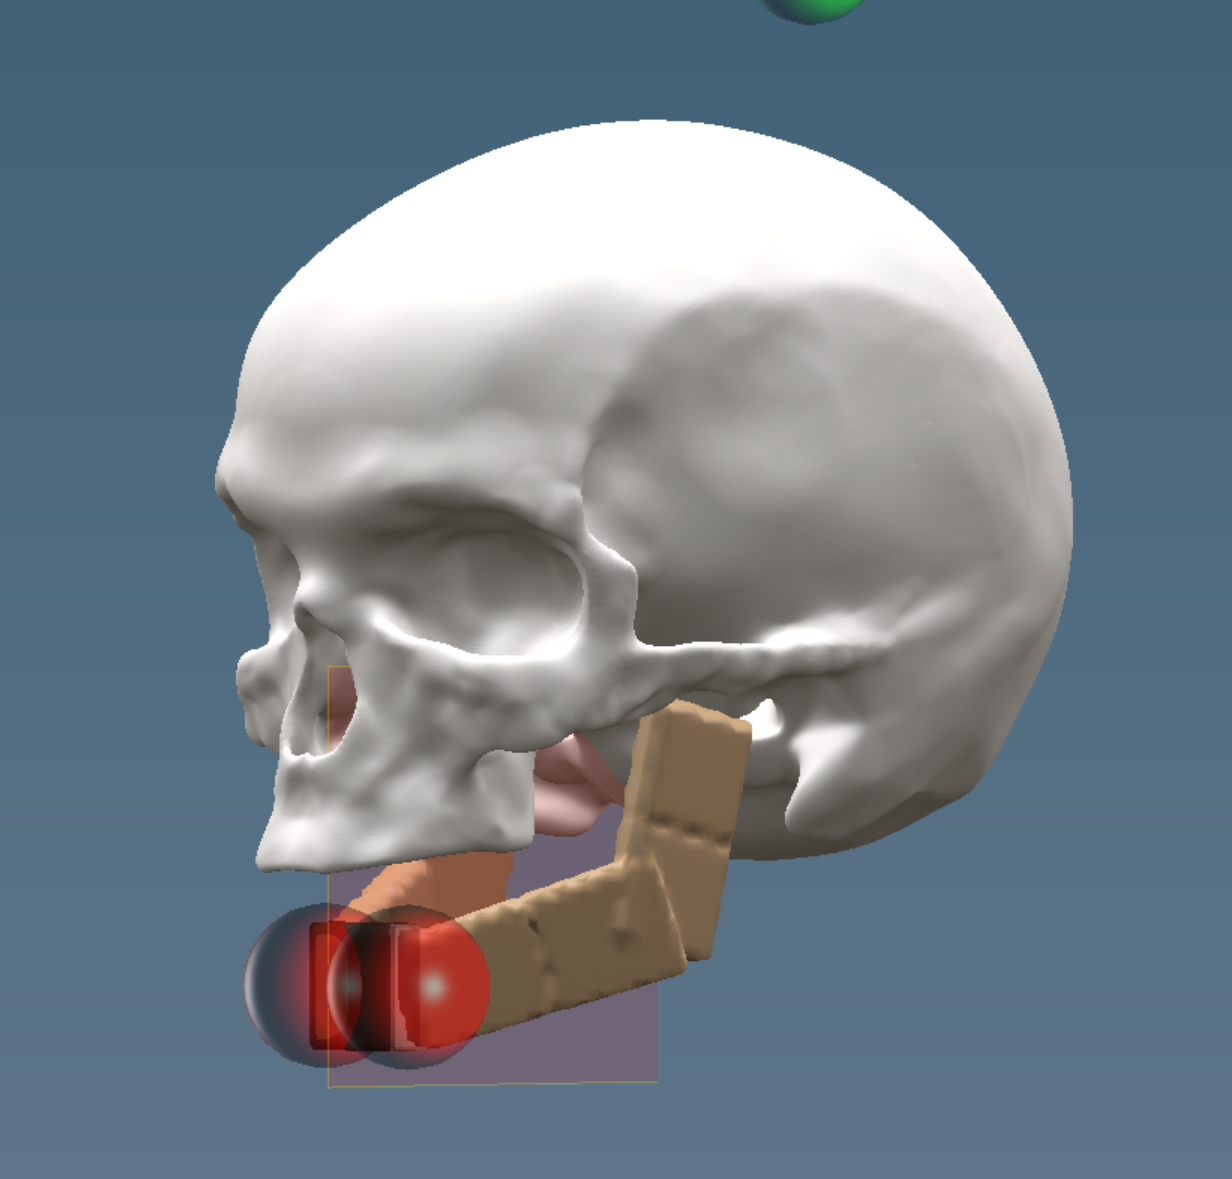
When I was looking at some source photos of the skull lately I was thinking about how strange a thing it is. There's this big cranium, a shell housing this huge brain and then the face architecture is sort of stuck onto the lower front of it, almost like a carpenter's scaffolding. It got my thinking that rather than trying to sculpt the entire head all as one mass, rather you should create this brain container then use the Curve Tool to construct the rather delicate structures of the face; Inferior nasal concha , the mandible, the maxilla, the palatine bones, the vomer, the zybomatic bones. Then duplicate and shrink down that Cranium and use it to subtract it from the original to hollow it out so you can study the interior of the skull too.

-
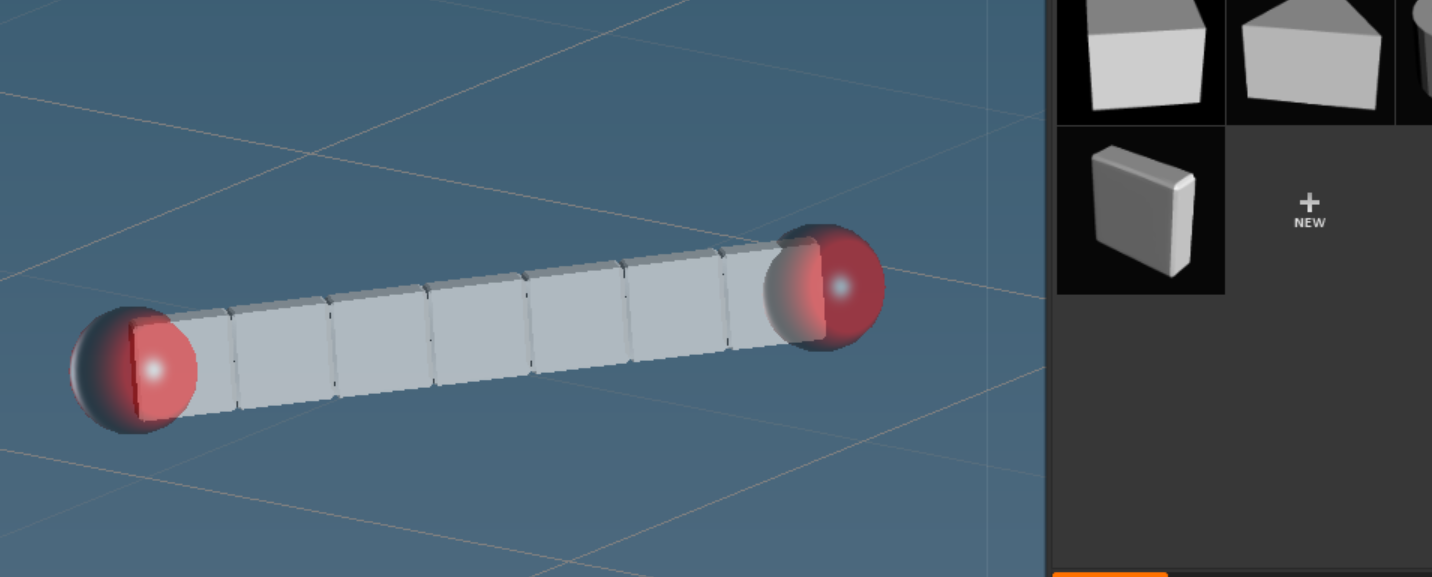
So I created a new curve for the Curve Tool. If I just make one span it's set up perfect, face on, just the way I want it to be. But if I go for a third or a fourth it flips over on edge. Is there any way to keep it face on no matter how many segments I make with it?
Also when I was making my new curve object, I came across this cool page in the manual on creating new curve shapes but when I go to the curves section in the sculpt chapter of the manual I can't find it. I only could get it through the little menu drop down when I was creating the new curve tool shape. The manual is very mysterious and uh..opaque. I wish it had all Andrews notes when he was creating each tool item or something like that.
-
-
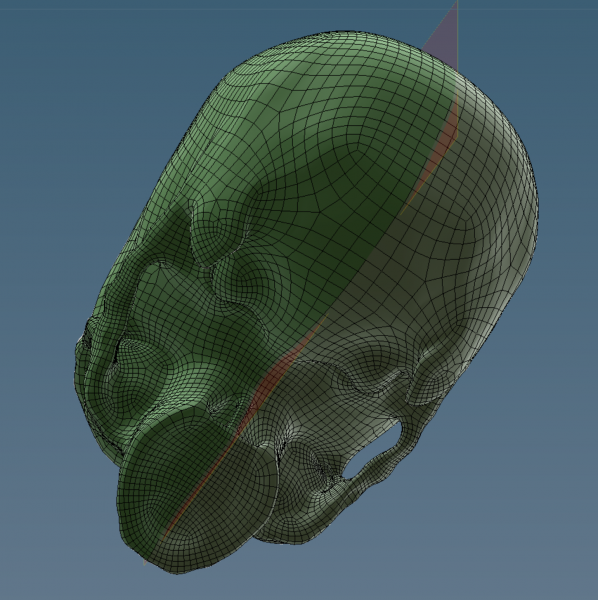
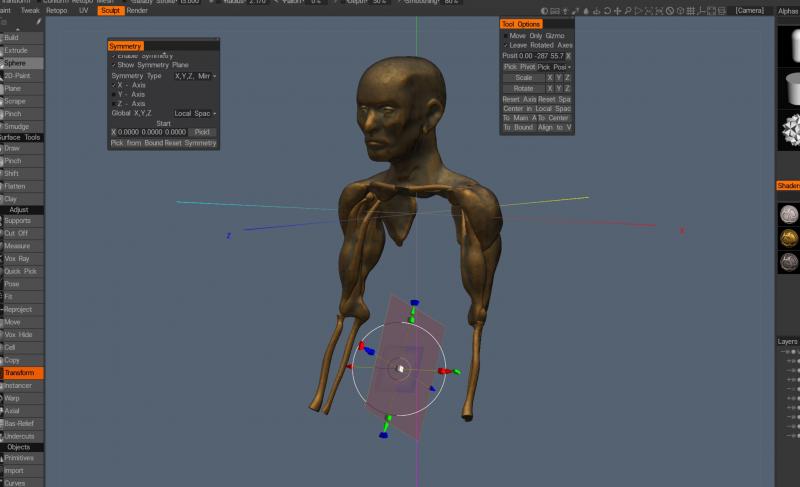
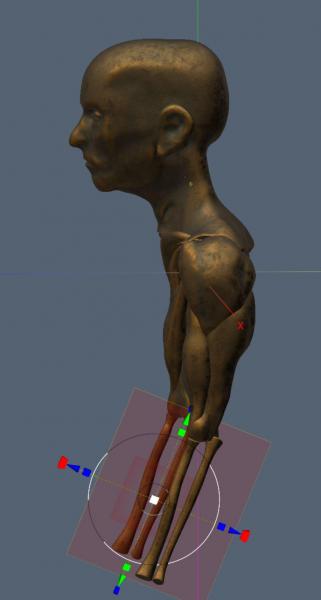
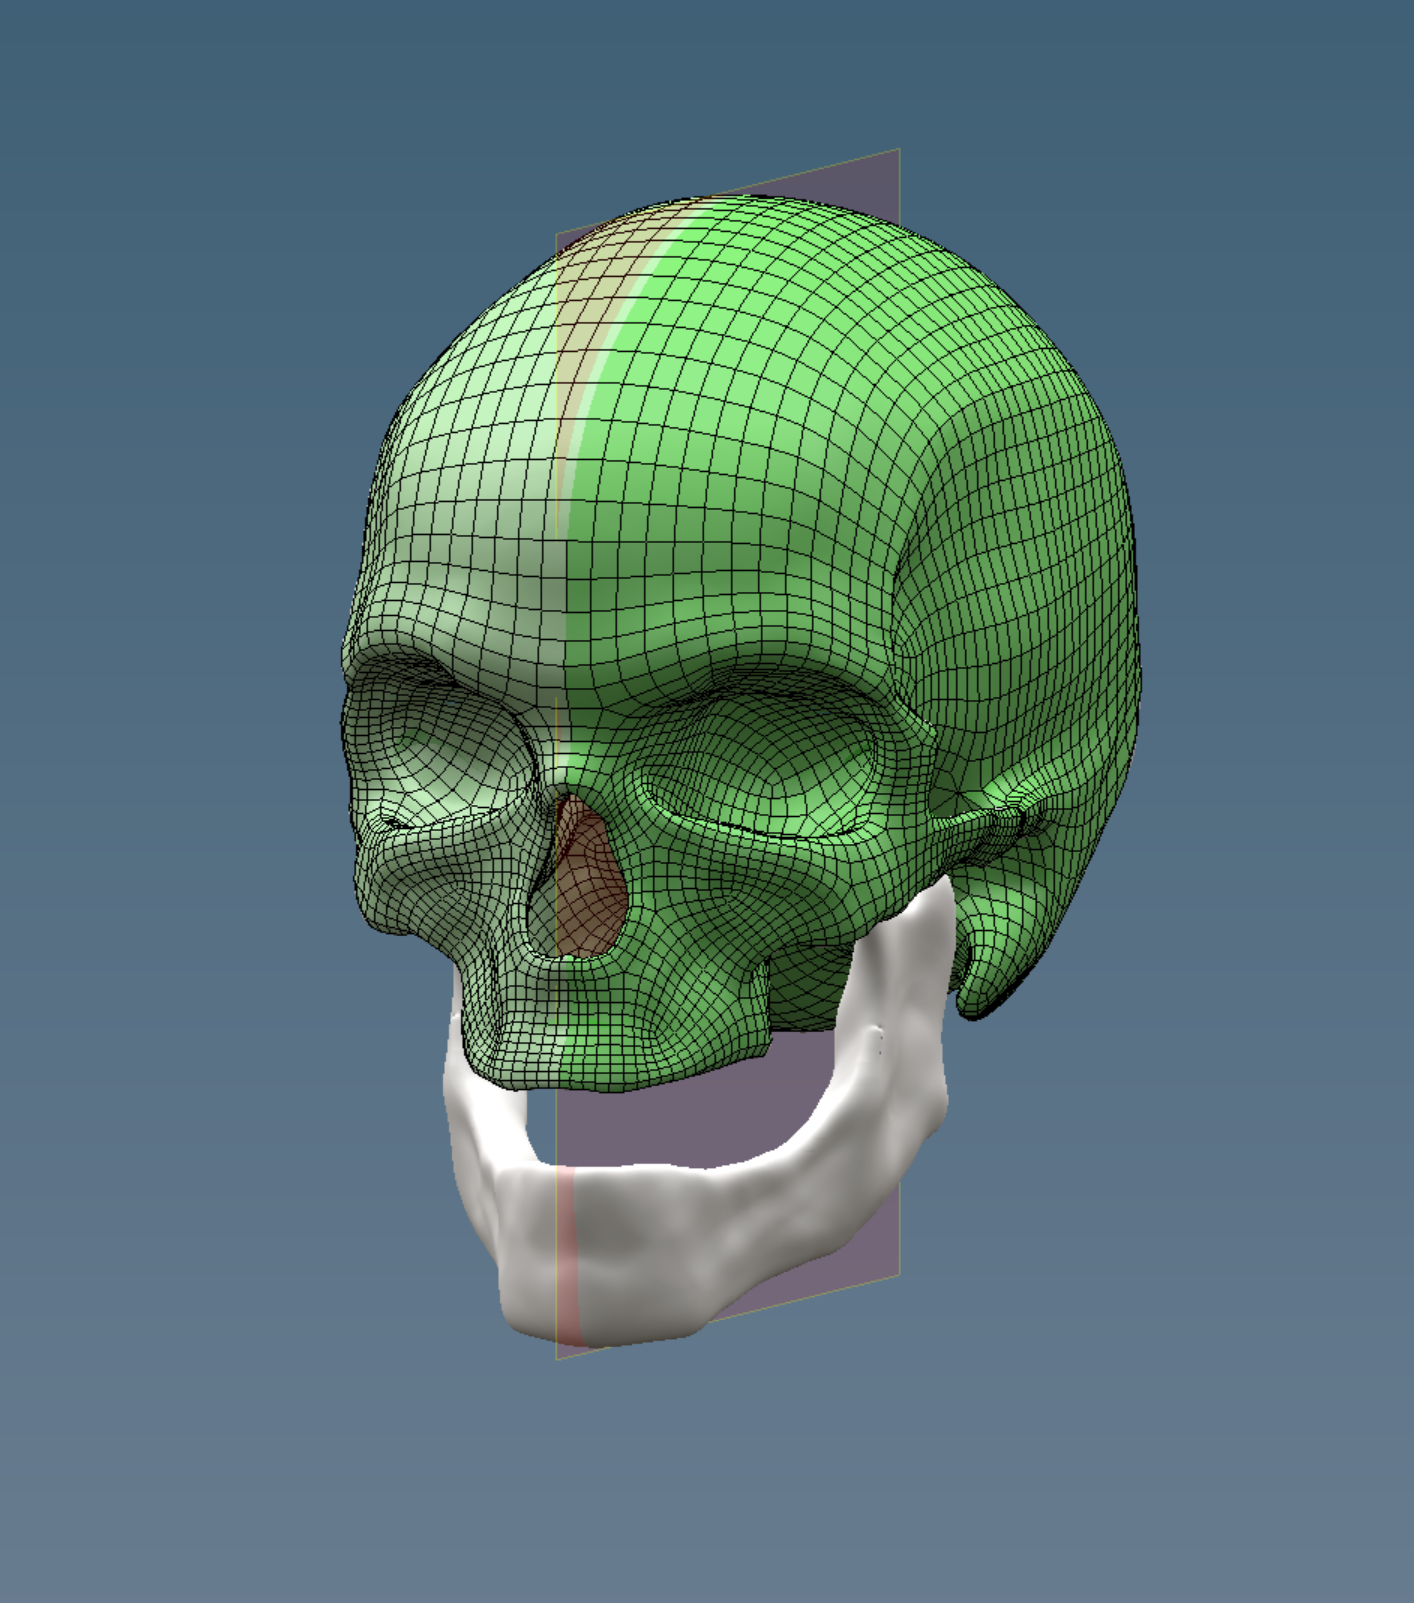
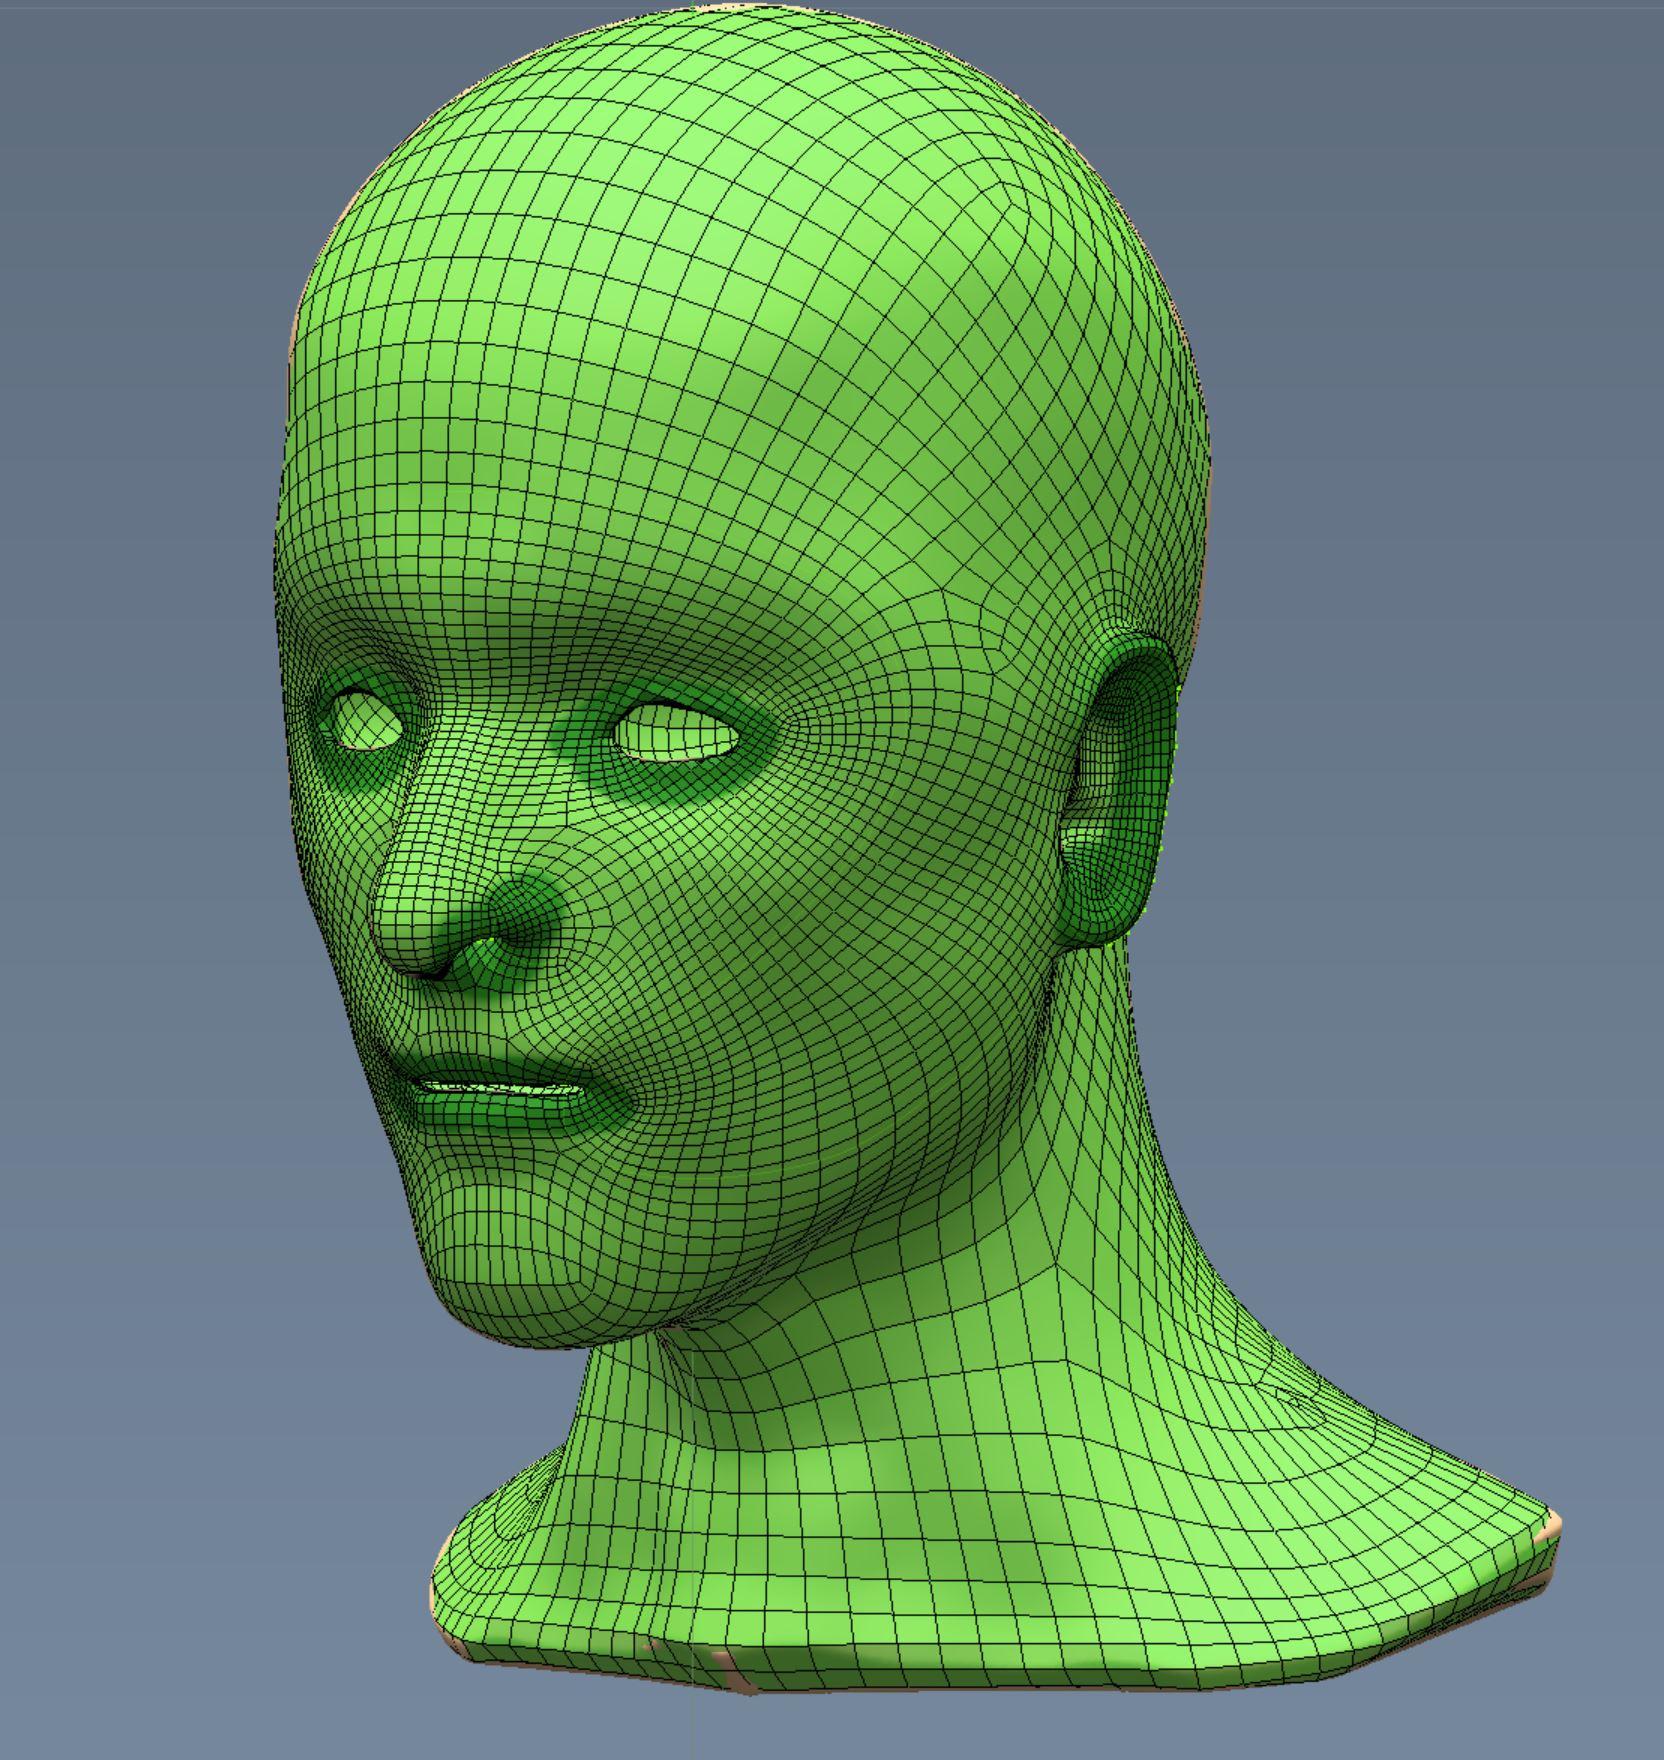
So on further reflection I did a lot more work on Autopo, adding painting the voxel area where you want more detail and also adding indicators for mesh flow. After many tests my verdict is less is more but having said that, it works well. I felt it was particularly important to have more geometry flowing around the nostrils and it worked not too badly. I went from 4900 to 10,000 polygons and didn't have to even touch up a single ngon or tangled mess anywhere. Using symmetry was essential to good results. My only critique would be around the rim of the eyes but when you start drawing in too many splines and insisting on two many conflicting flows that's when things start to get tangled up in the overload. I can live with this.

Well actually I went back and tried an added loop around the eyes with three lines coming out of the eye sockets; one across the bridge of the nose, one straight back to the top of the ears and one up into the forehead. Really, there is no need for ZRemesher at all now. 3D coat can handle it all.
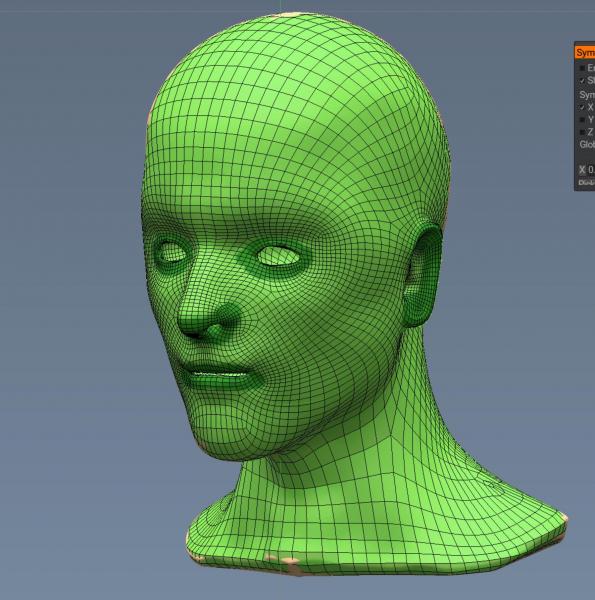
Oh and I just discovered "close holes" and "remove n-gons". Very nice for those unreachable problems in the eye sockets and other enclosed areas.
-
2
-
-
It's been two years and frankly I'm astounded at just how good AUTOPO is. I know it's not going to give animators the kind of precise mesh they want but still. I'm just amazed at the results it's giving me compared to the junk it was putting out before.
What happened. Can one of you historians of 3D Coat and Andrew tell me just what has been going on in this department?
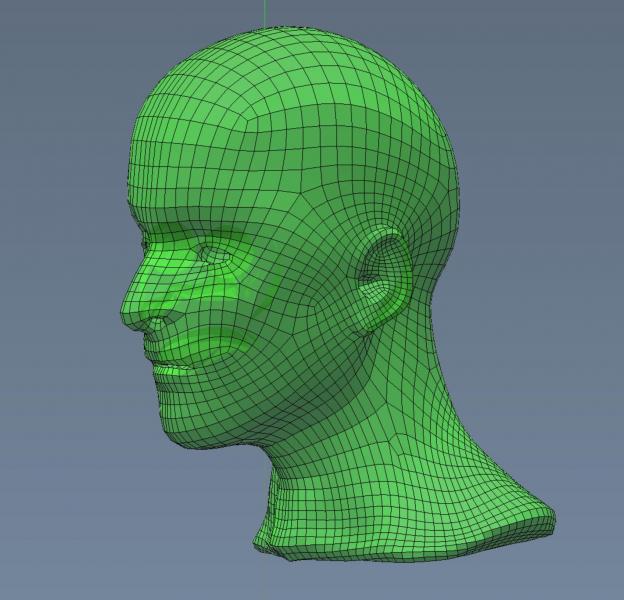
This is 4900 polygons with internal space for the mouth and nasal passages and eye sockets as you can sort of see. That alone should have confused it and made an atrocious mess.
Bravo Andrew.
-
 1
1
-
-
8 hours ago, Mihu83 said:
Ryzen series isn't that hot, with Ryzen 5 1600 3,8ghz I've had slightly over 30 degrees, but I've been using Dark Rock Pro 2 with 1600 and now Dark Rock Pro 4 with 3700x.
That's what I'm finding with my 2950x with a Dark Rock Pro TR4.
-
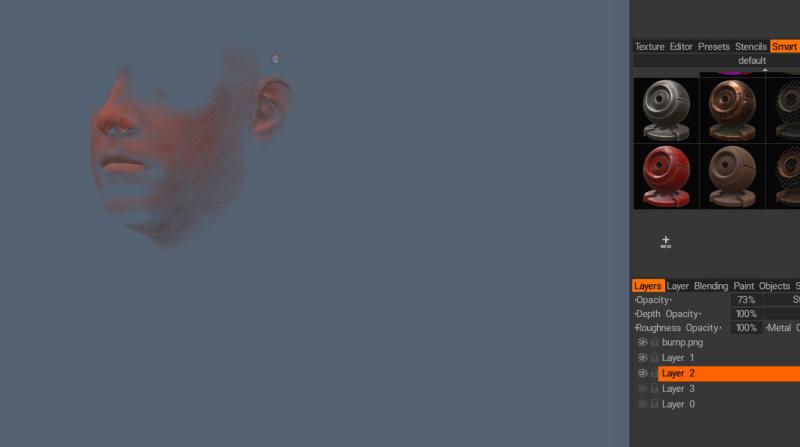
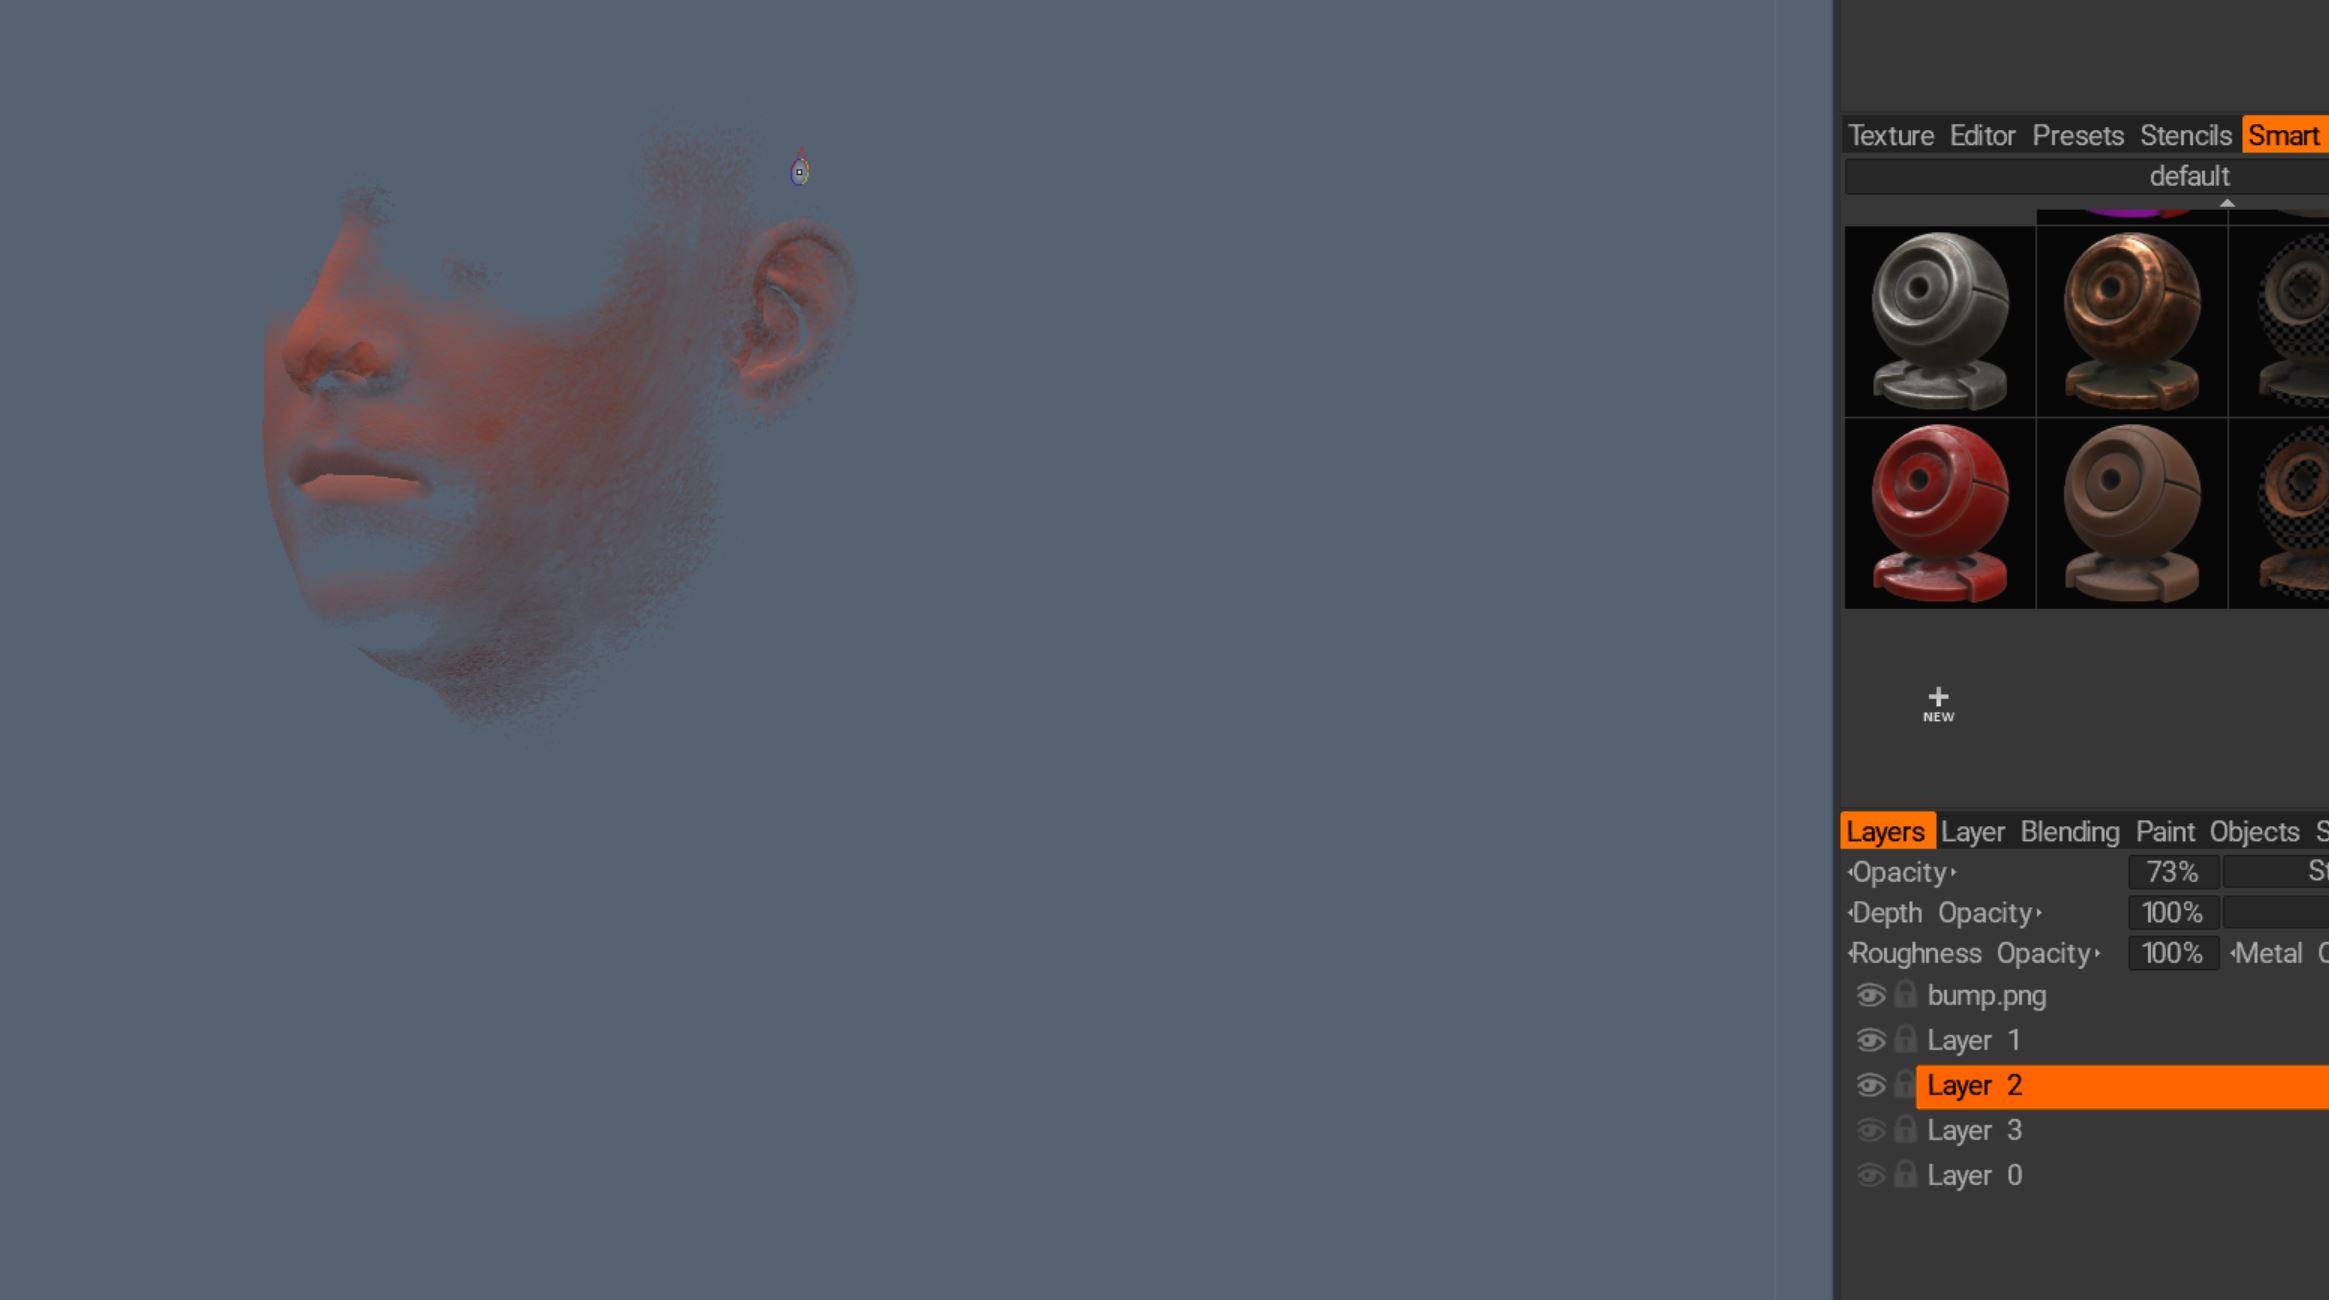
So much to learn after a long layoff
This tutorial serves just as well for 3D coat which is better set up for making layers for sss skin renders. I really think 3D coat is superior to Zbrush in this capacity.
-
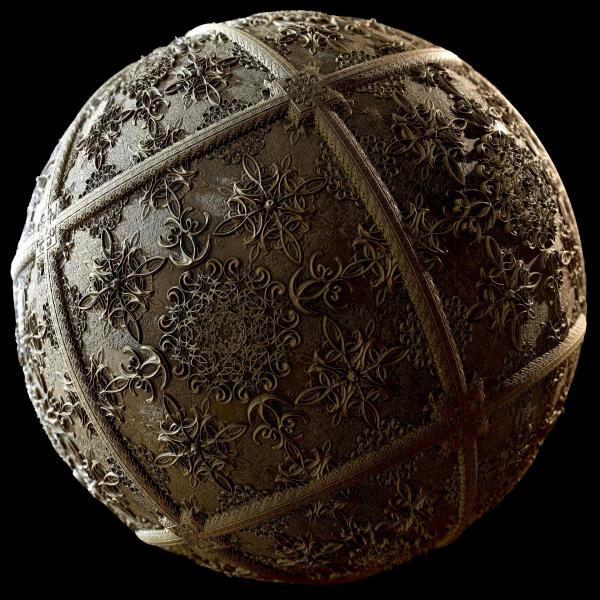
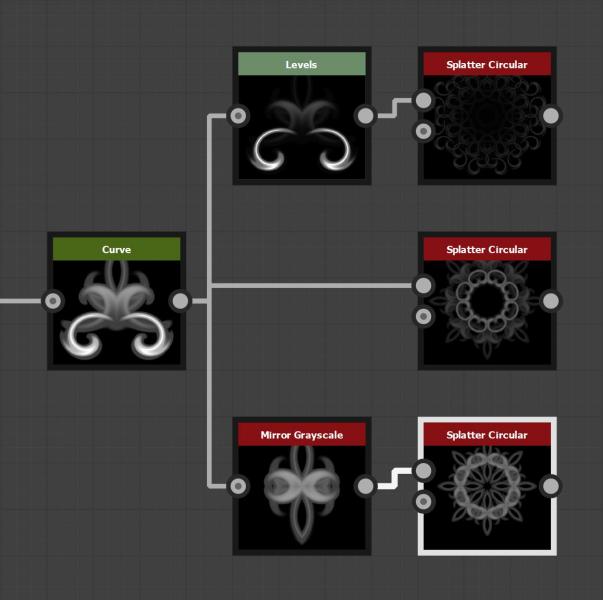
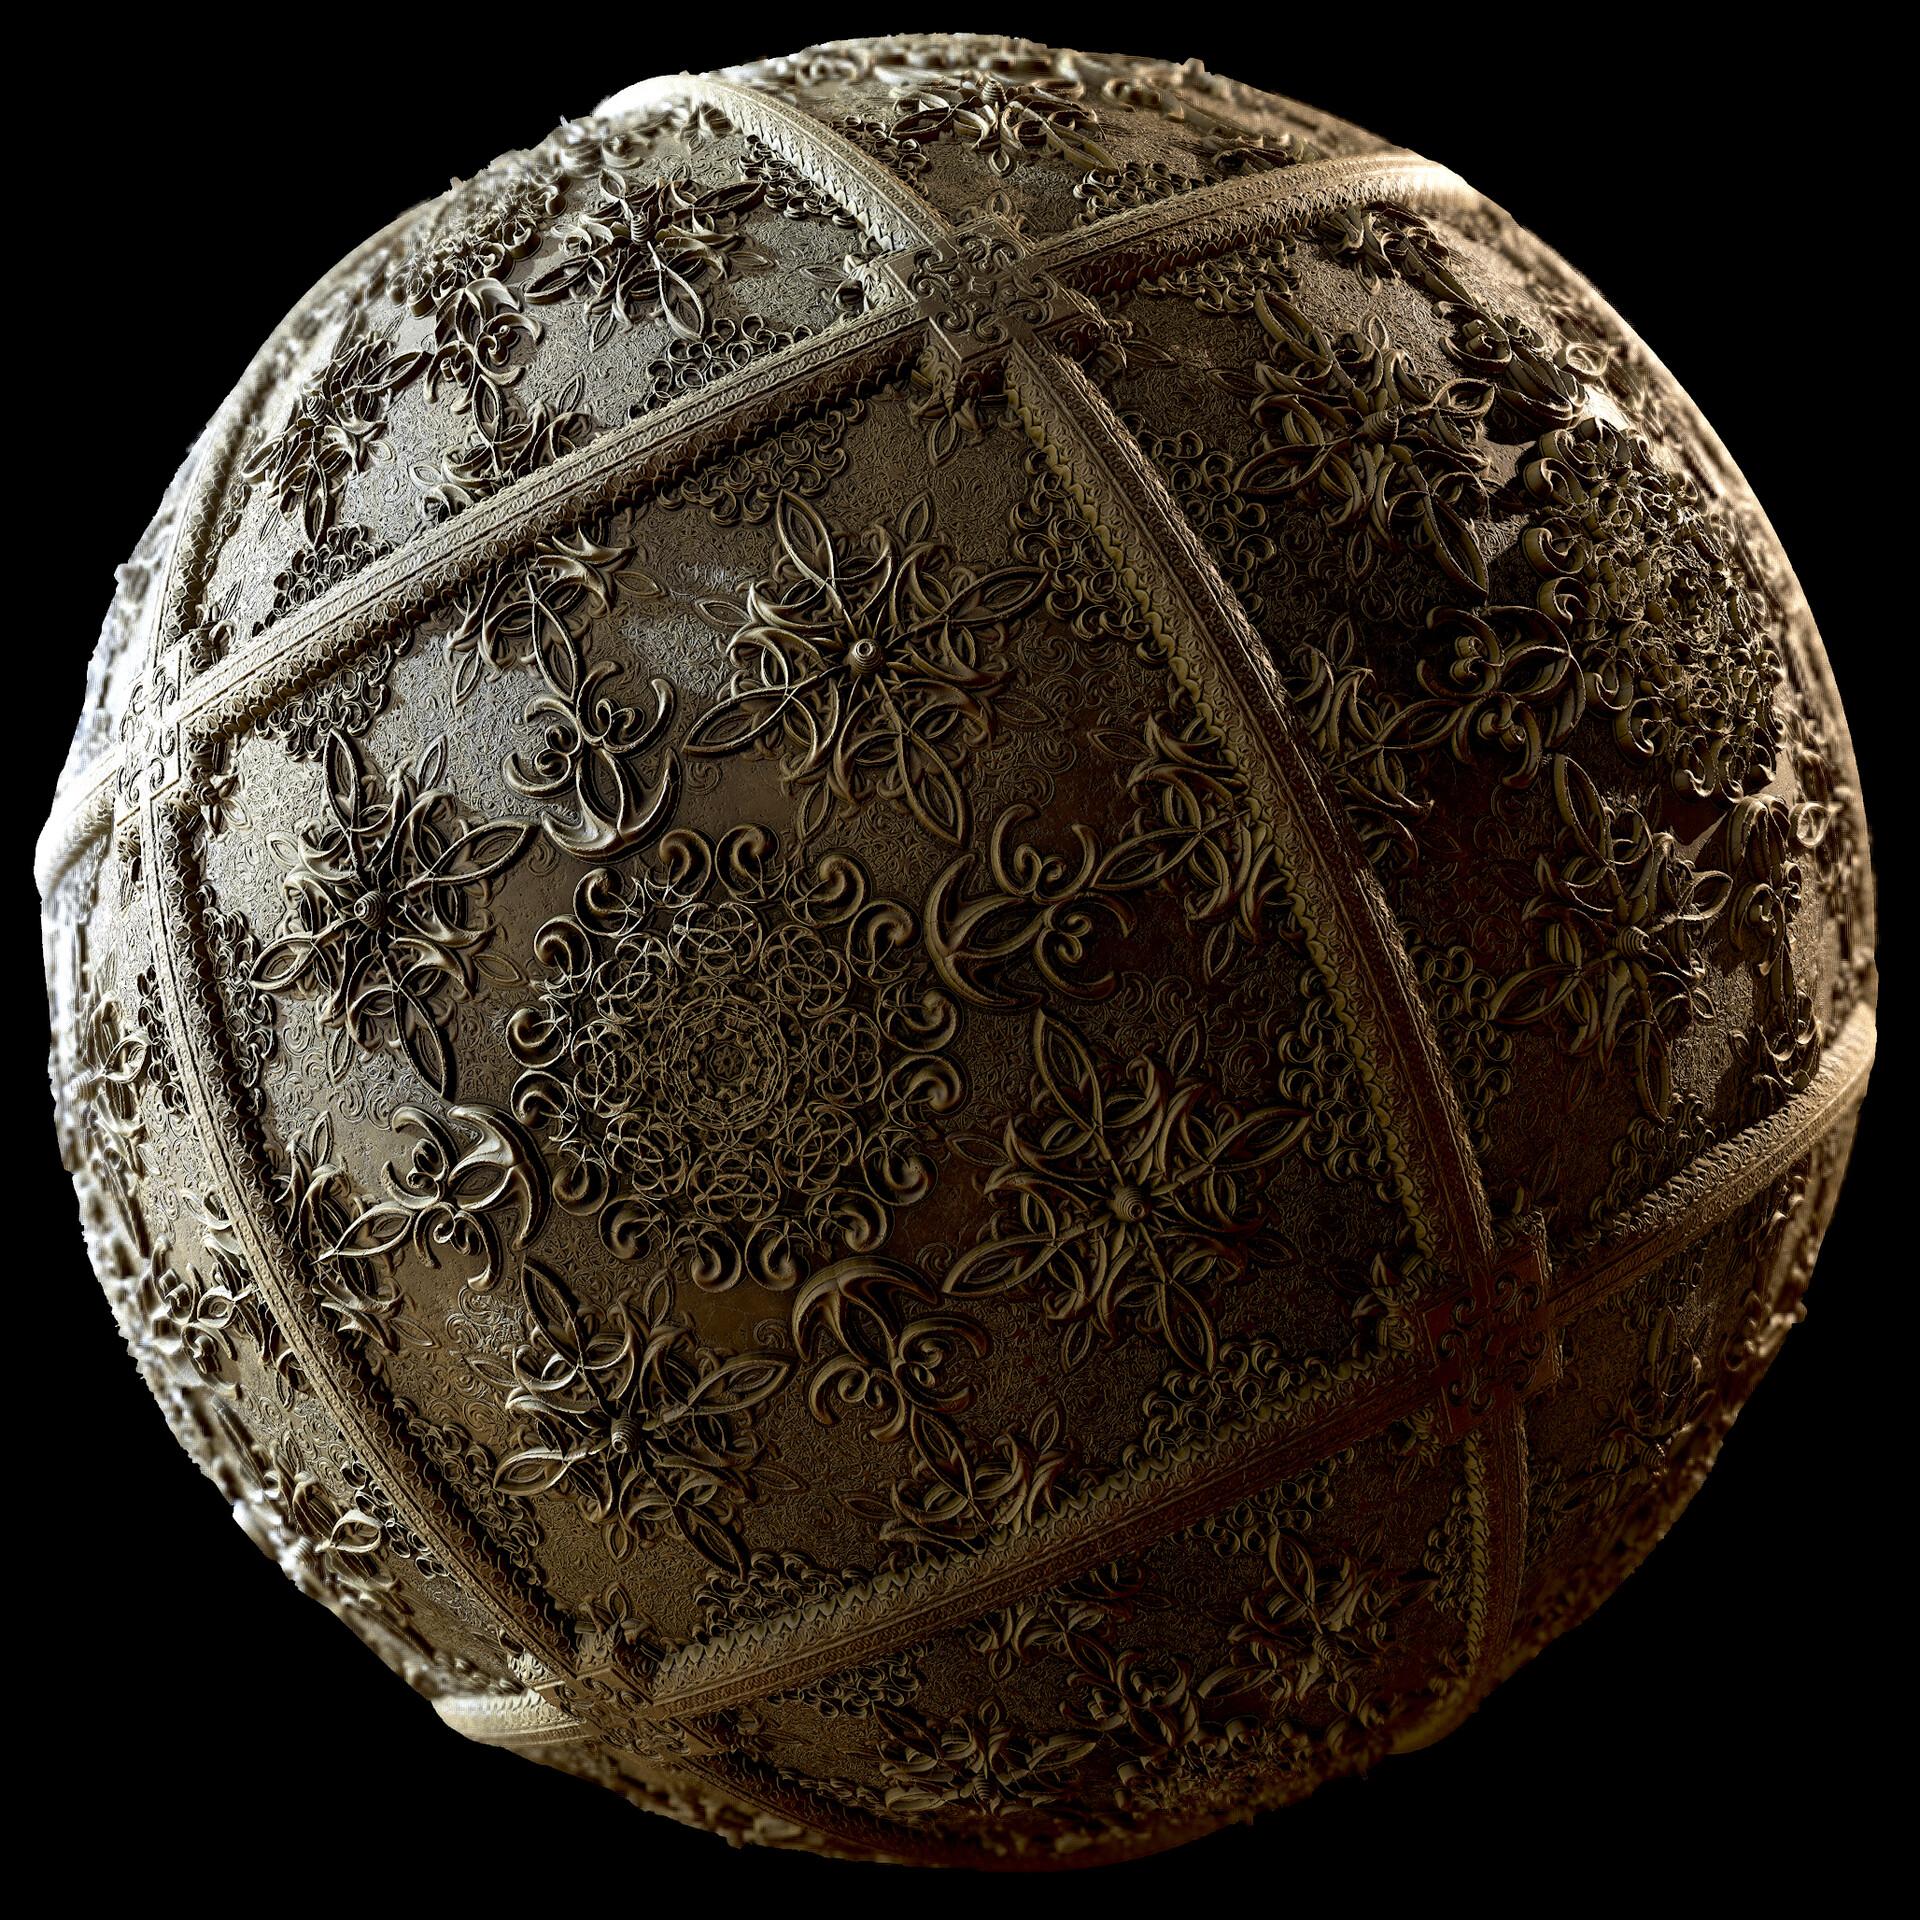
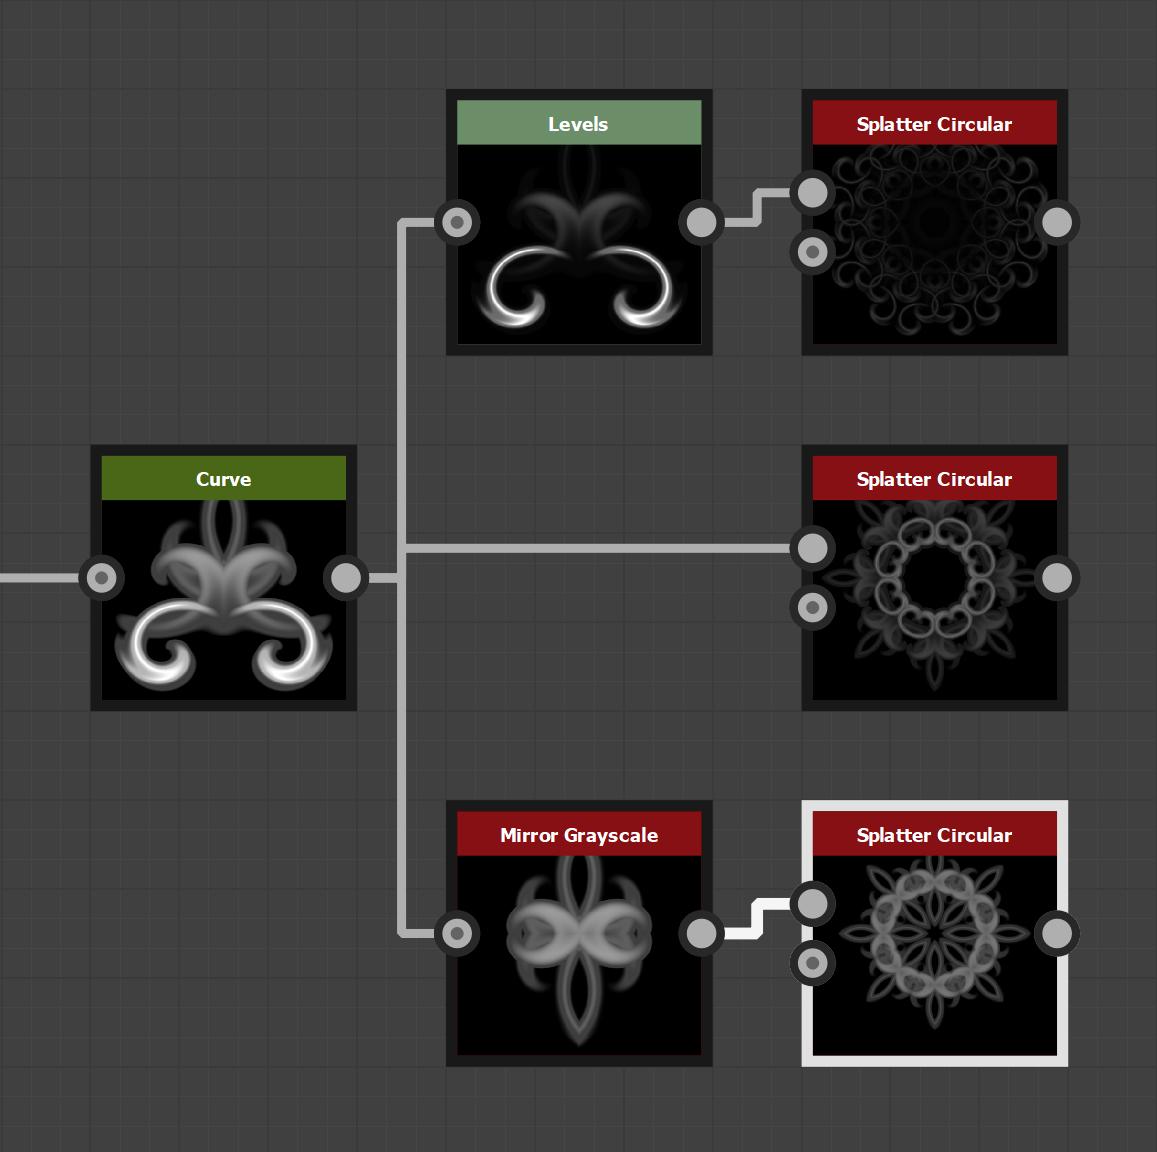
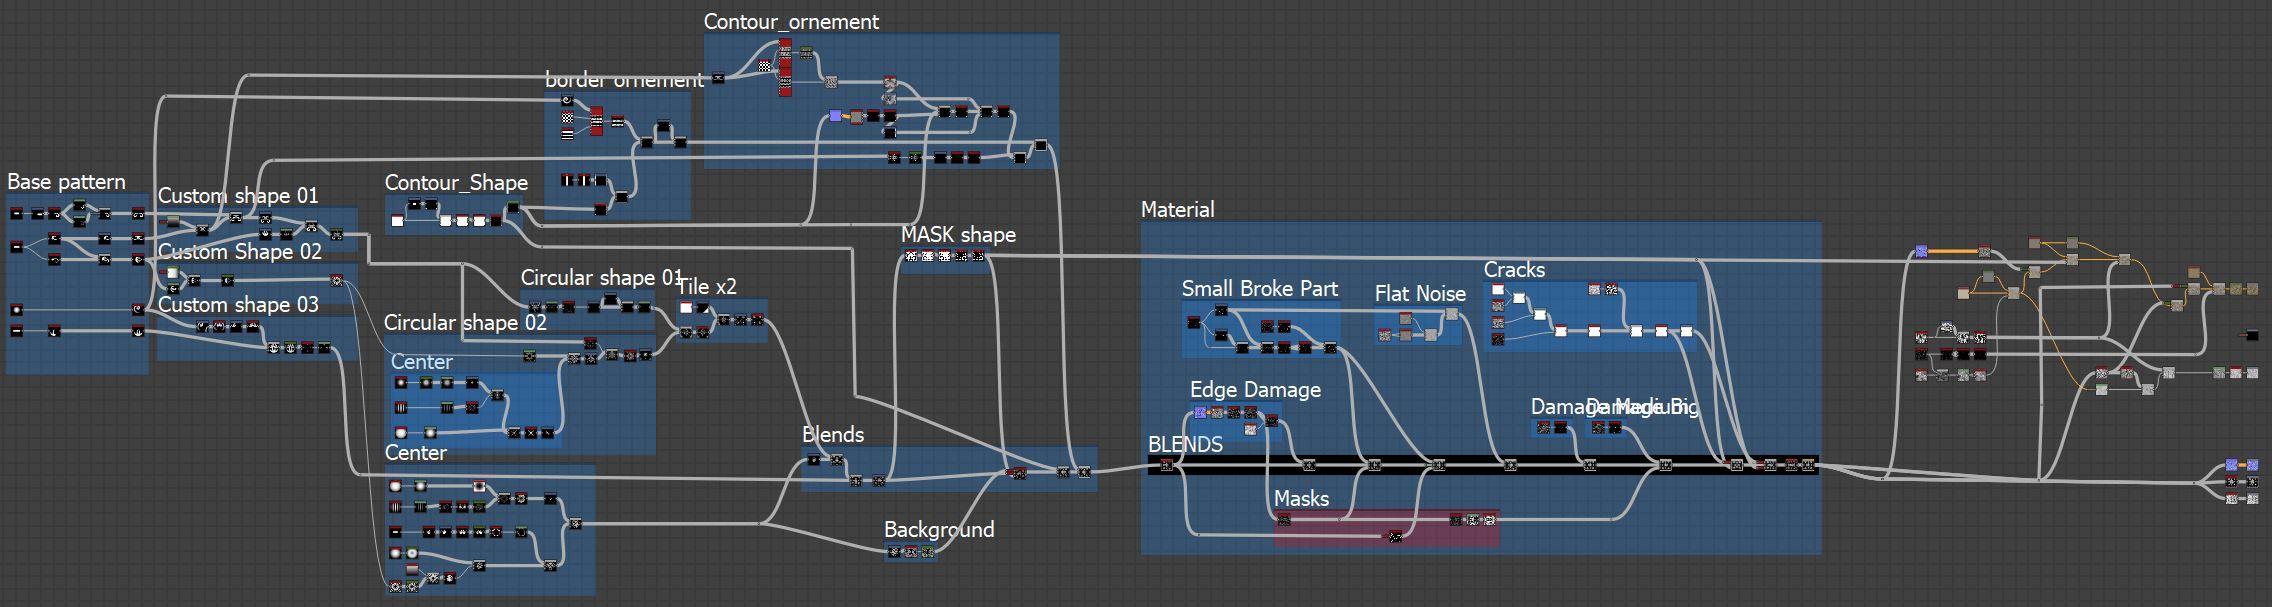
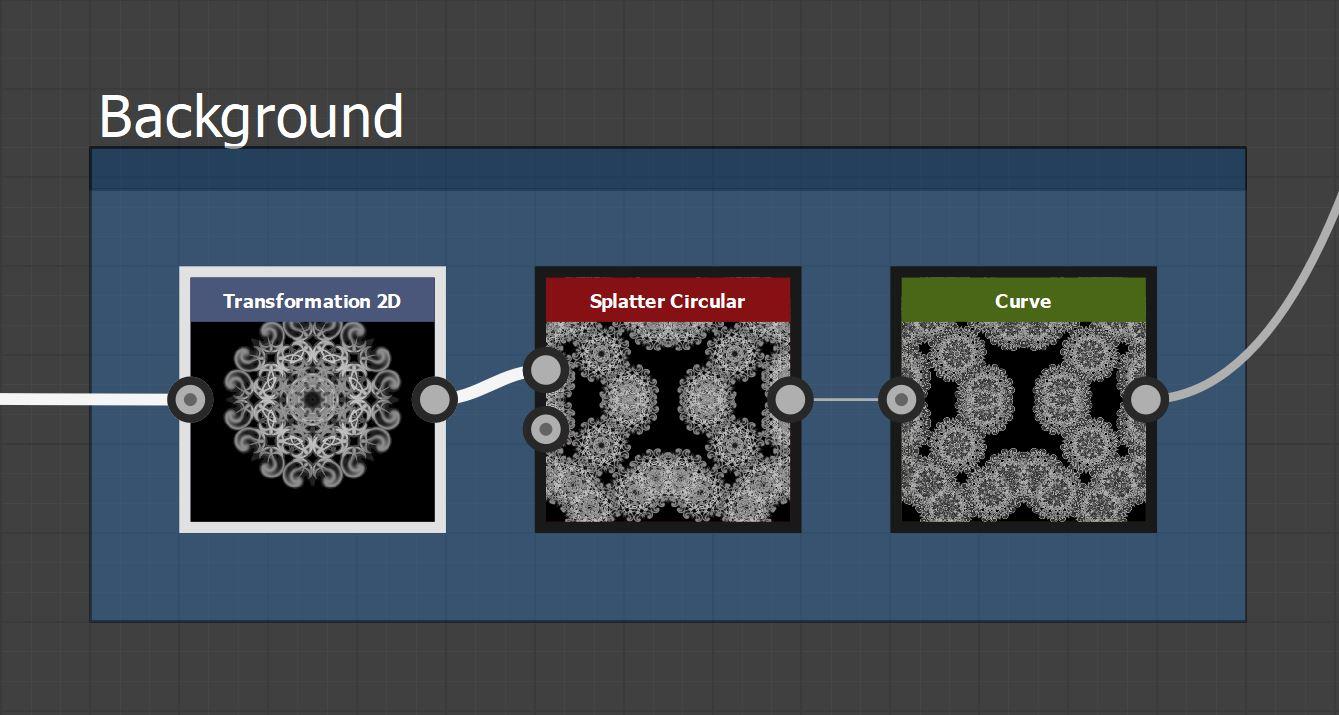
A lot of Substance Designer textures frankly aren't very good, so it's very encouraging to see that Substance Designer is capable of producing work of the very highest quality.
The work by this guy just blows me away. This far beyond mere game asset quality.
https://80.lv/articles/001agt-creating-a-gothic-ornament-in-substance-designer/


-
1
-
-
On 8/18/2019 at 9:19 AM, Mihu83 said:
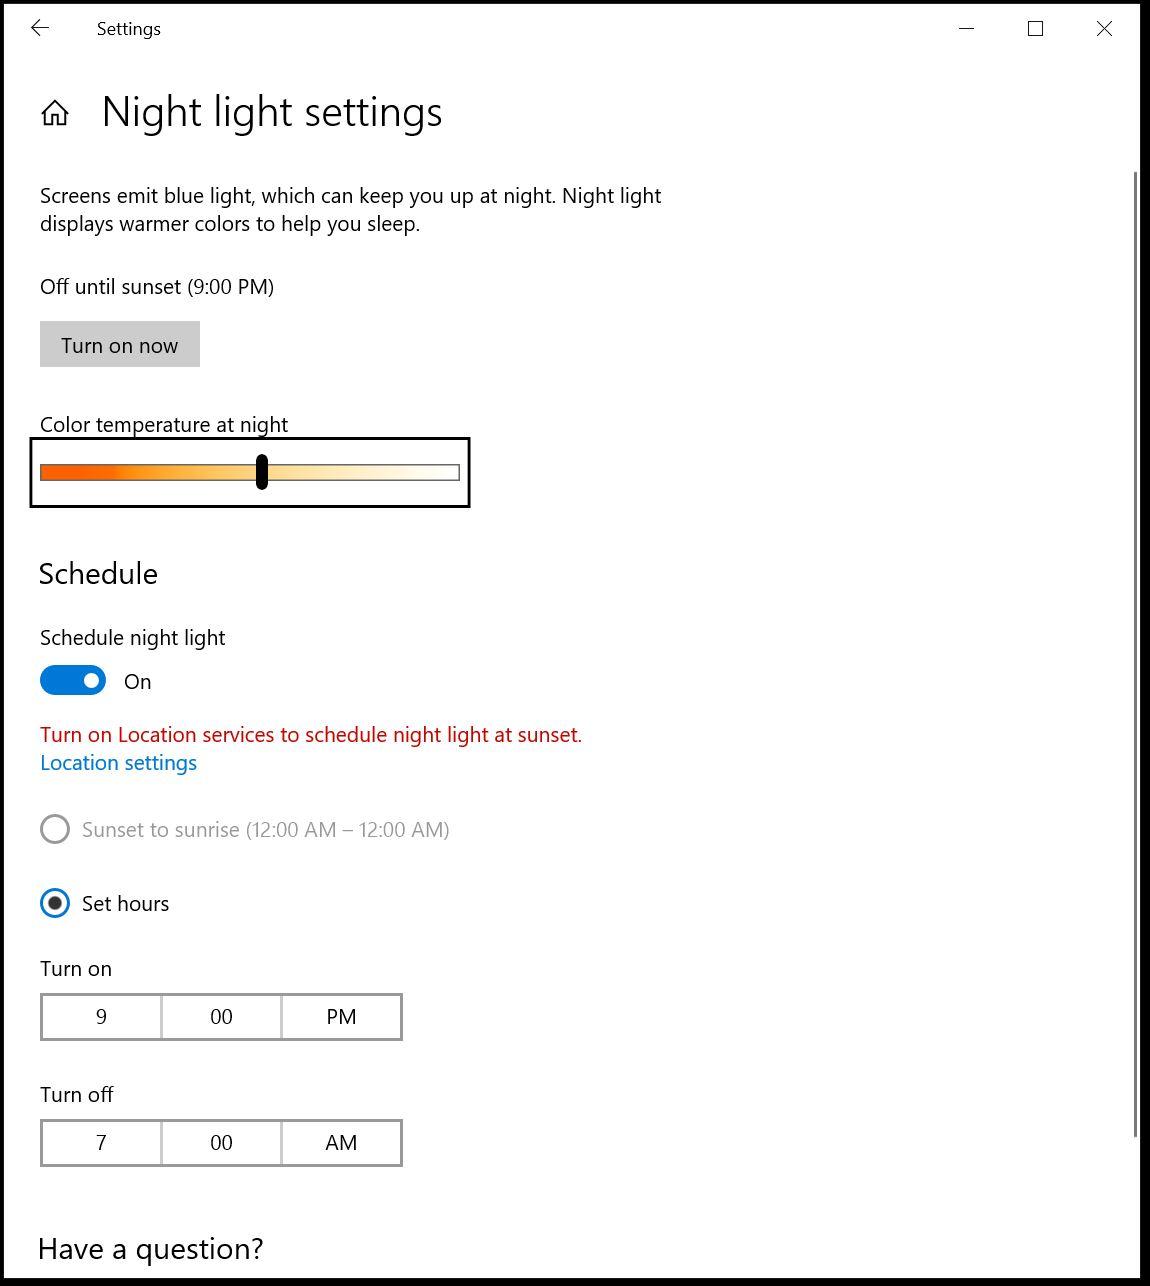
Thanks for advice, but I don't use night mode.
Did you check it though? It comes automatically turned on with Windows 10 installation.
-
On 8/26/2018 at 9:41 AM, Skye said:
Finished my gunblade concept art, all done in 3dcoat
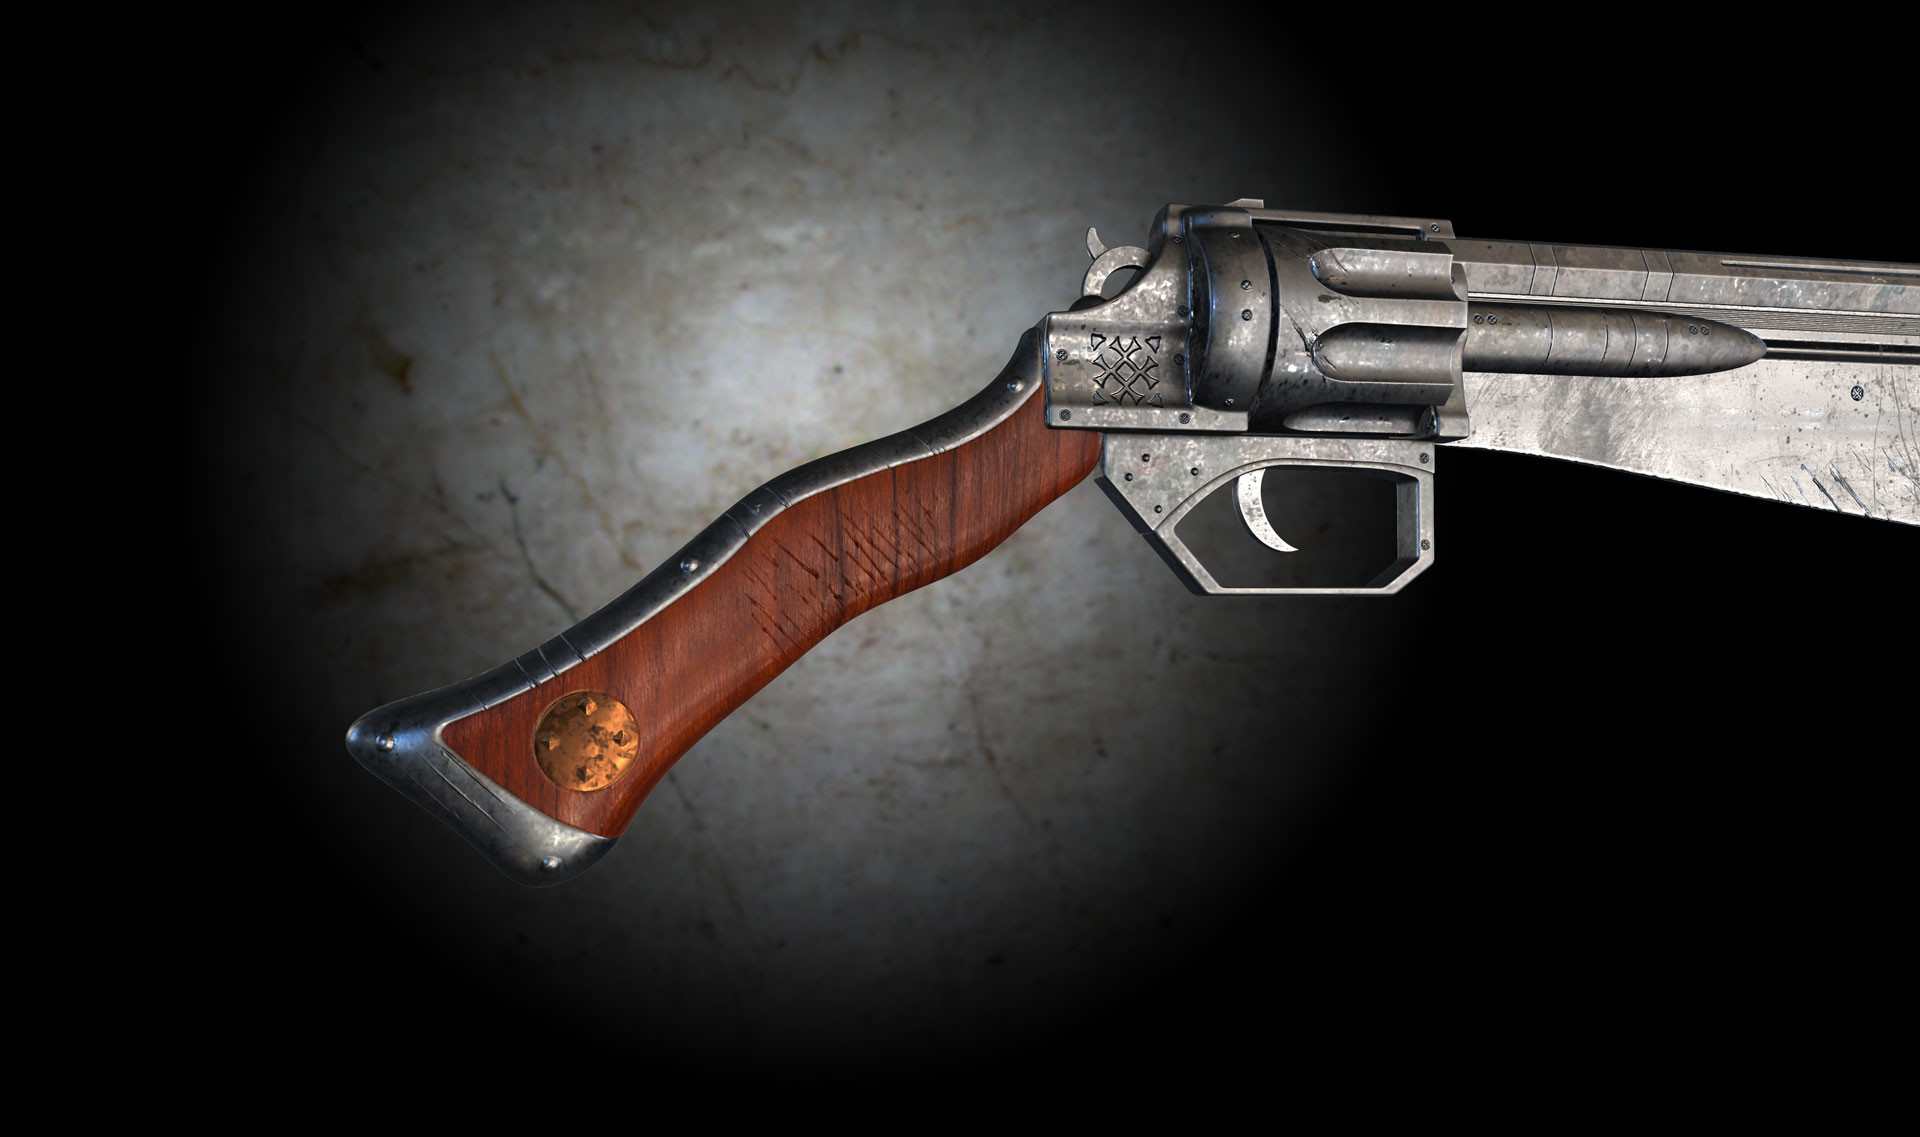
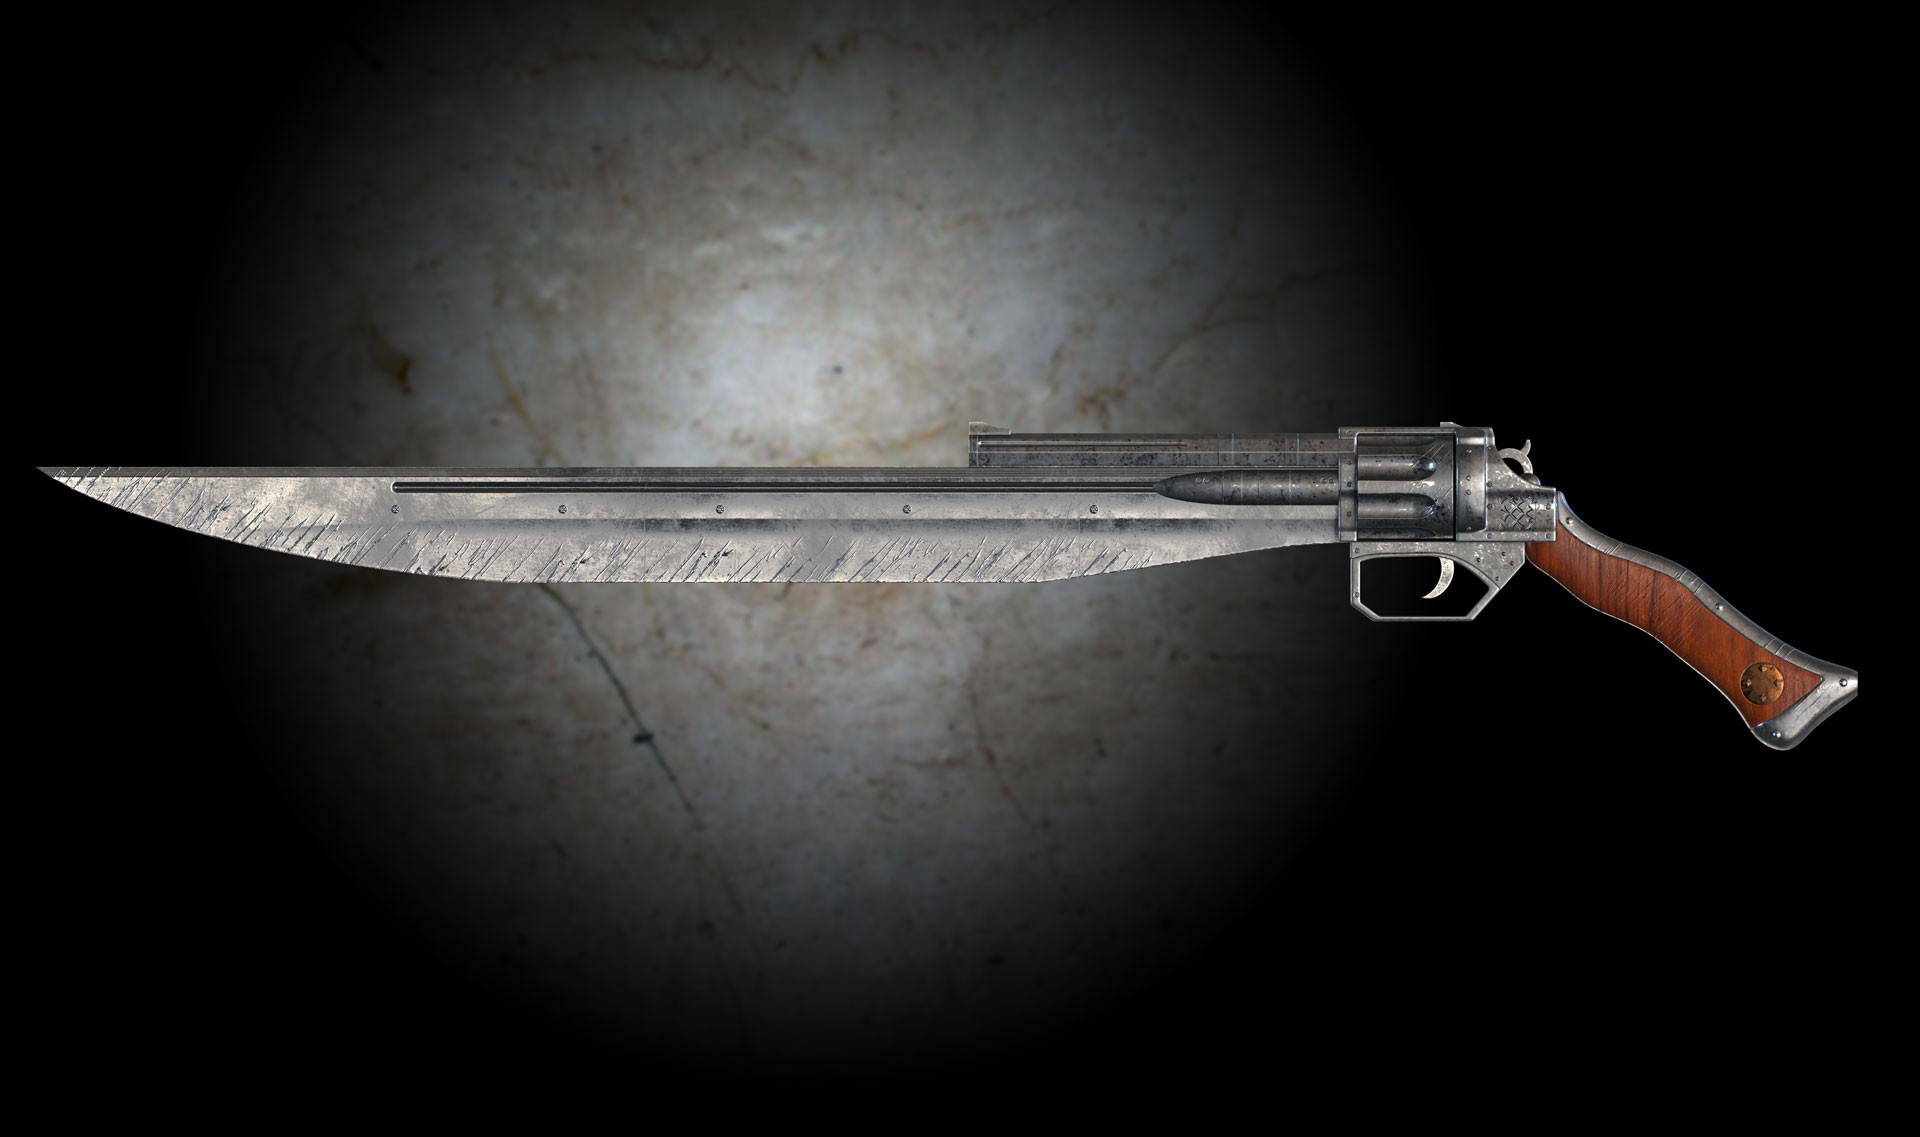
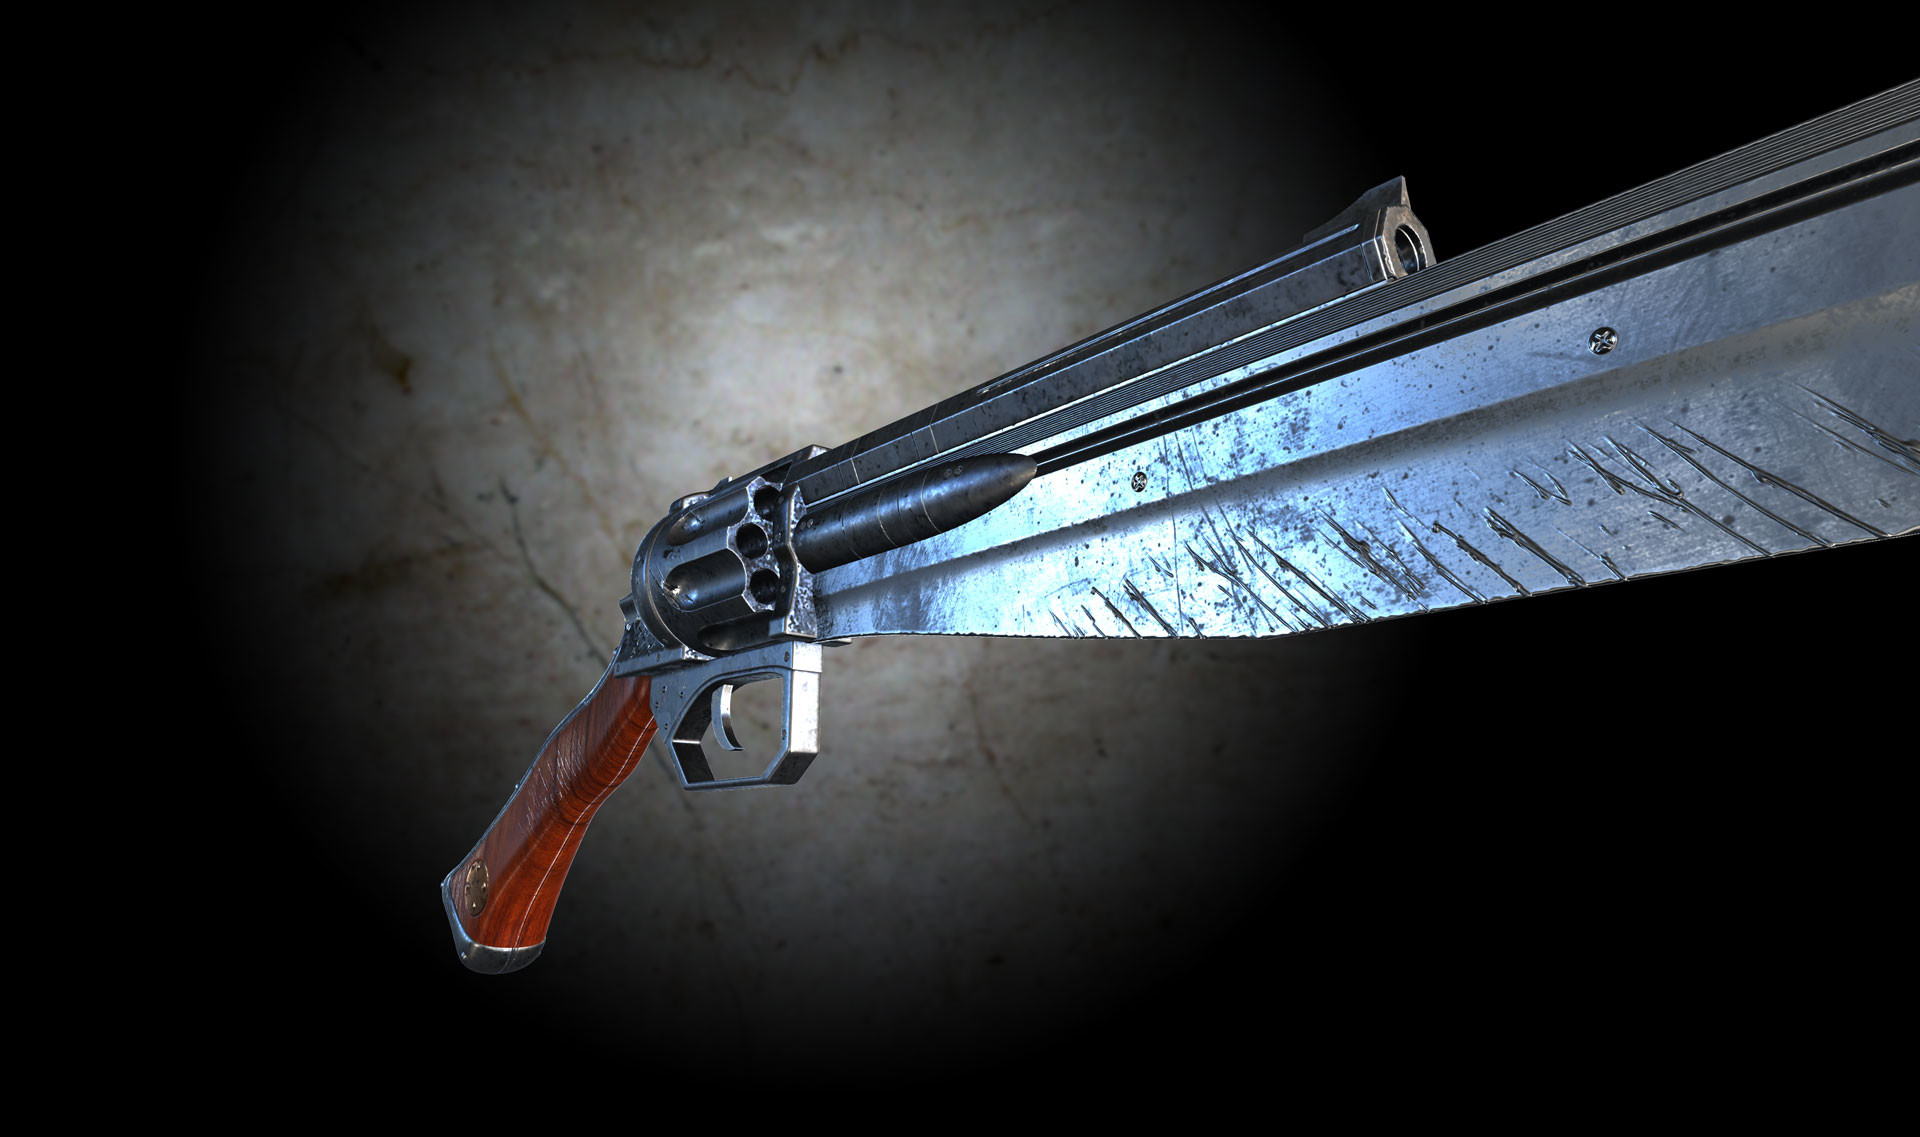
you should be working for the team that made Dishonored 2
-
1
-
-
And for me there is nothing in the world that gives me more pleasure than working in 3D Coat with a powerful rig. I just love it. I love just messing around. I've really missed it every day of those two years.
-
1
-
-
9 hours ago, Mihu83 said:
Well, I still get this warm, yellowish tint... maybe I need to get used to warmer look, as previously both displays were quite cold in terms of colour.
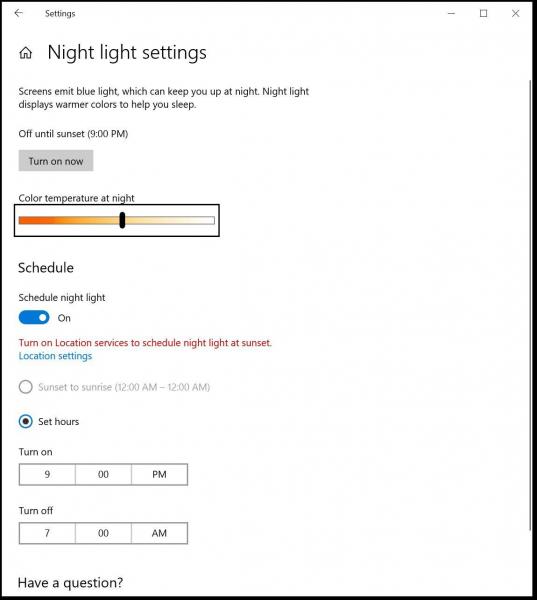
Check your night mode
-
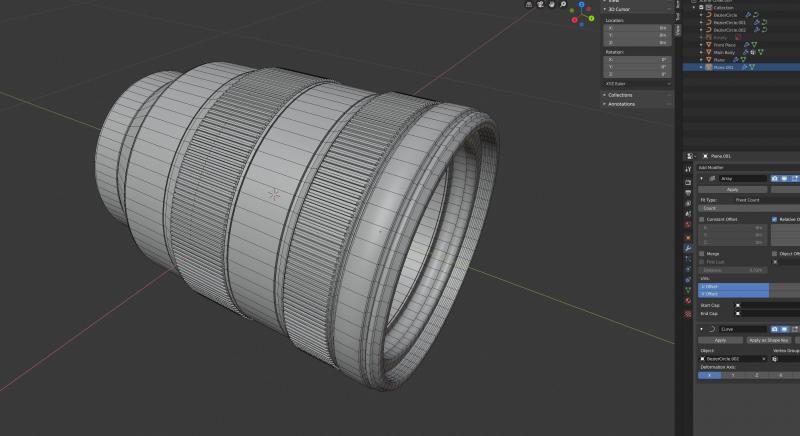
I've been doing that Chris P tutorial for the last few hours and is it ever fun. I'm really amazed because I've tried a couple times to pick up Blender and it was sheer torture, but now it's actually a pleasure to use. Normally when I start working with a new program there's always mysterious glitches that drive me into a hellish rage. That hasn't happened yet.
I'd rank this tutorial up there with Pixelbahn's Maya tutorials on You Tube.
")
-
1
-
-
This is probably a superfluous post for most of you but I'm finally getting around to trying it, and learning its interface and it's beautiful. I'm thinking it's better than Maya's. It's got a really good feel to it. EEVEE is awesome. Is there another preview renderer out there that's as fast with such great results? It's just amazing to me because Blender was such a steaming piece of ***** for such a long time.
This seems to be an excellent series of getting started in Blender videos. I'm enjoying it..
-
AMD has officially released Radeon ProRender for Blender 2.0, the latest update to the Blender edition of its free physically accurate GPU renderer, at Siggraph 2019.
The update rewrites the plugin to support Blender 2.80, and adds AMD’s new AI-driven denoising system, adaptive sampling and the option to render large images as tiles.
The Maya edition of the renderer has also been updated, with version 2.7 adding support for tiled rendering, improved denoising, and support for portal lights.
AMD also announced new integrations of the renderer for a range of BIM, CAD and industrial design tools, including InstaLOD’s Studio XL. A plugin for Unreal Engine is currently in beta.
Blender: support for Blender 2.80, AI-driven denoising, adaptive sampling and tiled rendering
First released in open beta earlier this year, Radeon ProRender for Blender gets a complete rewrite to support the new features of Blender 2.80, itself released during Siggraph.ProRender now supports the most commonly used Blender shader nodes out of the box, including the Principled BSDF shader and Blender 2.80’s new Principled Hair BSDF and Principled Volume shaders.
Some native Blender nodes, particularly noise nodes, are not supported – you can find a list here – but native Radeon ProRender nodes are provided for more “expert-level” set-ups.
Other changes include a new AI-driven render denoising system, which supplements AMD’s existing GPU denoising technology, introduced last year.
The update also introduces support for adaptive sampling, focusing computational effort on the noisiest parts of a render; and for rendering images as tiles, making it possible to render at higher resolutions than would otherwise be possible in the GPU memory available.
-
1
-
-
This looks pretty impressive...
SideFX is pleased to announce SideFX Solaris at SIGGRAPH 2019. This presentation was recorded on Tuesday July 30 at the Houdini HIVE in Los Angeles. Solaris brings a new context called LOPS, or lighting operators, that brings native USD [Universal Scene Description] support to Houdini to allow for comprehensive lookdev, layout and lighting workflows.
Geometry brought into LOPS becomes USD - USD remains USD while in LOPS.
Solaris provides a visual editor for working with USD.
Solaris supports a wide variety of lookdev, layout and lighting tasks.
Solaris is a new context in Houdini Core, Houdini FX, Houdini Indie and Houdini Apprentice - not a separate application.
A new USD-compliant renderer called SideFX Karma Render was announced for Solaris/USD
This new renderer works with Hydra for fast IPR.
This will be a fast CPU-based renderer with a GPU version of it being developed for a future release.
Solaris also works with other Hydra-compliant renderers such as RenderMan.
Solaris is planned to be released as part of Houdini 18 in late 2019. Karma Render will be released in beta at the same time.https://www.sidefx.com/community/sidefx-solaris/
What is USD?
Pipelines capable of producing computer graphics films and games typically generate, store, and transmit great quantities of 3D data, which we call "scene description". Each of many cooperating applications in the pipeline (modeling, shading, animation, lighting, fx, rendering) typically has its own special form of scene description tailored to the specific needs and workflows of the application, and neither readable nor editable by any other application. Universal Scene Description (USD) is the first publicly available software that addresses the need to robustly and scalably interchange and augment arbitrary 3D scenes that may be composed from many elemental assets.USD provides for interchange of elemental assets (e.g. models) or animations. But unlike other interchange packages, USD also enables assembly and organization of any number of assets into virtual sets, scenes, and shots, transmit them from application to application, and non-destructively edit them (as overrides), with a single, consistent API, in a single scenegraph. USD provides a rich toolset for reading, writing, editing, and rapidly previewing 3D geometry and shading. In addition, because USD's core scenegraph and "composition engine" are agnostic of 3D, USD can be extended in a maintainable way to encode and compose data in other domains,
-
-
Eevee is amazing.
And while we're talking of add ons here's the site for all the addons compatible with 2.8+
-
1
-
-
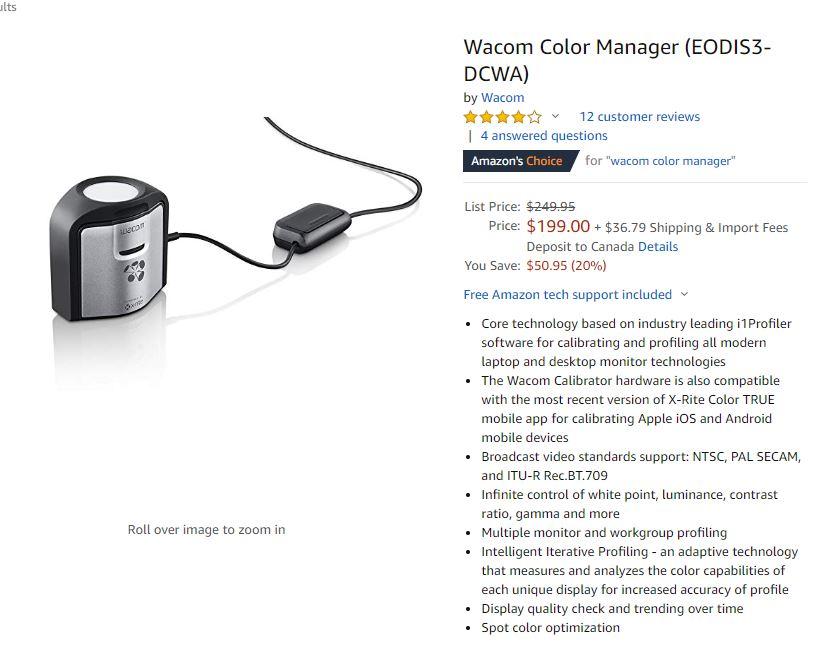
I'm looking seriously at the Wacom Cintique 24" pro;
That's a good price to me. It was $3500 just a year ago. This is the USD price;
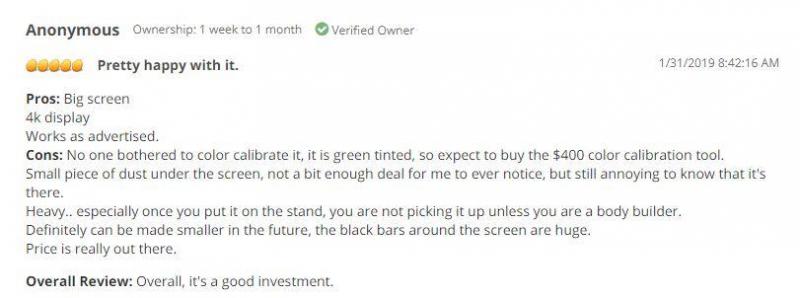
There's one problem though; color calibration. For example, this review at NewEgg;

Apparently the Wacom Color manager is exactly the same hardware as the X-Rite i1 Display Pro with different software setup.
There are other solutions both hardware and software.
https://hub.displaycal.net/forums/topic/xrite-i1-display-pro-colormunki-or-wacom-color-manager/
I'm a complete novice to this stuff and I suspect a lot of other people here are too so any knowledge you have that you'd like to share on this matter would be welcom.


Is it my imagination or is 3D Coat AUTOPO now just as good as Zbrush Remesher?
in General 3DCoat
Posted · Edited by L'Ancien Regime
OK. But I used to use that technique and this workflow is much better. That autoretopo with the long spindly loop is quite the technological accomplishment I can assure you, since you do seem to be new to this subject. In fact I'm amazed by it to no end. It's a huge liberation for artists in 3D computer graphics. It wasn't possible 3 years ago.
The 3D Coat/Zbrush/Mudbox workflow is to sculpt with 10, 20, 30 million polygons or voxels, then retopo, by hand or automatically, a much simpler poligonal mesh then bake out the fine details of the original sculpt onto the UV mapped retopology, then render the UV mapped poligonal retopo with it's Displacement, Normal Maps, color maps and ambient occlusion and curve maps, gloss maps and perhaps even emitter map.