


L'Ancien Regime
-
Posts
2,189 -
Joined
-
Last visited
Content Type
Forums
Calendar
Gallery
Posts posted by L'Ancien Regime
-
-
I did what you said Polygoon.
Works like a charm.
Thanks again.
-
That is 1 method, or it can be done similar with 3DCoat.
Also instead of merging sub tree, you can "merge to" individual layers, remember the resolution of the layer being merged to will be the resolution used. So if you merge a layer of x2 to a layer of x3 the end result will be x3. If you "merge visible" all visible layers will be merged to the layer currently selected, inheriting its resolution in the process. The thing to watch is you don't end up with too many triangles/polygons if you merge layers will large objects but low res to layers with high res. and really bog down the functioning of the program. You can minimize this merging the layers individually eg. "merge to" then deleting each layer once it is merged to keep the over all poly count as small as possible.
Awesome. That's exactly what I needed to know. I suspected the lower res areas were degrading the higher res areas. This is a good solution. Thanks a lot
-
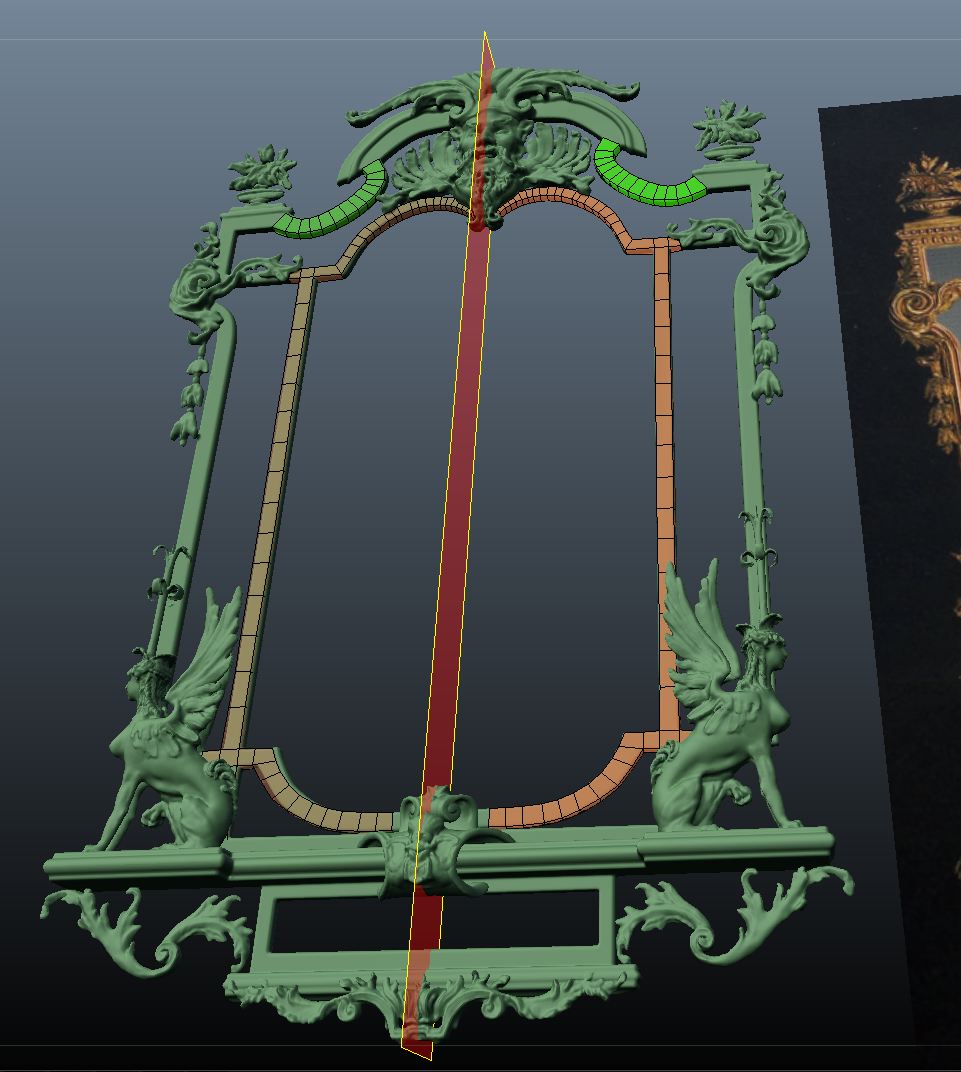
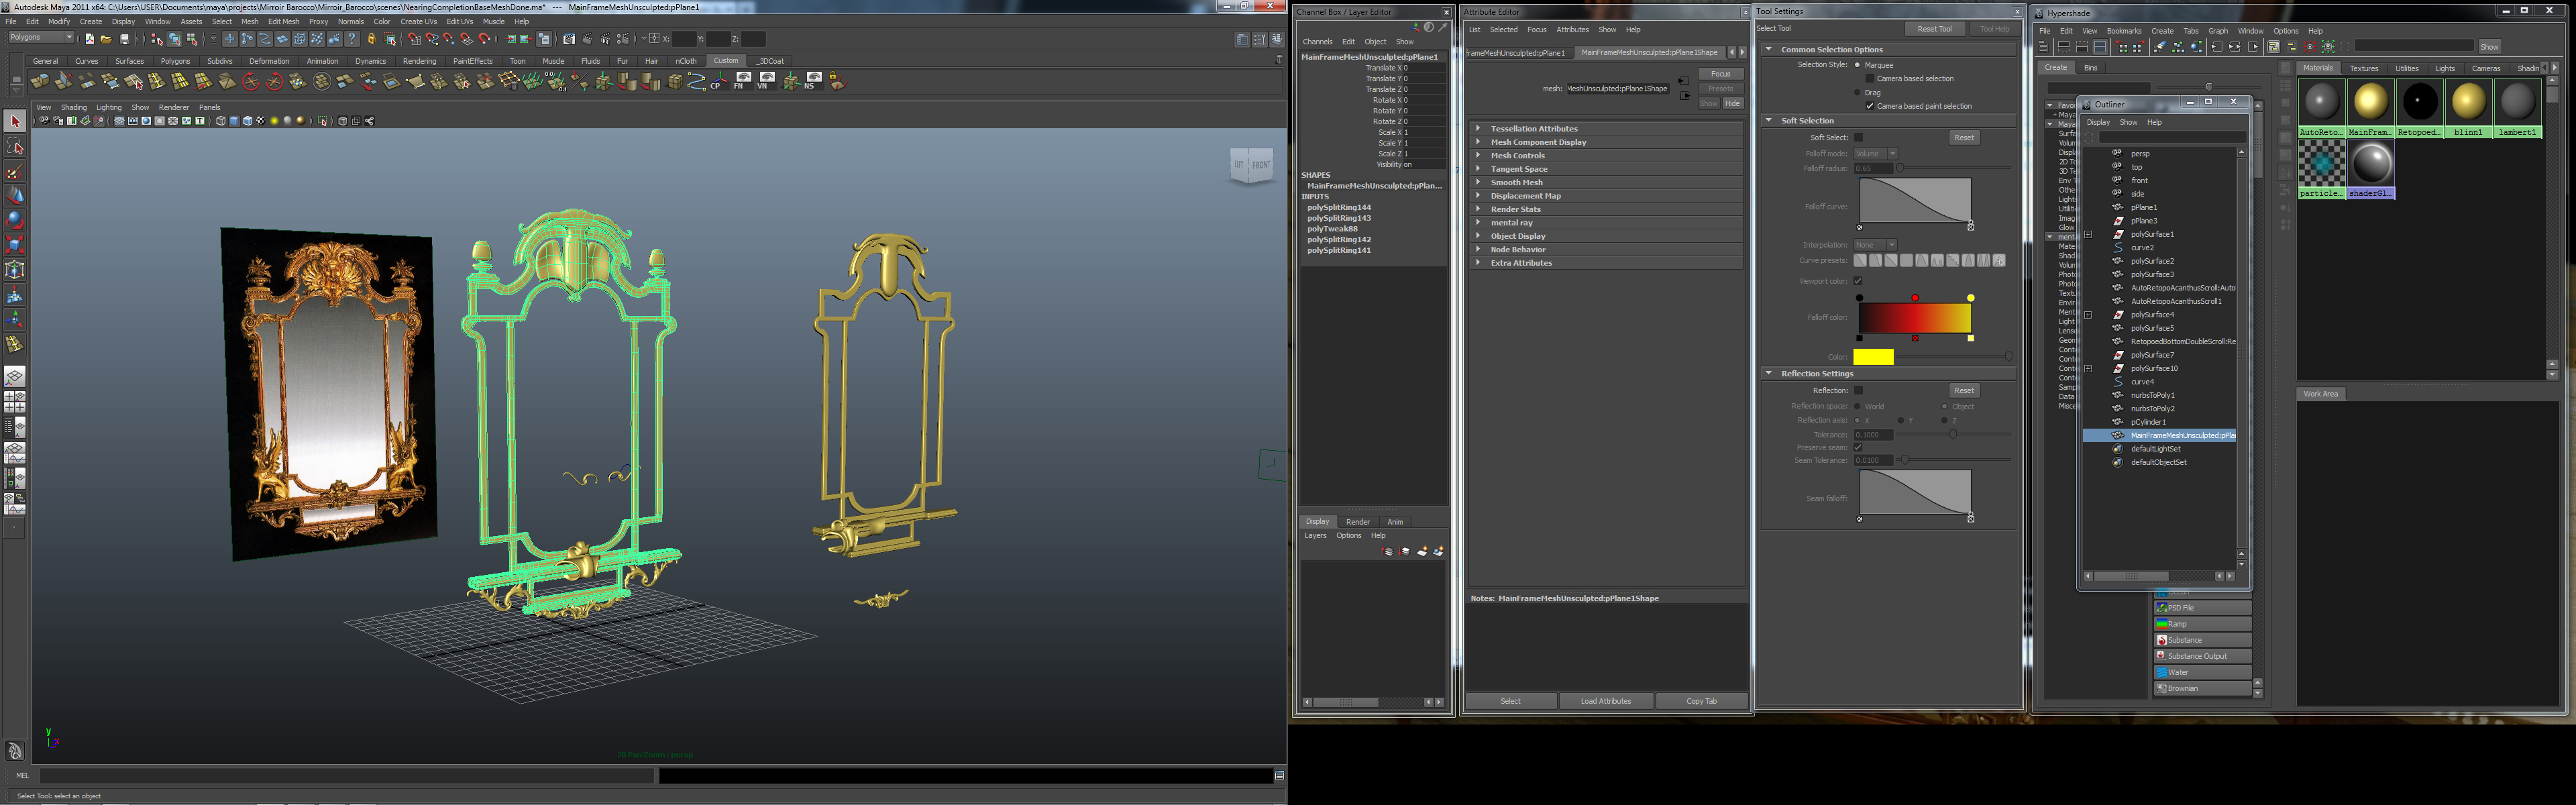
Maybe the only way to do this is to hand retopo each of the 5 or 6 layers separately then and then bake out the displacement, normal maps etc then take all the layers back to maya and parent them there with separate UV, normal and displacement maps for each.
-
So basically when I merge my layers at 23,081,000 triangles to one layer (the parent layer) the MERGE TREE tool is spitting out a single merged layer of only around 2.5 million triangles which doesn't look very good at all.
I'm looking for a way to cirumvent this..
-
That's cool. It's really good to just play with whatever program you're using like this. It's a great way to learn and develop skills without putting any pressure on yourself to perform. Plus it's lot's of fun.
-
I get rid of unwanted vertexes like that by attaching them together into a polygon then deleting the polygon. if there's only one vertex then create 2 more and make the three of them into a triangle polygon and delete the polygon using the tool for it in teh retopo menu.
-
I'm merging all my layers in a voxel sculpt to one layer, using the MERGE SUBTREE function and each time my mesh is being reduced to an unpleasant and unwelcome level of resolution. I've already reduced the polycount of the various layers using the RESAMPLE function on each individually so that they're all 2x resolution.
How do I prevent MERGE SUBTREE from automatically making my mesh coarser like this?
-
I'm impressed. I've made a couple of attempts to learn Python and failed so if you can code a game, any game that's pretty cool. Thanks for sharing.
-
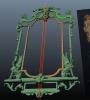
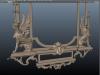
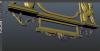
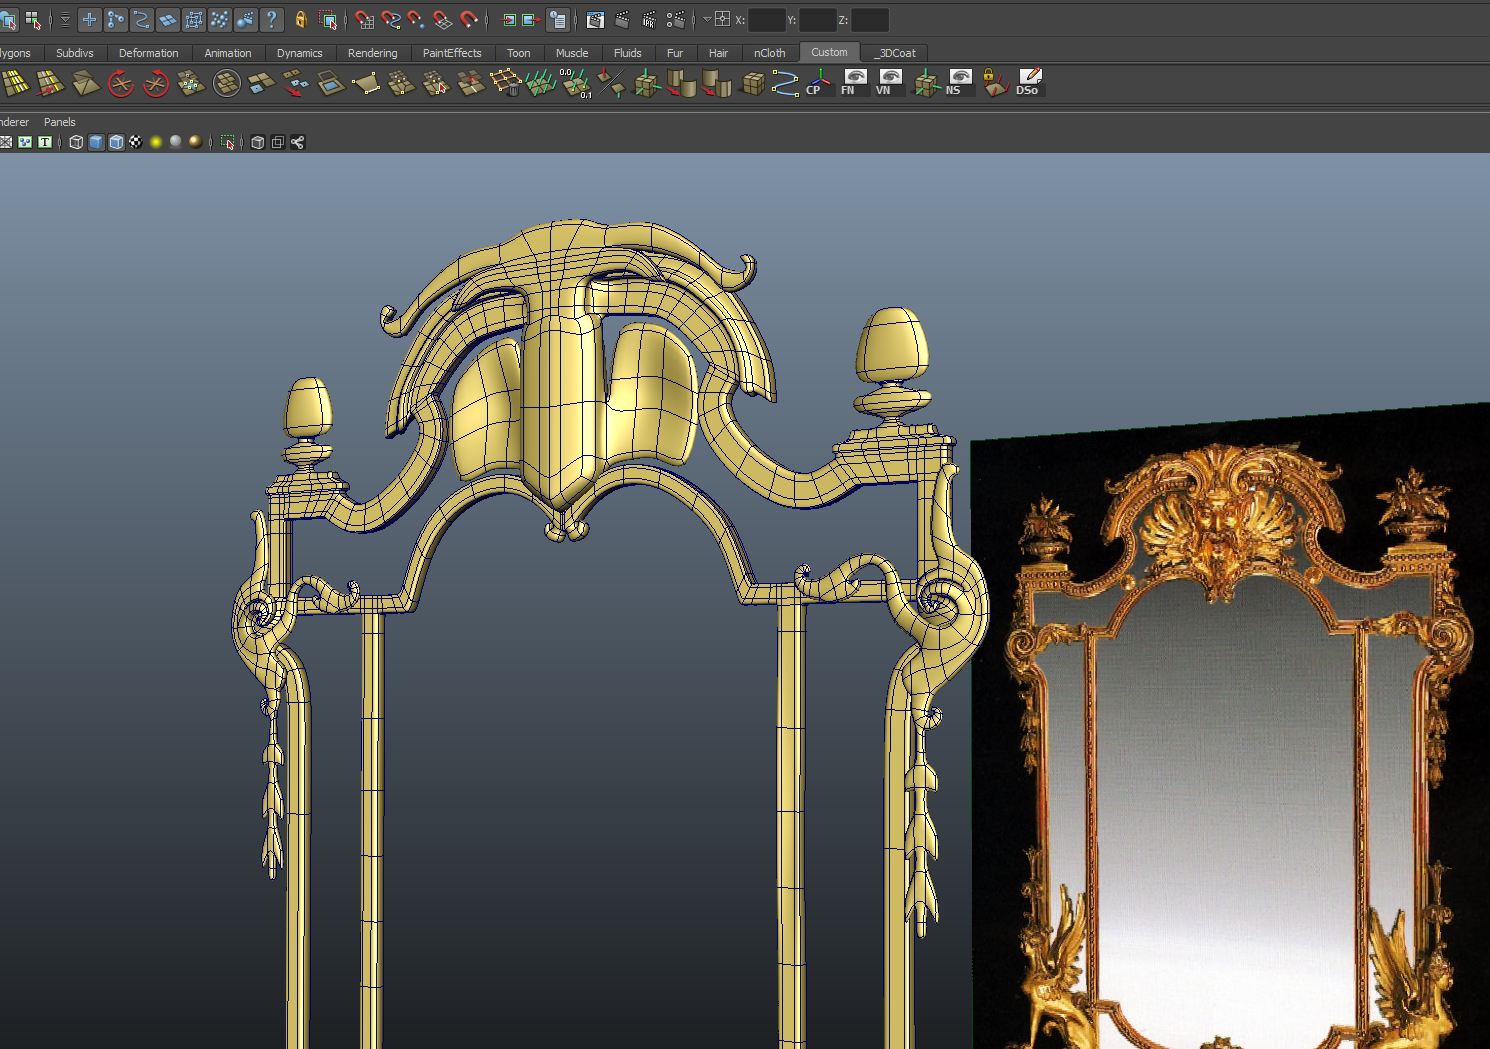
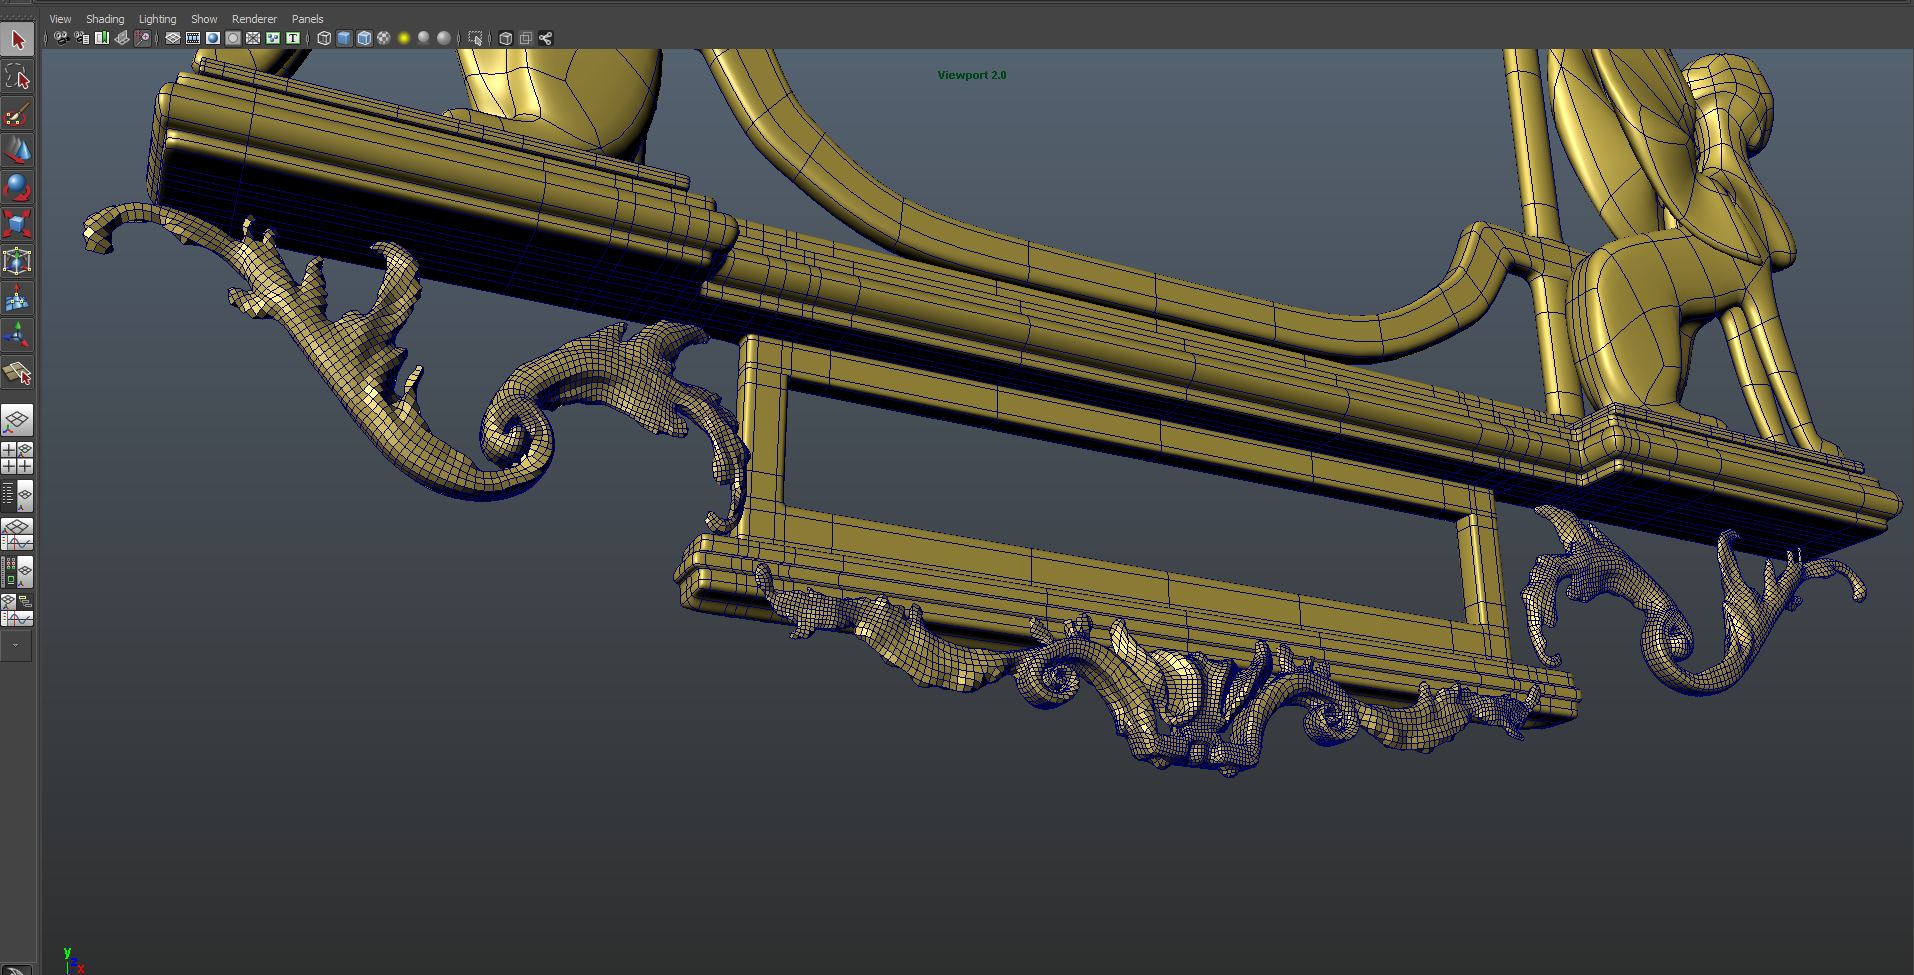
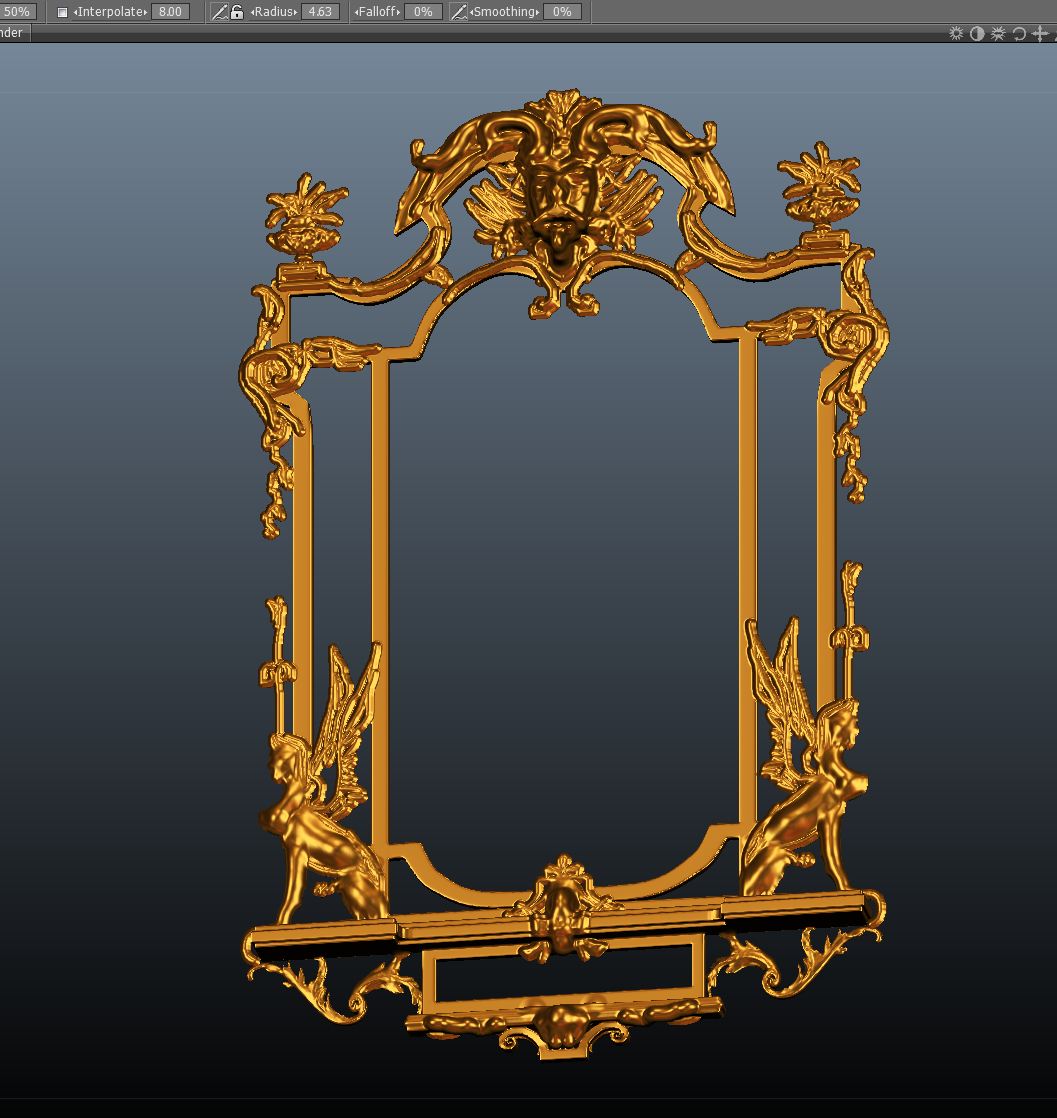
Finished the sculpture, so Right Click on the parent layer of all the sublayers and hit Merge Subtree to collapse all the sublayers into just the parent then open up the Retopo window and start the laborious task of retoplogizing the entire unified voxel 3b file object...I need to do it by hand to have the rectilinear frame of the mirror laid out for the patterns that will be applied as normal and/or displacement maps in Photoshop.
-
I had a lot of forebodings last night and this morning but I woke up with some ideas on how to solve the problems of dealing with the scrollwork on the upper frame corners. The morning was drudgery without hope but the evening was fun as things just coalesced to where I wanted them.


-
I asked Oleg about this and he said Andrew replied he would work on it soon, but it was no small task.
Thanks.
-
Teh main thing for me is being able to set up all my menus on a second monitor and having the viewport free and clear on my main monitor, like I do with Maya..

-
Getting the hang of the merge tool and setting up layers to assemble complex projects. Very satisfying and not at all difficult to learn, really.
-
Definitely know the feeling. But one good thing about this is that you can use a good bit of the work...again, down the road...by building your own little Kit-bashing stash/collection. You can drag a voxel layer directly into the models pallet...and have a saved model to use at some future point, and a thumbnail to go with it. Or you can right click a layer > save as .3b file.
You can even save your curves/splines to re-use. Good work...keep it up. By the way, are you using Auto-Retopo to create the mesh or are you doing it manually. These are oftentimes very good occasions to use the AutoRetopo feature. I wouldn't elect to use it for Animated characters, but for many other models/purposes it can work well.
\
So far it's auto retopo and this is a very impressive tool
But in the end I'm going to do what you just said; drag all my elements in as voxel layers and position them together then I'll hand retopo them and UV map them. The hand retopo will be necessary if I'm going to put all the symmetrical pattern details on the mirror frame in Photoshop. I'll want the mesh to be laid out as carefully as possible for that. But I don't mind because hand retopo tools and UV mapping in 3d coat are actually kind of fun. I'm planning a huge UV map..as big as Maxwell will handle...8192, maybe 16384...
-
Incidental ornament. You can reach a point where you feel overwhelmed by all the work that needs to be done to finish an elaborate project and the work slows down to a crawl. That's when you have to force yourself to just plod forward to your goal..
-
I got really good at gauging what voxel density would give me a good framerate on my machine while I sculpt. it's a combination of finding the right res+ and size. and having a GTX580 with lots of CUDA cores. the brush is a standard grow with the mask applied. btw the mask hidden and scaled before the video started.
Yeah that first video was excellent and I really appreciated seeing you use the masking function. That was great. I wish the video had included the insertion of those long curvilinear tendrils emanating from his face though...
Thanks for posting those vids.
-
Hey Digman, I just resampled from 13.5 million down to 6 million with no loss of detail. Thanks
And I'm using Surface tools and they're vastly improved (I'm using the latest Beta version of 3d Coat) from the last time I tried them some time ago...
-
Forget got to mention, good looking work, looking foward to seeing more and keep up the good work...
Here is one more picture of a model with a voxel polycount at about 700,000 including the eyes as seen in the lower left hand part of the picture. The voxel count is kept low as I build form and some detail
Again hope this is helpful...
Thanks a lot Digman...something to mull over here..
-
See the thing is I utterly despise the retopo in Zbrush while I think the 3d Coat's retopo tools are THE BEST in the business. Unwrella, HeadusUV Layout whatever, they're all junk to me. 3d Coat is it. I actually enjoy laying out UV maps in 3d Coat and that's insane because UV mapping fills me with nausea.
So on one hand I need to be in 3d Coat but on the other hand I'm apprehensive about it's ability to handle a large complex structure like this.
So what I'm doing is basically tippy toeign around a lot of problems hoping that they'll all resolve themselves somehow by the time I'm finished sculpting and ready to lay on textures...textures that must be fairly precise, repetitive and tightly symmetric or regular...
I'm not sure doing that in 3d coat's 3d environment will work..
-
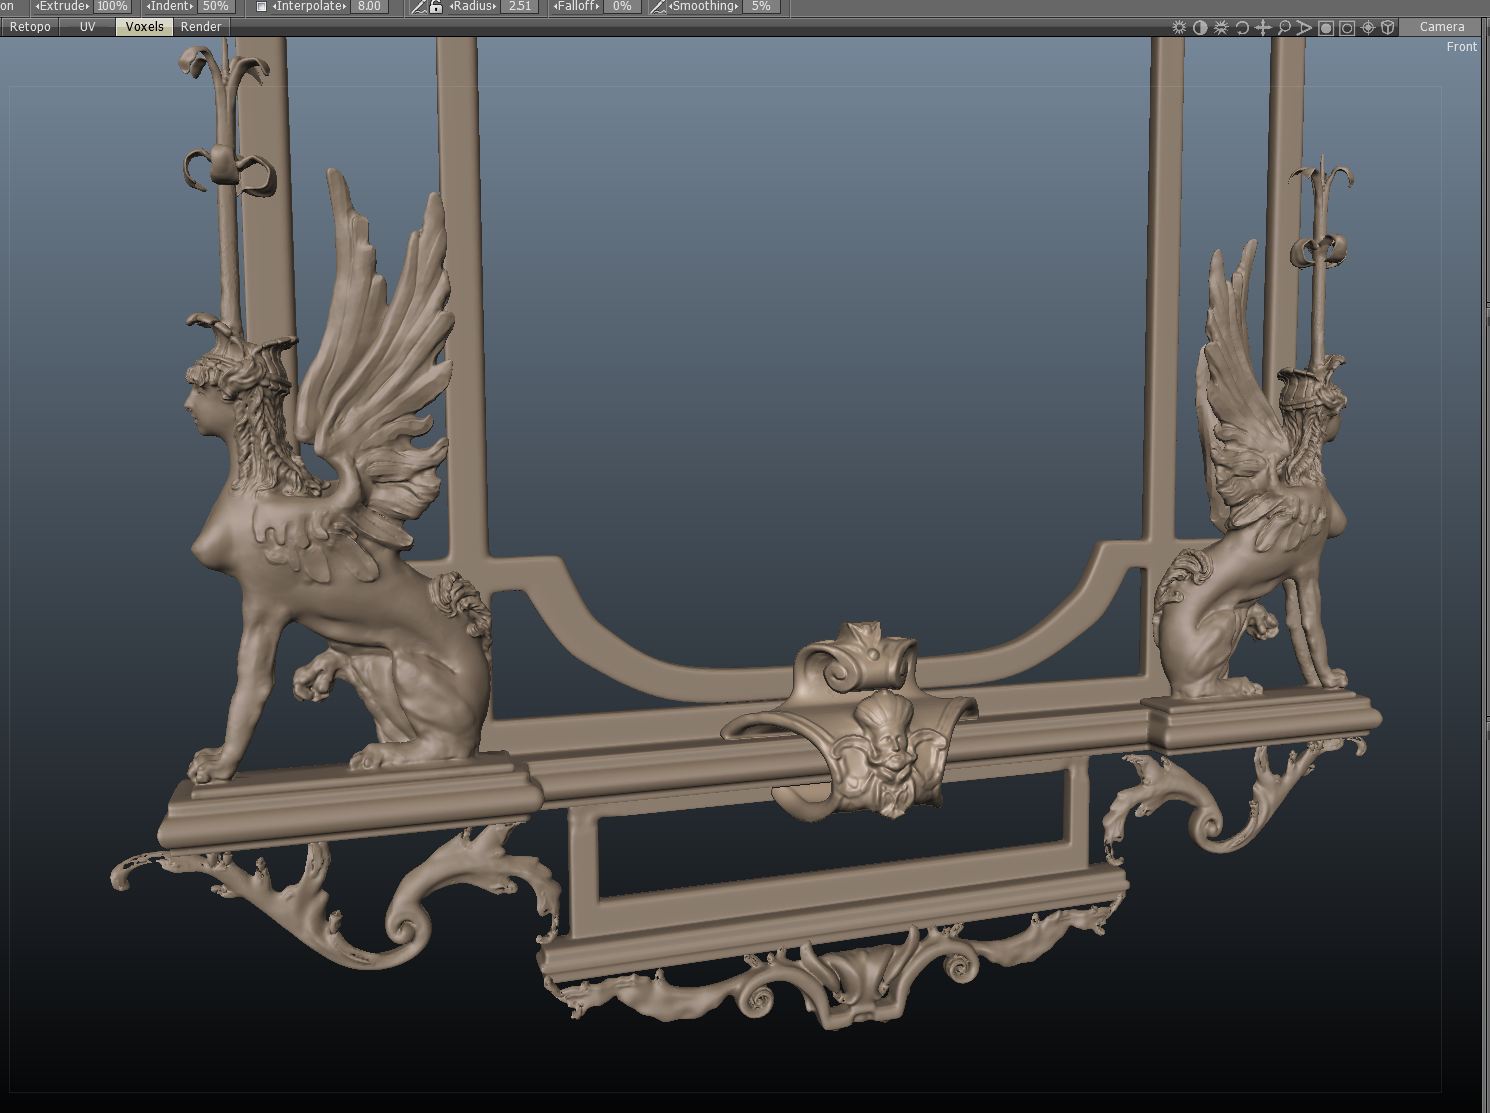
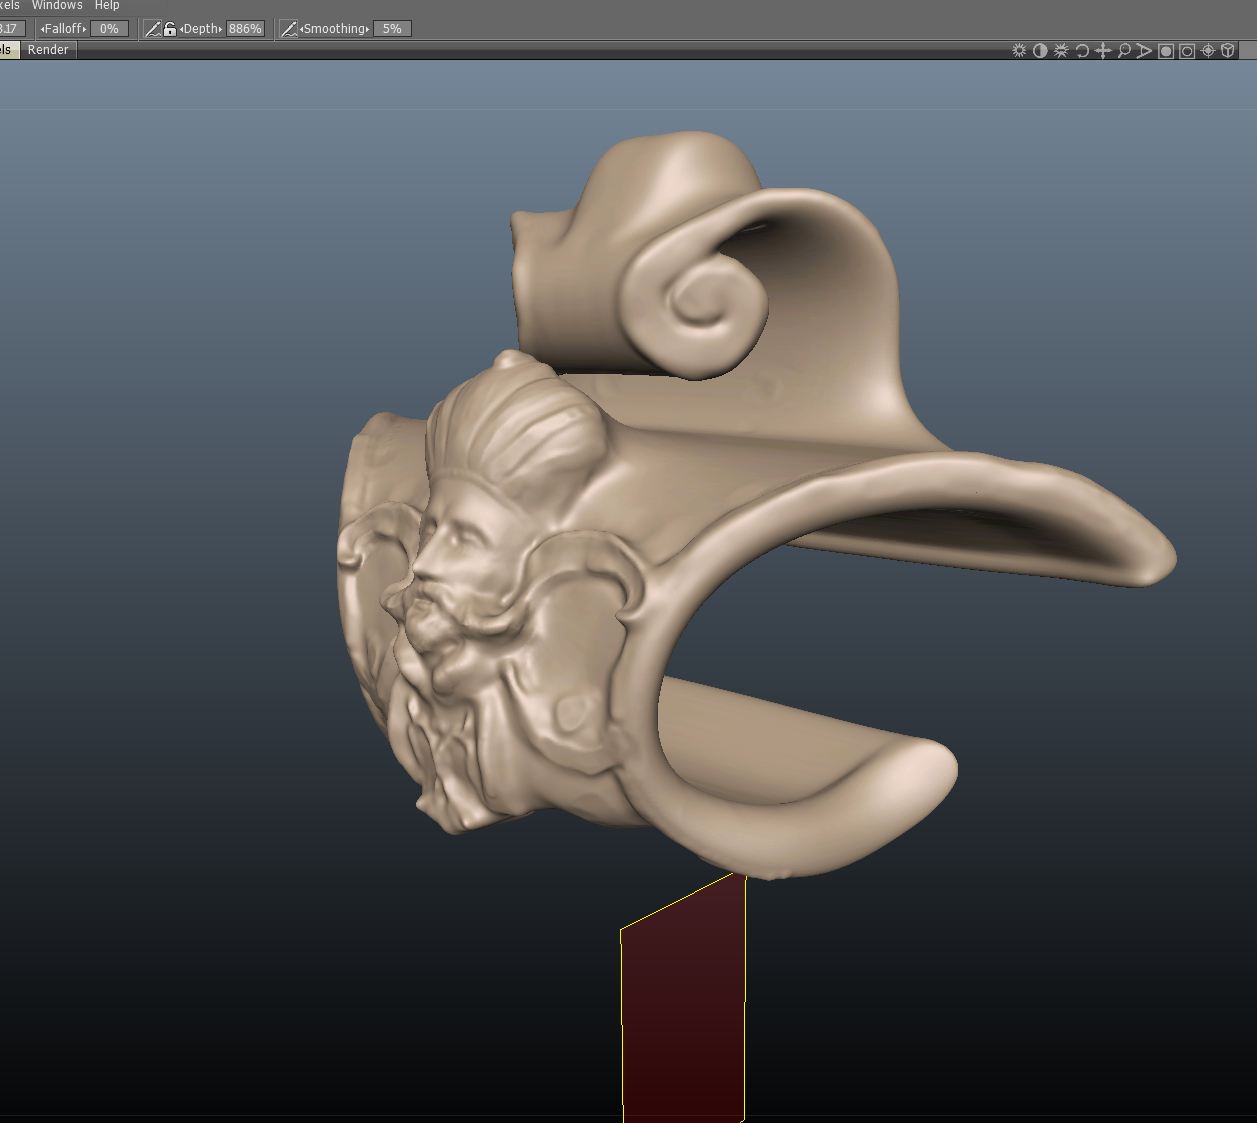
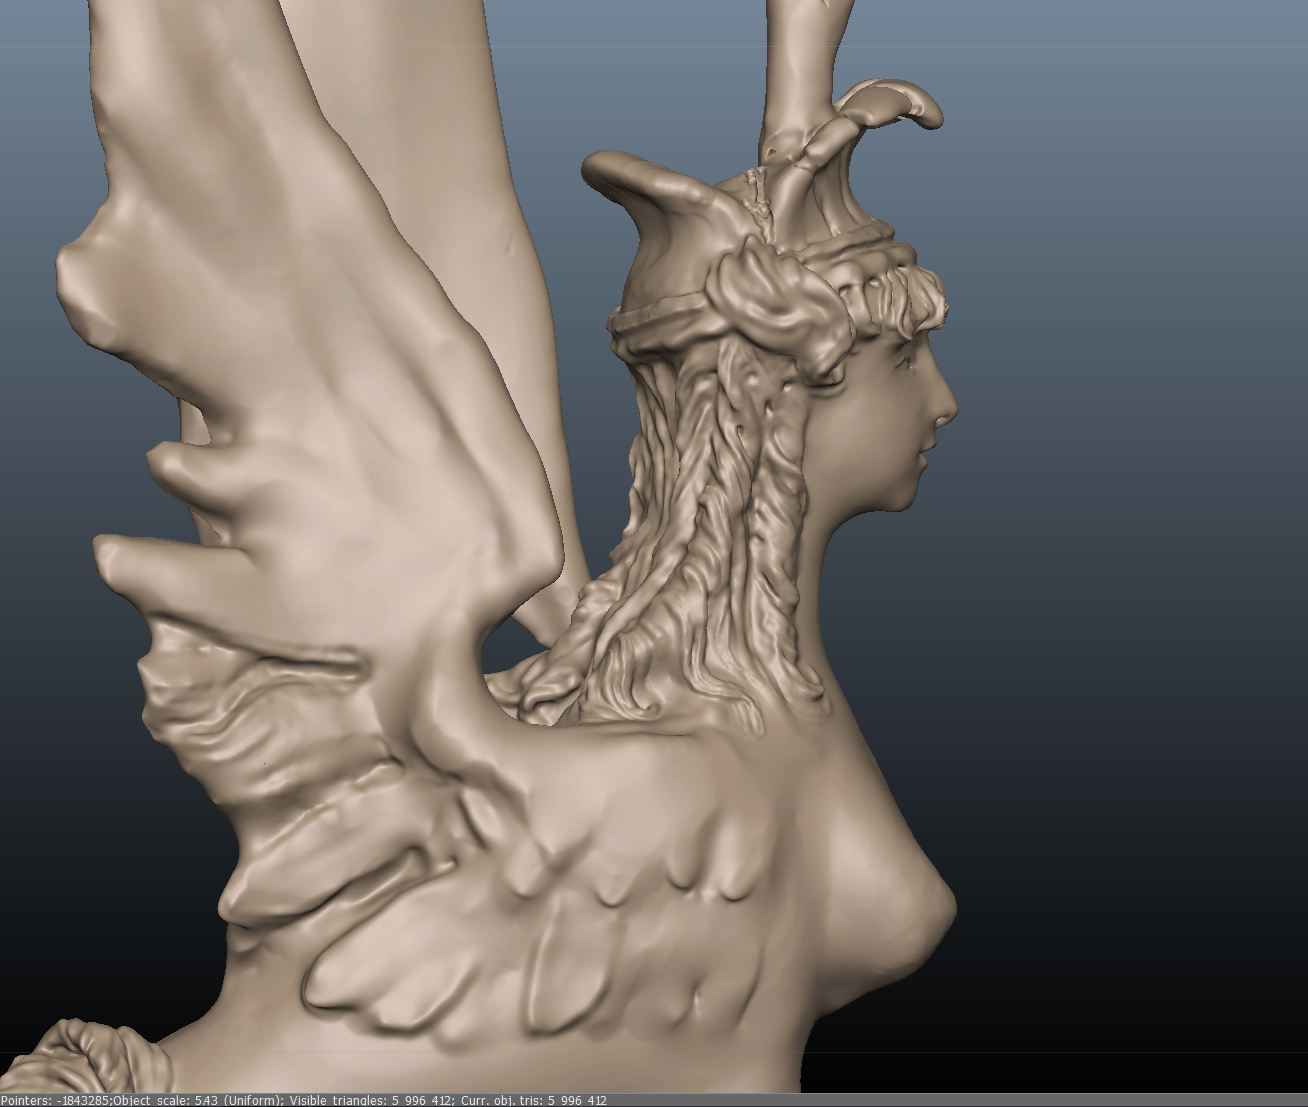
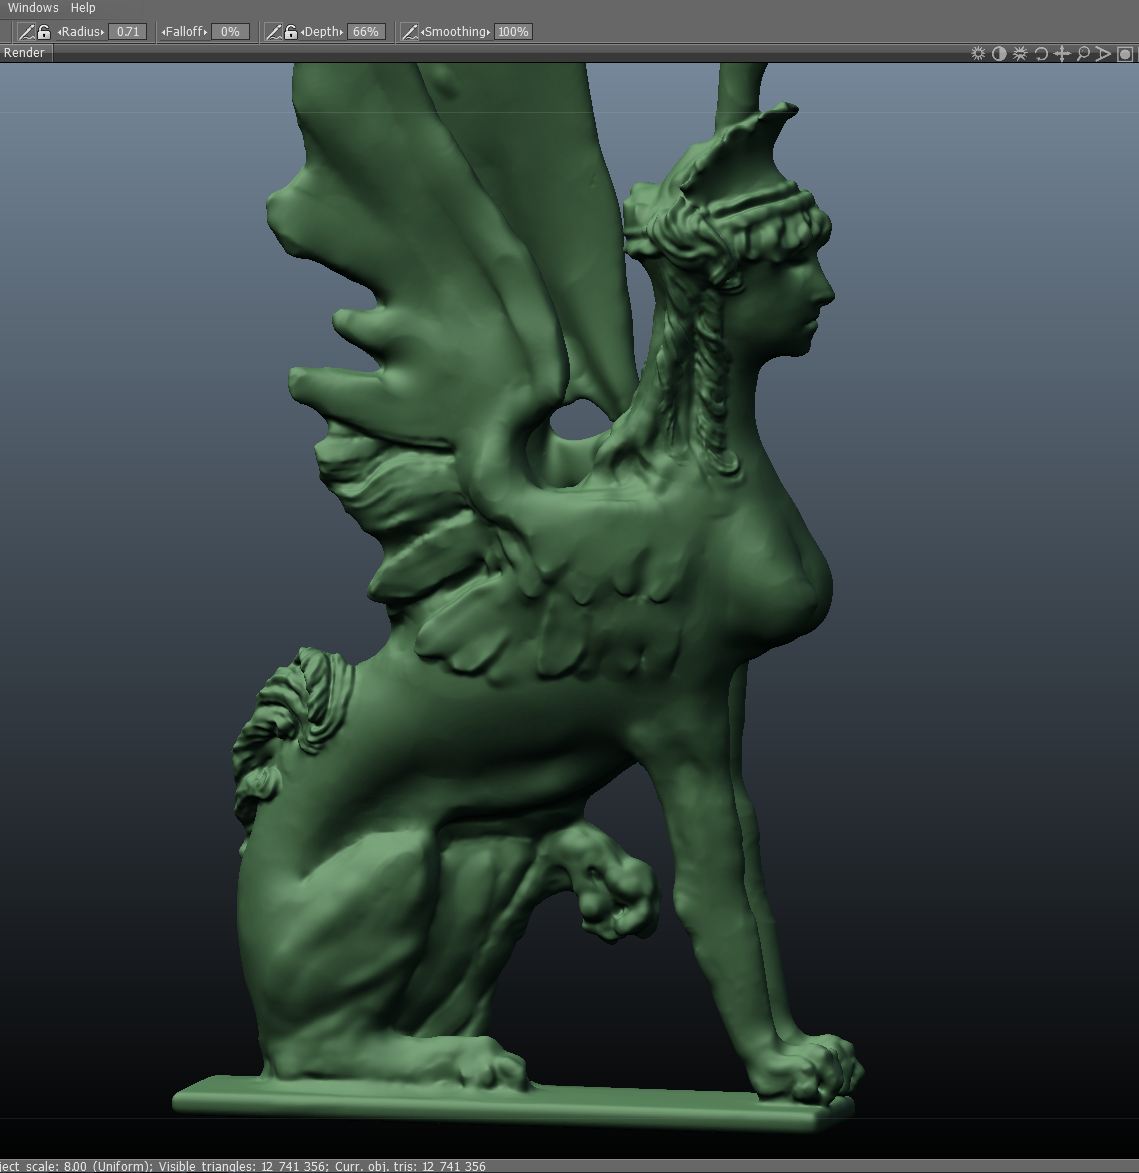
The workflow is strange but then I'm not content with any of the workflows I've seen out there and there seems to me to be two contradictory elements to this work pulling it in two directions. The hard edged frame will need to be elaborately textured, and like my fauteuil on the finished works gallery I'd sort of like to have it firmly pinned down in its rectilinear topology so I can place the repetitive geometric patterns carved into in in Photoshop. But contradictory to this there are the organic elements; the scrollwork, the garlands of acanthus leaves and the sphynx. I'm tempted just to go back and forth with them between maya and 3d coat working and reworking them. I'm sort of toying with finishing them in Zbrush if I can't get the detail I want in 3d Coat though for now I'm trying my best to keep this a 3d Coat job. Frankly the Zbrush workflow leaves me a bit cold and I like Voxels a lot. Perhaps I'll have to just bite the bullet and go out and buy 8 more gigs of RAM to double up on it to handle the full load of the work. Note the Sphynx is over 4 million triangles...
If you can suggest various resolutions to this puzzle they'd be welcome. I'll definitely consider them carefully.
-
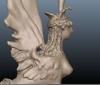
The Chimera...I wonder what it would be like to make love to such a creature??? I think I'm falling in love with her..

-
What I was suggesting was to put all that voxel work on a flat surface (since it is always displayed on a flat surface) and use exported displacement and normal maps to achieve a very low poly but gorgeous mirror for use in a scene with many other assets.
That's at the end when I'm texturing it. By sketch I mean just roughing things out to see how the proportions will work and how I'll lay out the masses of the object.
-
Do you mean "quick sketches" used to make planes painted with color, normal map and alphas?

No, just quick voxel sketches...voxels cry out for a monster computer with massive amounts of RAM and a Soviet Army of CPU cores but if you can get them 3d Coat rules..
-
Rapid test sketch to see how everything will fit together. 2d paint brush is awesome for this.
And this makes me think that in huge scenes when you need to have a lot of props in your scene, it would be a very effective way to work to have the most distant objects in the scene to be nothing more than quick sketches like this that would give a mere impression without requiring a lot of toilsome detailing....


switch to liveclay
in General 3DCoat
Posted
I'm going to View/ Wireframe but nothing is happening. Any way to switch over to wireframe like the author of the video shows?