-
Posts
2,189 -
Joined
-
Last visited
Content Type
Forums
Calendar
Gallery
Posts posted by L'Ancien Regime
-
-
-
-
-
That's beautiful...just in time to hopefully employ it in my own new project. Thanks a lot of taking the trouble to make us a new tutorial, another valuable acquisition in my comprehensive hard drive collection.
-
Ambient Occlusion dirt maps would be awesome...
-
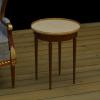
The biggest problem here was making the brass rail around the edge of the table in Maya. Initially I wanted to use transparency maps to pierce it into a grille but that proved impossible so I boned up on creating deformers under Animation and pieced a fully 3d one together with all the punched openings in the metal. Lots of messing with little stubborn problems there but it all worked out in the end.
Yesterday I pieced it together...today I figured out the metal railing and did some UV mapping in 3d Coat (the best UV mapper there is right now I think) and tomorrow I'll take all the pieces of it into 3d Coat for per pixel painting of color maps, normal maps and displacement maps, like the grooves on the legs of the table.
Then I'll assemble all my maps in Maxwell to create the MXM files. I'm planning on really aging that railing; I hope I can make it look like really old brass..right now all the textures in the table are Blinn placeholders...
BTW, anybody got a nice white marble with dark streaks in it, something high res like 2096 x 2096 or higher that they can share with me?
Update; I've been wrestling with painting this grille railing all afternoon. IF YOU DON'T HAVE YOUR UV MAP LAID OUT RIGHT THEN YOU AIN'T GOING NOWHERE IN PER PIXEL PAINT. That's all I have to say about it. But I finally cracked down and made cuts on every opening in the grille...all 180 of them. Let's just say I'm developing a facility with handling my obj in the view port..
But the ugly work is done so let the fun begin...generating a whole series of color, normal and spec maps, to try to give the impression of fatigued brass with some worn gold on top of it...This will be fun.
So I've put a thin unevenly mapped layer of dull gold over a substrate of some kind of corroded smooth metal, with a broad bump map to make an uneven relflection to break up the perfect finish and make it look like worn electroplate gilt trim. It's got a way to go yet
-
Excellent modeling - texturing

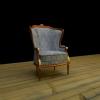
But I already found what's wrong. You probably used normal maps, right? Well, on the back of the chair these are inverted alright. Maya-maxwell, hmm, I'm not sure what format in 3dcoat export preferences you have to use. A LW, or a Maya compatible?
Edit: a second look on this. Probably maxwell is trying to indirect light these areas. It isn't too convincing though. Something is wrong.
You're right...that happened going back and forth from 3d coat to Maya I think.. Man, you're sharp
Thanks
Maybe the lighting problem is partly because of my simple setup
-
I like the color map on that a lot...Hope I get that good soon..
-
Totally done from scratch in Maya, 3d Coat, Photoshop and rendered with Maxwell. And it's a bit too clean looking so I'll be dirtying it up a tiny bit with some ambient occlusion and maybe some low level bump maps..
OK and this is with the normals on the back upholstery flipped to their proper configuration.
-
 1
1
-
-
Looks good! I did a similar chair for a project a few years ago. In fact, I did it in 3DC 2.x before we even had voxels!
3dCoat 2.xxx was a crude beast. I respect you for that.
-
-
Have you tried the maya AppLink for 3DC? I don't use maya so I couldn't help with how it works.
http://3d-coat.com/forum/index.php?showtopic=6886
Otherwise you should be able to load the object as OBJs. You should see them as layers you can turn on/off on the Objects tab, if you don't see it look at Windows > Popups > Sub-Objects. For UV editing just import it to the paint room, switch to the UV tab, hit Clear Seams. Then Mark Seams and place them where you like (hold Shift for a full loop), then hit Unwrap. Click Apply UV-Set to send the new UVs to the model in the paint room.
Thanks
I'm using the Applink for Maya 3dCoat and it's excellent but there's a hell of a lot of buttons to push in it and a lot to know..
I've gotten a created asset from Maya to 3dcoat for Voxelization in the past, but now I want to transfer an asset as a topology for UV Mapping...and it's all trial and error for me...I'm looking for a smooth workflow here.
-
Also, it's in pieces...I'd like to bring them in from Maya as layers I can turn on or off and manipulate seperatly as I work on them but I'd like them all on the same setup in 3d Coat. I'm bringing them in from Maya so I don't necessarily have to import them to 3d Coat as .obj files if that is necessary.
-
PTex and C4d are a lot easier to work with than PTex and Houdini;
-
That's too bad that the reseller is not fair with the content that helps them grow. Too much of that going around these days. What's worse is all of the app hacking. A guy was developing a really good plug-in for Max a few years ago for character animation. I bought V1 and wrote him last year to see if there was an update. He said that once the hackers got it and threw it on the warez sites his sales plummeted and it wasn't worth keeping up with all the intense coding. It's a shame because it was a really nice plug-in.
Back on topic now. I just viewed several of Leigh's videos. They are really nice and he doesn't get all mired down in tech stuff. He is very laid back and says "just play." I like that. I'm getting better with 3DC and really like it. I had played with ZBrush and just couldn't quite get used to the interface. 3DC is much more intuitive. I'm sure there is a place in the world for both but I much prefer 3DC to ZBrush for now.
I'm good to go now with merging meshes for Voxel work. It's working nicely for me. Here's a sample of my recent model (for a job). I had a rough model I'd made in Max, exported an .obj, imported that into 3DC, retopoed it and exported it. I then wanted to make some detailed changes and that's when I realized I needed to get it back into 3DC and posted. The client is very happy with the result and it's my first work in 3DC. It's only uphill from here.
Thanks All...
Nice, are those night guards or for contact sports?
-
-
You know, it's pretty sad that if I write "rendering ptex in mantra" into Google, this is the first hit I get.
I've got 5 videos in my collection that I've gleaned here and there on this rather important subject and THREE OF THEM DON'T HAVE SOUND AND ARE OF DEPLORABLE QUALITY. Of the other two one is only a tacked on segment of two or three minutes to a Houdini Master Class and the other is Peter Bomar where he works with texture maps to Houdini from 3d Coat BUT IT DOESN'T DEAL WITH PTEX.
This is the kind of support that Houdini gives to PTex;
http://www.sidefx.com/docs/houdini11.0/shade/ptex
Big help eh?
Please, will someone make a proper comprehensive guide, written or video on how to implement PTEX between 3d Coat and Houdini??
-
Greg,
Thanks a lot for that. It gives me a good and accepted way to proceed. I've been playing around and not getting very far. I appreciate your direction. It's not a workflow that's well documented or easy to find for some reason.
Regards,
Rob
yeah documentation is sparse and frankly few of the Kurv videos are very good. L J Bamforth's are the exception to that rule. His videos are outstanding.
This should lay out the workflow for you on the Merge tool in 3d coat;
-
-
As far as I know Cuda Toolkit is now included in the 3DC installer, so you should not need to install it separately.
That's nice to know. Thanks a lot.
-
OK, I modeled a femur in Maya then took it over to 3d Coat and used Merge Tool to turn it into voxels and rework it at a higher level of refinement. All went well after a bit of buggering around to reteach myself this arcane skill.
So then I finished working on the modeling with voxels level and did an Autopo For Per Pixel.
What I got from this was a retopoed mesh in the Retopo UI, A UV map of my work in the UV UI, and in the Paint UI I have what appears to be the Voxel version of my original sculpt in it's Old Bone Sans Ambient Occlusion material. Apparently though I'm not sure.
In the Layers menu I'm looking at four things;
-Baked Occlusion (map)
-Normal Map
-Voxel (of my sculpt) That is the one selected and if I click on the eye next to it it disappears.
-Layer 0
Now as you can see I'm texturing away but I'm a bit worried about where this is all going since I'm sailing off into a bit of mer incognita here.
1.When I'm finished texturing what next? How do I extract all this to a mesh with maps (8096x8096) that I can take over to Maya/Mental Ray for rendering?
2.When I do bake all this information out somehow or other how do I select the folder where I want these newly baked maps and .obj mesh to end up? Will I be able to get a displacement map out of this as well as a normal map?
This is my first venture in painting directly onto the voxels and I like it a lot so far...here's hoping the entire episode doesn't end in disappointment.
Also I've got one other question about texturing, which in my opinion is really the selling point of 3d coat. It's amazing and a real rival to Weta Mari; if you look at the smooth bulb of the ball that fits into the hip socket you'll see I wanted to make it smooth, but on the borders of each setup of the texture map to a new angle the overrun of my texturing brush creates an unpleasant seam or indentation that ruins the effect. I've got falloff on the brush over 50% but it's still doing this. Is there any solution so I can have seamless borders between texture patches?
-
Great stuff. Thanks a lot. You've got an attentive and appreciative audience over here..
-
Yeah I'm having problems with this myself. I'm trying smooth tool and fill tool cranked up to a depth of over 4280% and nothing doing...still bumpy...
Wow, I just downloaded and installed the 3.5.18 beta and smooth and fill and carve tool are working 1000x better than the updated version I was running before...
-
Thanks, just relabeled it, put the old manual in a holder file and stuck it into my Program/3D Coat installation folder for easy access. Very nicely done. Thank you.


Ormulu Belle Epoque Mirror
in Finished Projects
Posted
Yay! I finally figured out how to get the Merge tool to work with high rest Voxel image..