


Hammers
-
Posts
128 -
Joined
-
Last visited
Content Type
Forums
Calendar
Gallery
Posts posted by Hammers
-
-
Thanks digman - this got me where I needed:
I right click on the layer with the low poly object in the scene > export obj
then retopo>import - place (without snapping) et voila!
I'm not unwrapping the pearls anyway I've decided, but will use this method on the staff and straps and a couple of other bits. Great

Might be cool if there were a one step workflow for this, rather than exporting-importing into the same room, but no biggie...
Cheers.
-
Thanks for the reply FreezeFrame. Yeah I think I blew it merging things into the same layer - not thinking ahead. Good suggestions anyway.
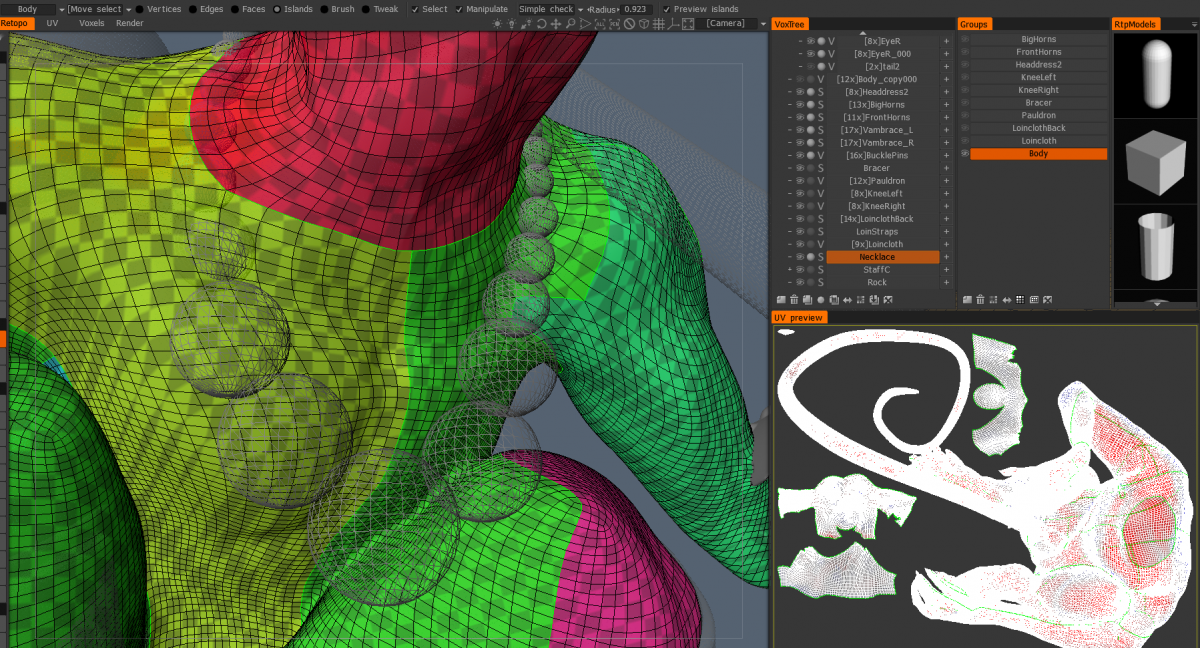
And yes I just wanted to get the low-poly from the Voxel room to the UV room to unwrap, without retopo. but can't figure that bit out. As in this screenie, I can't mark seams on the object in the retopo room.
I could reimport from Blender, but I'd have to reposition and whatnot. Maybe I'll just leave them till I do the Blender Render and use the original low polys there.
Cheers
-

A couple of quick questions:
1. Working on my Monkey King (see my WIP thread), I've brought in a couple of low-poly meshes to the Voxel room, without voxelizing. I'm retopo=ing and UV unwrapping most parts of the model but a couple that are largely unchanged (e.g. his staff and pearl necklace) I'd like to just unwrap as is for painting.
I haven't been able to figure out how to get these meshes into either the UV or retopo workflow. They show up on the Vox tree (both in Surface mode still), but how do I just use their meshes as-is for unwrapping?
2. A couple of parts I merged into a single vox layers but now they won't retopo easily and I can't separate into their parts even with "separate disconnected pieces" (e.g. hanging rings on end of staff, belts and buckles on his vambraces). Is there a way to approach this or should I just remake the offending parts on separate layers?
-
Not much different to before, but with added loiny bits (no, not those loiny bits
 )
) Now for some retopo!
-
 1
1
-
-
@Tony Yes that's a great way to think of it for UVs, that actually helps me approach things.
@Methelina I hadn't made the connection with Hanuman. I think the artist who did the painting was basing it more on the Chinese Monkey King myth (as in 'Monkey Magic', Tripitaka etc.), But this guy certainly has some visual links to Hanuman, especially once his tail is on fire

Tearing my hair out trying to do nice flat strips of fabric curved into loops in 3dcoat, so I'm going to do those in Blender and bring them in. In the end I've only done a couple of base mesh bits and the staff/knob in Blender so far…so yeah learnt heaps. Wanna paint now. And make hair. And Fire….mmmm fire….

-
Thanks Tony, I wasn't sure with a project like this whether to do a T-pose and then rig/pose it, or to just treat it like a clay sculpture - 'it is what it is'…
There's certainly some ugly spots where parts of his body are merged together that I would have happily avoided.Given that the project is up in the 16M triangle range, I suppose I need to at least do a perfunctory retopo job to make painting and rendering more practical.
Is that the most sensible approach going forward do you think? Every step is a new learning curve for me, though I've dabbled in retopo — it was the initial reason I bought 3dc.
Cheers!
-
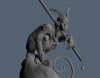
And a few more hours work, dipping my toe into hard surfaces for the first time. Tried the Voxel layer tool for the vambrace straps - nice. Now just his loincloth to go, before starting on retopo(?) and painting. Yay!
-
2
-
-
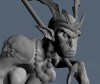
Feels like I'm getting bogged down and lost a bit of direction. Sculpting some fine detail on face hands and feet particularly, but probably doesn't stand up to close inspection. Still I'm very gradually coming to terms with *some* of the tools. And then there's all the Artman presets. Whew! I feel like I need weeks on this full time just to get a handle on what's possible and how.
But I think I'll move on now to armour. It won't be perfect but still been a good learning experience, and I just want to get into doing his paintjob and hair etc. Better I do more sculpts than work on this for too much longer


-
Just adding a few accessories for now. Next - finish the body sculpt before I get too distracted.

-
1
-
-
Thanks…<slinks off feeling n00bish>...
-
I've started a WIP thread, and get my first pic up a few days back, but now I can't seem to figure out how to post images on followup posts...
-
Great progress guys. Hope to have an offering this time. Great excuse to try hard surface stuff in 3dc
-
Thanks for the feedback and ideas digman. I agree the poly count is a bit crazy. I did work on the head separately for a while and found I had to bump up the body resolution when I merged the head with the body. So I'm certainly hoping that's about as high as it goes now that I've started in surface mode a bit...
Good to get an idea of what to aim for anyway. I like your sculpts too esp. the armoured guy.
Yeah 3d-coat can do some amazing stuff with hard edge objects, and they seem to get a more 'real' look than some poly modelling, but it does seem like a very different approach than I'm used to so will save that for another day
. Hope to post more tomorrow. Cheers. -
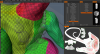
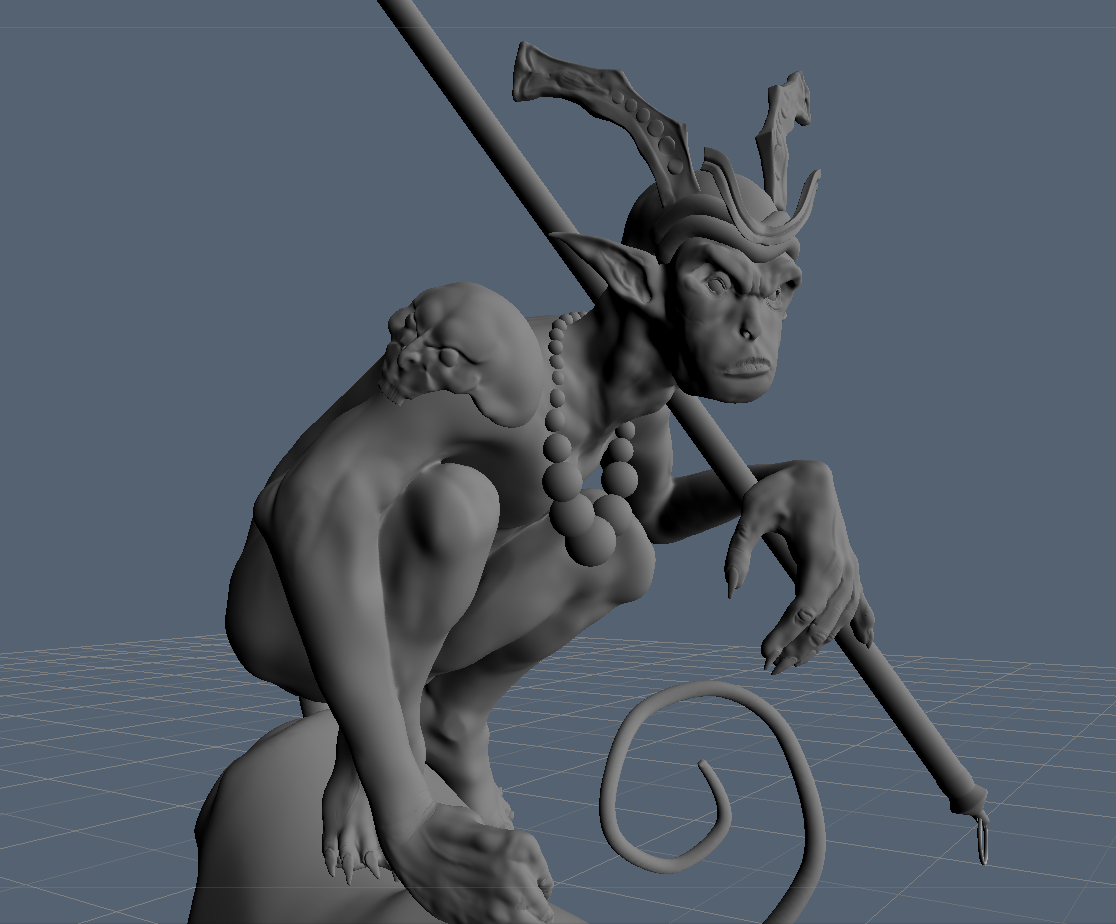
As an exercise in slowly coming to grips with sculpting in 3d-coat, I thought a concept sculpt based on Jesper Ejsing's beautiful painting 'The Monkey King by Moonlight' would be a fun project. The painting is featured in the magazine ImagineFX Fantasy Icons 2012, p47.
And you can see it here too
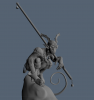
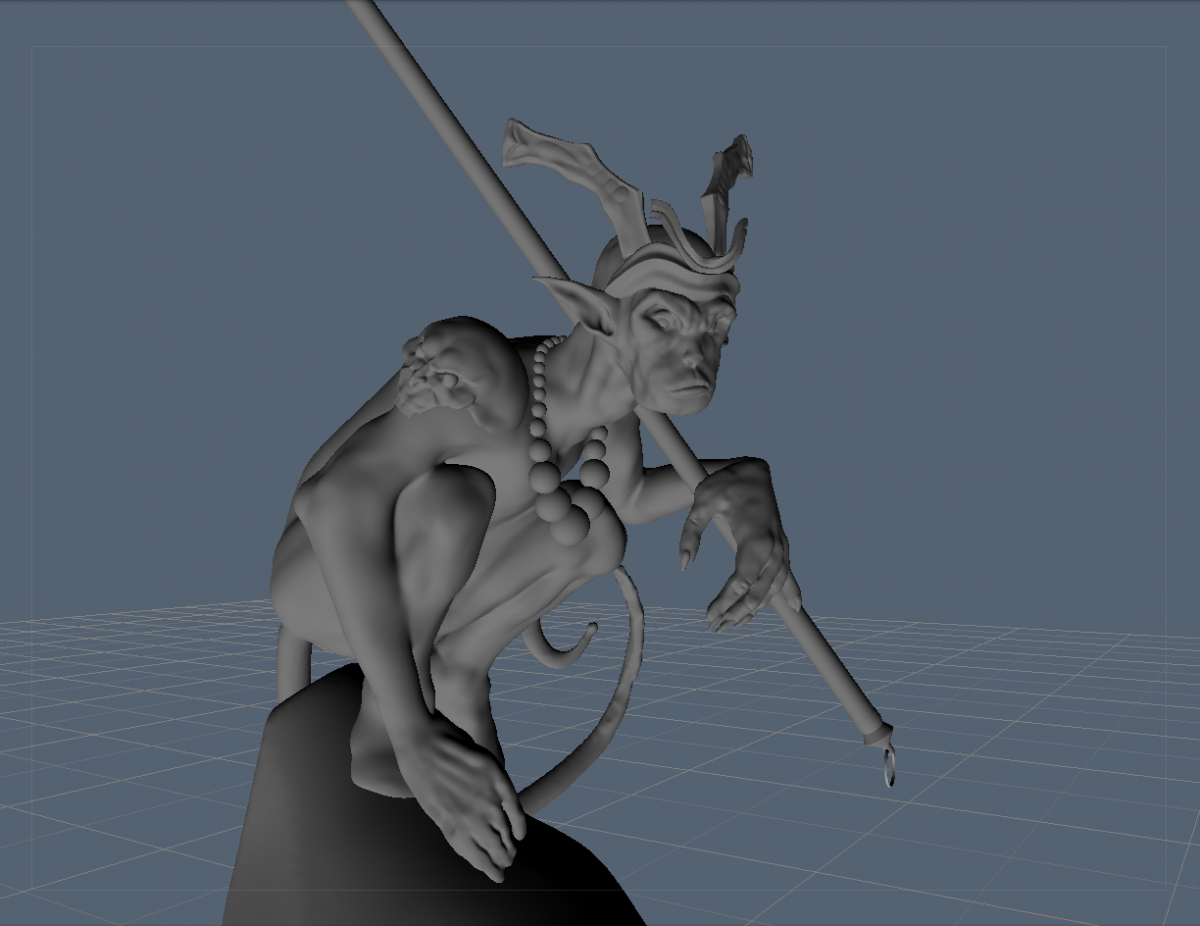
Well things are progressing a bit for me and I'm at the stage of probably getting to the limits of voxel work on the body, before going mostly to surface mode I think. This is all new and I'm still trying to understand good workflow, especially switching between V and S, and what the two modes are best at.
I definitely feel like getting tight creases (e.g. between lips) is a bit tricky, so any suggestions welcome.
I'm also wondering whether maybe going to Blender for the hard-surface stuff (armour etc.) might be on the cards for this sculpt, and I'll tackle learning that in 3d-coat in another project.
I'll probably do fine details in the normal painting, and try some texture painting too I'd say, before going to Blender Cycles for hair, fire and rendering. Probably not looking at retopo on this guy as he'll just be a still image I guess. Or?… If I want to do turntable renders, would I be better off doing a quick and dirty retopo to save render times?….
Anyway this is WIP and I am learning, so any thoughts, crits and suggestions are encouraged.
Thanks for looking.
-
2
-
-
Thx AbnRanger
Yeah the gizmo method works OK, but still at some point the curve e-key stopped working for me, and that's the way I learned to use the curves tool most efficiently in the first place.
Will probably try to figure out how to do a bug report soon, unless someone sees something else that I've missed.
-
Here's a short video showing my problem. I did discover that after e-key scaling if I hit w and move the scaled point slightly the curve updates. You'll see that in the last bit of the video.
-
Thanks for the reply. Yes what seems to not be working for me is sizing an individual point with the e-key. clicking and dragging resizes the red point itself, but not the curve at that point. It's worked for me before, but I might have to submit my file for a bug report I guess.
-
Sounds good too Carlosan. I think some sort of deadline is a good thing though, whether your 1hr speedsculpt or a longer challenge period.
-
I'm trying to edit a curve object in 4.1.04A osX, and I can't seem to scale the curve points with the 'E' key. W R Q work ok but E only scales the red point ball itself - not the curve object. It works ok if I double click the point and use the manipulator.
Is this a bug or am I doing something wrong?
-
Well, I hope the challenges keep going. I'm still getting my feet wet in 3d-coat, and mostly I've been too time poor to participate, but for the next little while I was hoping too as work has eased up somewhat.
Personally I like the weekend challenge idea, even if only a couple of people submit, it encourages short bursts of concentrated practice, which may be a better learning experience that a larger project. More frequent and small, and hopefully build interest. But really for me, it's the challenge of responding creatively to a brief, while learning/practising.
-
2
-
-
A short followup in case anyone else is looking for answers. I did some tests with Blender, as follows:
1. Exported .obj with 1 material, 3 textures and 3 UV maps/sets. Reimporting .obj into Blender, now only has one UV map. I.e. doesn't export multiple UV sets to .obj, at least with a single material.
2. Same deal, .fbx this time. Blender didn't even reimport it's own exported fbx, except as a single origin point...
3. Exported .dae, reimported, and all UV sets/maps correct (though may have to tweak material/textures, not sure)
So I'm hoping that Collada import/export will be in Mac 3d Coat soon
. this will solve the Blender pipeline difficulty I've had with different UV sets.Thanks again for the responses.
-
Yeah I'll give blenderartists a go. I've got no problem getting the uv sets happening in Blender, though for this example they need to be used within the same material, as they overlap, and maybe that is the issue somehow.
If I ever figure it out I'll report back in case anyone else ever comes across this hurdle. Thanks for the time.
-
Thanks for the responses. I started documenting what I am trying to do to make things clearer, but I'm starting to wonder if this is a Blender bug/'feature-I-don't-understand'
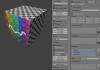
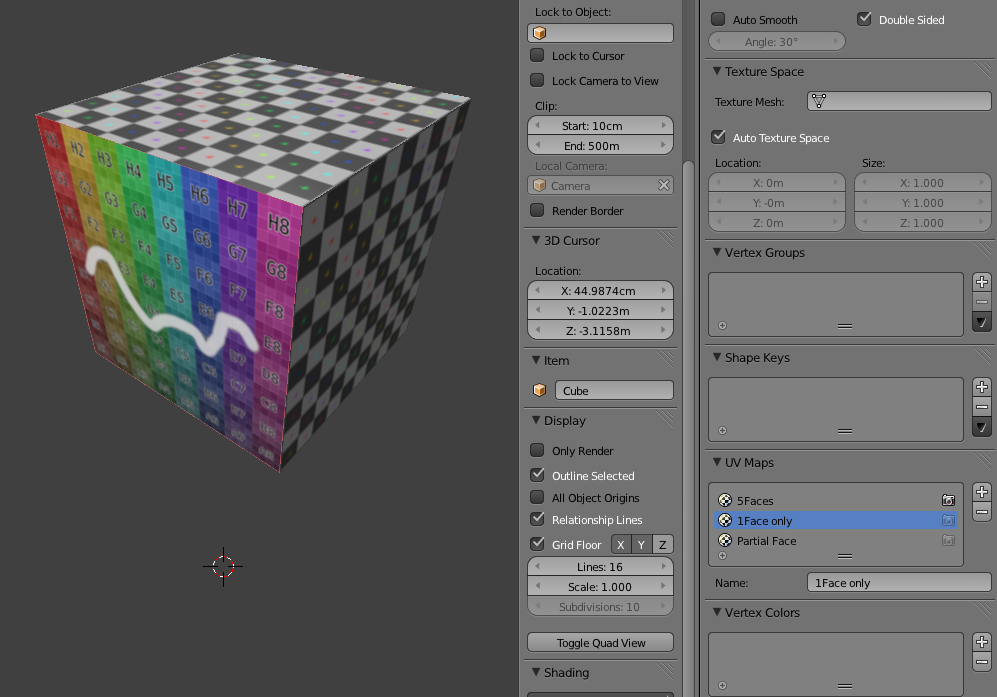
Here's my test object. It has 3 UV maps, one for just the front face, one for the other 5 faces, and one that is just a partial section of the front face (imagine a mouth decal over a high-res face texture, and a low res body texture. That's my ultimate aim btw)
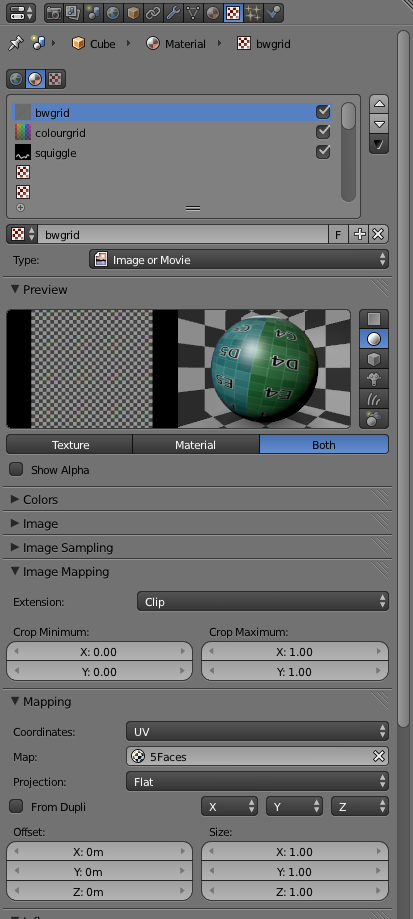
 The 3 textures are mapped to the object within the same material in Blender, each assigned to the appropriate UVmap
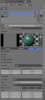 Here's what happens when I export to .obje.g.1
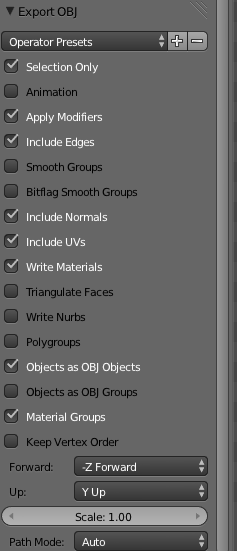
 Here I've selected the 5 face UV map in the object data panel.And here are the export options I'll use (don't understand all of this..)
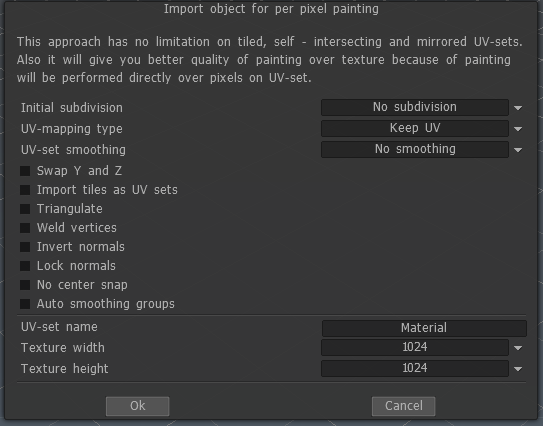
 Import for ppp - only one UVset - 'material'
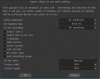
 If I select a different UV Map from the list in Blender before exporting, that seems to be the one that comes over to 3dc.
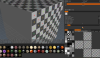
 I've tried various options including splitting the blender material into three, with one texture and UV map each, but I can't get that to behave even within blender. Here only the UV set that has the 'active for render' camera icon will show up (+ the topmost UV), and I can't select more than one UV map's camera button.
 Exporting from this state only included the one Uv map again—the highlighted on in the UV map list (single face).As I said my thinking is that this is a Blender issue (I'm using 2.69 btw). I'd be happy if someone has a suggestion thoughThanks for your time.
 -
Just using BI.
I've just tried an experiment. When I select a UV map in the list in the object data panel, and then export as obj or use the applink, that is the uv map that becomes the uv set in 3dc.
But still only one UV map at a time...
Is .dae-collada importing possible in 3d coat?


Base mesh UVing etc.
in General 3DCoat
Posted · Edited by Hammers
Thanks digman again. Yeah that sounds like a good plan - next time when I can see more than 1 step ahead I guess...
I've got another quick Q as I'm now done with retopo and unwrapping. Will pm you.
Cheers.