FreezeFrame
-
Posts
104 -
Joined
-
Last visited
Content Type
Forums
Calendar
Gallery
Everything posted by FreezeFrame
-
I was curious on how to make opacity maps form a high poly. For example a high poly fan grill with lots of spokes. To make it to a low poly an opacity map would be needed. Render to texture somehow. Use the grill only and bake white textured spokes to a transparency layer with alpha channel(or to a black background and remove after))??......Guessing here, barely done any baking at all. Possible here in 3D coat?
-
Can shapes be drawn in "surface mode"? I used the "click to add points to a curve" brush with blob and works quite well to make shapes in voxel mode.
-
 Nice sculpt. Has it been used professionally anywhere yet?
 -
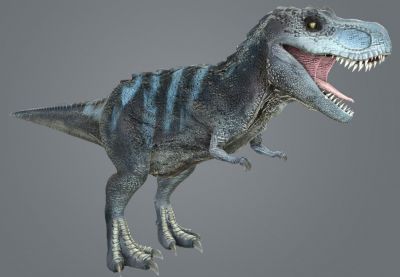 Looks nice, I like dino's!!
 -
If I import to paint on a uv model, I see it's not available in the voxel room. Is it possible to merge there also? As far as I see I would have to "merge object" in the voxel room, make my changes, then save out and reimport to the paint room. Ok, guess that will work. For practice, Trying to save some of the 1024 texture. May as well make model changes and repaint!
-
Great thx. Much appreciated!! I can use auot-po for this charcter and try it soon!!
-
Actually if you paint with a brush instead of splines, while in motion it also snaps to the 2d grid, less hastle for short distance areas.. Handy for sure!! I was wondering myself. Will need it one day! Also using the retopo lines as a quide can work well, depends....
-
I'm not sure how accurate you can get with this way but. It snaps to the 2D grid. Add where you want the points and subdivde the line. I Just tried and worked...
-
If your talking about the splines used with the curves in the voxel room. You just put two points close to the corner. 'Edit points" or use the 2d square plane for reference and forget the confusing numbers! If you mean auto-po. I don't think splines were meant to be at a 90. leave a space at the angle, I guess. Fairly noob here!! lol
-
Hi, I have an old hi poly model from Sculptris. Sculptris uses a randomly generated uv template, so it's not vertex colors here. I would think it is done the same way. Bake to texture map for the low poly. Not sure if this could be done in 3D Coat, since it's not vertex colors. Blender 3D maybe? Just curious, I'm probably going to edit the model(make it symetric across the x axis, most likely, not sure yet. It's a tree character so symmetry dosen't really matter) and have to repaint anyways.....Maybe a new type of model update from it!
-
Actually I can see now the above is a litle messed, may work on it for hand practice. I realized the problems I was having with auto-po and have a decent one to work with here. Back to retopoing the head another day!
-
A basic question about retopo. I was wondering if I should be placing my retopo lines to follow the edge all the way. They get pulled that way by other loops I guess, where I put the color dots in the image. Also the "caps" shown where I drew a line in the image, seem to cause a hassle(they can get bunched up). Probably should have used quads all the way around the edge and worked from the edge? If I used quads all the way around the edge the triangles would have ended on top. Not sure why I'm asking!
-
I found that you can get some interesting results by changing the shaders while painting vertices in the paint room. Not ready for baking until I retopo. So, I was wondering if It gets baked on the model as well? Check the layer 0 visibility to off, if I do not want layer 0(shader) to bake?
-
Actually, got it. srry.. I didn't notice the layer system in the retopo room till It clicked in to check a few minutes later. :/
-
I modeled my character with it's mouth a little closed. So I used the voxel hide to get at the part for retoping. Crashed the first time. Second time I downgraded the mesh to disk and seemed to work fine. Is it possible to hide parts of the retopo mesh that may be in the way? I know the opacity can be set. I would like to hide the lines also......
-
Anything yet? Weld loops or multiple vert.....points?
-
Hi, was wondering where the displacement mapping gets used. Specifically characters and assets? I know this is used more I believe in Landscape, for game engines etc... Is this used more in movie making software like 3ds max Maya for characters and assets? Is there possible realtime deformation with game engines for characters? idk... Or actually is it just better for rendering with some 3D models? Is that it....
-
K, thx. Was curious about some scripts for mesh deformation. Maybe as I get more experienced with it something will come up. For example I used a very basic software and it was so easy to create some cool shapes for rocks and boulders in seconds, just by dragging, I think it was a circle or line through the mesh. Maybe I will find quick ways in 3D Coat eventually that are similar....
-
Final WIP image before retopo and paint.... Well, starting to get a feel for the smoothing in 3D Coat anyways. Stayed in voxels, since I will paint normals on in the paint room, instead of baking the normal details. Maybe somtime next week, I will get through the retopo and post the finished model. Did a quick test and the wings are fine with auto-retopo contour guide lines....
-
Srry, didnt look too far. I was wondering if there is a repository somewhere, too test some scripts out to get use to the process of installing and using them. Seems staright forward though unless writing in code....Basically some scripts here through the threads here idk?
-
Actually maybe next time I will try the splines or curves with a shape and voxel them to the edges I had the problems with, around the back of the wings. Just too get a nice looking uniform edge. I don't think it's too much problem right now..... Actually tried flatten Clay for the wings. Did wonders! Good to go for next round :/
-
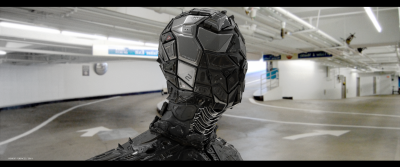
This was switching to Voxel model. Still have the Surface mode, only difference is the indentation in it's head lol!!
-
I did go to voxel. before reading your post. I have one saved as voxel and one as surface though. Went back to voxel, I lost the details in the mouth area and don't see a way to get them unless I go to 2 million poly's in voxel mode. Guess I will have to finish smoothing in surface mode. Another half hour. When going to auto-retopo it states that it is better to have that part checked for voxelizing the current mesh. Ah will have to experiment a little I guess.... What does someone think for polys with this model? I Was thinking of starting a little higher because, not sure? Around 30 thousand tris?
-
Ok, thx. That helps!! I converted to voxels(1 million). Quick test. That helped and did some quick smoothing. So I should be able to finish it tonight and get it ready for auto-retopo. Have to do a couple things in surface still. I'm not quite sure how to set up the spheres(auto-retopo) for problem areas, have to watch the video again. This could take some time!!
-
Around 700, 000 in "surface mode". Actually I read somewhere that the mesh should be converted to voxels first before auto-retopo. Would this be at a good stage to switch to voxel mode to smooth things out, better idk? Will have to experiment later and see.....I didn't want teeth in my first charater models until I pick up speed........