


Vaiktorg
-
Posts
30 -
Joined
-
Last visited
Content Type
Forums
Calendar
Gallery
Posts posted by Vaiktorg
-
-
the method i stated is probably the one used by Quixel by the look of their big box ("MegaScanner") and for what i have seen on youtube videos. it can be tileable if the picture is big enough lol but hey! one can only learn through experimentation! x) have fun sir and good luck!
-
Sir, ive been researching about this and there is a post i made somewhere with some links to what i have found so far.
You should want to shoot 4 or more (depending on your lighting rig) pictures with light coming from different angles with the use of a circular polarized lens filter and in Photoshop set all layers to Lighten. This is your Albedo/Diffuse.
Here you can learn how to make the Normal Map. I recommend also using your lens filter. http://www.zarria.net/nrmphoto/nrmphoto.htmlafter taking the pictures, you can use this so that you dont have to use Photoshop! http://normalmapgenerator.yolasite.com/
For specular color, youll need to do the same with as the Albedo but turning the lens filter 90 degrees or 180, i dont remember lol and then adjust the image in some way (not so sure about this yet, that is all i have found)now, you could go more technical and read about photogrammetry and laser scanning, spherical unidirectional harmonization pattern projection bla bla bla on some Siggraph documents.
-
Here i found an idea of what i believe how Quixel's MegaScanner works.
https://udn.epicgames.com/Three/TakingBetterPhotosForTextures.html
-
Yeah, I've seen it. I've been looking for a LOT of documents and pretty much all of them use either lasers, or projecting lines at a model, or an orbital something something.
-
I found this pretty neat website on siggraph project documents about different methods of capturing normals, albedos, speculars, and other stuff, from surfaces.
So... i was thinking... is it possible to actually get real-world readings with just a camera, a linear polarized filter, a black box, sequential hemispherical lighting on all 360 degree?
What i mean is, taking a picture from a polarized camera thats 90 degrees aiming down to the surface, and each picture will have a different lighting value. Then with some editing, recreate all the maps? Or is it more complicated than this? -
OOO: how come i never knew of this! I must try it :DD probably make a track there!
Thanks!!! -
i found a picture of a book online and tried to replicate it as good as possible in photoshop lol then made it tileable lol
-
Awesome! O: ive heard also that Yakuza exhibit the skins of the dead chiefs or something like that :P and also a few medical books and bibles are bound in human skin! i made a texture of human hide if someone would want it x)
-
Thank you guys!

It will be kind of a dried skin kind of texture! and yes, i think so too!
I'mma try to add some volume without loosing too much detail already lol! But it is greatly appreciated!
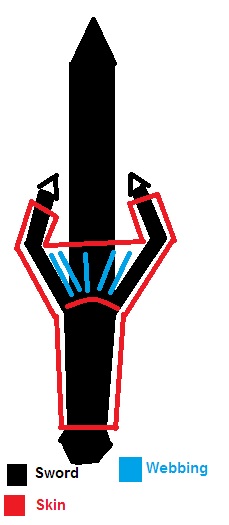
 I was going more of a "metal sword wrapped in skin" cuz of how i made the skin look on the pomel of the sword, The place where the fingers meets the hilt, was thinking on making it like some sort of webbed "skin" between each fingers, but i cant manage to make it look good lol
-
Well, BETA 2 worked wonders and better than i thought actually
Happy bout this!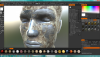
-
It kind of magically repaired it self ._. cuz i (sadly) re-did the work lol but i really dont know how or why this happened.
-
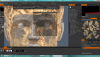
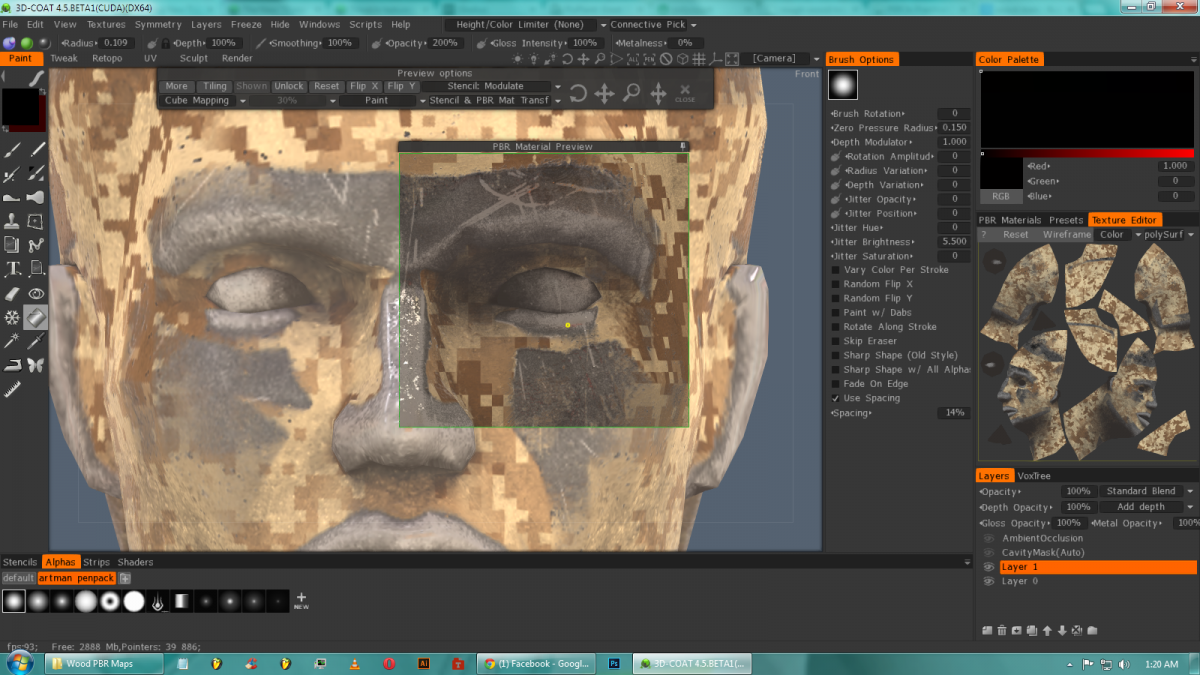
Did what you ordered and still can see a difference, the lights are conforming better with the normals and the masks in the model through the material previewer than the actual viewport. You could clearly see the difference in the texture on the painted camo and the depth on the paint over the bare metal, vs the viewport texture.
Will try the same again with Beta 2 and come back!
-
Nop, same results, exactly how you did! Quick 4K res test, same results!

-
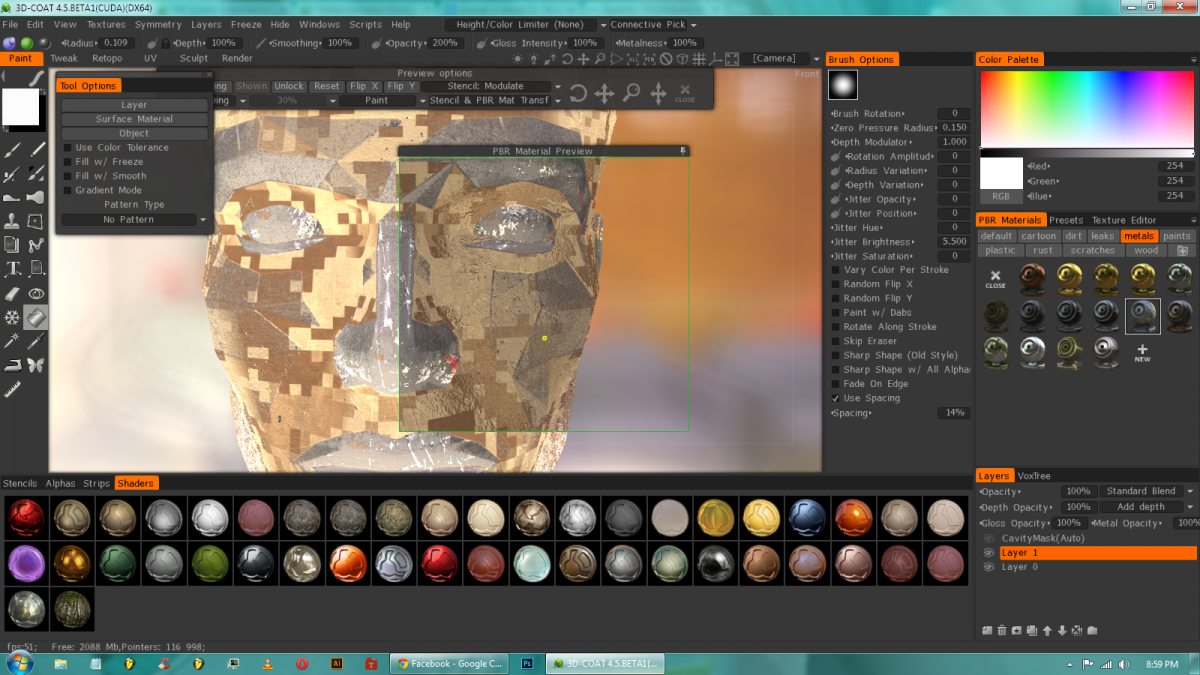
Im having this issue where i cant really see what im doing because the viewport and the render room, is not showing me the correct visual representation of the PBR material. In contrast, the PBR Material Previewer works wonders and it looks how it is supposed to. Is this an BETA problem or is it just me? I added a picture of what i mean as an attachment.
Yes, i have tried everything and read everything, even work with the lights!
-
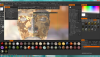
So i started making my first full project on 3DC and its a sword!
im still new at this so i wish if you could lend me your advice! Im not making so many details since this is only for a game asset! Tho, i want it to look good! I still need to paint it, retopo, bake and finalize!

-
 2
2
-
-
If you can see in the image, i have various parts removed from the sword, and divided them into layers with the use of the "separate from hidden". They're supposed to be different meshes. I made the other layers in ghost mode so that i can have a visual representation where should i move the geometry over the other pieces. But it seems that there is still hidden geometry on the sword handle, where the blade should go.
-
Ok so i manage to make a simple mesh and separated everything so that i can now start sculpting BUT! i came into this problem! I dicided the "organic part" of the model, from the metal ones. Now, when i try to sculpt over the place where the blade should be, part of the blade appears, so i thought to myself, probably i hvnt deleted the hidden geometry! ok, so i went to Geometry > Delete Hidden and went ahead to sculpt.... NOP! the blade's hidden geometry is still there!


-
I believe that the best way to get this PBR painting would be with something that could let you visualize better what you are doing. The PBR painting is EPIC, no doubt! but, its rather difficult to see how its looking if the onbord render engine wont work with it. Why not step it a bit further like in Substance Painter/ Marmoset Toolbag?
-
i vote for this... or a procedural material editor with built-in mask painting with the use of the brushes already in 3DCoat.
That way, materials can be made inside 3DC and used for painting. -
Thank You!
-
Every time i import an .obj to 3DC in any way!
Import > .objor
File > New > Vocel Sculpting/Surface Sculpting
The .obj appears off center and it really bothers me! I tried a lot before coming here, but i cant quite get it to work.

-
Thing is, its not actually on a work file! I'm still exploring everything, and in every chance i get to try to see if it works, it doesn't!
-
I'm having a problem or difficulty with the "Separate Hidden Part" option. When I hide a piece, with the Surface Hide Tool, and try to make it come back as a separate volume, it wont come back. Not even the dialog box opens.
-
Got it to work! Thanks guys!


PBR Clear Coat & Glass (no refraction?) lol
in General 3DCoat
Posted
Well... i tried making some carbonfiber material with a clearcoat and i cant manage to make a clear coat with layers..... and much less glass.. D: any help?