


rooattack
-
Posts
37 -
Joined
-
Last visited
Content Type
Forums
Calendar
Gallery
Posts posted by rooattack
-
-
1 hour ago, AbnRanger said:
These videos might also give you some ideas:
In Surface Mode, you can use the Flatten Brush in a similar manner as the PLANE tool, in Voxel Mode. Just click the ON PLANE option in the Tool Bar (just above the Viewport), when the Flatten Brush is active. Between the Hide, Plane/Flatten and Cutoff tools + Pose tool (Swiss Army modeling tool in 3D Coat), you can create some really amazing shapes
I think you answered my question. Thats exactly what i needed, I think. That's really interesting. I can't get it just right quite yet but I think that solution is the answer if I can get it to work how I need
-
Man...i ran into a crappy bug. Whenever I freeze something then choose another tool, it corrupts the selection into this weird blocky thing. This has happened with the model itself on another bug I submitted that corrupts the model itself.
-
12 hours ago, AbnRanger said:
There are so many different tools you could use, but what I would probably try first is use the Freeze tool, in Surface mode, to make the selection with the Close Spline or 3D Spline draw mode > Invert selection (CTRL + SHIFT + I...just like in Photoshop, or invert from the FREEZE Menu) > Smooth the selection from the FREEZE menu if needed > use the Polish brush from the PRESET Panel to softy trim only the selected area. The Extrude brush can extrude along vertex normal and such, but I think the first technique is what I would try.
The other option is to use the POSE tool > PAINT SELECT mode > use either the standard gizmo to flatten the selection a bit, or use the FreeForm Lattice for more control
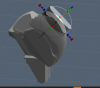
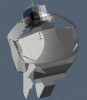
Thank you so much! I will try those. I know its going to take a while for me to figure out how to actually apply those tools to this situation, but you've given me great direction. Here's another example of what I'm doing
-
29 minutes ago, AbnRanger said:
You mean you want to create an indent that looks like the part is separated? If so, you are using the wrong draw mode. Use the Spline Stroke draw mode:
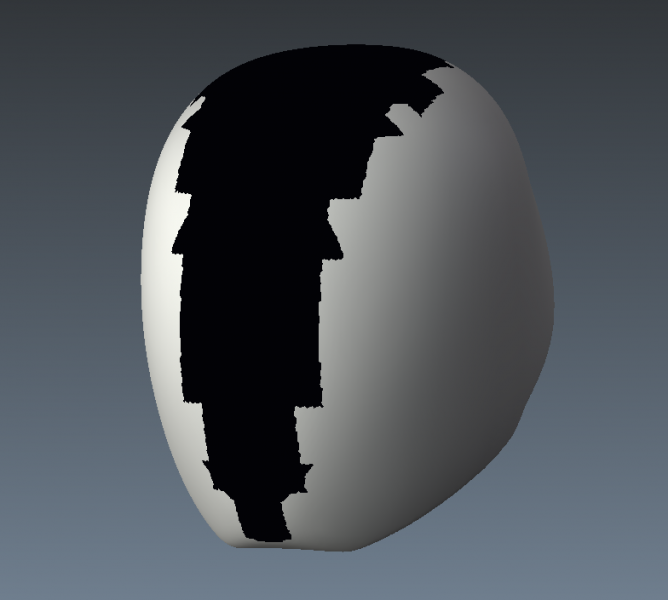
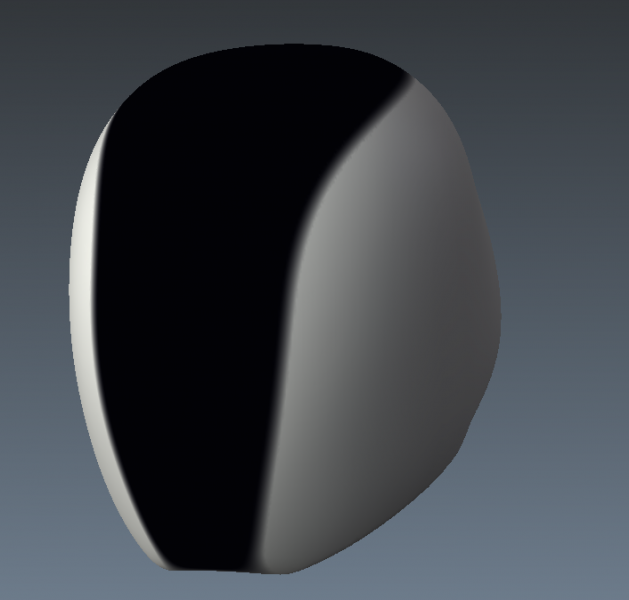
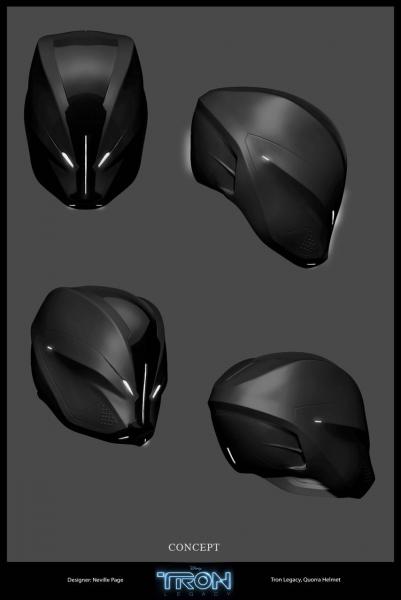
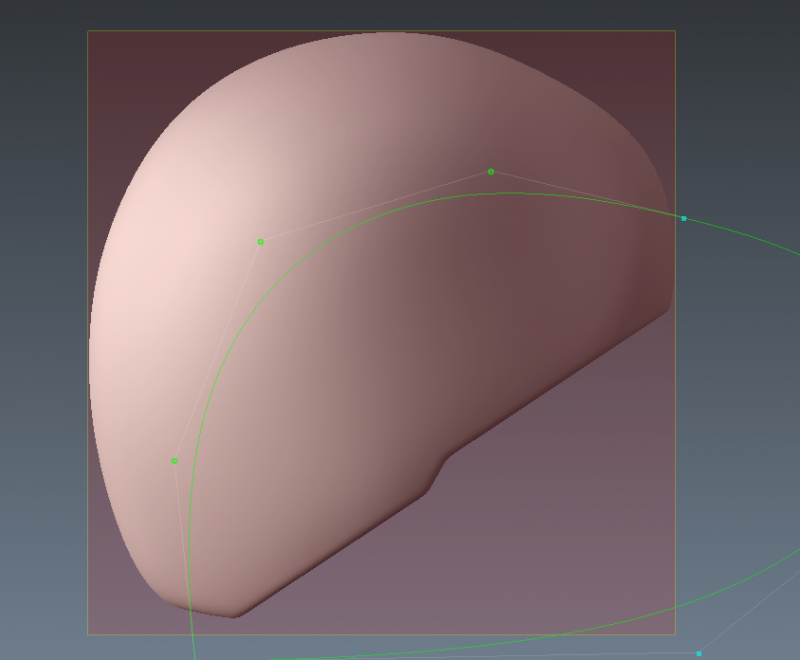
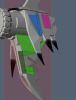
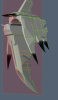
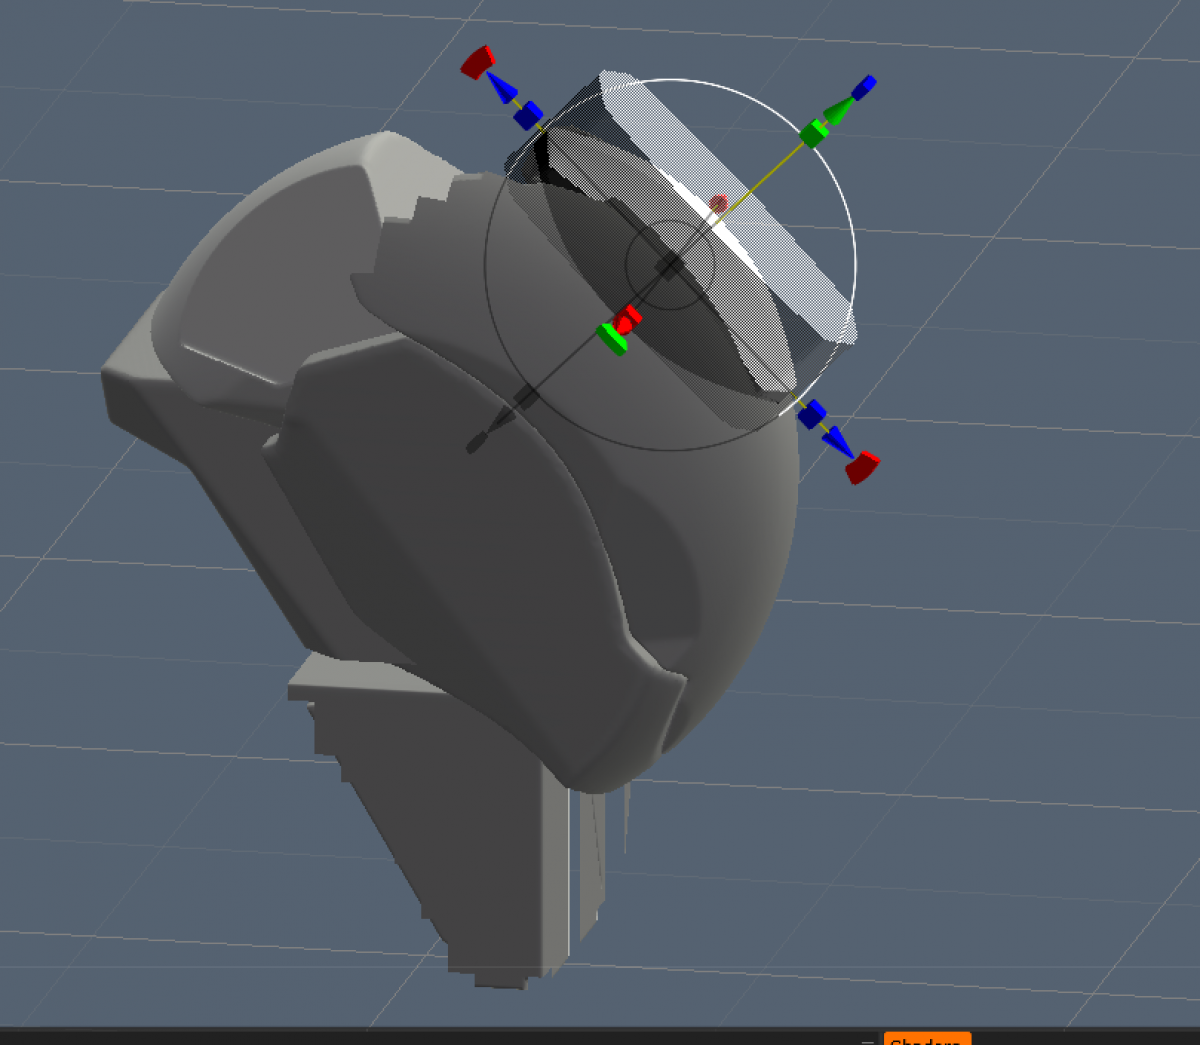
No, I mean I want to cut out a piece of the sphere but follow it along the curve of the sphere. I know how to make things look separated by splitting them or creating indents. I'm talking about the shape of the helmet, not the splits in it. Look at how the helmet curves. From a sphere, you would need to somehow cut out that shape and following the curvature of the sphere so it doesn't just cut out a little chunk of the sphere.

-
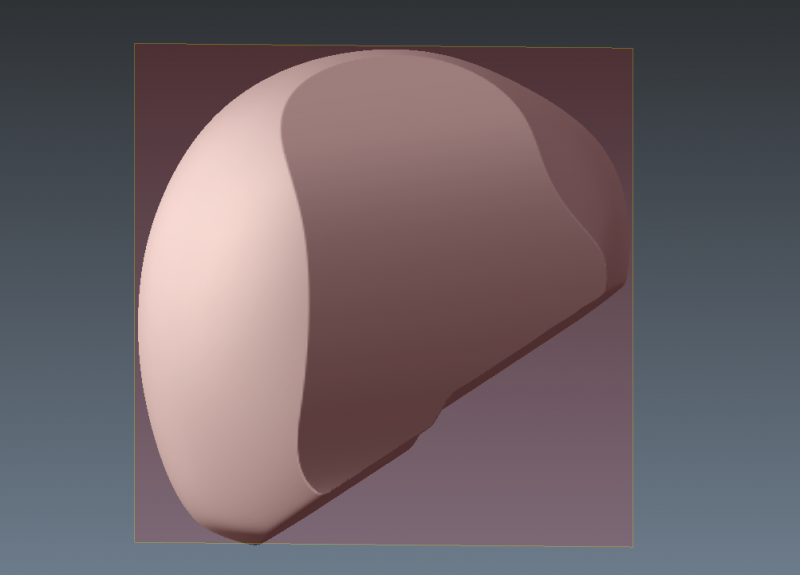
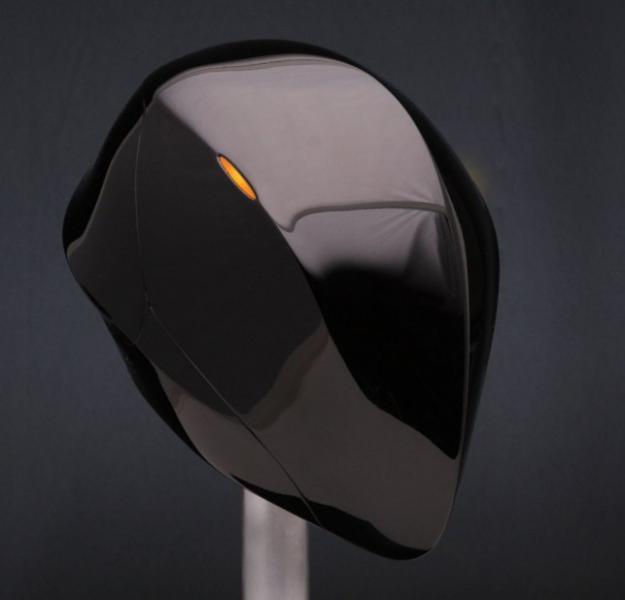
Hi everyone,
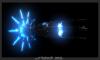
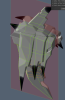
I am having the biggest problem trying to figure out how to cut a curve along the shape of sphere. I am trying to mimic the curve on the Rinzler helmet from Tron (see attachments). I feel like I've tried everything and pulling my hair out. I just need to cut along a curved form, like cut a shape along a sphere, but whenever you do that, it just cuts a small chunk out. I the only thing I can do it keep cutting multiple parts out of the sphere but it isn't fluid. This is where Maya and other 3D programs seem so much easier because you can just select polygons and bend them to a certain form. Sculpting in 3D coat seems so difficult to do this.
I have attached the base model I am starting with, another shot of a curve im trying to cut out, and the tron helmet. The curves on the helmet seem so complex even though it looks simple. Any help is VERY appreciated. I'm actually getting this manufactured so I would love any feedback.
Thank you everyone!

-
I just captured a video of it! See attached. I wasn't even on the layer that it corrupted. I was importing an object on a separate layer then clicking on another tool to exit the import mode.
-
Hi. Its happening quite often but what helps Is to convert mesh to global (assign shortcut) So after every major tweak, make it global. Maybe its not a right solution though.
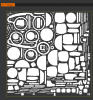
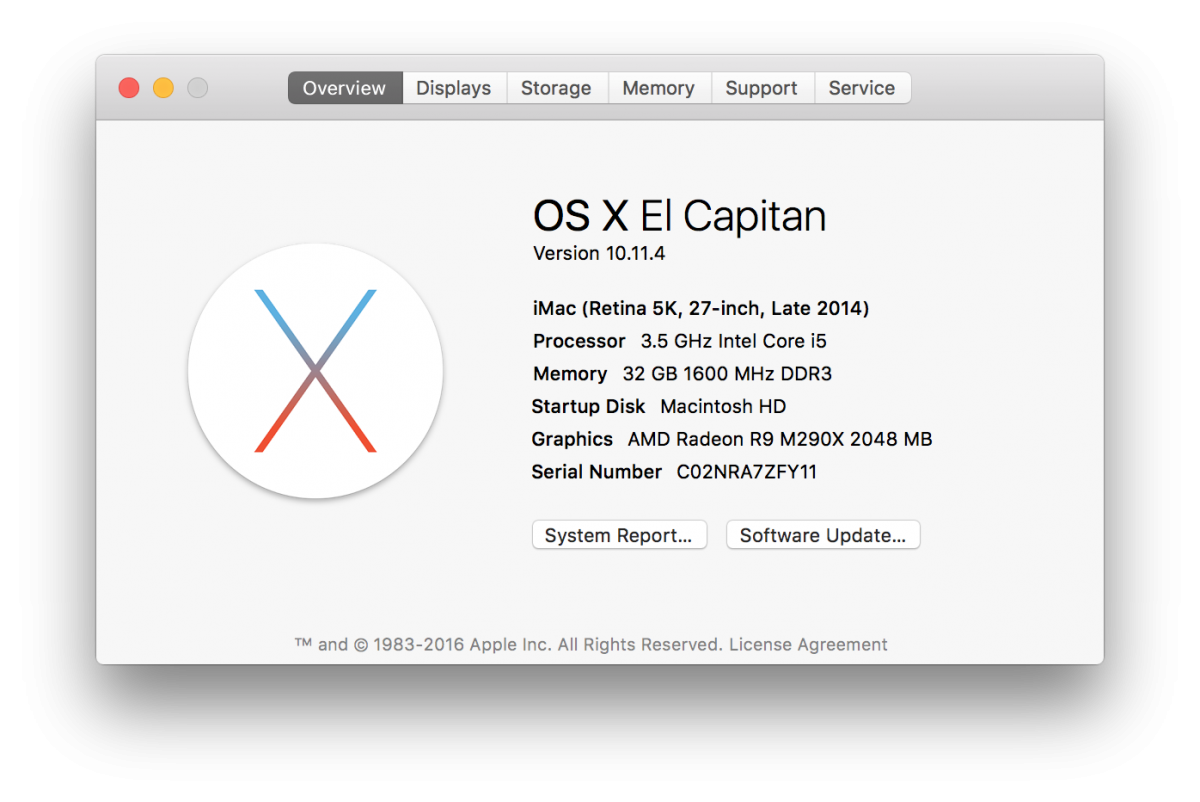
When I do that, it changes the position of the object sometimes. I just found out that this is consistently occurring when I 'subtract' elements from other elements. So if I use an 'import' object and hold 'ctrl' to subtract that shape from another shape, it happens. Or when I use a Primitive to subtract from another object. I wonder if it could be some kind of graphics card thing. Attached an image of my Apple hardware build

-
Haha I know it says
If you believe you actually need to use the strokes for the auto retopo (again, you can just skip it if you want), then I recommend watching these videos:
They're pretty long winded, but probably worth it. Right out the gate though, I like how in your image the pop-up menu says "Don't cross strokes", and yet you cross all of them! The strokes for auto-retopo are just guides for meshflow, you wouldn't use them in the same way you'd use strokes to manually retopo.
Haha I know it says not to cross strokes. But I also found a video by the guy who does all of those videos, crossing all of his strokes and he got the most clean retopo doing it. However, that may have been a manual retopo he was showing. So I actually tried it without doing that first. If I don't use any strokes at all, I never get any polygons. And of I do, they're always totally out of wack. I am watching those videos right now
 thank you!
 -
Honestly, if you were happy with just chucking out obj's straight from the sculpt room, you can definitely skip the strokes-as-guides bit of the autoretopo. Did you know that you can just click "next" or whatever the button is, without laying down strokes? Same goes for when it asks you to paint areas of priority, you can just skip that too. The main thing I think you want to watch out for it just your desired polycount. Let 3dc take care of the rest.
I have come to a final workflow, maybe. However, it requires merging everything together which concludes a different look than i really desire. And also doesn't really keep my raw high poly look.
I'm going to merge all of my objects into a single object. Use 'Instant Meshes' to retopo it by simply clicking a button > import that back into 3DC and manually uv map it by selecting the clean polygons. Then bake a much higher poly version of that onto the retopo model. The only thing I am still trying to figure out is how to mask out sections of the high poly version without doing a retopo to it.
-
Add camera shorcuts in Perspective mode
At render room, If you check Render Frame Sequence, it should render your turntable instead of an image if you hit Render button.
or to use Render Animation:
possibility to render blended states between several saved scenes.
In so way short animated illustrations may be easily rendered.
Thats such a great idea! I forgot about saving camera shortcuts! Only issue is, I don't understand how to actually import textures onto your model. By this, I mean, importing multiple normal maps that relate to 'arm, head, feet, legs'. They all have their own normal maps and baseColor so I would somehow need to mask off these textures to apply to only those objects
-
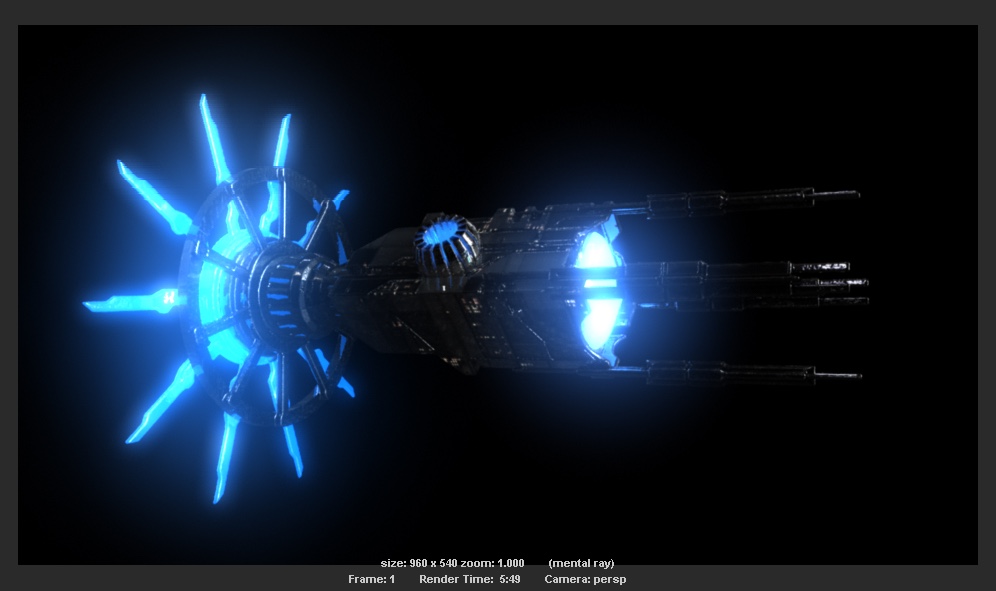
I got Maya to work! The last guy who did our modeling could not figure it out, but this new animator got it done in just an hour. Wow, it is so refreshing to be working with knowledgable people. Attached is the output from Painter vs Maya. They look nearly identical except the environment is rotated different so the lighting is a bit off.
I am on a mission to master retopo. I know how valuable it is, but I still always find myself having to do it manually. I watch videos of people doing it that make it look so easy. I also attached the way I have done my strokes for a model. Maybe I am doing that wrong (obviously I am, just dont know why). How do you treat curves that vary so much?
I attached the actual 3D coat file too, if anyone feels bored enough to take a look at how they would stroke it. I really don't expect anyone to spend the time doing this. But feel free

-
To import the fbx model in Paint Room with no crash use
Import for vertex paint
you model is a high poly withouts UVs, import for PPP is not the option to use
That does work!! However (ha), when I try to do this, it comes in with no UV map at all because that import option doesnt include auto-uv map (attachment)l, which is expected of course. I will have to figure out how to mark seams on a model without retopologizing it (doesn't really work with voxels).
DAZ Studio will let you render your imported models in transparent PNGs. You could animate and render them there too.
OOO I will try this

-
I have my animator trying the Maya import thing again. She is going to let me know if that works. Our last animator/modeler tried it and said it didn't work so maybe this new one can get it figured out. ::cross fingers::
-
You should take a look at the app links forum for 3dc integration for different packages:
http://3dcoat.com/forum/index.php?showforum=60
Ultimately though, getting the same sorts of results isn't difficult in theory, most of what you're seeing in the likes of 3dc and marmoset is just image based lighting, and you can set Maya/Max/Modo etc up to use HDRI environments, then it's just a case of making sure your materials are set up in a way that would make use of those environments with their spec/gloss roughness/metallness textures. Granted, it's not likely to be a 100% match, but if you're doing sequenced animations I would prioritise a bit of time in getting your traditional modelling/animation app up to a good quality of rendering.
I totally agree with the rendering comment. As far as Maya goes, we could never get it to look even somewhat close. I attached how I export textures. I suppose I can try it again. I believe I will have to convert metallic to specular and roughness to glossiness.
Thanks again for all your help and advice. I am getting to the end answer very soon. At least some solutions.

-
I know this looks like a mess. But I don't understand how you do strokes with models that have so many varying angles and cuts. Second attachment is the output. If i could understand the stroke thing, none of this would even be an issue. It is a serious lack of auto-topo understanding on my part. I know how to do it manually but that takes forever,
-
How are you handling the animation and render? I realise it's a bit off-topic but I've not seen you mention anything like maya/max/blender/modo etc? I'm hoping you're going to have rigged and animated objects before you reach the rendering stage?
Marmoset would be a strange use of rendering out animated 3d sprites, but I'll admit the thought is pretty interesting since it can handle animated exports. Whenever I've had to do sprites from 3d objects in the past I would always have 3ds max as my last port of call, that way if an animation had to change, I'd just change some keyframes and render off the sequence again, nice and easy. Very good for iteration.
So this is how we have to do it, right now at least. We animate in maya, but Maya does a terrible job importing textures from painter and making them look exactly like it did in painter. It's not very good at PBR and takes years to render. So we have to actually save multiple versions of the model as they are stuck in a new position in the animation. Like saving it in key frame #4 then a new one at #5 and so on. Marmoset allows me to replace the model with a model in that new key frame without repositioning the model's angle that I was last at in key frame #1 for example. So I can screenshot that position then pack them all into a Sprite and voila! Seamless animation. It is tedious and I hate marmoset but it works.
I don't know how 3DS max handles importing PBR and exporting animated transparent screenshots, but if that works that omg I will be picking that up and you just saved us 1,000s of hrs, really. My life would be complete
why not to use retoporoom for uvmap ?
or paint the high poly directly in paint room ?
Do you export the highpoly object from 3DC sculpt room to another app ?
a step by step workflow could help to understand your pipeline
This is all explained up top in the above thread of comments we made previously
-
I'm have actually not been bringing them back into 3DC after painting. Painter was my last step. I export the object from 3DC, then import it into the UV room to UV map it, then I export that to an fbx or obj file so I can paint it in painter. Painter is my last and only step. Then I render it from there.
However, I did want to see if I could bring my model back into 3DC even after painting it because 'rendering' is a whole separate issue in itself. I sometimes have to apply my textures I created from Substance Designer or Painter into a separate program like Marmoset. Rendering is really the last most important thing as it's the thing people see in the end. So I am exploring every application for that to see which one performs the best render. There is a very unique way I have to perform these renders based on the way our video game works. (3D > animation > 2D Sprite sheet). Painter has the best bloom and painting effects. 3D coat is best for modeling. Marmoset allows me to replace and fbx file with a new model that is saved in an animated frame. They all have certain purposes. My goal is to rid myself of Marmoset and even Painter for rendering.
-
You're right! Wow I knew I was doing something wrong. So basically I have to retopo each object (layer) at a time? Meaning I retopo one layer, click on the next layer, retopo that and so on? How does auto retopo handle multiple of these or does it combine it all?
-
Rooattack, try this experimental software out: http://3dcoat.com/forum/index.php?showtopic=18576&hl=%2Binstant+%2Bmeshes
AUTOPO is a nice tool to use, and it saved my bacon more than once, but it is also quite slow. If you have thick and watertight meshes, like in that FBX, it should work okay and you'll get the result pretty fast. Of course, you will have to tweak and reduce your retopo mesh afterwards a bit (in retopo room).
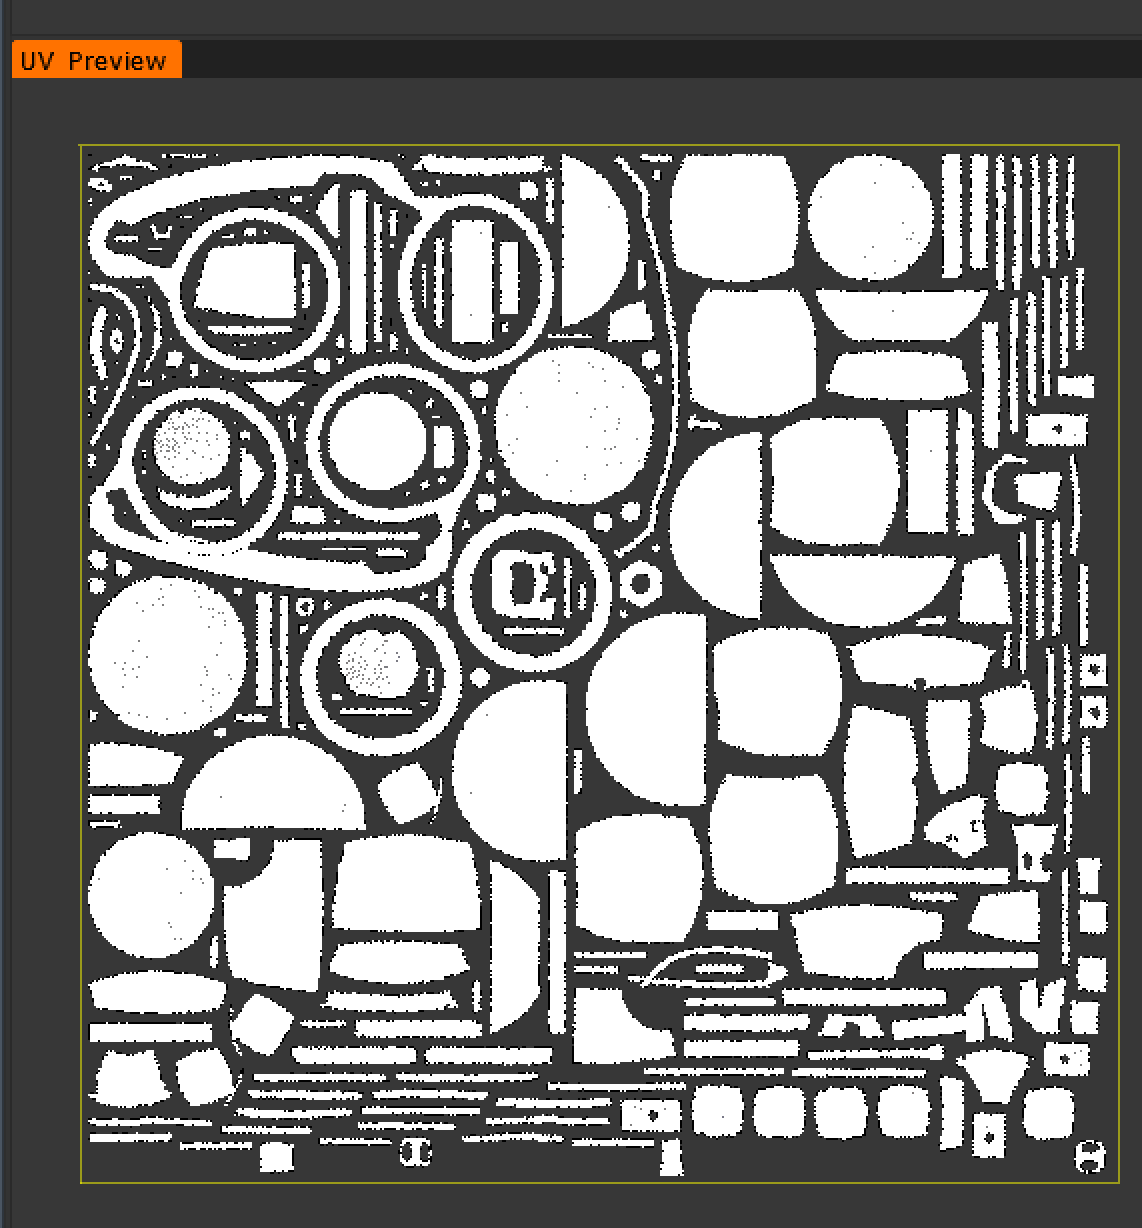
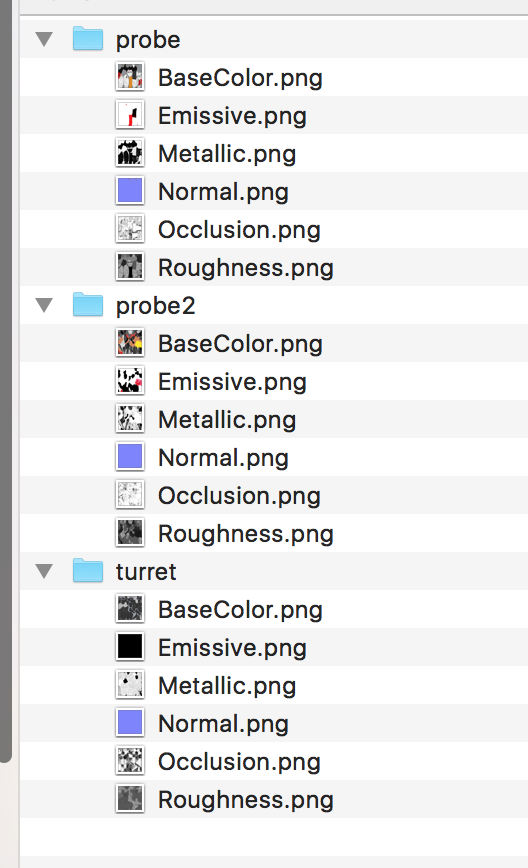
I just used this tool last night, but again, it removes my uv sets. When i export from Substance, i get multiple texture files (I.e. normal_map_head and normal_map_legs). How do i combine all my textures into a single model with one UV? Man, this is getting so complicated! ha
-
Also, even when i use the auto-retopo tool, it seems to combine all my meshes into one layer. So i lose the uv mapping.
-
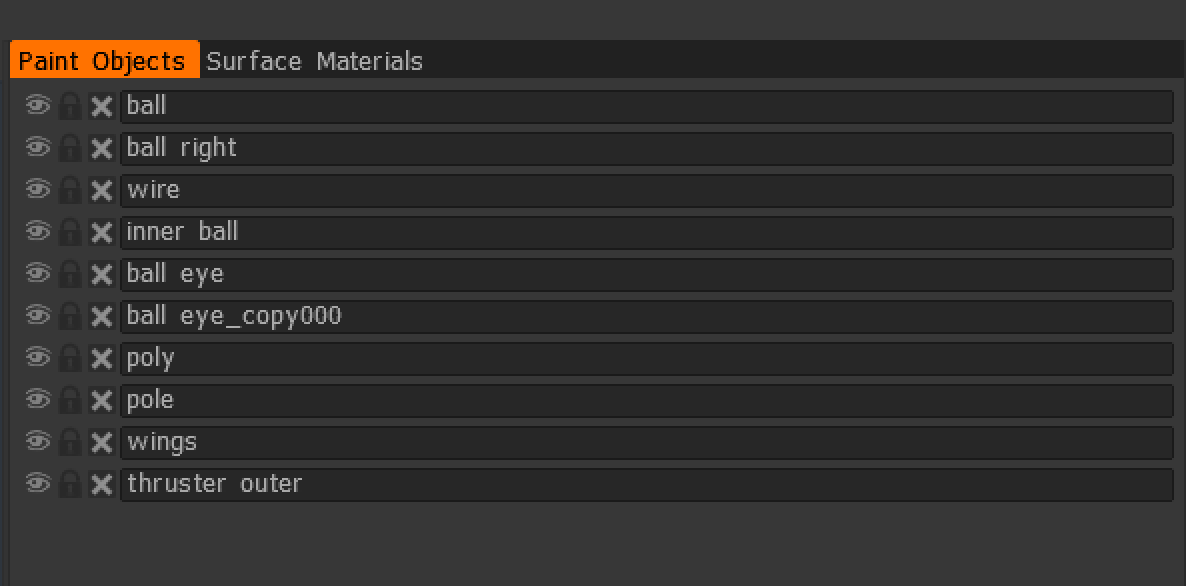
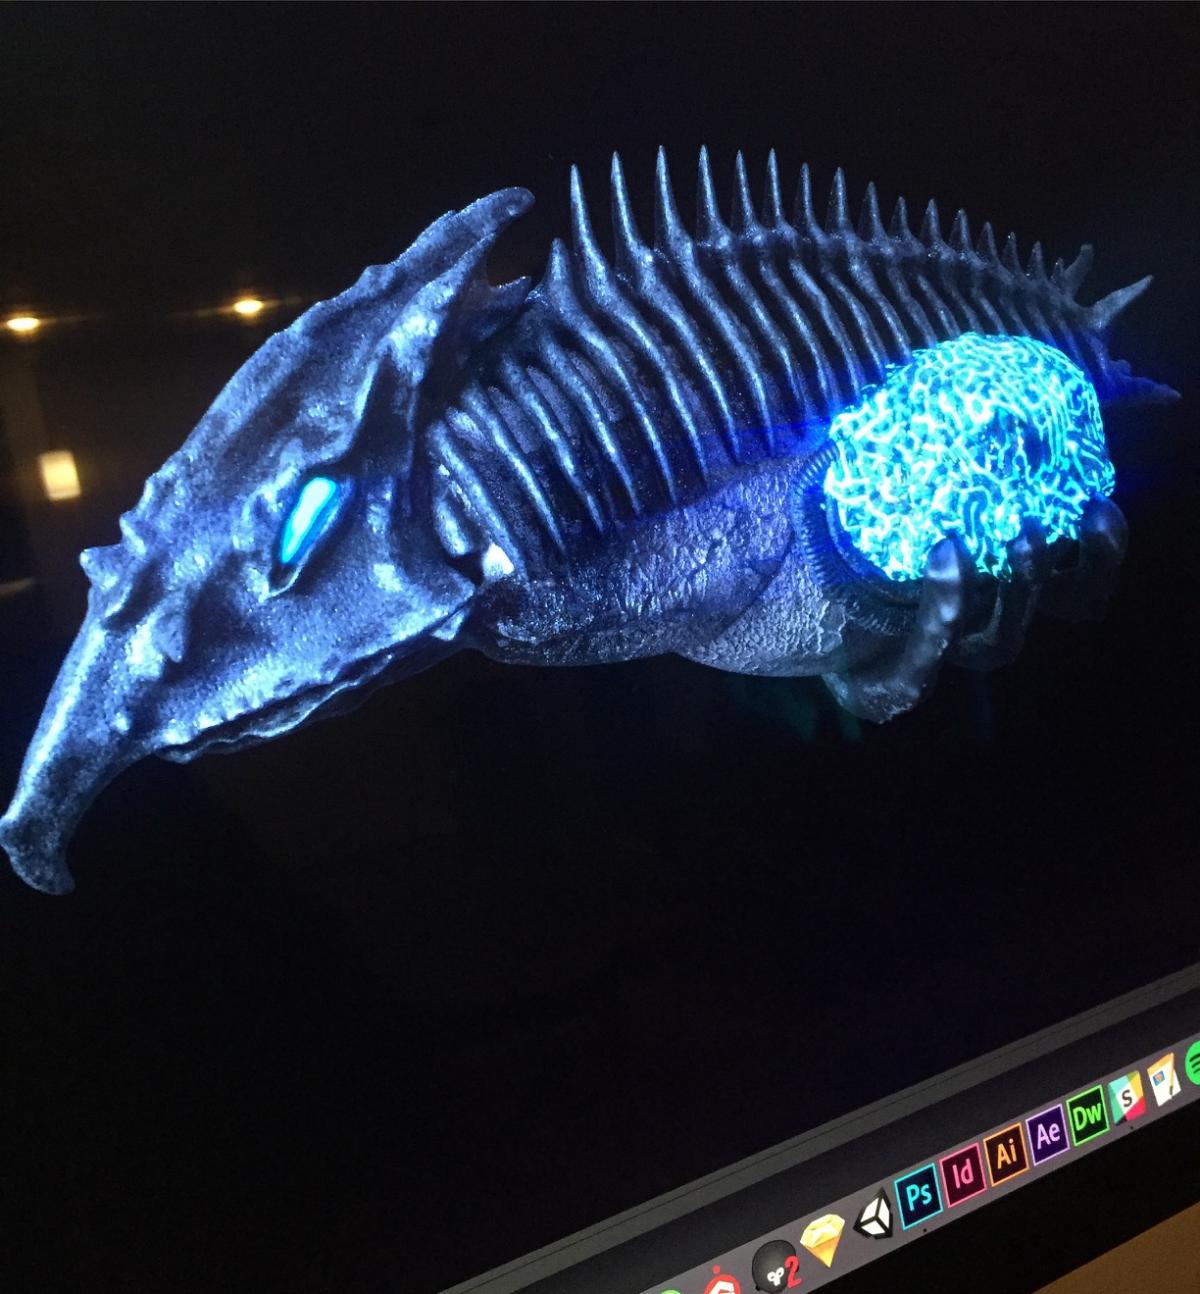
Here's an enemy that we used. You can imagine trying to retopo this. We have 200 enemies in the game and 2 weeks before we launch. Having to retopo all of this would be a nightmare. Auto retopo just seems to not work no matter what I do with these things. I end up having to manually topo it. I really just want to pay someone to topo these enemies for me
 or just pay someone to train me correctly on the auto-retopo.
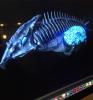
-
Well, auto-retopo is only a few clicks, and you can set the estimated poly count to be high enough so that you retain all of your sculpted detail. I suppose a drawback of this is you would need to do it for each piece in order to retain multiple UV sets, or rather independent UV sets for multiple objects. But again, this is just few clicks per separate object. That said, you could also look into 1 UV set but using multiple objects, PBR materials in 3dc and substance I believe can work on a per-object basis rather than worrying about a dozen texture sheets for each of your models. I realise I'm being vague here, but we can look into it more if you reckon it's a path worth walking.
One thing that might make your life easier as well is to perhaps ditch the use of substance painter? 3dc is more than capable of dealing with the PBR workflow.
The obj difference is intriguing though, could you perhaps upload an obj you're having issues with, rooattack? If obj's have UV's created automatically on export from 3dc, then I wonder if it's treating it as multiple objects = 1 UV set, and the confusion is coming from painting on a per-object basis in substance? Rather than multiple UV's, without looking under the hood you wouldn't really be able to know the difference.
@ajz3d, yeah, I would assume that the modo export has probably created those UV's, or the import to modo + export is what's causing it. Either way we know the original export from 3dc has no UV's, which seems to be the issue 3dc has in importing it straight back in. Admittedly, I did not test with importing his FBX to the UV room directly (is this even an option?) I imagine it might throw the same crash back though.
1. Great advice, both of you! I'm very impressed by the user engagement. It helps people more than you can imagine. I honestly can never get auto-retopo to work right. I watch tutorials over and over and think im doing strokes correctly, but just comes out being a mess. I am trying to find something that helps me really understand strokes, rather than just the few points like not putting them close together or intersecting.
2. Anyway, Substance in my honest opinion (and I'm sure you have your reasons for loving PPP instead) is much more powerful than 3DC for painting and so much easier to use; it is of course the entire purpose of the product. 3DC is so much more tedious in my opinion. They can do similar things but 3DC makes it way more difficult to perform a simple task. Painter just feels like Photoshop and has a really easy to use interface. Plus the rendering is amazing
As for the OBJ file, this is what 3DC does. I make a model with layers > export the model to obj > import to per pixel painting > export that as an fbx or obj file > then import to Painter. 3DC only recognizes a single UV set when I import the OBJ, but Painter recognizes the actual layers that were originally in my 3DC project, so I am able to use those layers as sort of a mask when I'm painting. I can also turn on/off those objects of the model if I dont want them rendered. The reason I can't separate these objects into multiple files and paint them separately is because i need to be able to render the model as a single transparent PNG. The next comment below is the reason why.
So background on our video game in case you care and why this is such a huge issue: Our video game is a completely 2D sprite environment. However, we trick the viewer by creating everything in 3D and using parallaxing, then rendering out high poly 3D sprites. I still have yet to find an application that will render out 3D animations into transparent PNG's. This is why I use painter. I model everything in 3DC, get the texture down just right in painter, and render out my model (but i have to replace the model over and over with the new model from the next animated key frame in the animation).

-
Okay, I've just grabbed your FBX from the other thread.
I think I know what the issue is. The objects you create in the sculpt room do not have UV's, and you're trying to then bring that data into the per-pixel room where it's expecting UV's.
Granted, 3dc could handle this a bit better by applying some arbitrary mapping on import, but ultimately you're dealing with a flawed pipeline from the get go.#
If I import your fbx into 3ds max it gives a bit more information on the issue, and unlike 3d coat, 3ds max will apply "some" mapping info onto the mesh that will allow it to import. Though its worth noting that the mapping it applies is basically redundant.
If you look closely at the second image there, in the UV window you'll see a very small orange cross in the bottom left, this is me selecting all of the UV's for that chest/abs piece. The same result is applied on all other pieces. Because they did not have any mapping information to begin with.
You should really look into the auto retopo tools within 3d coat, as this is typically the best way to get a voxel sculpt into the realms of a normal UV mapped mesh for per-pixel painting. Your workflow at the moment is a pretty bad one.
Thanks for your advice!
The whole reason I am trying to import the fbx file is so that I can UV map it
. Are you saying I have to retopo every model I work with? I literally don't have time to do that with 200 models I am creating (we are creating high poly models and rendering 2D sprites out of them, so we have no need to retopo anything ). The thing is, it works fine for OBJ files and I can go in and at least maintain texture ID's so Substance Painter can use it, but then I lose the ability of multiple UV sets when I use OBJ. I think 3D coat should be able to import what it exports regardless, especially if it handles one file but not the other. At least remain consistent. -
Here is the log file


Voxel corruption bug since v4.0
in General 3DCoat
Posted · Edited by rooattack
This has been a bug since I've owned the program and it's so frequent and not being fixed that I'm starting to think about switching, which is really disappointing. It requires me to completely redo the model. I don't know why it does it, but i just opened a file and the model was corrupt. It also happens while modeling. BUT, I found a workaround, which is really odd. I've uploaded the 3D coat file ("6.b")
1) Problem: The polygons corrupt and become 'jagged'
2) Solution: Resample the model and it doesnt matter what value you resample it. I don't know if this will always fix it but its working for now
6.3b