Axel6430
-
Posts
19 -
Joined
-
Last visited
Axel6430's Achievements
Newbie (1/11)
6
Reputation
-
Now that I've done a HS workflow, I'm trying to figure out organic modelling. Thought that starting with a face would be a good idea to improve quickly. Used a reference to help with the modeling of the head. I think I'm satisfied with the fleshy part for now (might return to it after a bit to give it collar bones, neck muscles and more defined shoulders), though I wish I were able to make it a bit more faithful to the reference I was using. I guess I should be happy it ended up looking like a human in the first place. I'm now at the hair phase, which turned out to be unexpectedly difficult for me. So far I'm using artman's broad preset along with pinch to create the flow of hair, but it's still a bit limited. Are there any good techniques for sculpting hair that might help me?
-
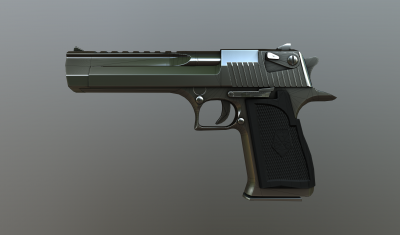
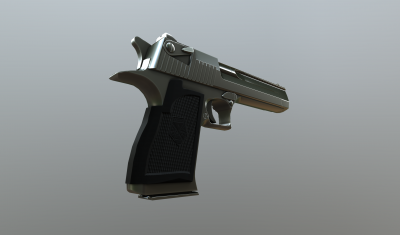
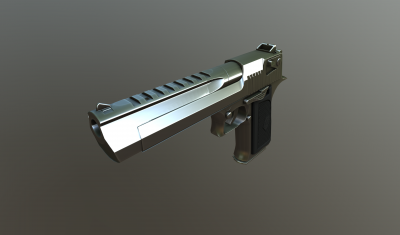
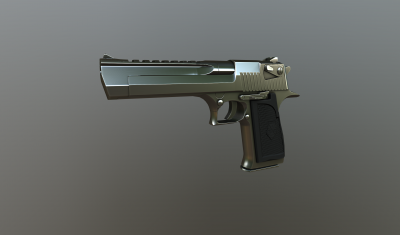
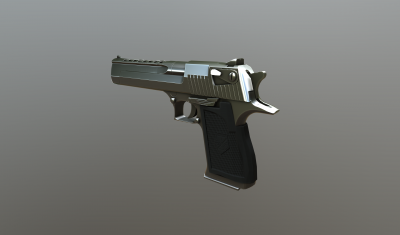
My first hardsurface model, a Desert Eagle pistol. Modelled, textured and rendered in 3DCoat. Manual retopo, 3412 triangles.
-
-
Alright I see, so basically I can use "more on convex" for details on bumps like scratches and "more on concave" for details in small holes like dirt? That's pretty useful.
-
Thanks a lot for the help! I'll look into it. I just finished the normal maps for the grip, how does it look?
-
Are there websites that serve as PBR material banks? Would be pretty handy. Ideally I'd love to be able to make my own shaders. Are there any good tutorials on how to create realistic PBR stuff? I did the whole thing in 3DC, made the voxel object with boolean operations and the occasional pose tool. Good idea for the grip, I'll look for some nice logo to use for that, and do diamond pattern for the normal map. For the text thing, I guess I could retopo the frame to be asymmetrical. I still need to blend the UVs of all the paint objects into one, though. How can I do that? Use the UV room?
-
Decided a gun would be a good entry point to learn the ropes of HS modelling. At the painting phase right now : Maybe a bit too simple-looking material wise, but I'm not sure what details to add without cheating and making it engraved or something. Maybe add a bit of wear on the chrome?
-
That seems to have solved the problem. Thank you !
-
This is my first time trying my hand at modelling, so I decided to start easy and do hard surface stuff first. I (almost) finished the manual retopo phase (which was really tedious, far from the "just wrap everything in polygons" I expected) and will soon move on to painting. I have a small issue, though. The frame and barrel (upper part) are symetrical meshes, but the lower part is a single mesh that takes both sides of the plane. As a result the AO is symetrical on the upper part, but not on the lower part, which makes it looks like one side has a lighter color than the other: Can someone here explain to a newbie like me how such a problem can be handled? Is there a way to ensure the AO "sources" are symmetrical relative to the symmetry plane when baking?
-
Hi, I'm from France and this is my first actual attempt at getting into 3D (I've tried my hand at Blender a few times before but quickly gave up). I've decided to try out 3DCoat after watching a vulgarization video about standard modelling workflows for videogames (from a series named Pause Process, really recommend it to any French speaker, it explain in layman's terms many technical aspects of the videogame industry), the way it described the voxel approach really interested me, as making a topology from scratch was what put me off the most in my previous attempts at modelling. The user-friendly texturing method and PBR seemed impressive too. Since I'm (almost) completely new to 3D modelling, I decided to start with a hard-surface project (after a dozen hours looking at tutorials to get familiar with the software), I'm done with the sculpt now (A Desert Eagle pistol) and at the retopo phase. Satisfied with the result so far. I plan on porting it to the Unreal Engine once I'm done, maybe make it into a mod or something. Organic sculpting seems pretty cool too, but I'm afraid I'll end up with something like the clay stuff I made in preschool, since it's not as angular and clear-cut as hard-surface, and I'm not much of a 2D artist to begin with. Should I look for specific tutorials beforehand (especially ones about human forms and proportions)? Anyway, seeing the beautiful stuff you guys manage to create is really motivating. I can only hope I can reach the same skill level at some point, though I suppose that will take quite some time.
-
Aw badword, that may be it. So in essence if I've got actual symmetry turned on in the retopo room I should disable the virtual mirror and vice versa? With the small difference that if I use virtual symmetry I have to click "Symetry" when I'm done? ie if I have virtual mirror on I should have this unchecked? If so then how does it know according to which plane it should apply the symmetry once I click on the symmetry button? Maybe I'm misunderstanding what you're saying.
-
It's on, does it mean it may create duplicates where I don't want them?
-
It seems that deleting the problematic polys and redoing them returns them back to normal somehow. This is really weird, I'm experiencing a lot of bugs while doing this, like sometimes I just split a poly and half the mesh suddenly disappears. Am I doing something wrong? Manual retopo is a legit workflow in 3DCoat right?
-
Yep, I made sure to uncheck that after baking it.
-
Hi, I tried baking without AO, the areas are no longer darker than the rest, however a difference in specularity remains. I'll try your suggestion tomorrow. Thanks for the help!
-
Hello, I'm trying to make a model for use in a game mod. I'm currently doing a manual retopo but I stumbled upon an issue that I don't quite understand; After baking the retopo mesh some faces appear darker than the others, as if the AO rendered twice for them or something of the sort: For reference, here's a screen of the corresponding mesh: Also, unrelated question; I have a small part of the model that's supposed to go in the green area in the above screenshot, but it's too much of a tight fit so when baking normals for the whole mesh that section ends up being broken. Is it possible to bake it as a separate mesh then add it to the rest once in the paint room? Thanks in advance!