


Daniel Aubert
-
Posts
26 -
Joined
-
Last visited
Content Type
Forums
Calendar
Gallery
Posts posted by Daniel Aubert
-
-
On 6/20/2013 at 1:41 PM, Zafio said:
Finally got the solution from Andrew:
That definitelly is not easy. This should be right click and set to default. There must be an easier way. Other than that, back to Blender and Zbrush.
-
 1
1
-
-
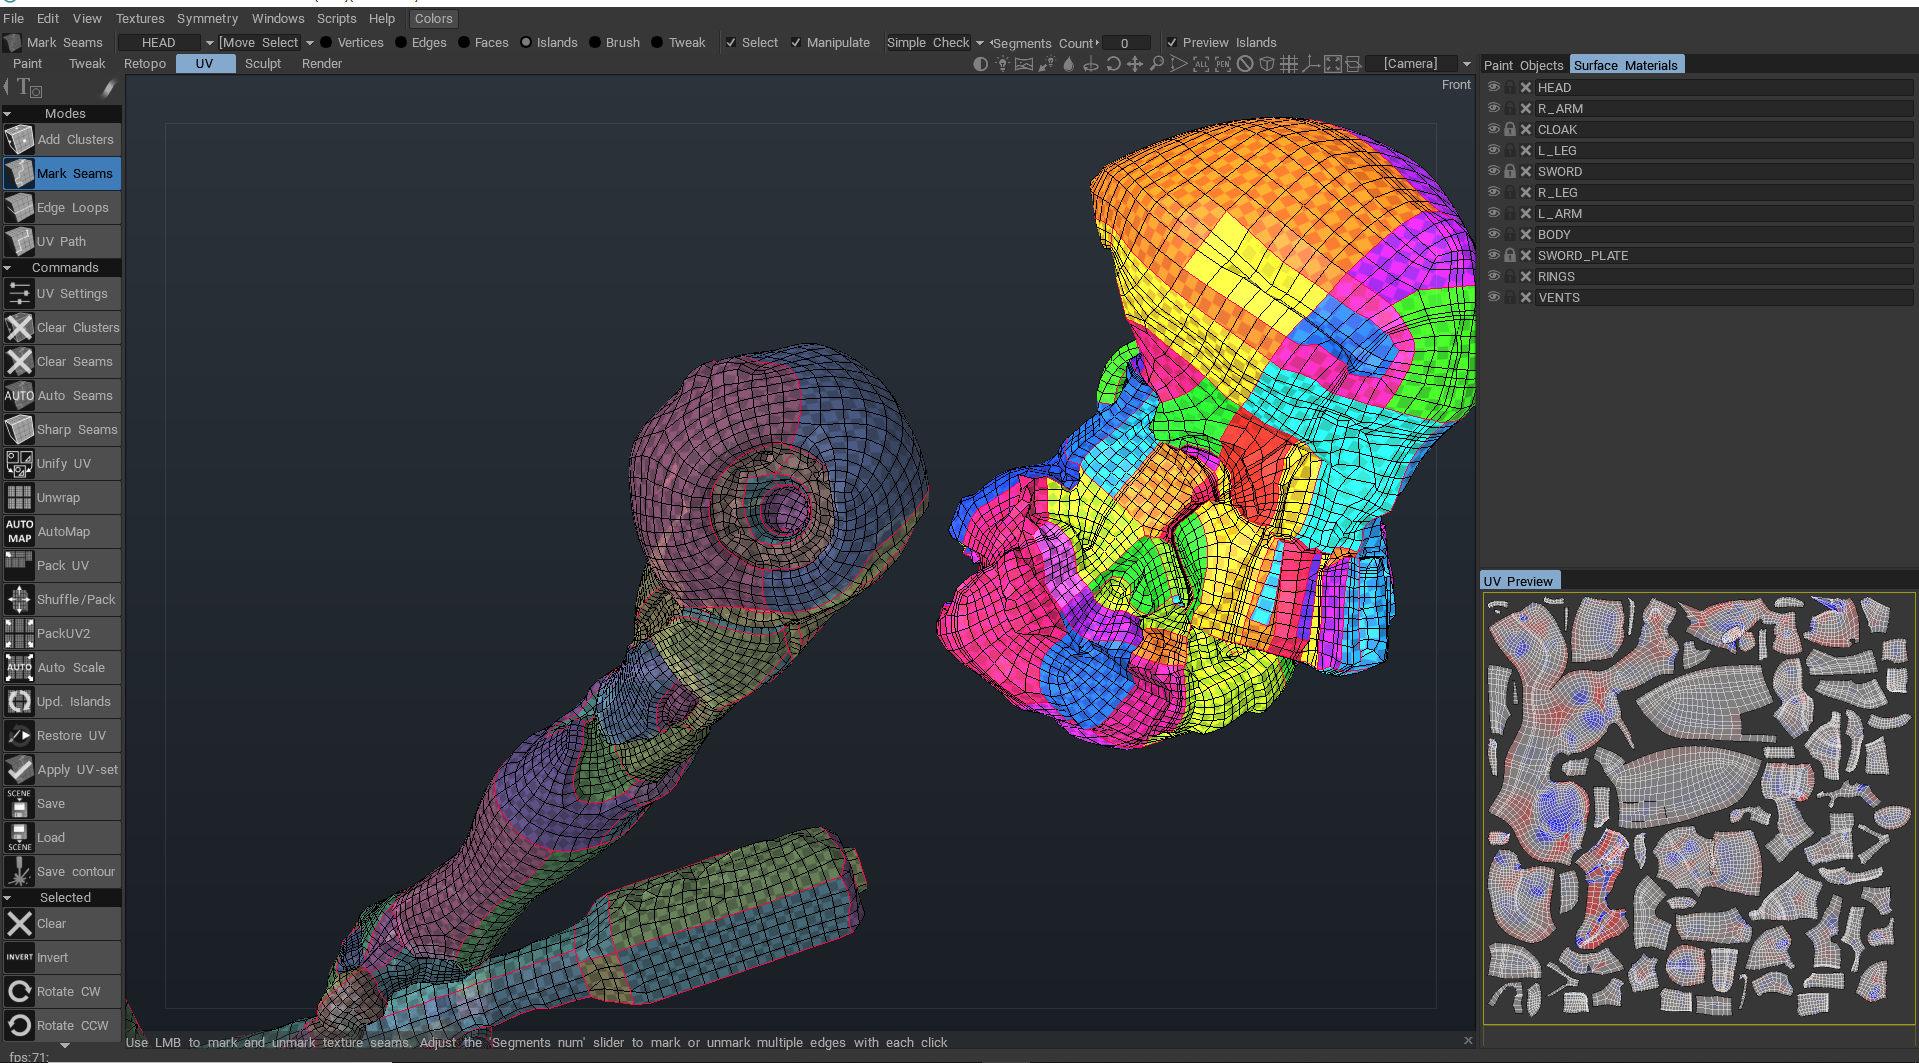
I solved the leg problem by import the obj inside Blender, then I reset the UV, exported back to 3DC, then auto mapped (because I had enough of marking edge loops to unwrap), and after baking the normals, the painting works. PHEW!!!! It is like there is a 3DC demon on my shoulder...
-
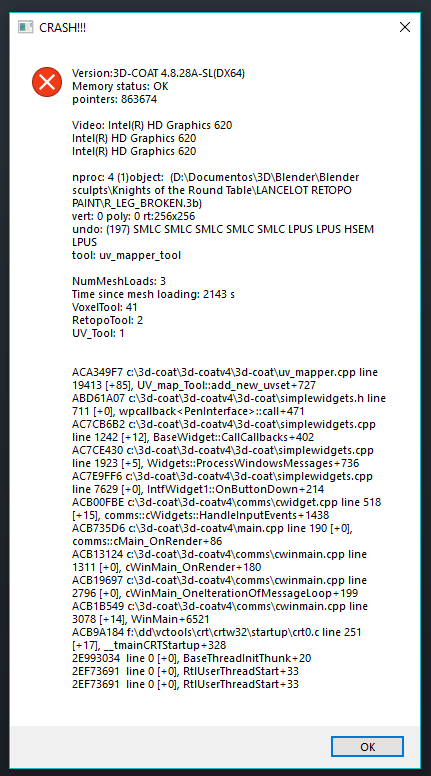
Now I had this crash when tried to add new UV set on UV room. It is werid because I already had unwrapped the model in retopo room, but it had no UV on UV room.

-
13 hours ago, Carlosan said:
You have some Surface Materials locked, switch off padlocks

They are not the ones that I am using to paint. And even if I uncheck them, the same problem still happens.
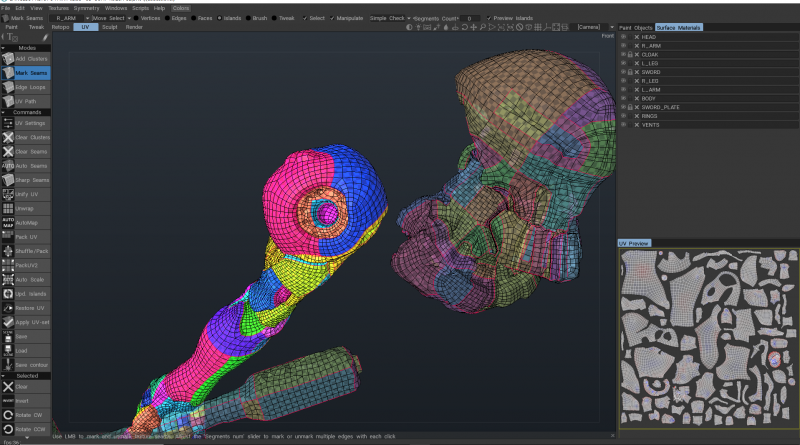
Now I am importing each object on separate 3DC files and then baking normals and panting them over there. It was working just fine for most objects... then when I tried the R leg, it has this problem when I fill it with a material. It is like the UV is not correctly placed. I already tried unwrapping again, but the same occurs. Don't have a clue what is happenning here. When it is not one problem, it is another... :/ This should be a simple task.
-
One other thing to notice is that, 3DC only asked to create a ambient occlusion and curvature map for the object that is working normally (the head). For the other parts it never asked, when I selected a smart materials that required those maps.
-
I am compressing the file for that! It is almost 900 mb, and my internet is not that good.
I have one question though, I don't know if it may be related some how: I imported a .obj file from Blender. It had separate parts, but the method to import it in 3DC was - 1 open new document; 2- "Perform Retopology" on splash screen; 3- select auto retopo; then when it opened, I canceled the auto retopo, so I could subdivide the object (because the obj came as a single piece in this mode, if I tried other methods that came with it already subdvided it would crash because of high density) 4- The I jus subdvided the mesh with objectfy and started auto retopologising them.
Whe I have the link for the file I will put it here.
-
I even have the separate UVs of each object.

-
3 minutes ago, Carlosan said:
Hi
3DC will look at UV tiles as UDIMs, and will allow you to import and export them. The function is currently called "Import UV Tiles as UV Sets".
... I didn't understand... I created the UVs inside 3DCoat. The objects imported were only high poly without any UV. So I retopologised them and baked normals... What should I do??
-
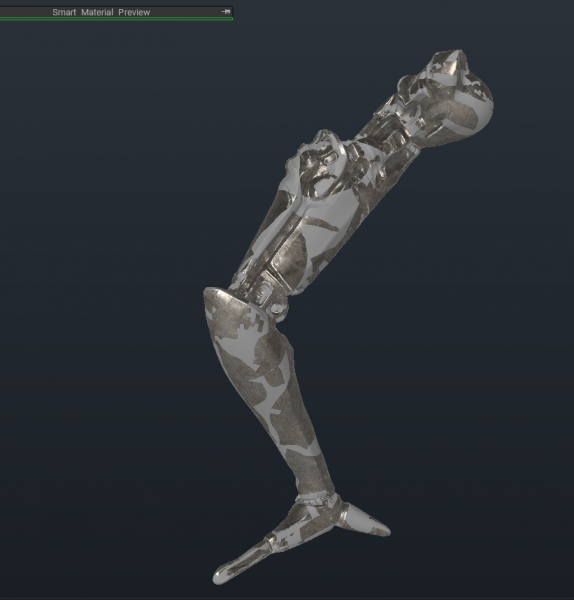
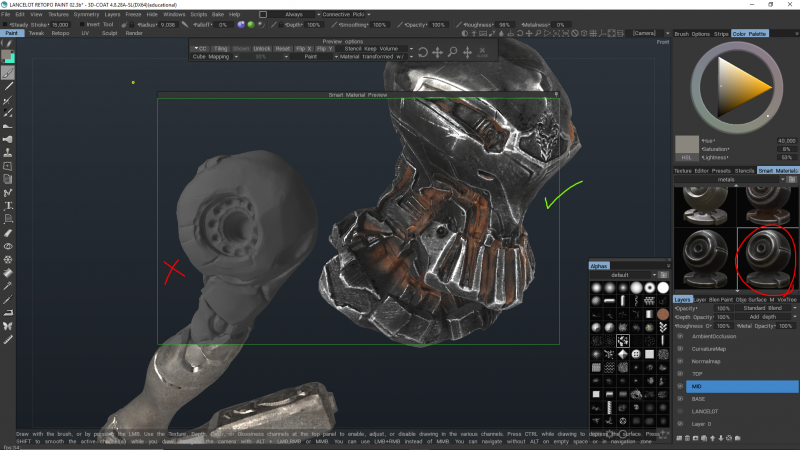
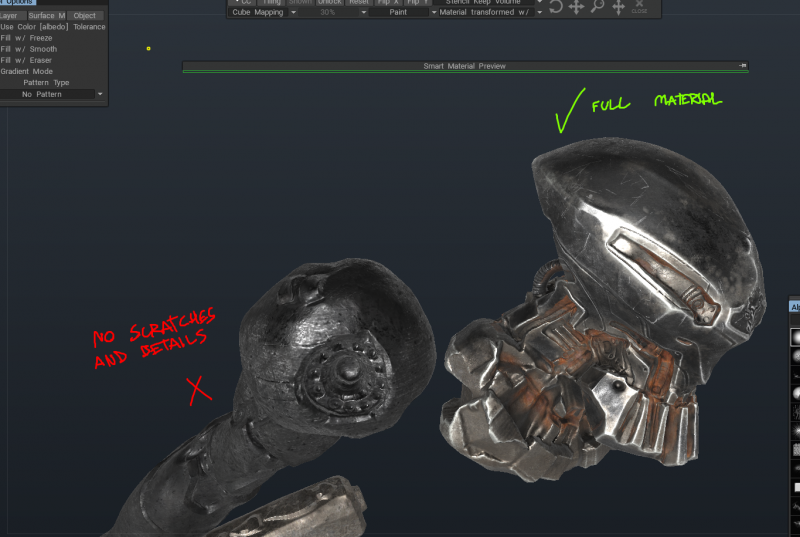
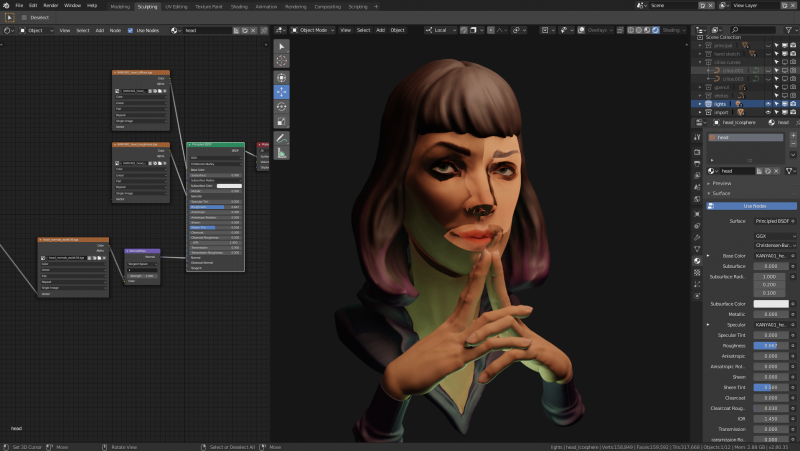
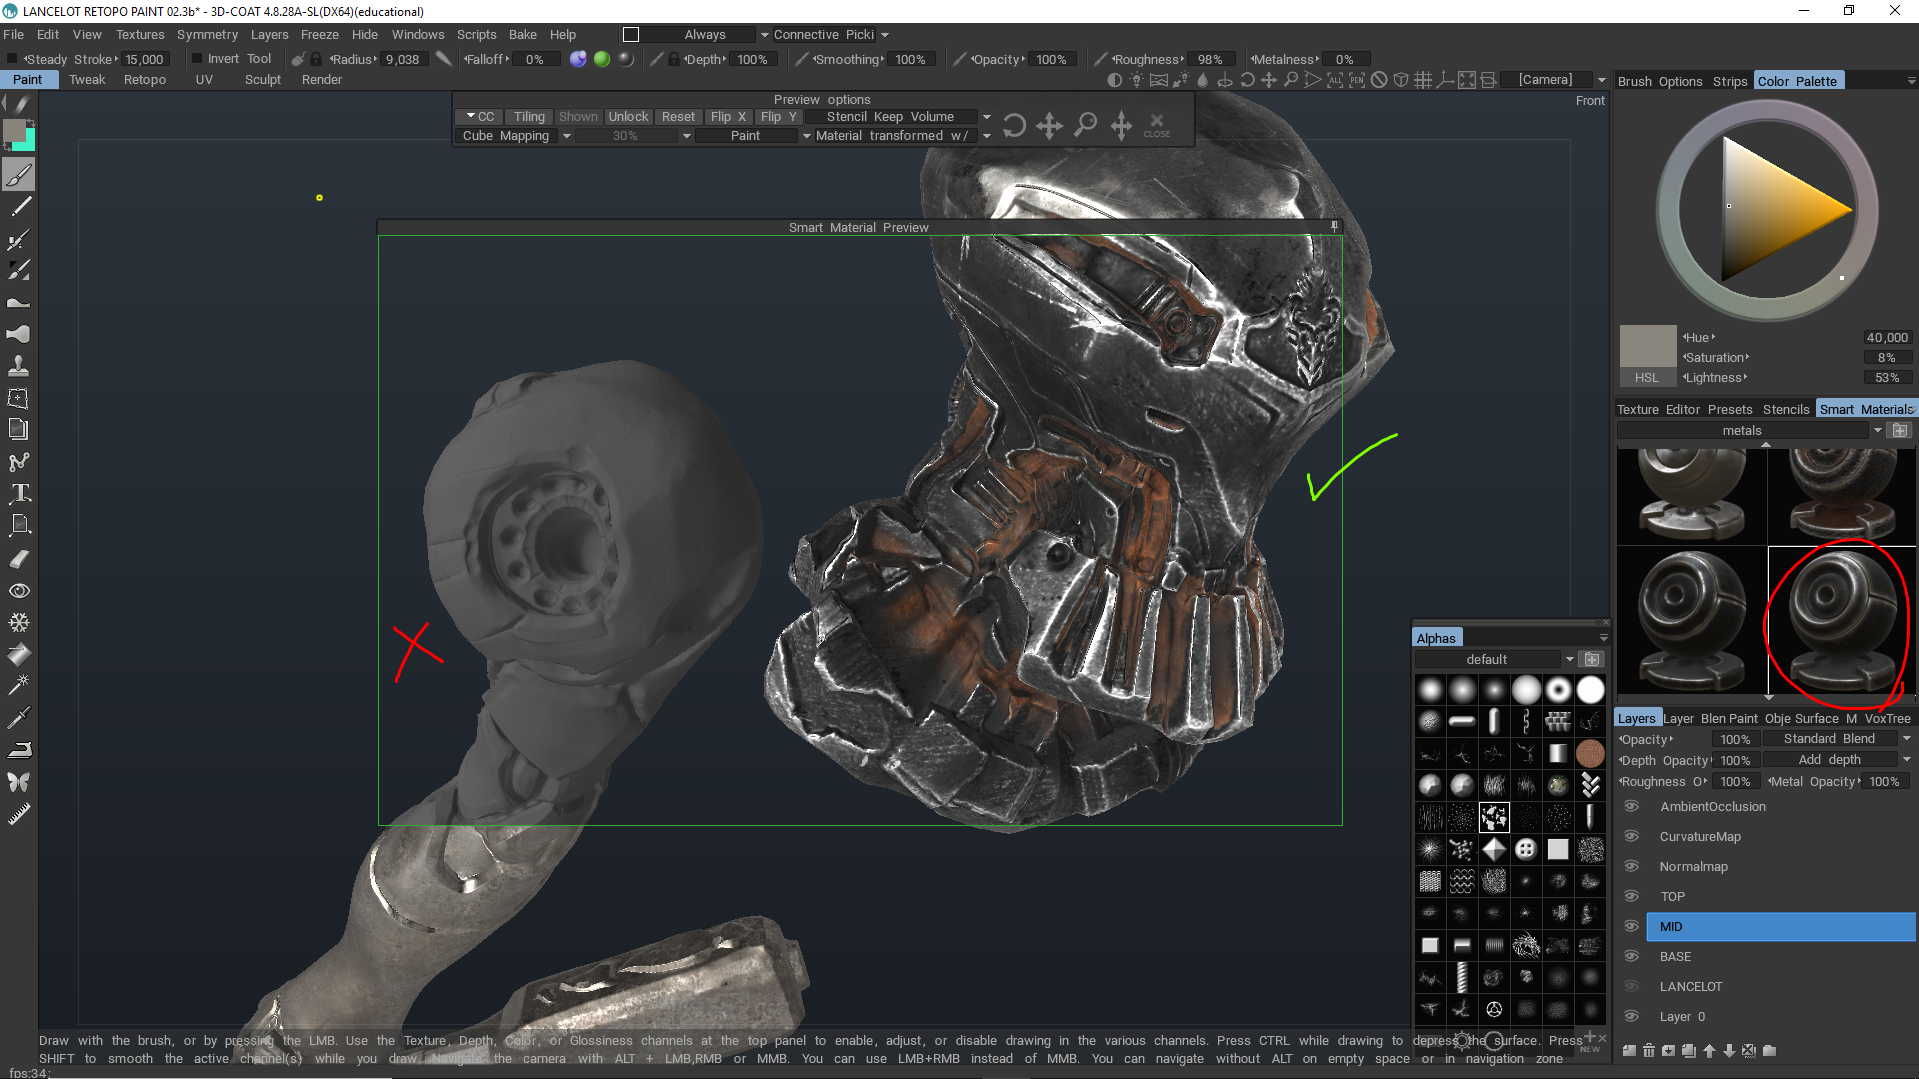
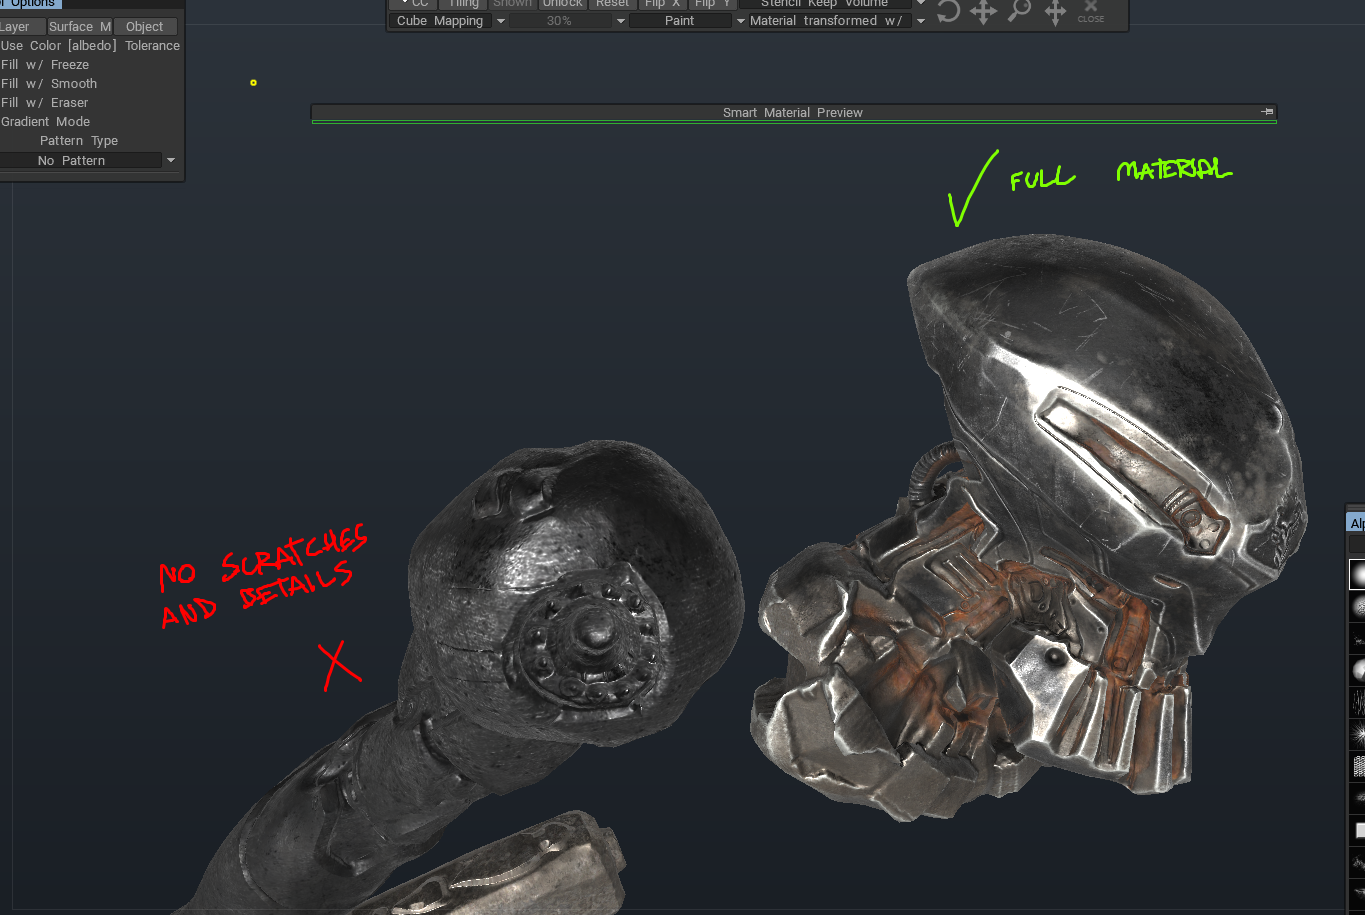
Hello guys!
I am working on this new project which I have several parts and already made the retopology and baked the normals from the high poly. But when I went to paint room, the materials only worked on the first object I made (the head). The others don't display correctly on the materia preview window and whe I apply them, the material does not have all the qualities, like it is only using the procedural textures, I guess. See the images below. I used the same process of retopolgy, baking and painting for every object... I don't know what is wrong! :/
-
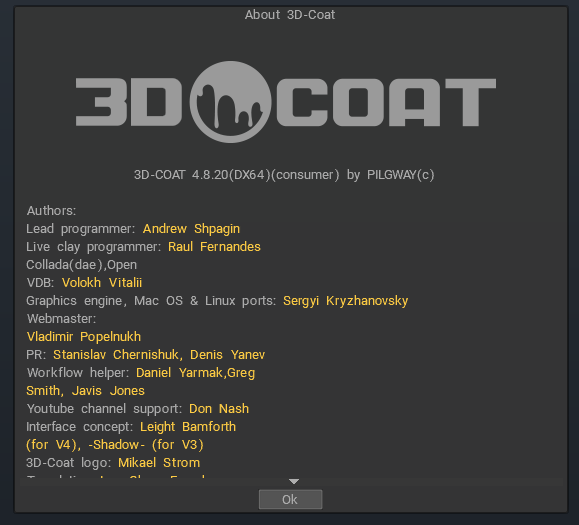
On 12/19/2018 at 11:35 PM, Carlosan said:
Yes, steam version is outdated.
- Hope this help:
On 12/18/2018 at 12:26 PM, InternetFriend said:In blender make sure the image texture node going into the normal map is set to non-color data.
Hey! I updated to 4.8.28A and by setting non-color data on normal map it worked!! See this new model I am working on, it is working perfectly without those stupid seams!
Thanks a lot guys!!!
-
1
-
-
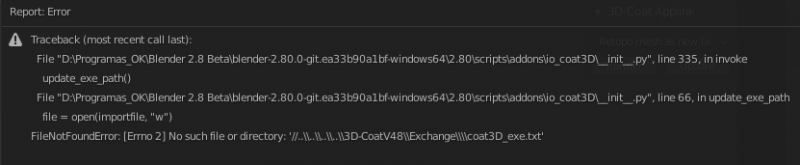
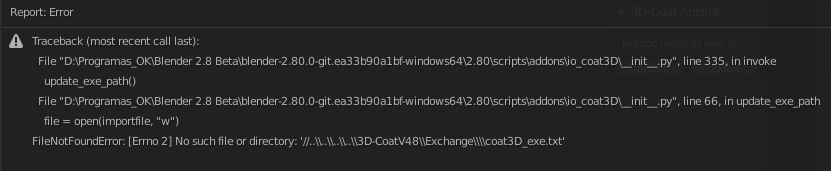
Hi again! After selecting the 3dcoat and exchange folders I get this error.
I am using 3DCoat 4.8.28A exe file and the transfer folder in documents/3D-CoatV48/Exchange. Is the exchange folder wrong? Is there another one that 4.8.28 A creates somewhere else?
-
24 minutes ago, tokikake said:
@Daniel
I manually made "Exchange" directory" in my COAT_FILES_PATH . (my custom 3d coat documents folda, all 3d coat user file will be saved there,,) once you set exchange path, I believe, other files will be auto generated. when you click "transfer" in blender., and export from 3d coat.

I alerady tested (delete all files in exchange once) . other files are auto- generated again.
but if you do not use custom 3d coat document directory. you may need not. as default Exchange folda, is in your document .
===============
I found when I import FBX by this plug in,, FBX rotate 90 with Y axis,, (or change X and Z axis In 3d coat) , so if I see from front view,

Blender monkey look left side,. It may not cause problem but ideally I hope it keep same view (my request
 )
)
Thanks a lot! Will do that!!!
-
How can I select the exchange folder? Can't find the blank place to select the folder. :/
-
I will try to contact them, because I don't know how to update it from steam. It already has the option to update automatically, and since I purchased it a few weeks ago, I think maybe the steam version is outdated.
-
12 hours ago, Carlosan said:
Are you using latest version 4.8.28A ? Some baking problems was fixed on that version.
- Try exporting any default mesh (Shift+M) to check any issue with your project.
- Use applink to get direct connection in between apps.
It is not 28A. I will try updating! It is the steam version. And will try these other options as well. Thanks a lot!!
-
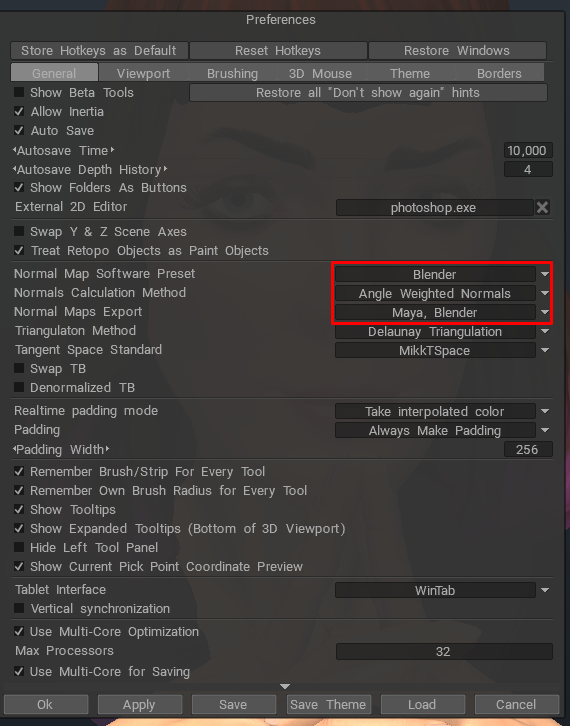
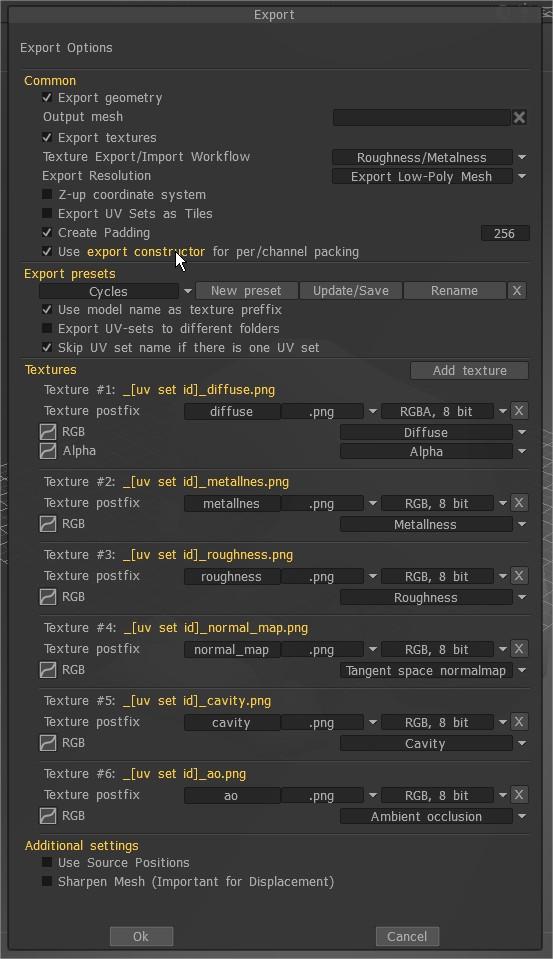
This is how the preferences are set

-
Do you guys think I have to bake the normals again from the high poly model in 3coat? Aftyer changing some setting of course. Would this remove the albedo information from the object?
-
11 hours ago, InternetFriend said:
In blender make sure the image texture node going into the normal map is set to non-color data.
Thanks! But didn't make any effect...
-
11 hours ago, haikalle said:
But if you choose in 3D-coat prefrerences ->Normal map export = Maya, blender. This should take care the rest ?
It was already set to Maya/Blender.
-
On 12/16/2018 at 6:19 PM, Carlosan said:
Normal map
For a normal map you can separate the RGB color channels and invert just the red and the green channels. Like in the image below.
click image for full size
Thanks for all the info! But unfortunately the problem remains. :/ It only flipped how the light was behaving, but you still can see the difference beetwen the uv islands. Like if each island had a different lighting position, dunno... so the seams appear like in the images above. Don't know what else to do... Thought this should be simple.
-
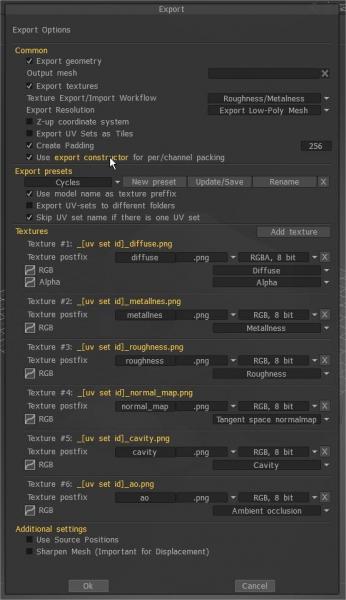
On 12/15/2018 at 10:49 AM, Carlosan said:
Hello
Looks as Y channel inverted.
Do you have Export Constructor actived ?
Did not work. Even tried changing the preset to unreal, but made no difference...
-
I'm gonna try that now... will report back.
-
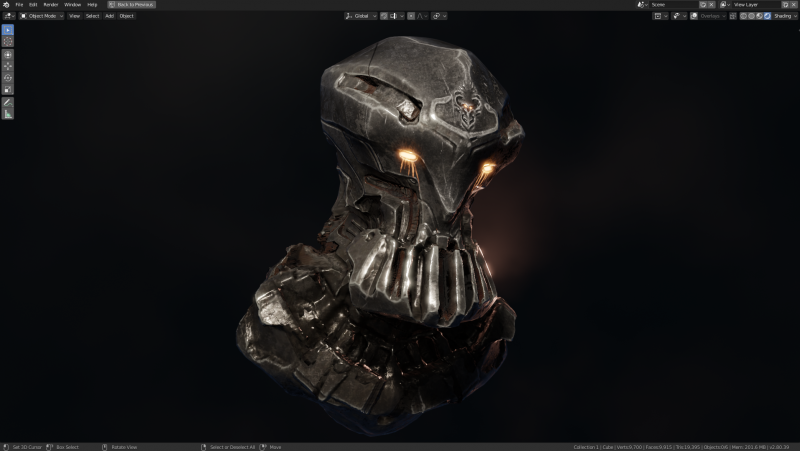
Hello!
I made this model highpoly in Blender, exported to 3DCoat, retopologised it, unwrapped it, and painted on it. But when I exported the obj back to Blender it had one problem: normal map is wierd with the seams showing, like if each island were recieving different lighting. And the normal map is the only texture that had this problem; albedo and roughness are working just fine. This may be something I am doing wrong, cause I am new to 3DC, so I would be very glad if anyone could help.
Here are some screenshots:
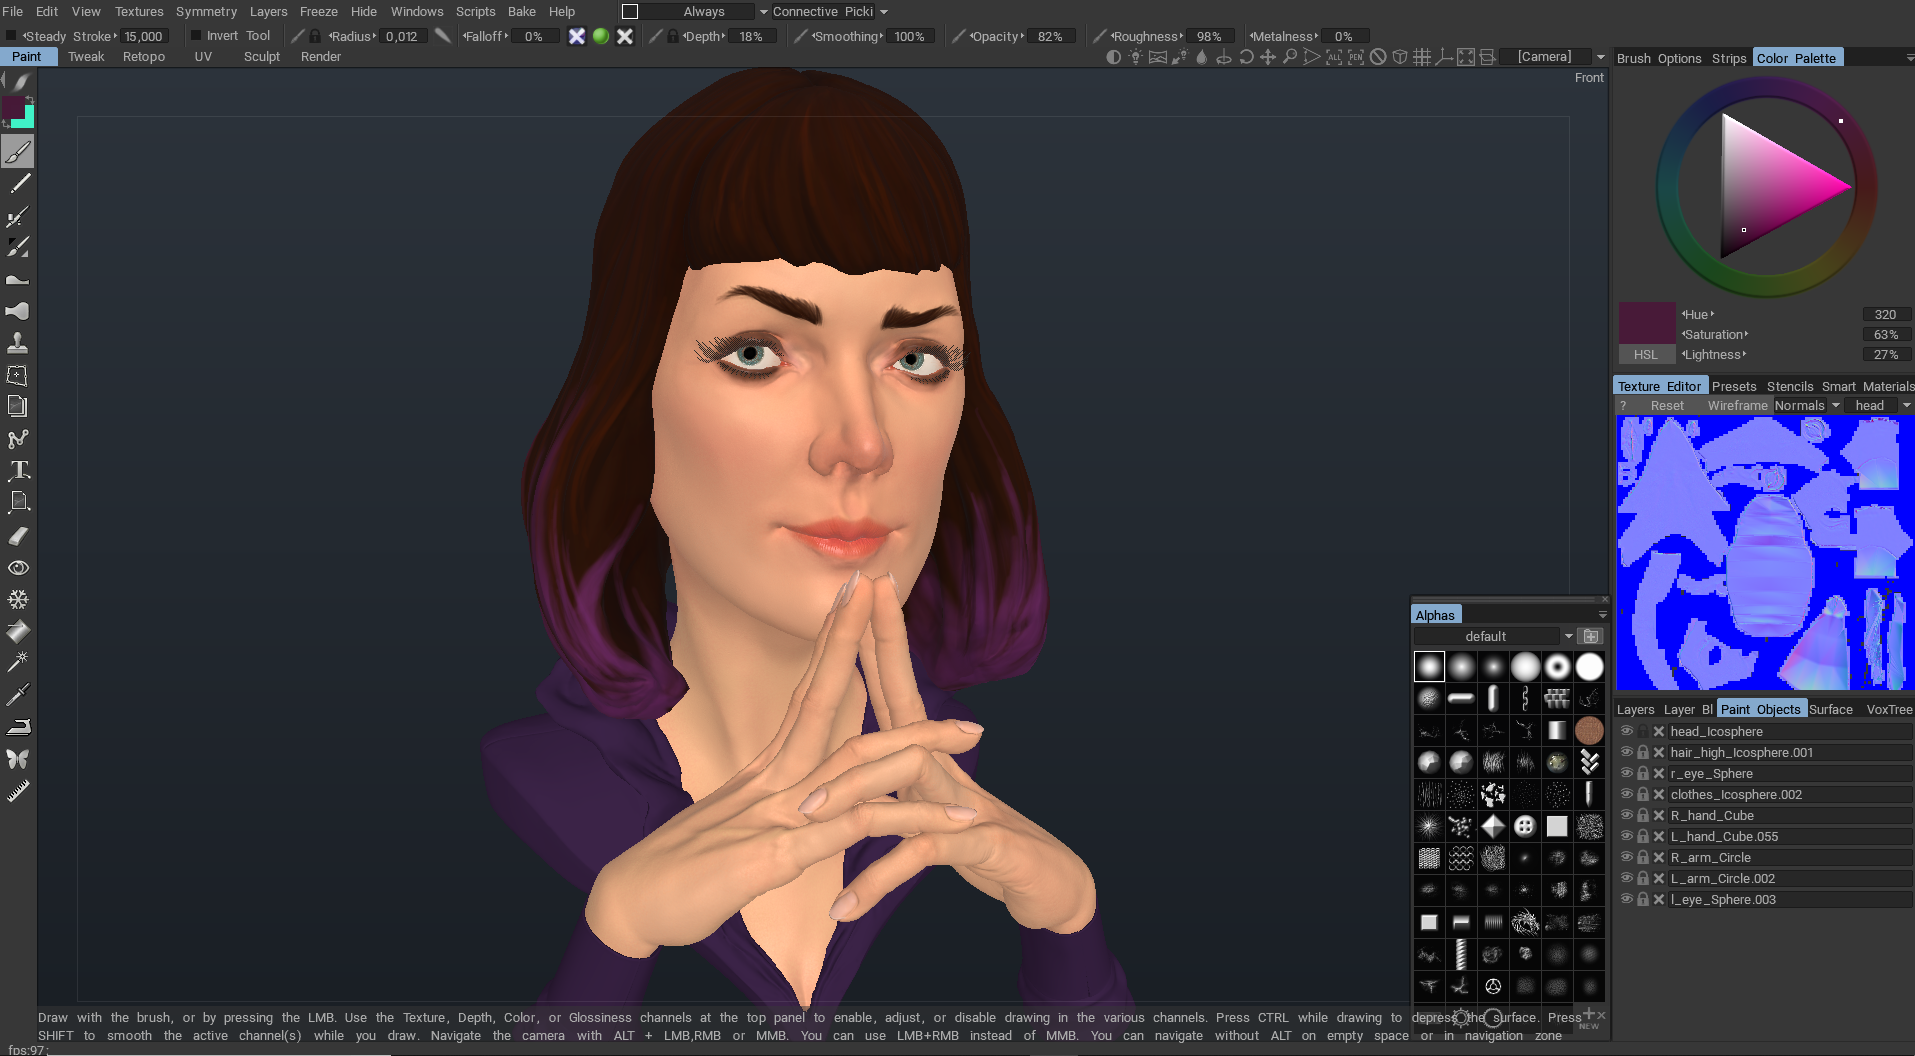
a. The model working fine on 3DC, with normals working.

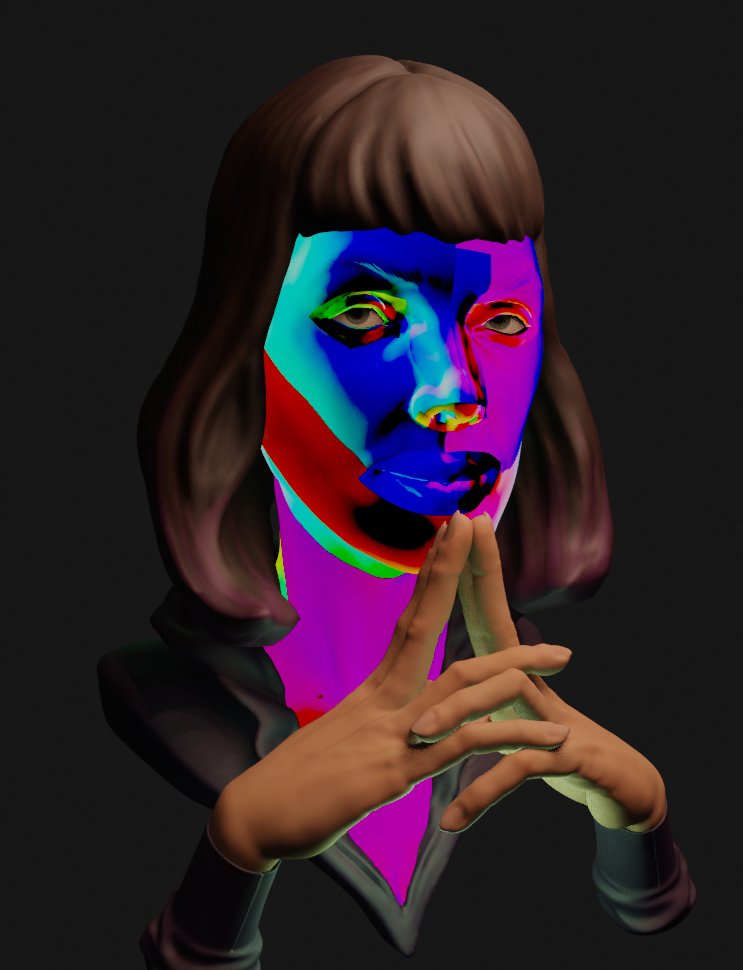
b. In Blender the normal is not good. And it is not related to the uv coordinates, because the seams are in the correct place, but each island is behaving differently to light.
c. Here you can see how the map is on the surface.

d. This is the normal map - world-space
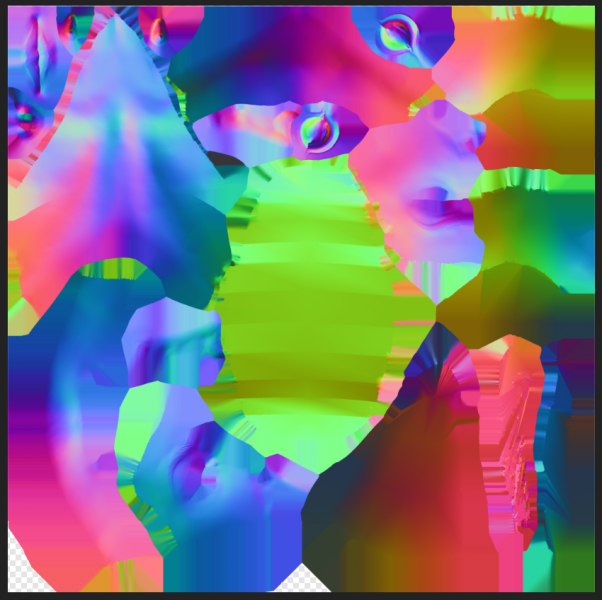
e. This is the normal map - tangent-space (both have the same problem)

Thanks in advance!!
-
Oh I found out how... haha
-
1
-


How to reset brushes to default
in General 3DCoat
Posted
Oh and it does not work. I just want to reset the alpha of crease live clay brush to deafult. Because I can't find the same alpha in the alpha pallete.