Search the Community
Showing results for tags '3dcoat'.
-
 Hi Professional Software Developers, Seriously frustrated, so attempt to overlook any snark that comes through. I'll start with the forum issues. I cannot seemingly post in the 3D Coat section, nor can I reply to any posts in the 3D Coat section, neither in that section, or from the front page (Those sections are greyed out). Why can't I post there? Thus, I have posted here. 3D Coat problems. Pink Edges for 'Sharp Edges" seem to show up no matter what I do. I've seen people say: "select all edges and Clear Sharp" but, I've never seen a "Clear" sharp button on the UV-Unwrap menu. Here's my process in image format: As you can see, it defaults to the hateful pink edges even without requesting it do this, and while ia see a button proclaiming Sharp Seams, how the heck do I remove ALL sharp seams. I HATE, HATE HATE these pink marks, obscuring my seam markings. Please please turn them off by default. 3) Something it also does, which is infuriating, is move parts of my FBX file around. I've tried 'No Center Snap', I've tried 'Center Snap' selected, and without seeming cause, messes up positioning on SOME fbx files. Nothing like this happens upon importing the same files into Zbrush, Substance or Marmoset. The files originate from 3DSMax and I always export with the same settings, and sometimes, it messes up the alignment some parts in relation to other parts. 4) Sometimes, edges are very close together, and my brush will simply not get small enough to select a particular edge when trying to make a seam. It'll snap to selecting one seam close to it but it avoids the seam I want. Very very annoying. 5) Sometimes parts of a mesh, upon using 'Unwrap', tangle the hell up, and become INCREDIBLY SMALL... and it takes me ages to see that they've done that if it's a spare polygon or three, but regardless, every time I try to flatten them out, they re-tangle up and become tiny, requiring me to use a rectangular lasso to select them. Large chunks of poly-space can end up invisible in the UV Preview space. Guys, it's getting to the point that it's (I can't believer I'm saying this) easier to UV unwrap in 3DSMax. Can we please go back to making this program rock solid and really good at what it does, and be LESS worried about adding the kitchen sink?
 -
Just downloaded the latest beta Jan 22-2020 of Moi3D ver 4 and was surprised to see it now has subD support. I imported the spaceship I created in 3DC. And exported the retopo'd OBJ and imported in MOI3D ver 4. It was taking too long to import on my I7-4700 and I also had Adobe Lightroom & Photoshop opened. So I installed MOI3D beta 4 on my newly built AMD Ryzen 7 3700X and after several minutes the OBJ opened (122,000 faces). WOW. This could be a game changer for me!!!
-

From the album: Kenmo's 3D Art
Rendered in Vue with postwork using ArtRage & Photoshop. I modeled the zeppelin parts in Hexagon & Groboto3D. And assembled the parts in Hex. The Zeppelin was uv mapped & textured in 3DCoat. -
 I'm using 3DCoat to create retopology. I have run into the problems with complicated objects consisting of many parts. After importing into the program, I find part management very difficult (hiding, unhiding, selecting part for retopo) and the performance is very bad. Any idea how to improve this? I am thinking about dividing larger objects into smaller groups, but how could this be done most efficiently?
 -
I recently started to get back into 3d coat, and decided to go back into my 4.5 version, but after fooling around and having my cat stupidly run across my keyboard after being spooked, I can't seem to paint on the models I'm using anymore? Whenever I go to draw or color on any part of the model, it erases instead of coloring. I've looked through the settings, tried all the keybinds, uninstalled and reinstalled probably about 10 times, restarted my computer about 4 times, unplugged and even restarted my tablet drivers, and nothing. Can someone help out?
-

From the album: Alemar 3DCoat Gallery
© Marco Alemar
-
- 1
-

-
- character creator 3
- 3d
- (and 2 more)
-
The Plane tool's Pick point & Direction (Local) mode is broken.. when selecting a surface (by right clicking the surface) to project the local direction, the local projection isnt aligned correctly to the surface, it rotates slightly making the tool useless to flatten surfaces or expand an already flat surface as it will slowly diverge from the initial local direction of the surface. if you hold right click and drag over a slanted surface that is 100% planar, you will see in the Tool Options Menu that the Normal cords will shift around, this indicates that the surface isnt Planar as the Normals are changing from one point on the flat surface to the next... this only happens when a surface isnt 100% XY or Z projected, ie - a boxes surface that is rotated. The only way to currently get an aligned projection to the surface is to change your brush to something like the clay brush, hover your brush over the flat surface and press the (*) button to align your camera to the surface, than pick the "Pick point & Forward Direction" option in the Tool Options Menu and right click the surface. in the first image i uploaded, you can see the red plane is sliced in half indicating that its not local to the surface, i got this result by turning a box and res+'ing it once. the second image is how the first image should look, and in this one i aligned my camera to the surface than right clicked with the "Pick point & Forward Direction" option. i cant think of any practical reason for the local mode not working so it must be a bug, this is the newest update and i dont know how this has gone undiscovered for this long but i hope it can be resolved.
-
I know this is the wrong section, but the feature request was disabled for posting? I'm working on mapping some bread to low polly loaf shapes, I've been shooting photos of each side stitching together onto a 2d plane and then mapping orthogonal views to each side and then stamping (cloning) out seams, they look really good (SEE ATTACHED SCREENSHOT OF FINAL). I've been jumping back and forth between substance and 3DC bc technically for what I'm doing they pretty much do the same thing, BUT when I need to tweak alignments and such I have to jump to photoshop and liquify and then bring back in and I know substance has live layering and 3DC also does from projected views to use this a work around. Ultimately, it would be awesome to see a liquify toolset in 3DC and i would never use another program again! Affinity Photo has an even better live liquify capability and dozens of other photo softwares out there have the included toolset, so to think an added plugin to 3DC wouldn't be too unrealistic. With a UV set it could easily bring in the UV set to a separate window with the generated pixels from the specific layer selected (Merge all could be used to capture entire work area, or isolate a specific layer selected) and liquify tools to help adjust would be simply amazing and very functional. Smudge and other tools just deminish quality completely, but to have a functional less diminishing option similar to photoshop liquify would be magic! In addition, TRANSFORM would be amazing, to take a layer and transform it to move across the 3d plane on an object, scale, rotate, etc..would be equally as great.. If 3DC did nothing else between now and V5 that would be an amazing add on that would just be texture paradise in my opinion. I come from 15 years of retouching, and I may be bias, but ultimately textures are super important and to add a few essential retouching tools to the 3DC toolset would be a great overall improvement, and leave SP in the dust in my opinion. Now that Adobe has their future in their hands, it's not long before similar strides are probably met on that end. Ultimately, these may just not be able to work into the program, but in my head they seem to and I would love to know why they wouldn't if so. LASTLY, I know there is the TRANSFORM/COPY tool which isolates a selection to transform and copy again, which is nice and does come in handy, I am proposing a transform layer option in addition to that tool, which essentially you take the current layer and can rotate and transform live across the 3d plane, for example you paint a smily face with height and color so you have a bit of a raised smily face, you can then freely drag it rotate it scale it across the plane while still keeping that layer isolated and nothing changes except the UV coordinance. I know a work around and similar method would be a smart object with an alpha mask and then painting in, which is nice and works. But if I'm cloning small pieces and want to slide up or over or copy and move again and have these all isolated to layers individually, this is my goal and dilema. Thanks! I love 3DC and just want to keep making it more awesome. SD
-
From the album: Sci Fi Concept
-
From the album: Sci Fi Concept
-
From the album: Sci Fi Concept
-
From the album: Sci Fi Concept
-
From the album: Sci Fi Concept
-
From the album: Sci Fi Concept
-
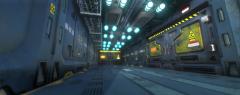
From the album: Sci Fi Concept
-
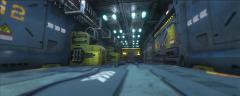
From the album: Sci Fi Concept
-
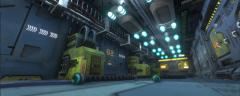
From the album: Sci Fi Concept
-
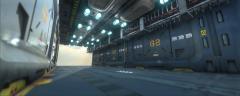
From the album: Sci Fi Concept
-
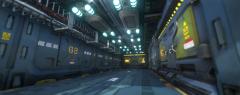
From the album: Sci Fi Concept
-
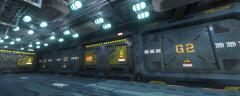
From the album: Sci Fi Concept
-
I've been editing an existing retopo and saving my progress along the way. However, when I reopen the file, it is showing only the original version. My edits aren't shown until I use "delete edge" on it or click the retopo layer "hide" and "unhide" it. I'm not sure how to export my edited version. Any advice would be great, thanks
-
This is a 3d rendering of Brom's concept artwork "Strik" for his card game "The Dark Ages". Modeled in 3D Coat and Blender. All Texturing was done in 3D Coat using smart materials. Some baking done in Blender and some in 3D Coat. Rendered using Cycles, and posed using Rigify addon (Nathan Vegdahl, Lucio Rossi, Ivan Cappiello) inside of Blender.
-
I recently bought 3D Coat and I've been having fun with it. The fun lasted until I exported the textures to Blender. The results I'm getting in 3D Coat are not the same I'm getting in Blender. The textures look stretched and the details are not there in Blender. I tried using Eevee, unwrapping in different ways and tried different export setups. Soo this is how it look on 3Coat and this is on Blender UVs and nodes and here is the export setup I hope is something I'm doing wrong and someone can help me out because its been frustrating
-
Hi! I have made a 3d scan of a starfish using the real sense camera SR300. I used 3D System Sense software. It outputted an .obj and an .mtl filetype. I used blender to clean up around the model. Then, I exported it from blender to 3dcoat as an .obj filetype. In 3Dcoat, I fixed up the mesh and the texture. I exported it as an .obj file type and put it into unity, but the texture is missing. The texture is visible on the mesh in 3dCoat, but it is not accessible through the Texture editor. I am at a loss. Can anyone help me figure out how to recover my texture, so that I can export the mesh and texture into unity? texture editor doesn't show the texture.. XOif I turn off layer 1texture visible in 3D coat, but not accessible..... ;/ I would be REALLY grateful if someone can help me out! Thanks! Leona S
-
Been a while since posting. Model was done and rendered in Blender as well as smoke FX. All texturing was done in 3D Coat.