Search the Community
Showing results for tags 'Render'.
-

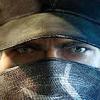
From the album: FanArt
This is a self-portrait based on the Star Wars hype. This piece was created as a update of a previous work. Hope you liked it! -
Hi everyone. im new to this application but loving its functionality rather then other mapping & baking softwares. i managed to stumble across a way of baking all the specular, < shine and lighting & also the ambient occlusion maps into one image but i havent managed to find a way to do it again with other models. reasons behind i would like these textures to be baked with predone lighting ect. as seen in the preview window is because where the models will be placed do not allow me to have individual maps for the model just one texture file thats all i get.. thank you secondlife... i know there is a way to bake exactly what you see onscreen to the uv layout... but i am struggling to figure it out again any help would be fantastic Great program none the less guys! keep up the amazing work!
-
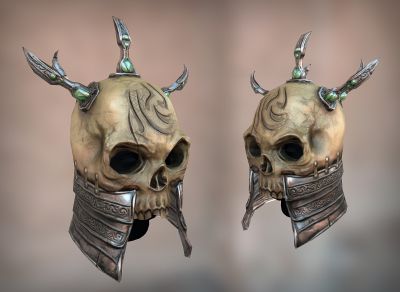
I've very recently started playing around with 3D coat. Now I've finished texturing my first model I've hit an issue. The image on the left is how i see it in 3D Coat and the right is after i have rendered it in 3DSmax. It seems to have lost a significant amount of detail and a lot of the spec I'm using the default scan line renderer in this image in max but have also tried VRay and had the exact same result. Can anyone give me any pointers as to what i am likely doing wrong? I've basically spent the entire day trying to figure this out and feeling a bit fried. (we've all been there) Any help gratefully received. http://sta.sh/0c2rmylhn6j
-
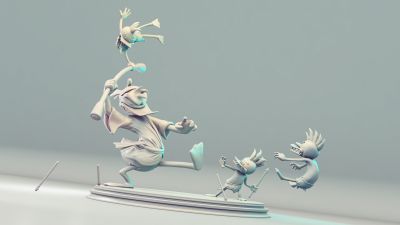
From the album: FanArt
First render for an upcoming project. Hope to show more very soon. Hope you like! -
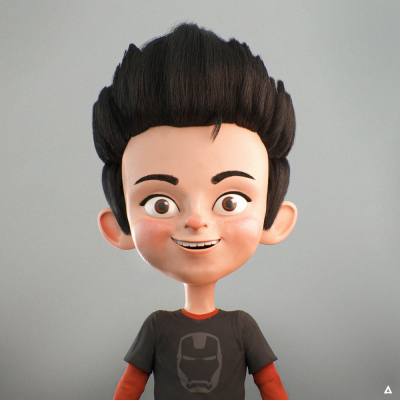
From the album: FanArt
Second illustration for Civil War Kids series. Team Iron Man Hope you like it! -
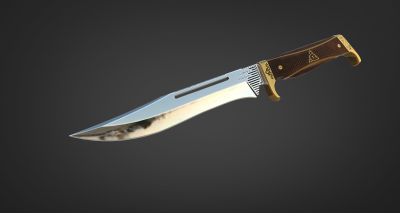
From the album: Weapons and more
Only used the 3D-Coat -
I believe that the best way to get this PBR painting would be with something that could let you visualize better what you are doing. The PBR painting is EPIC, no doubt! but, its rather difficult to see how its looking if the onbord render engine wont work with it. Why not step it a bit further like in Substance Painter/ Marmoset Toolbag?
-
у меня такой вопрос, можно ли прикрутить какой не будь сериозни плагин для рендера, илье интегрировать в соат.? напримр кeишот, закончил модель текстуры, выбрал настройки, нажал на кнопочку, и модель со своми текстурами экспортируется в каишот. назначается стандартный шейдер с текстурами. в общем я думаю что эта программа очень очень очень нуждается в форутеалистичном рендерштуке а как вы дуайте? и думайте ли вообще об этом ?
-
From the album: Fantome artwork
Rendered in marmoset. -
 In the render viewport when you select a light colour it gives you the exact opposite of the colour you choose. This is using the HSL1 colour picker. I have tried others and they all give the same value. However it's not quite so simple as that. If you choose pink at the NE setting of the hue wheel you get the correct colour. Equally if you choose green in the SW quadrant it seems to be correct. Other positions are not the colour you choose. I am using 4.0.04A on a Mac Pro with Mavericks 10.9.1
 -
 Source http://io9.com/disneys-new-rendering-technique-could-usher-in-a-new-e-1467435361 Link to the paper http://www.disneyresearch.com/wp-content/uploads/Project_jis_sigasia2013-paper.pdf An animation studio can spend days rendering a scene that features water, smoke and other substances that affect light (and its simulation) in complex ways. Now, a team led by Disney Research Zürich has developed a computational algorithm that can reduce rendering times for such scenes by a factor of up to 1,000. Animators call substances like smoke, fog, water, mist, and dust "participating media," due to their tendency to deflect or scatter light as it travels the distance separating its source from the camera (the shafts of light visible in the upper right hand corner of the Monsters University screenshot featured above are a good example of how we perceive illumination in the presence of participating media.) Existing rendering algorithms account for participating media by randomly sampling potential paths that light might take through a scene, and then averaging the results. But the number of potential paths is usually quite numerous, and many of these paths will often have little or no effect on the look and feel of the final animated sequence. Imagine, for example, a path that intersects with an object in the scene that blocks the light entirely, or a light source that is too distant from the camera, or separated by too much dense fog, to be seen at all. Calculating paths like these are not only a waste of time and processing power, they can also introduce unwanted effects in the animation. Getting rid of these unwanted effects, of course, winds up taking even more time, and introduces still further opportunities for rendering errors to emerge. Expand Above: The interaction of light and dust in a rendered scene from Zero Dark Thirty, via fxguide.Now, a team led by Disney Research scientist Wojciech Jarosz has developed a method called "joint importance sampling" that efficiently identifies which paths of light are most likely to contribute to what the camera actually sees. As its name suggests, the algorithm helps sort out which paths are important to include when rendering the final scene, and which can be excluded. The researchers will present their findings this week at the this year's ACM SIGGRAPH conference in Hong Kong. Researchers have looked into the use of importance sampling (IS) techniques in the past. Some of the most sophisticated methods rely on a bidirectional process that traces potential light paths not just from the light source to the camera, but from the camera back to the light source. Traditionally, however, bidirectional techniques have sampled the light-source–>camera and camera–>light-source paths independently. Jarosz's team's joint importance sampling method, in contrast, identifies potential light paths with mutual knowledge of both camera and light source locations. The result, the researchers claim, is a boost in efficiency that reduces rendering times while improving animation quality. Expand In the figure above, the results of the team's joint importance sampling method is contrasted with traditional techniques for both unidirectional and bidirectional path tracing. The boxes along the bottom of the images show close-up views of the scene. The relative lack of noise highlights the improved accuracy of Jarosz's team's sampling method."There's always going to be noise," said Jarosz in a statement, "but with our method, we can reduce the noise much more quickly, which can translate into savings of time, computer processing and ultimately money." It could also add considerably to the creative process itself. "Faster renderings allow our artists to focus on the creative process instead of waiting on the computer to finish," Jarosz explains. "This leaves more time for them to create beautiful imagery that helps create an engaging story." In an exhaustive two-part essay on the latest trends in the VFX industry (which goes into much greater detail than I can provide you), fxguide's Mike Seymour cites from a speech delivered by Jarosz earlier this year, and highlights how novel techniques like joint importance sampling could help pave the way to a new era of animation: [in "The Perils of Evolutionary Rendering Research: Beyond the Point Sample,"] the keynote by Jarosz at EGSR 2013, [Jarosz] argued that the way "we approach many difficult problems in rendering today is fundamentally flawed." Jarosz put forward the case that "we typically start with an existing, proven solution to a problem (e.g., global illumination on surfaces), and try to extend the solution to handle more complex scenarios (e.g., participating media rendering)." While he feels that this "evolutionary approach is often very intuitive," it can lead to algorithms that are significantly limited by their evolutionary legacy. To make major progress, we may have to rethink (and perhaps even reverse) this evolutionary approach." He claimed that "a revolutionary strategy, one that starts with the more difficult, more general, and higher-dimensional problem – though initially more daunting, can lead to significantly better solutions. For more information on joint importance sampling, visit Jarosz's team's research page. For more on how joint importance sampling fits into the broader field of visual effects, I highly recommend "The State of Rendering," Seymour's comprehensive overview of the latest trends in VFX, including, most notably, the industry-wide push to achieve increasingly plausible shading and lighting.
 -
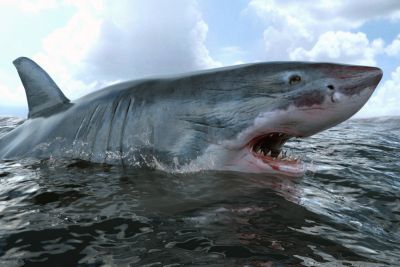
From the album: Great white shark
-
Hi, I'm starting a small new project, a great white shark. I'll be modeling and texturing it in 3d coat. Once the model is done I'll try to make a nice underwater scene and render it in mental ray.
- 16 replies
-
- 1
-

-
- great white shark
- modeling
- (and 4 more)
-
New CPU based render. http://www.fluidray.com/ Interface somewhat similar to Octane.
-
I noticed in the latest version there is a Show Retopo mesh in the Render Room. I like having the option to do this and while I also like having the option to show it with the colors of the various retopo work from the Retopo room done, I would also like the ability to customize that view in the Retopo Room. For instance, it would be great to have the option to use just a flat white poly shader with a black wireframe, or a gray shader with a blue wireframe, or to keep it like it is now. If we could also add to that the ability to show the wireframe via an adjustable gradient alpha, so that the Render Room could show off the painted model that maybe has half of it in shaded wireframe, and perhaps even a third of it unpainted sculpt, that would be super awesome. Right now, I have to composite all of that in Photoshop or some other tool. This would put the Render Room aspect of 3DC above some other programs, like 3ds Max, where you have to really work hard to get it to render the wireframe and shaded models in one.
-
once I have retopologized and painted my object, is there any way to arrange this to create a scene with other retopo'd meshes I have previously created (or even duplicate my mesh). A few trees, a wall, a gate etc. Currently, I can't see any way to do this in 3D Coat without taking the individually meshes to an external program. Is there? Thanks Simon
-
Is it just me or do the real time render and turntable renders flicker?
-
http://madebyevan.com/webgl-path-tracing/ Path tracing is a realistic lighting algorithm that simulates light bouncing around a scene. This path tracer uses WebGL for realtime performance and supports diffuse, mirrored, and glossy surfaces. The path tracer is continually rendering, so the scene will start off grainy and become smoother over time.