Search the Community
Showing results for tags 'pbr'.
-
Hey everyone! Here's a rig I made during beta to use with PBR texture maps. I meant to get it out right after launch, but I've been a little preoccupied. It supports diffuse color/albedo, gloss/roughness and metalness. For good measure there is also a spot for normal maps already set, but if you don't need/want it, simply delete it from the shader tree. For usage, just double click the preset, it'll add a material group to the shader tree called "3DCPBR GrpMat". Inside this group you'll find a number of layers/nodes. You want to use only the Diffuse, Metalness and Glossiness IMG nodes, and the Match 3DC/Unreal Fresnel. To apply one of your textures,select the appropriate layer/node, go to the Textures Layers tab, and browse to your image. Once selected, make sure you also choose the right UV map that you want to apply it to from the Texture Locator tab. Notes: -The Match 3DC/Unreal Fresnel is provided for convenience, and is on by default. To turn it off, toggle the eye icon. -The default for Roughness/Gloss is Roughness. If you want to use Glossiness a map, select the Gloss/Rough IMG Node, Texture Layer and turn ON Invert. -I recommend not poking around and editing the nodes in the graph, it could break. -Don't delete the group locator named "3DCPBR-TLocs" or "3DCPBR GrpMat" from the scene, unless you don't want it on your scene any longer. -If you want to assign the created material group to a specific mesh/section/etc., that you've already created, drag and drop the 3DCPBR GrpMat under that material. -You can also assign the 3DCPBR GrpMat to something else, using selecting sets, material tags, etc. directly. It's a good idea to rename the group if you've done this and plan to use multiple copies of this material preset. -To note one more time, lighting is important! If you want to match the lighting and appearance from another application exactly, use the same HDR/EXR and settings for it, that you are in that application. Otherwise it wont appear exactly the same. -You can use textures from applications other than 3D-Coat of course, they just need to be diffuse/albedo, glossiness/roughness & metalness Fixed: -An unwanted "Texture Group" group locator is created in the item list, delete this. This is a known issue and there is no known way around it at the moment. -Material rendering black -Naming conventions -Changed default for Gloss/Rough to Roughness to match 3D-Coats new default That's all there is to it. It should now render as closely as possible to 3DC/Unreal (though do note that it wont be exactly the same for a number of reasons. Namely lighting.). The revolver mesh and textures used in the image is provided by "d1ver" over at the PolyCount forums, here: http://www.polycount.com/forum/showthread.php?t=130641 Also huge thanks to Gideon Klindt, David Maas, Funk and Captain Obvious for helping with the rig and driving me it to make better. Here's a download link on Google Drive. I'll be updating it occasionally, and if I do, I'll post a notice in this thread with the update info. Thanks! https://drive.google.com/file/d/0ByesnXO2ExYDbEl1c25nZkxTZEE/view?usp=sharing
-
Hey guys, have you been messing around with the new PBR Smart Materials in version 4.5, but you don't feel like you really know what you are doing, or if you are doing it correctly? Well don't worry, because I found this really great tutorial about how to paint with the new PBR Smart Materials in 3D-Coat! It is made by an Italian guy who goes by the name of DoctorDanko on Youtube. His Italian accent is only mild, so his English is still very easy to understand. (Big thanks to DoctorDanko for making the video!) In the video you get a good explanation of what the new PBR Smart Materials do, how to paint with them, and also how to build your own. Enjoy! https://www.youtube.com/watch?v=7hyz8OrzBtA
-
 What is the best way to export and set up "Smart Materials" texture to Maya with no PBR support? For example I have a metal object and want to get as close as I can to the beautiful PBR smartmaterials results that I see in 3D-coat. If someone could write a quick tutorial on this that would be awesome! For now I'm just going to have to experiment a lot in Maya to try and get same results. This is for production so it I don't have much time to experiment. Thanks! Daniel
 -
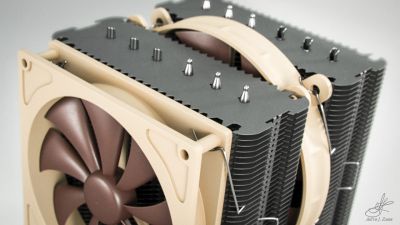
From the album: Noctua NH-D14
SubD modelling: Nvil, Houdini Texturing: 3D-Coat 4.5 BETA Rendering: Houdini (Mantra) Post: Houdini, Photoshop.© Artur J. Żarek, 2015
-
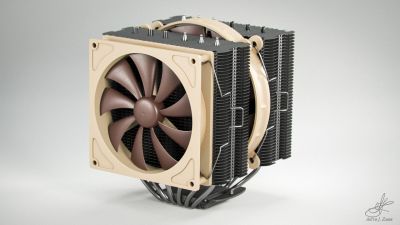
From the album: Noctua NH-D14
SubD modelling: Nvil, Houdini Texturing: 3D-Coat 4.5 BETA Rendering: Houdini (Mantra) Post: Houdini, Photoshop.© Artur J. Żarek, 2015
-
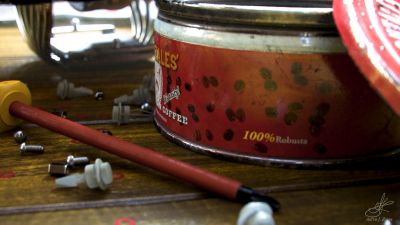
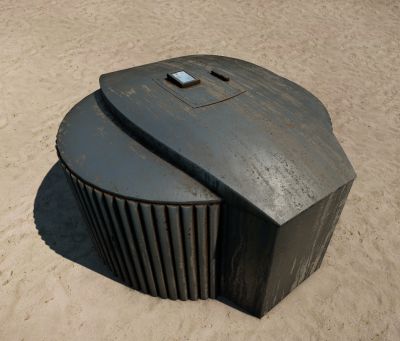
From the album: Nuts and bolts
© Artur J. Żarek, 2015
-
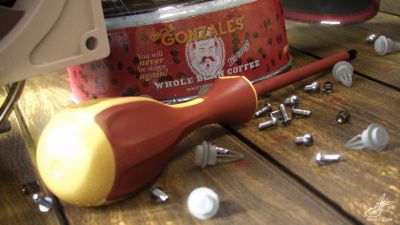
From the album: Nuts and bolts
© Artur J. Żarek, 2015
-
From the album: Nuts and bolts
© Artur J. Żarek, 2015
-
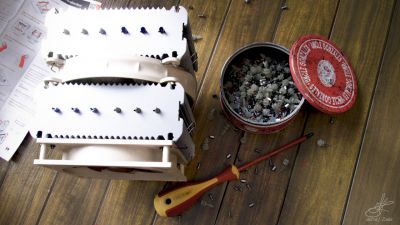
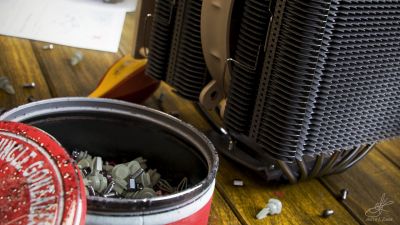
From the album: Nuts and bolts
This was tricky. I really liked the shot, but it revealed an awful seam in the pattern of the floor, on the leftmost side of the frame. I had to come up with something to cover it and ended up with a scanned NH-D14's user's manual. That's an awesome CPU cooler, by the way. I recommend it to anyone with a compatible CPU. Quiet (low-RPM) yet very powerful - thanks to a huge heat dispersion surface of radiator ribs.© Artur J. Żarek, 2015
-

From the album: Nuts and bolts
© Artur J. Żarek, 2015
-
- 3
-

-
- pbr
- subdivision surfaces
- (and 7 more)
-
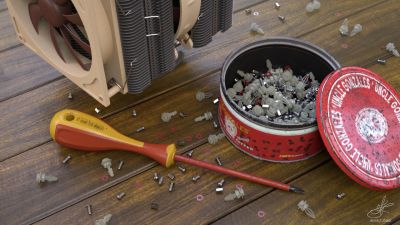
From the album: Nuts and bolts
All UVs and textures (with the exception of the floor) were done in 3D-Coat V4.5 BETA. Objects were modelled in NVil/Houdini and the scene was rendered in Mantra. Postprocessing: Houdini.© Artur J. Żarek (2015)
-
Does anyone know of a method to construct a pbr glass material in 3D coat? Thanks for any advice, bk
-
Wow, I have to say- very impressed with the PBR material default set ups. I have yet to transfer the maps to my final render but the 3D Coat stuff looks stunning and nice and idiot proof (just the way I like it). Nice work guys - I look forward to when this all comes out in 4.5.
-
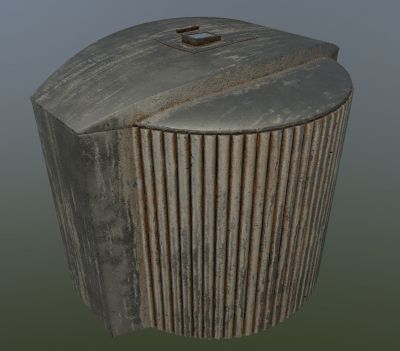
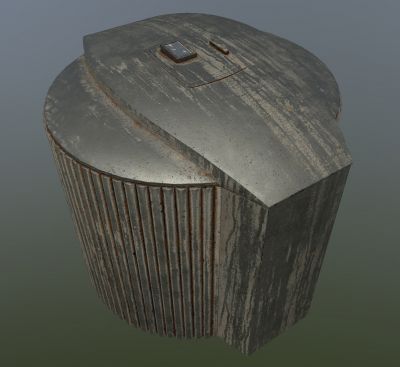
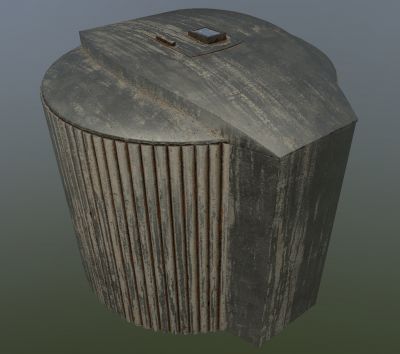
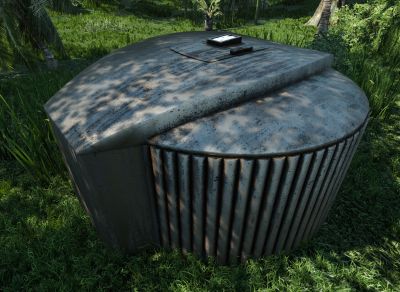
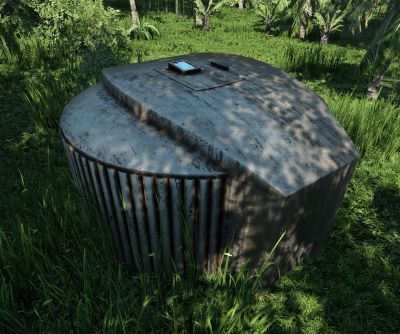
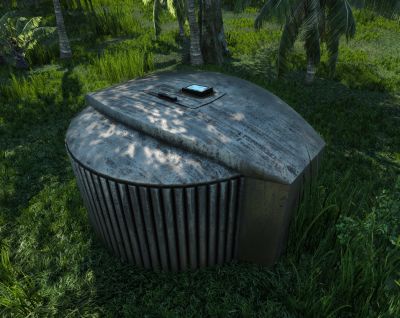
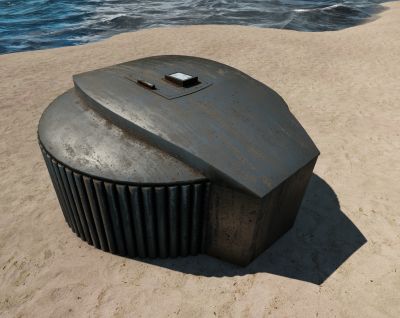
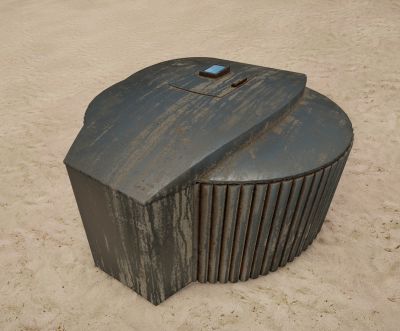
Hello. The first three pictures screenshots from 3D-Coat viewport. The other screenshots from Cryengine viewport.
-
-
-
-
-
-
-
-
-
-
Hello guys, I ask here because I cant anything in the forum related to this. There is any thread where people are sharing their custom PBR materials?
-
I found this pretty neat website on siggraph project documents about different methods of capturing normals, albedos, speculars, and other stuff, from surfaces. So... i was thinking... is it possible to actually get real-world readings with just a camera, a linear polarized filter, a black box, sequential hemispherical lighting on all 360 degree? What i mean is, taking a picture from a polarized camera thats 90 degrees aiming down to the surface, and each picture will have a different lighting value. Then with some editing, recreate all the maps? Or is it more complicated than this? http://www.pauldebevec.com/index.html