Search the Community
Showing results for tags 'photoshop'.
-
I'm trying to use Ctrl P to Edit all layers in external editor via Photoshop but all i get is the cannot write file error. I'm using version 4.8.18. Windows 10. It says its up to date. Same thing happens if i open as Admin.
-
From the album: Kenmo's 3D Art
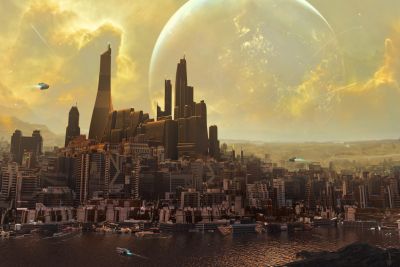
Influenced by Robert E Howard's story - Tower of the Elephant. - 3DCoat, & Hexagon3D, rendered in Vue with detail added with ArtRage & Photoshop© Ken R Morris Jr 2015 ©
-
Anybody know how to setup the spacebar to pan. I go back and forth between PS and 3DC with the projection in EXT editor command. Ive been in the customize navigation setting and I cant figure out how to set the pan from MMB to Spacebar+LMB. if anyone knows how to set this up please let me know. I have setup other hotkeys with the standard method (END) but this one I cant seem to get. Thanks Duey
-
From the album: Kenmo's 3D Art
Rendered in Vue with postwork using ArtRage & Photoshop. I modeled the zeppelin parts in Hexagon & Groboto3D. And assembled the parts in Hex. The Zeppelin was uv mapped & textured in 3DCoat. -
I'm currently texturing a character, and between the torso and the arms, there's a big ugly seam I want to get rid of. I've tried painting/blending over it in 3DCoat, or gone over it a bit to then carry on back in Photoshop. However, exporting the texture out and loading it in Photoshop just gives me a single image file and I lose all of my layers. What would be ideal is loading up my Photoshop file in Coat with all my layers and then exporting it back into Photoshop with all the layers in tact. Is this possible at all? Because when I tried doing it, I get this weird mess in 3DCoat... :-\
-
Hey Guys, I'm not that familiar with 3D Coat yet. For awhile I was mostly using Blender but more recently i've also grown rather fond of 3D Coat especially with the UV Toolset, Voxel Sculpting, and Retopo Tools it has which I happen to like a lot better. I'm working on a first indie game I started with most of my models done so now I just need to texture them decently so that they all look decent when used together for game objects. Originally I was exporting the UV Image only then opening that in Photoshop since I have textures I would then map over it because I'm not very good at texture painting yet so that is why I have gone that route for the time being until I can figure it out better over the course of time. Now, in 3D Coat I am looking for that but I can't seem to do that? Is there no option or way to do that or am I missing it somewhere? I have poked around and tried to look for clues and made several attempts to figure this out more but other than messing around with it more until I get the results I desire. Any advice about this or could someone at least help point me in the right direction that has more experience than me with this?
-
Do we have clipping mask support that is compatible with photoshop clipping mask. I currently still bounce back and forth ps and 3dc but the clipping mask doesn't work. Wish there was a way to support this non destructive workflow between ps and 3dc.
-
Hey guys, really need help with this one as it's halting production on my art pipeline. So as you can see this smart material is very simple. It paints on fine, but when I export the layers it inherits the flat colour from the colour picker as part of the layer. I need the transparency from the green layer to stay intact. So in other words what I am after is a smart material that fills this pattern with green and no blue in the background just transparency. I've achieved this before with the same setup on a different smart material and now the old smart materials are inheriting the same problems. Is this a reinstall situation? Please help! Thanks, Guats
-
Hi, I'm having a problem with smart materials, in particular the particle brushes like dirt and scratches. When exporting the psd to photoshop, the particle brush's brush strokes show up as full brush strokes. When I load them back into 3d coat however, they look fine, although creating a duplication of the layer will cause the new one to look as it does in Photoshop (full brush strokes). This means that the object looks fine in 3D coat, but when I try to test it in game or export it to another program like Substance painter I get these thick lines everywhere that weren't visible in 3D coat. My guess as to the problem is that the 3D Coat editor can interpret the layers as particle brushes fine, but the 2D version of the UV map is saving them as full brush strokes. Creating a new layer with the same colour/diffuse information causes the 3D editor to not recognise the layer and interpret it as it actually looks in the 2D editors. I have attached some images to illustrate the problem. Thanks in advance, Matt
- 4 replies
-
- smart material
- particle
-
(and 2 more)
Tagged with:
-
Hey guys, really need help with this one as it's halting production on my art pipeline. So as you can see this smart material is very simple. It paints on fine, but when I export the layers it inherits the flat colour from the colour picker as part of the layer. I need the transparency from the green layer to stay intact. So in other words what I am after is a smart material that fills this pattern with green and no blue in the background just transparency. I've achieved this before with the same setup on a different smart material and now the old smart materials are inheriting the same problems. Is this a reinstall situation? Please help! Thanks, Guats
-
Hey guys, New here! Just thought I'd share some of my experimental stuff in 3D-Coat, and hope to get some critique / feedback! I'm experimenting with a good workflow using 3D elements to be incorporated into 2D concept work, and trying to achieve a movie still quality style. So I'd love to have any feedback you guys have! Hope you like the work so far! Mohzart
- 4 replies
-
- 7
-

-
- scifi
- conceptart
- (and 9 more)
-
From the album: Yu-Gi-Oh Set
-
- 3d game design
- 3d
-
(and 4 more)
Tagged with:
-
Hello, Programmer retraining himself as a hobby to do more visual work. I'm following Kelvin Tan's tutorials on stylised texture painting using 3D coat. He's on an older version (4.1). To me it seems he was able to export a PSD file with transparent space between all the UV area's. However, pressing CTRL + P myself i get the following image (see 1st attached image) as opposed to the 2nd image. [For bonus points]: It seems he has a specular set up when painting where as i only have metal/roughness sliders, cant seem to find a toggle of some sort in the settings.
-
I'm painting in 3D Coat and i have everything organized inside groups, whenever I send to photoshop and saved there, the groups get messed up. Already tried everything, I have removed all the groups and created new ones, already changed the name of each layer (with and without "_" ) and each group, this always happens. There is no space in the names, everything works normal until i save in photoshop and return to 3D Coat. The bottom group is added to the top group creating a ladder of groups, one inside the other. I already exported all layers as .psd, opened in photoshop, saved and reimportei in a new file in 3D Coat and the same happens How can I fix this problem? Even if i put all groups inside a main group holding all groups this happens after i save in photoshop EDIT: Also tried with 3D Coat 4.7.23 64-bit. Same problem
-
Hello everyone, I am trying to set up a pipeline using 3DCoat as my main painting program for Low Poly 3D Pixel art. I run into two issues. The first is the pixel padding settings when using the Ctrl-P shortcut are not respected. Steps to reproduce Problem 1: Import an .obj for painting in 3DCoat Go to Edit/Preferences/General tab Set padding to Never and padding Width to 0 Export your layers using the hotkey Ctrl-P Go to Photoshop and notice that the padding is still there. The second issue has to do with the corruption of multiple layer groups when a .Psd file is sent back and fort between 3DCoat and Photoshop. Steps to reproduce Problem 2: Import an .obj for painting in 3DCoat Create at least 3 layer groups and fill them with a random amount of layers. Export to Photoshop using either the Ctrl-P hotkey or go to Textures/Export/All Layer Color Go to Photoshop and notice the dialog box indicating: "Some Groups were found corrupted and repaired." Notice that some of the groups you have created are now turned into empty layers and that the layers contained within are placed below the new layer. Alternate steps to reproduce Problem 2: in Photoshop, Create a .psd with at least 3 layer groups filled with a random amount of layers. Save and Import them in 3DCoat. Notice that some of the layer groups are now nested inside of one of your Groups (usually the one placed highest in the list). Notice that if you export back to Photoshop, you may get the "Some Groups were found corrupted and repaired." dialog box. I am using Version 4.7.06 of 3DCoat and Photoshop CC 2014 on Windows 7. Related Mantis bug reports: Padding Problem: http://3dcoat.com/mantis/view.php?id=2144 Layer group problem: http://3dcoat.com/mantis/view.php?id=2145
-
From the album: Macalabs Sketch Dump
Scifi environment workflow practice. P.S. This is a tweaked an edited version of my very first city image in this gallery.- 5 comments
-
- 1
-

-
- macalabs
- environment
-
(and 8 more)
Tagged with:
-
From the album: Macalabs Sketch Dump
Some hardsurface practice. Fuelship, as the title implies.-
- vehicle
- concept art
-
(and 6 more)
Tagged with:
-
From the album: Macalabs Sketch Dump
This is the final result, rendered in Keyshot and painted over in Photoshop, now onto other shores I go :P -
So i export my "All colours layer" and it looks great in photoshop but when i re import it even on the exact same model in 3d coat only a certain amount of layers show up. Ps: http://prntscr.com/b52joa Import error: http://prntscr.com/b52g7g
- 8 replies
-
- all layers
- photoshop
-
(and 3 more)
Tagged with:
-

3D coat importing PSD terribly
Jake Dunlop posted a topic in SOS! If you need urgent help for 3DCoat
So i try to import this psd (that was just exported from 3d coat and not even touched by photoshop) and it simply doesnt have all my layers. Also i don't know how but it really fucked up my clean folder structure i had :'( -
From the album: Macalabs Sketch Dump
-
Hi, As the title says - can I group layers like in Photoshop (in the paint room)? I tried to make a 'folder' but you can't seem to drag layers into it? Thanks Sarah
-
Hello and nice to meet you all fellow artists! I have a set of hand painted texture I have made from photoshop and need to be applied to a collection of buildings. These include textures for walls, roofs, wood, bricks etc that can be applied to parts of buildings. I would like to use a similar tool from photoshop called clone pattern if theres one in 3d coat? Or is there another method you might use to ease the process than using the brush tool and apply your textures as stamps? Thanks in regard!
- 3 replies
-
- clone pattern
- photoshop
-
(and 1 more)
Tagged with:
-
Всех приветствую и прошу Вашей помощи! В общем открыл я модельку в 3d coat'е, выставил ширину и высоту текстуры 2048 и решил раскрасить ее с помощью фотошопа. Выбрал пункт "Редактировать проекцию в Photoshop". Текстурка открылась в фотошопе, все нормально. Раскрасил ее. Вот что получилось в фотошопе Меня все устроило, сохранил текстуру. Захожу в 3d coat, а там вот это... Вот не знаю, что делать Подскажите как исправить ситуацию и, собственно, саму текстуру. Заранее спасибо!


