Search the Community
Showing results for tags 'retopo'.
-
Hey guys. If you were to create a fluffy carpet (https://encrypted.google.com/search?tbm=isch&q=fluffy%20carpet&tbs=imgo:1), or other similar fabric that is made out of fibres that stick out from the main surface, then how would you approach it if it was intended for a: 1) short; 2) real-time engine; Let's say you're starting from scratch and you have 3D-Coat and some traditional modelling software at your disposal.
- 5 replies
-
- 1
-

-
- techniques
- sculpting
-
(and 2 more)
Tagged with:
-
Hello. Just purchased the latest version (educational) and maybe too eager to learn. Although i am slooging my way through the tutorial and watching every youtube video on 3D Coat's Retopo room i seem to be missing something? After importing a model, turning on the symmetry plane, creating my mesh and exporting, i seem to be only getting half the mesh? Now while i can go into another 3D package, mirror my mesh and weld it together i am sure there is something i am not doing with 3D Coat to give me the full mesh? Would be greatful for any slap in the face to know how to do it correctly. Thanks. Pat Lane
-
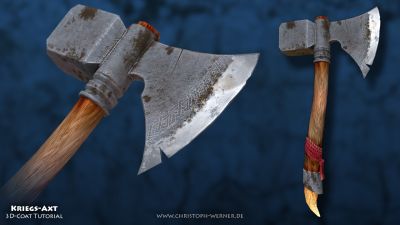
From the album: Artworks
This is a result of one of my tutorial series you can find on my YouTube-Channel. My YouTube-channel: http://bit.ly/1z0f2dW© Christoph Werner
-
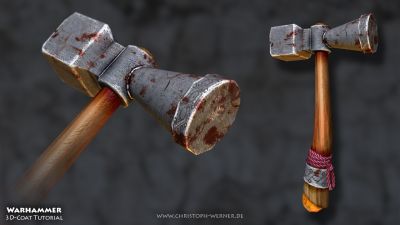
From the album: Artworks
This is a result of one of my tutorial series you can find on my YouTube-Channel. My YouTube-channel: http://bit.ly/1z0f2dW© Christoph Werner
-
Hi everyone, I am brand new to this forum but I have been enyoing 3D Coat for quite a while, especially for modelling. Well for my job I have to take a 3D Scan high resolution .obj file of a head and its texture (8k) and create a low poly version that can use the same texture. I can the create the geometry quite well thanks to the awesome AUTOPO tool but I am struggeling with the UV Maps. Could you guys give me please a small guide how I can get the retopo mesh to use the same texture as the high resolution mesh and if possible keep the details in a normal map? What I've tried so far (Some menu entries names might differ I am not using English as menu language): 1. At startup panel -> Correct scanned Model -> Surface Mode -> Select the High Res .obj 2. Right click on the voxel volume -> Autopo -> Autopo ( Pixel Base) -> ok -> continue -> continue -> the retopo mesh is created 3. Then for the maps -> ok -> ok -> then I select keep uv coordinates, change the uv map size to 8k and press ok 4. Then I am kind out of options, so I go to the Retopo Panel -> File -> Export Retopo Model Now when I go into Blender and import the Retopo .obj file -> select the object -> go to edit mode -> select all vertices -> go to UV/Image editor the vertices are not layed out as usually like a UV map, in fact none are visible and when I load the texture it is tiled all over the head model (many small versions of the whole texture are visible) I already tried messing around with several options under UV-Tool panel -> Textures before progressing to step 4, but did not get any results. Could you please help me out, what have I to do in order to be able to reuse the texture and details in a normal map? Your help is greatly appreciated... Regards, Marcurion
-
Hi everyone, Very newb question- I have been retopologizing a character with different parts, head, body, hands, hat etc and I don't understand the reopo group layers. I read the information in the pdf but it didn't answer my question. How do I get a piece of new topology created hidden, so I can retopo a part that is underneath? Thank you in advance Martian Girl
-
Hello everyone! Does somebody know if one can Retopo / Autopo multiple VoxTree layers at once? The thing is, when I merge all the separate layers on a new, "complete" layer, all the layers will have the highest subdivision level used on the layers. Also, I generate much more unnecessary data that's already there which reduces performance. Besides that, it would save some time if I was able to Retopo over multiple layers as I don't have to create a new layer containing all the other layers. Hopefully, someone can help. Many thanks in advance, Greetings, Shu
-
I am trying to get clean auto-retopos. Tutorials say to symmatrize the model and then check the symmetry axis on the AutopoParams popup. Buuut, as you can see, I don't have the the check boxes. I used to have them, but clearly, I did something and I can't figure out what. Thanx !
-
Hey, i just saw this: http://3d-coat.com/?id=109&list=singleimg&img_name=137762198694&img_type=1 And people say it's from automatic retopology! But i can't find any guides how to achieve effect like this. The most important is to keep hard edges hard - and these on the picture are really accurate! I will be grateful for some hints. Hard surface auto retopology is something that world really needs
- 2 replies
-
- hard surface
- auto
-
(and 3 more)
Tagged with:
-
Almost all objects I make that have edges that are not round come out jagged after retopology or uv room. Everything looks great until I bring it into the paint room or render it.
-
Well I created this model in 3d Coat in the Voxel Room. I did the manual retopology. I uv'ed the model. Clicked apply uv set. I painted the model and when I try to export the model all I get is gray textures. I am sure I messed something up in the file just not sure how to fix it. I was going to upload the file but it is way to big.
-
Is CySlice process twist http://www.headus.com.au/3d-tools/cyslice?id=79 The starting point is a dense polymesh, from sculpt or a 3D scanner. Next the user draws guide curves over the mesh surface to define where the patches are to be placed. These curves can be moved around easily to adjust the surface flow over the underlying mesh. - The guide curves are used as "limits" to create the "islands or patches" - The program automatically create the edges filling the patches, using the guide curves - When the user press enter or apply... the faces are created automatically. The retopo mesh resulting fits perfectly over the underlying dense mesh. The UVLayout is used to create displacement and/or normal map.
-
Hello! I am currently using the 30 day period to evaluate 3d coat. I want a better way to retopologize than what maya has to offer. After i retopologized my object i attempted to export it as a .FBX, which resulted in a crash. In fact i tried all 4 versions of the program executable and everyone one crashed when attempting to export the retopo mesh as a .fbx. I have submitted the info as prompted but i just wanted to post it here and see if maybe it's something that I'm doing wrong. A good note is that exporting to .OBJ works just fine. Attached is the screen shot and here is the submitted info of the report. http://pastebin.com/WbVuRQEh Thank you! -Jon
-
If you unwrapped in the Retopo room but then made changes, how do you get those changes to update in the UV room?
-
Hello, I am new to 3D Coat but really like its retopo tools. Is is possible to import a reference mesh and show its vertex colors (for baking out a diffuse map)? Thank you for your help! Best, mike
-
Hello, I am new to 3D Coat but really like its retopo tools. Is is possible to import a reference mesh and show its vertex colors (for baking out a diffuse map)? Thank you for your help! Best, mike
-
Hello! Playing around with 3d coat for the first time, I've created a face in zbrush, and now I'm looking to retopo and uv it. I've managed to finish the retopo version (the retopo tools were VERY nice to work with) with x symmetry turned on, it looks something like this: Here's the part I'm unsure of. I'd like to "commit" to the symmetry, and have one full mesh. (Similar to doing a duplicate of the half, mirror, and merge in other 3d apps). I tried out hitting the "Symmetry" button, which gives me these results, as you can see some of the edges along the symmetry line are no longer visible: With the UV Mark seams too, I can highlight edges that should be there, but no visual feedback indicates I've selected anything. Selecting the edges I can see turn green. What am I doing wrong? Thanks
-
Hey probably a dumb question, but I don't know where to start to do this easily - it seems there should be an easy way to not have to do a lot of tedious repetitive steps. Say I've got a medium/high resolution LW object which contains a number of facial and other morph maps and I want to retopo it - either manually or automatically. Let's say I manually retopo the neutral or base pose to my poly flow liking - is there any way to have the new retopo object pull across the morph maps to my new object relative to the poly flow I've created while manually retopoing my object? For example let's say I have Head which has Neutral, Happy, Angry, Sad etc in the imported object. Then I retopo Neutral. I want my retopo'ed object to automatically still have Happy, Angry, & Sad as part of it - but now using my new retopo'ed poly flow. I don't want to retopo all of them individually and worry about merging and point order. I want an automatic solution given that I only do the retopo to one of the X morphs in the imported object. Is this possible? thx
-
Hi again, I really need help on this one. I've managed to make a Voxel-model and to manually retopo the whole thing. But now there is still the inside of the mouth to go and I can't seem to figure out how to do it. I tried making the upper jaw invisible (first the Voxels, then the Retopo-polygons). Then I tried to Retopo the lower jaw in the "points/faces" mode, but the points snapped to the invisible upper jaw insead of the lower jaw. Hmmm.....how would you go about this problem? I've attached some (three) screenshots to better explain my problem. Thanks in advance! Greetings from Schmölau Petra
-
How do I get what I have done in the Retopo room to apply to the UV room? They are completely different.
-
I think I've tried this before but couldn't figure it out. I have imported my mesh, UV'd it and textured only to discover it's pivot is in the wrong place. Can I move the pivot in 3dCoat rather than having to export to another package? Seems like a simple enough operation. Cheers
-
Hi, I'm coming from Topogun and I have found 3DCoat retopo room to be heaven sent. I've pretty much found all the info I needed on these forums but one thing still eludes me and unfortunately it is a make or break thing because it's the last link in the chain - without it all my work is worthless. I'm here to ask any expert for advice on the following: I have broken down my retopo object into several uv sets. How do I export (from Retopo room, NOT paint) the maps for these uv sets... So far I get overlapped maps on one map. In other words my 3 displacement maps are superimposed into one. Now for the question of why I don't take my object to the Paint room... because I could not find one single way, after literally dozens of tries based on the 3DCoat tutorials and docs to get it into the Paint room without artifacts. Thank you all so much.
- 23 replies
-
Hey guys, Just wondering... After doing a retopo of my model in 3DC and bringing it into C4d, placing it under a HyperNurbs,.... ooops SubdivisionSurface, I loose part of my Volume of course. Simplest thing to do, is to use the brush and go over the shrinked parts, I normaly use a high density exported version from the voxel room and place it at the same place as my retopo-ed version but with a different color. That way I can check which parts needs to be corrected in order to have the same shape/volume as my voxel version. I'm curious to know how other people deal with this, maybe there is a more clever way of doing this. Thanks, Robert
-
Hi How would one go about importing a reference image into Retopo and then building my retopo mesh from the 2d photo? Thanks!
-
any tips on how i might remove these nasty white bits on the low poly bake

