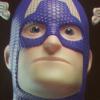
Member syunikiso Posted November 24, 2021 Member Report Share Posted November 24, 2021 Hi guys, I'm sculpting a miniature for a client and he asked for the character to have curly hair. I tried this: After all, the head is going to be 7mm tall. However he didn't like it and asked for something like this: Which honestly I have no idea how to sculpt it. Do you have any suggestions on how to do it in 3DCoat? Quote Link to comment Share on other sites More sharing options...
Advanced Member Yousung Posted November 24, 2021 Advanced Member Report Share Posted November 24, 2021 This post was recognized by Carlosan! Yousung was awarded the badge 'Helpful' and 1 points. Wow.... Among the Brush Engine Modifiers, there is a 'Rotate' that has an effect similar to Swirl Clay. I hope that it will help you to make curly hair. 1 Quote Link to comment Share on other sites More sharing options...
Contributor poeboi Posted November 24, 2021 Contributor Report Share Posted November 24, 2021 4 hours ago, syunikiso said: Do you have any suggestions on how to do it in 3DCoat? I have an idea however you said miniature, does client intend to want it 3d-printed? Because not sure if the solution I have in mind would work particularly well for that honestly I struggle to envision how one could get particularly better results suitable for printing than what you have 1 Quote Link to comment Share on other sites More sharing options...
Member syunikiso Posted November 24, 2021 Author Member Report Share Posted November 24, 2021 24 minutes ago, Yousung said: Wow.... Among the Brush Engine Modifiers, there is a 'Rotate' that has an effect similar to Swirl Clay. I hope that it will help you to make curly hair. Hey Yousung, Thank you for teaching me this feature! I wasn't aware of it. However, it looks like it won't be enough if I try to sculpt directly. I believe I'll need something like individual strand meshes to be placed separately, although I'm not really sure it'll work. In any case I'll tinker with the rotate function to see if I get better results Quote Link to comment Share on other sites More sharing options...
Member syunikiso Posted November 24, 2021 Author Member Report Share Posted November 24, 2021 5 minutes ago, poeboi said: I have an idea however you said miniature, does client intend to want it 3d-printed? Because not sure if the solution I have in mind would work particularly well for that honestly I struggle to envision how one could get particularly better results suitable for printing than what you have Dude. Same here. I'm struggling to think of a way to sculpt a more elaborated version of this hair since it will be only 7mm tall. In any case I comissioned a few brushes for michaelgdrs (he's an user of this forum and has a rich gumroad page) expecting to add some variation to what I already have. If this don't work I don't know what I'm going to do lol 1 Quote Link to comment Share on other sites More sharing options...
Contributor poeboi Posted November 24, 2021 Contributor Report Share Posted November 24, 2021 This post was recognized by Carlosan! poeboi was awarded the badge 'Great Content' and 1 points. @syunikiso Here is my proposed solution, this is a bit of a quick and scuffed example, you should be able to make more elaborate result with this but just to present the idea. All steps included in .zip file but here are the highlights: Create a vaguely "hair contour" shape suitable for bending We're then going to create some curves from the edges of this spiral fix the "hair shape" so it's pointy, before we bend it also use smooth curve deform tool to make the curve more organic Bend it along curve, adjust accordingly with parameters of bend tool Subdivide so it's smoother This will be "one iteration" of a curl that we can use multiple times, store it in meshes panel Having stored that curl to the meshes panel, and using the "primitives" tool with it (the curl) as the "primitive" in sculpt workspace gives us these controllers that we can use to easily place it and change it's shape somewhat with the handles And so you place and deform a lot of these poly curves like that Again, very quick example, the curl came out a bit scuffed but you can make a mor elborate contour and curate it much more etc hope it can help, didn't have a lot of time on my hands righ now curlhair_steps(quick example).zip 2 1 Quote Link to comment Share on other sites More sharing options...
Advanced Member sprayer Posted November 24, 2021 Advanced Member Report Share Posted November 24, 2021 Yes i am also thought to model strand and scatter, but it looks like scattering (on brush) in 2021 is broken, it smudge the model during drawing, in 4.9 it work but radius jittering not working. Can you check this guys? Quote Link to comment Share on other sites More sharing options...
Member syunikiso Posted November 24, 2021 Author Member Report Share Posted November 24, 2021 2 hours ago, poeboi said: @syunikiso Here is my proposed solution, this is a bit of a quick and scuffed example, you should be able to make more elaborate result with this but just to present the idea. All steps included in .zip file but here are the highlights: Create a vaguely "hair contour" shape suitable for bending We're then going to create some curves from the edges of this spiral fix the "hair shape" so it's pointy, before we bend it also use smooth curve deform tool to make the curve more organic Bend it along curve, adjust accordingly with parameters of bend tool Subdivide so it's smoother This will be "one iteration" of a curl that we can use multiple times, store it in meshes panel Having stored that curl to the meshes panel, and using the "primitives" tool with it (the curl) as the "primitive" in sculpt workspace gives us these controllers that we can use to easily place it and change it's shape somewhat with the handles And so you place and deform a lot of these poly curves like that Again, very quick example, the curl came out a bit scuffed but you can make a mor elborate contour and curate it much more etc hope it can help, didn't have a lot of time on my hands righ now curlhair_steps(quick example).zip 13.85 MB · 0 downloads One of the problems about me is that I'm a 3DCoat noob. I couldn't even have this idea considering my skill level in the software Amazing stuff man, thank you very much for taking the time to do that, I'll definitively tinker with the file you gave and try to create more strands to work with. 1 Quote Link to comment Share on other sites More sharing options...
Member syunikiso Posted November 24, 2021 Author Member Report Share Posted November 24, 2021 1 hour ago, sprayer said: Yes i am also thought to model strand and scatter, but it looks like scattering (on brush) in 2021 is broken, it smudge the model during drawing, in 4.9 it work but radius jittering not working. Can you check this guys? I wasn't even 100% aware of these options lol But I'll probably mess with them in this piece. If so, I'll let you know how it went 1 Quote Link to comment Share on other sites More sharing options...
Contributor poeboi Posted November 24, 2021 Contributor Report Share Posted November 24, 2021 This post was recognized by Carlosan! poeboi was awarded the badge 'Helpful' and 1 points. 9 minutes ago, syunikiso said: One of the problems about me is that I'm a 3DCoat noob. I couldn't even have this idea considering my skill level in the software Amazing stuff man, thank you very much for taking the time to do that, I'll definitively tinker with the file you gave and try to create more strands to work with. no problem! The trick I think will be creating one "curl" model that's an adequate approximation of a curl of hair and placing multiples, making them distinct enough. The one I did in the example is obviously not very appealing it was just for demonstration purpose As a bonus, here's two more ways to place the curl/model in case it's easier 1. using "Import" tool, and using "on brush" lets you place it with your brush instead and changing some parameters 2. using the entire curl as the model to bend, and bend along curves you place on the head. You can do multiple curves in one go as well by the way, (select all curves, model, and bend) but you lose some control and it can also take up too much memory l7VCJMudiJ.mp4 JR57Gkkhfd.mp4 1 Quote Link to comment Share on other sites More sharing options...
Advanced Member sprayer Posted November 24, 2021 Advanced Member Report Share Posted November 24, 2021 (edited) This post was recognized by Carlosan! sprayer was awarded the badge 'Helpful' and 1 points. 2 hours ago, syunikiso said: I wasn't even 100% aware of these options lol But I'll probably mess with them in this piece. If so, I'll let you know how it went Affected settings for scattering some of them in import window and some in brush options, there is spacing and other staff for jittering, what important is radius(scale) with jitter position it works more or less Edited November 24, 2021 by sprayer 1 Quote Link to comment Share on other sites More sharing options...
Member syunikiso Posted November 25, 2021 Author Member Report Share Posted November 25, 2021 11 hours ago, poeboi said: no problem! The trick I think will be creating one "curl" model that's an adequate approximation of a curl of hair and placing multiples, making them distinct enough. The one I did in the example is obviously not very appealing it was just for demonstration purpose As a bonus, here's two more ways to place the curl/model in case it's easier 1. using "Import" tool, and using "on brush" lets you place it with your brush instead and changing some parameters 2. using the entire curl as the model to bend, and bend along curves you place on the head. You can do multiple curves in one go as well by the way, (select all curves, model, and bend) but you lose some control and it can also take up too much memory l7VCJMudiJ.mp4 1.72 MB · 0 downloads JR57Gkkhfd.mp4 5.02 MB · 0 downloads There are videos I can just say thank you Actually I got the brushes from Michael. Greeeat stuff! However I believe I'll try to make some myself. I need to learn more about the program... 1 Quote Link to comment Share on other sites More sharing options...
Member syunikiso Posted November 25, 2021 Author Member Report Share Posted November 25, 2021 9 hours ago, sprayer said: Affected settings for scattering some of them in import window and some in brush options, there is spacing and other staff for jittering, what important is radius(scale) with jitter position it works more or less What's with that emoji lol Yup! I think that a mix of everything you guys taught me will allow me to finish this one! (and the brushes I got as well ) Thank you once again. 2 Quote Link to comment Share on other sites More sharing options...
Member syunikiso Posted November 30, 2021 Author Member Report Share Posted November 30, 2021 Hello! The result of the printing of the version that I did turned out very bad. Not only the hair didn't work, the head itself wasn't very good in the given scale. While trying to figure out my next step, I was looking at my earlier attempts and processes for the head. I want to share them with you. But, before that, I would like to ask something. I'm trying to put high frequency detail in a model but the way that 3DCoat presents the results for me is making me confused. Here's how it looks with a cavity shader: I can't even see the real shape of the alphas (there are shapes and directions in the alpha, not only a random noise). When I put a shader w/o cavity it looks like this: Very different. And when I render with a SSS material in Blender, it looks like this: I know this one is smaller, but what I want to show is that I had no idea how it would appear beforehand. I just found out when rendering and it actually doesn't look good. To add more pointers, here's how I'm doing the detailing: 1. I subdivide the area with the subdivide tool. 2. I apply the corresponding alpha for each area of the face. This part is hard, because: a. 3DCoat doesn't seem to handle well a big quantity of polygons b. Because of the shader issue I can't really see what I'm doing; if the scale of the alpha is correct, if the shape is correct, etc. If you guys have any suggestions to help with that, I would appreciate Quote Link to comment Share on other sites More sharing options...
Member syunikiso Posted November 30, 2021 Author Member Report Share Posted November 30, 2021 Here's the heads I did for this project (so far). They were rendered in Blender. 1. The first blocking. 2. Messing with expressions. 3. More expressions. (I know, it looks bad. I ordered the anatomy for sculptors book about expressions. It should arrive soon) 4. And even more expressions (this one was sent and reproved by the client). 5. First attempt on the hair, reproved. 6. Second attempt on hair, reproved. And the latest is the one in the beginning of the thread. Still trying to figure out how to proceed here, but this thread helped me a lot with this, so thank you! 1 Quote Link to comment Share on other sites More sharing options...

Recommended Posts
Join the conversation
You can post now and register later. If you have an account, sign in now to post with your account.
Note: Your post will require moderator approval before it will be visible.