Advanced Member alvordr Posted July 24, 2014 Advanced Member Report Share Posted July 24, 2014 I think he gets the point...sorry...I had to say it. Quote Link to comment Share on other sites More sharing options...
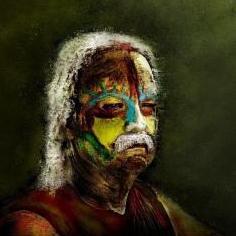
Reputable Contributor digman Posted December 24, 2014 Author Reputable Contributor Report Share Posted December 24, 2014 (edited) Took an older sculpture of mine and did some 2D overpainting in an android paint app and then a iPad photo adjusting app for the filter... A little holiday fun... Edited December 24, 2014 by digman 3 Quote Link to comment Share on other sites More sharing options...
Contributor Tony Nemo Posted December 24, 2014 Contributor Report Share Posted December 24, 2014 Thus spake Zarathustra. Quote Link to comment Share on other sites More sharing options...
Advanced Member Garagarape Posted December 25, 2014 Advanced Member Report Share Posted December 25, 2014 David, Tony Nemo, Merry Christmas to you! Quote Link to comment Share on other sites More sharing options...
Advanced Member alvordr Posted December 26, 2014 Advanced Member Report Share Posted December 26, 2014 Cool, as always. Quote Link to comment Share on other sites More sharing options...
Reputable Contributor digman Posted January 12, 2015 Author Reputable Contributor Report Share Posted January 12, 2015 (edited) The old teapot test... default PBR materials and one adjusted dirt_material. Starting to see how PBR materials work... Dirty copper teapot. Straight import into the Paint Room, no baking... Teapot by comeinandburn from Blendswap.com Edited January 12, 2015 by digman 2 Quote Link to comment Share on other sites More sharing options...
Advanced Member Garagarape Posted January 12, 2015 Advanced Member Report Share Posted January 12, 2015 Hey Digman. Looks great! What do you mean by "straight import into the paint room"? Is that the result after a material bake? Or did you just click the paint room tab? I have to try too to understand probably. Thank you to always explore the new tools! Quote Link to comment Share on other sites More sharing options...
Reputable Contributor digman Posted January 12, 2015 Author Reputable Contributor Report Share Posted January 12, 2015 (edited) Hey Digman. Looks great! What do you mean by "straight import into the paint room"? Is that the result after a material bake? Or did you just click the paint room tab? I have to try too to understand probably. Thank you to always explore the new tools! I did not first import the model into voxel or surface mode, retopo and then bake. I imported the model into the paint room for PPP with a few subdivisions. Baked my cavity map and AO in the paint room. All under the Textures menu now. As this was just a test, I let 3DC make a auto uv set. The rest is all PBR material work and PBR rendering (latest beta) which we now have in the paint room... I used the PBR copper material, dirt and I adjusted another dirt to get the effect I was after. I hope Andrew will now give us better AO baking (calculation) in the Paint Room, we really need it for PBR... Edited January 12, 2015 by digman Quote Link to comment Share on other sites More sharing options...
Advanced Member Garagarape Posted January 12, 2015 Advanced Member Report Share Posted January 12, 2015 That's a great result with no artifacts for an auto uv set model. Yes, actual ambient occlusion bake in 3sC is not that great. I always do it with Xnormal (Which gives more artifacts and is much more sensible, but more sharp and accurate). Quote Link to comment Share on other sites More sharing options...
Reputable Contributor digman Posted January 15, 2015 Author Reputable Contributor Report Share Posted January 15, 2015 (edited) Wip of a older can with a little heavy dirt splatted about. Modelled in Wings3D: 780 polygons. Manual uv seams layout. No baking, imported straight into the paintroom with no subdivision for PPP AO baked in Blender. Girl painting is from an old can I have. I took the photo then removed the lighting from it so I could use it for a PBR material. Default materials, some adjusted and created my own dirt splatter material. Shown in PaintRoom with the default PPR rendering in the viewport. Edited January 15, 2015 by digman 1 Quote Link to comment Share on other sites More sharing options...
Reputable Contributor digman Posted January 15, 2015 Author Reputable Contributor Report Share Posted January 15, 2015 (edited) Rendered in Blender Cycles using the PBR Dual Shader. Some more tweaking on the model in 3DC but only the PBR materials, same low polygon as the first post. Edited January 15, 2015 by digman 3 Quote Link to comment Share on other sites More sharing options...
Javis Posted January 15, 2015 Report Share Posted January 15, 2015 That's cool David. Out of curiosity, what did you use to remove the diffuse/reflective lighting for your albedo? Quote Link to comment Share on other sites More sharing options...
Contributor Malo Posted January 15, 2015 Contributor Report Share Posted January 15, 2015 Looks nice. Quote Link to comment Share on other sites More sharing options...
Contributor ajz3d Posted January 15, 2015 Contributor Report Share Posted January 15, 2015 Nice. Does it contain candies? Quote Link to comment Share on other sites More sharing options...
Advanced Member Garagarape Posted January 15, 2015 Advanced Member Report Share Posted January 15, 2015 Nice decorated box! I have no idea of what you used to remove the shades. Is that done in Photoshop like in the following tutorial? http://www.creativebloq.com/remove-light-and-shadow-using-photoshop-8134072 Quote Link to comment Share on other sites More sharing options...
Reputable Contributor digman Posted January 15, 2015 Author Reputable Contributor Report Share Posted January 15, 2015 (edited) Nice decorated box! I have no idea of what you used to remove the shades. Is that done in Photoshop like in the following tutorial? http://www.creativebloq.com/remove-light-and-shadow-using-photoshop-8134072 That tutorial seems centered on removing localized lighting/shadows in images I am learning all this stuff from setting up the photo shoot to removing the lighting, brain is about cooked over easy now... I used Photoshop for removing the lighting. For our base PBR material we need the reflection lightning and removed from our image like how polorized lens help on a camera. First, nothing beats a good photo of a texture with even diffuse lighting for working in Photoshop. Makes life much easier in PS because directional lighting is a major pain so if you have a highly directional bright light source, better to move on and get a another photo of the texture... The girl photo was not well shot but I managed to at least make it workable. I will shoot it again later. We will want a non-colored image and at other times colored for our base PBR materials, like rock, metal, wood, cloth etc but we will use regular photos as well as in the case of the girl. We can not forget procedural textures either then we do not need photoshop at all... LOL I am working on a method right now that is a combination of what I read so far. I would need to make a tutorial on it if you guys think the results shown in the pictures warrant one. Here are a couple of pics though of the outcome. Texture downloaded from the web. These are just shown for the results of removing the lighting from the texture. You could add a little more contrast to the images too but I left off here on these. Are they 100% lighting information removed, of course not... Edited January 15, 2015 by digman Quote Link to comment Share on other sites More sharing options...
Advanced Member Garagarape Posted January 15, 2015 Advanced Member Report Share Posted January 15, 2015 Oh! That must be a hard work. So, I guess that if your want to neutralize the lighting, you need to have a bunch of lights around the thing you shot; like non of these lights can take over the others and give a direction info? And I bet you use levels in Photoshop + contrast and hue, may be. It's probably possible to make a script of it. actually I found a software a year ago, that do this kind of image management, but it would cost an arm (like we say in french). Because it was too expensive I didn't bookmark it and now I can't find it anymore I've heard that people who makes realistic characters for video game use this technique and also tweak gamma value. Always a pleasure to follow your explorations in and outside 3dCoat. Thanks! Quote Link to comment Share on other sites More sharing options...
Reputable Contributor digman Posted January 15, 2015 Author Reputable Contributor Report Share Posted January 15, 2015 (edited) And Garagarape as I woke up from my nap I thought to myself "gosh David", game artist have been removing lighting from textures for years so nothing really new here,it just more important than ever with PBR for realistic rendering of our materials so they look good under all lighting conditions... Gradient Map--- Default "Reverse" Really narrows the entire image down to the midtone range. Levels to bring back some contrast plus ( keeps banding from happening when running the high pass filter and high pass works better on a grey color range images it appears. High Pass filter (various settings depending upon the image.) high pass filter can be way to much but in this workflow it works fine. Levels ( a little) Luminosity blending mode if you want to put the color back in the image without the lighting Color balance and contrast if wanted or needed. Yeah, light diffusers, lights around your subjects, cloudy days, polarized camera lens and this too. LOL https://udn.epicgames.com/Three/TakingBetterPhotosForTextures.html Edited January 16, 2015 by digman Quote Link to comment Share on other sites More sharing options...
Carlosan Posted January 15, 2015 Report Share Posted January 15, 2015 I remember some read about in this post Since those textures are in most cases not polarized I do the following.- Duplicate the image.- Saturate it- Apply Gaussian Blur- Invert the color- Set that layer into overlay modeBy doing that I can equalize lighting in the photo and get rid of unwanted light sources. Quote Link to comment Share on other sites More sharing options...
Advanced Member alvordr Posted January 16, 2015 Advanced Member Report Share Posted January 16, 2015 (edited) I knew concentrating on materials like this would open up a can of worms. If we're going for render-ready shots, then this puts the render room into the queue for multiple light setups. This is why I feel it's better to let the best of breed do those things. My concern with the material setup from before 4.5 was that it didn't lend itself to useful flexibility without being overly complicated. Cheetah3D has the best material system I've seen...super simple, super powerful, visually-driven UI...it's similar to how Unreal and Maya do it, but better. Edited January 16, 2015 by alvordr Quote Link to comment Share on other sites More sharing options...
Reputable Contributor digman Posted January 18, 2015 Author Reputable Contributor Report Share Posted January 18, 2015 (edited) Another simple PBR model, a newer brush. Modelled in Wings3D. Imported into 3DC paint room at it's original 6000 polygons as it is just for rendering a still in Blender later.. Not happy with the bristles yet or the paint on the bristles but is still a WIP in the works. In Blender I might use the hair routine to get real bristles for the final model... Edited January 18, 2015 by digman Quote Link to comment Share on other sites More sharing options...
Contributor Tony Nemo Posted January 18, 2015 Contributor Report Share Posted January 18, 2015 It looks like the paint dried which is a bummer to restore the bristles to their pristine softness. Fortunately, 3DC has numerous tools to make the problem go away. Quote Link to comment Share on other sites More sharing options...
Reputable Contributor digman Posted January 27, 2015 Author Reputable Contributor Report Share Posted January 27, 2015 (edited) PBR can be used for Stylized work too.. A Wip concept spaceship...I like color... Edited January 27, 2015 by digman 3 Quote Link to comment Share on other sites More sharing options...
Contributor Tony Nemo Posted January 27, 2015 Contributor Report Share Posted January 27, 2015 It looks like a ceramic space ship which may be useful for reentry. Quote Link to comment Share on other sites More sharing options...
Reputable Contributor digman Posted February 21, 2015 Author Reputable Contributor Report Share Posted February 21, 2015 @Tony, yeah I just like the comic style colors on the ship... Ok, here is an early wip 3D helmet concept exploring idea. Nothing at all set in stone at this stage, just getting a overall helmet design that I will go with... 1 Quote Link to comment Share on other sites More sharing options...
Advanced Member Garagarape Posted February 22, 2015 Advanced Member Report Share Posted February 22, 2015 Nice helmet and spaceship David! I like the idea of a kind of Gaudi styled spaceship. That wasn't something done before I guess. There is something to explore here. The helm is good too. I like the shapes a lot. If it was a real one, the guy could be hit in the cheek by the open area on the side though. But of course, letting apparent skin area to bring rhythm to the whole is important too. What did you use for the eyes? They look mysterious with slightly glowing and wet feel. Quote Link to comment Share on other sites More sharing options...
Reputable Contributor digman Posted February 22, 2015 Author Reputable Contributor Report Share Posted February 22, 2015 (edited) Thanks Garagarape I added a thin pot helmet made with leather but with metal chin guards attached. The leather helmet works as a cushion for the heavier helmet too. Eyes are just a pbr material and they have a lot of AO on them.. I painted a little light reflection too... All materials are stand ins and the person wearing the helmet for now is just the default head bust. Basic design done. Now time to go back and start to hammer the blank out of it... Edited February 22, 2015 by digman 1 Quote Link to comment Share on other sites More sharing options...
Reputable Contributor digman Posted February 22, 2015 Author Reputable Contributor Report Share Posted February 22, 2015 A little better view of the chin guards... 1 Quote Link to comment Share on other sites More sharing options...
Reputable Contributor digman Posted February 23, 2015 Author Reputable Contributor Report Share Posted February 23, 2015 Last update of the evening... 4 Quote Link to comment Share on other sites More sharing options...
Advanced Member Garagarape Posted February 24, 2015 Advanced Member Report Share Posted February 24, 2015 Nice! It's even better with the beast on the top of the helmet. Quote Link to comment Share on other sites More sharing options...

Recommended Posts
Join the conversation
You can post now and register later. If you have an account, sign in now to post with your account.
Note: Your post will require moderator approval before it will be visible.