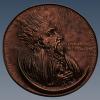
Advanced Member L'Ancien Regime Posted May 3, 2011 Advanced Member Report Share Posted May 3, 2011 OK, I modeled a femur in Maya then took it over to 3d Coat and used Merge Tool to turn it into voxels and rework it at a higher level of refinement. All went well after a bit of buggering around to reteach myself this arcane skill. So then I finished working on the modeling with voxels level and did an Autopo For Per Pixel. What I got from this was a retopoed mesh in the Retopo UI, A UV map of my work in the UV UI, and in the Paint UI I have what appears to be the Voxel version of my original sculpt in it's Old Bone Sans Ambient Occlusion material. Apparently though I'm not sure. In the Layers menu I'm looking at four things; -Baked Occlusion (map) -Normal Map -Voxel (of my sculpt) That is the one selected and if I click on the eye next to it it disappears. -Layer 0 Now as you can see I'm texturing away but I'm a bit worried about where this is all going since I'm sailing off into a bit of mer incognita here. 1.When I'm finished texturing what next? How do I extract all this to a mesh with maps (8096x8096) that I can take over to Maya/Mental Ray for rendering? 2.When I do bake all this information out somehow or other how do I select the folder where I want these newly baked maps and .obj mesh to end up? Will I be able to get a displacement map out of this as well as a normal map? This is my first venture in painting directly onto the voxels and I like it a lot so far...here's hoping the entire episode doesn't end in disappointment. Also I've got one other question about texturing, which in my opinion is really the selling point of 3d coat. It's amazing and a real rival to Weta Mari; if you look at the smooth bulb of the ball that fits into the hip socket you'll see I wanted to make it smooth, but on the borders of each setup of the texture map to a new angle the overrun of my texturing brush creates an unpleasant seam or indentation that ruins the effect. I've got falloff on the brush over 50% but it's still doing this. Is there any solution so I can have seamless borders between texture patches? Quote Link to comment Share on other sites More sharing options...
Advanced Member Grandmaster B Posted May 4, 2011 Advanced Member Report Share Posted May 4, 2011 Hi, nice to see that you like 3D-Coat! Since you are a beginner, there are a few things worth mentioning that arent too obvious at first. First of all, only the Voxel-Room (Tab) has a voxel representation of the model, all other rooms work with normal meshes. You can import existing meshes that you made in Maya as a mesh for retopo, UV editing and painting. And you can import meshes (like you did) into the voxel room, this will convert the mesh into a voxel model. All these options are useful for a particular case. For example, if you just want to paint a model you optimized and UV-unwrapped already you can just import into the painting room. And if you have a model you want to have more geometrical details you import into the voxel room, but keep in mind that in this case the original mesh topology and UVs will be lost and need to be done again. This is why in 3D-Coat you normally transfer voxel models into the Retopo room when done with sculpting. You probably knew that, already. To your questions. First, there are two ways to create ambient occlusion maps, first is when you transfer a model from the voxel room to a mesh and second if you use the "Calc Occlusion" option in the painting room (can be found in the "Textures" top menu bar). The latter is only the occlusion from the mesh, not taking the original voxel model into account! Important to know is that all visible color layers (which includes the occlusion layer!) are exported as a diffuse texture. You may hide one color layer (by clicking on the eye) if you do not want to include it in the resulting texture. Same goes for normal/depth layers and specular layers. You have to know what layer contains what type, you can paint color, depth and specular to any layer, so be careful with that! I recommend to stick to one type per layer. If you see visible seams on your model while painting, it most probably means that the UV map could be optimized. You can try to do that either automatically or by-hand in the UV room. The good thing is, if you edit the UV map of you mesh and apply the changes all layers/maps will be recomputed so that all your painting will remain. You can then draw on the seams again. Please refer to the manual on how to use the UV room and do some experiments with that first. You can paint meshes with no visible seams but it sometimes takes some adjustments. To take you mesh and textures back into Maya you can export it by doing "File" -> "Export Model", examine the options, its all there! Also there is the option to import/export textures with "Textures"->"Export". You may also try the Maya AppLink, it will synchronize the model with Maya. See here: http://www.3d-coat.com/forum/index.php?showtopic=6886 Im not a Maya user so i can not answer all your questions regarding that. 1 Quote Link to comment Share on other sites More sharing options...
Advanced Member L'Ancien Regime Posted July 10, 2012 Author Advanced Member Report Share Posted July 10, 2012 Thanks a lot Grandmaster B Quote Link to comment Share on other sites More sharing options...

Recommended Posts
Join the conversation
You can post now and register later. If you have an account, sign in now to post with your account.
Note: Your post will require moderator approval before it will be visible.