 中文 (中国)
  English
 Українська
 Español
 Deutsch
 Français
 日本語
日本語 Русский
 한국어
한국어 Polski
 Português
 Italiano
 Suomi
Suomi Svenska
 中文 (台灣)
 Dansk
Dansk Slovenčina
 Türkçe
 Nederlands
 Magyar
 ไทย
ไทย हिन्दी
 Ελληνικά
 Tiếng Việt
 Lietuviškai
 Latviešu valoda
 Eesti
Eesti Čeština
 Română
 Norsk Bokmål
How can i export only curvature and occlusion maps?
On Paint Room open the export Panel at File > Export > Objects & Textures

Create a new Export Constructor preset selecting only ExportAO and Export Curvature Map.
When i click on the Export Panel add texture and then i click RGB i cannot find any curvature name, only cavity. Is cavity same as curvature?
Yes and no.
Cavity Map focus on small details, while Curvature Map emphasize the overall shape of a surface, it map store the concave and convex edges of a mesh.
However ‘Cavity map’ is different than “Curvature map”. A Curvature map actually store the concave and convex edges of a mesh. Is also called Concavity, Convexity, Pits & Peaks, Worn Edge.
The convex (white) and the concave (Black) is Curvature map and the transition between peaks and crevices (gray values) of the model is Cavity map.
To produce a Cavity map that we could use as Curvature, we need more gray-scale values so that we can identify the convex (white), the concave (Black) and the transition between peaks and crevices (gray values) of the model.
– Cavity texture
Focuses on small details like crevices, grooves, and indentations (cavity maps are also known as crevice maps).
They are a more detailed version of ambient occlusion maps.
Cavity maps can be useful for improving dirt masks, enhancing colors, and adding highlights.
– Curvature texture
Focuses on the overall shape of a surface, showing where the surface curves inward or outward.
Curvature maps are also known as concavity, convexity, pits and peaks, or worn edge.
Curvature maps can be used to simulate edge wear, highlight details, and check for surface continuity.
Curvature can be both an RGB map encoding convexity/concavity in separate channels, or a gray scale map encoding convex edges as white and concave edges as black like in the image below.
I went ahead and exported cavity, it looks like a curvature map. Can i use that one as a curvature?
Select Cavity for Curvature. (the map generated is named Cavity at export).

This map is often (erroneously) called Cavity, but more accurately a Cavity map can also be a white map with concave edges encoded as black.
3DCoat does not have the option to export both maps at the same time, but you can generate them using the Generate Curvature map tool.

Utilize Normal maps during AO and Curvature baking
Other major new Improvement is the ability to utilize Normal maps during this baking process, so let’s go ahead and get started by hiding some of the layers.
Hold down the ALT key and select the visibility icon on one of these layers and the only one to leave intact is the one that has normal map information on it.
You need to have the Normal map visible so that 3DCoat can utilize it during this baking process.
So now let’s go ahead and go to the Edit menu and choose Calculate Occlusion and Curvature maps.
Pay attention that curvature consists of two components
First is local curvature that allows to detect small details, scratches.
Second is long-range curvature that flows smoothly and allows to detect large details.
If you need Gray Maps set intensity for both types: curvature or cavity.
- Turn intensity up create a cavity map. (curvature intensity 400, long range curvature 10).
- Turn intensity down create a curvature map. (curvature intensity 8, long range curvature 100).
Another workflow is to use Local Curvature RGB for Cavity map…

And Local Curvature for gray Curvature map

Following this steps you can get this result:

RGB Cavity map
Starting from 3DCoat 2021.53 the RGB Cavity map was introduced as the default calculation method in Texturing.
You can active RGB Cavity “Curvature” on Edit > Preferences > Tools.
On Cavity map RGB each channel contains different information, like convexity in red and concavity in green for instance.
Cavity Area Width:
This option requires the RGB cavity pre-calculated using the Textures->Calculate curvature, Local Curvature RGB.
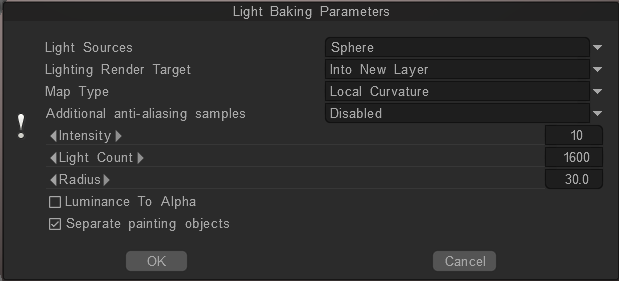
When you first run the Curvature using RGB Cavity, the Light Baking Panel comes up.
Not change the settings Local Curvature RGB (you can change some later) and run the Curvature Calculation.

In the Smart Material Editor this option appears in the Editor when RGB Cavity is selected as default. You may vary the width of the area of the cavity influence, make the cavity narrow or wide.

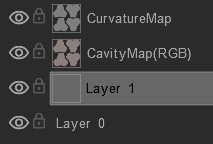
* Before that, you need to remove the regular cavity layer if it already exists.
Adjusting Cavity Area Width and Overall Cavity Modulator can give you some nice effects like several layers of old paint on top of each other. As is show on this video:
The curvature layer is required to use cavity/curvature as a condition for materials or conditional painting.
If you work with Conditions painting by layer, on the upper right side you can adjust degree & contrast

Remember that Conditions painting only work on freeze for sculpt surface mode or Surface Paint on vertex on Paint Room.
But the standard sculpting brushes do not respect conditions, only work on Freeze mask to restrict where surface sculpting tools will be applied to the surface of the model.
Just a fast simple example:
Base layer
1st layer = Old Copper
2nd layer = Blue paint
3rd layer = Red paint.
Adjust each smart material differently using Adjusting Cavity Area Width and Overall Cavity Modulator.

It is really not one smart material but 3 separate Smart materials on separate layers.
Can create it using any default Smart Materials.
Follow this steps:
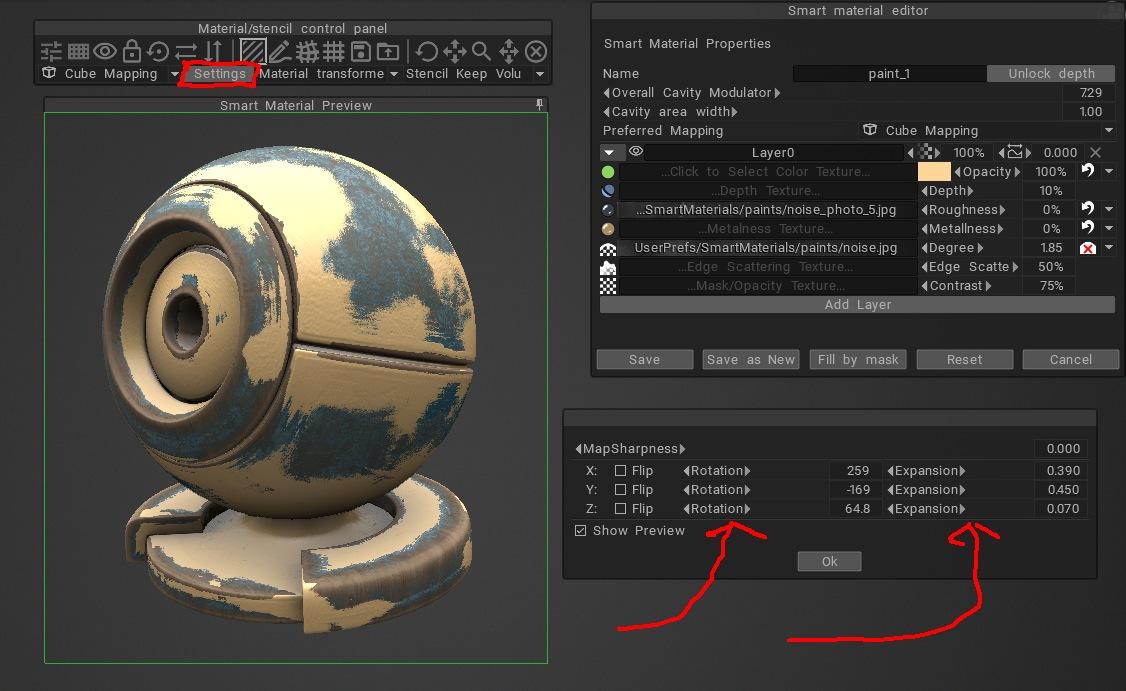
Open the Smart Material editor and the real time preview window, placing it over the model.
This is the most important because you get the real time view of the smart material and how it will be applied.
Do not go by as seen on the Smart Material Editor’s ball if you want real time feedback in this case.
Start Adjusting the Cavity Modulator and Cavity Area Width till you get the effect you want.
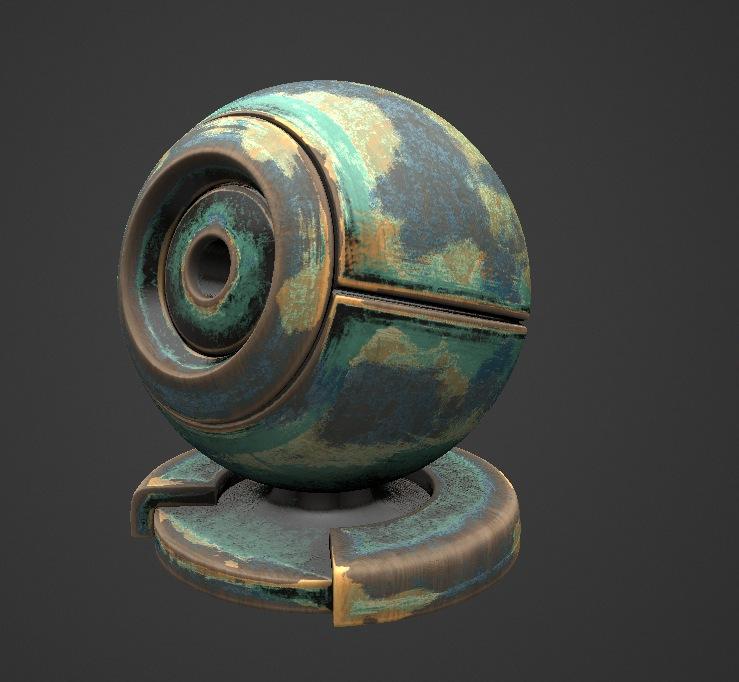
The picture above is the blue paint settings, it was the blue metal but looks like blue paint. It was the second layer in the stack.

This other example show how to further increase the variation of your applied Smart Material.
Assign Cube Mapping as Preferred mapping.
On Material/Stencil Control Panel, select Settings.

On this panel you can change the rotation of the cube map on the XYZ axis (per axis) and the expansion per axis as well as is shown in picture below.
You can preview in real time as the texture moves over the surface.
Last picture shown how to further increase variation using a layer blend mode. On this example is used the Overlay blend mode on the top layer.

You can adjust the strength of the blend mode by using the Opacity adjustment.

The new RGB cavity curvature calculation and Cavity Area Width plus Cavity Modulator is great.
Lots to explore here. Have fun exploring!