

tree321
-
Posts
476 -
Joined
-
Last visited
Content Type
Forums
Calendar
Gallery
Posts posted by tree321
-
-
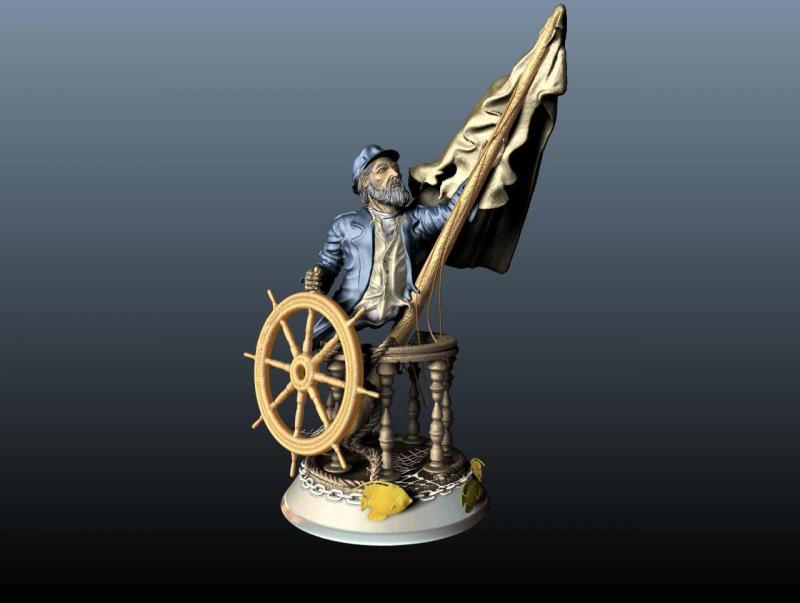
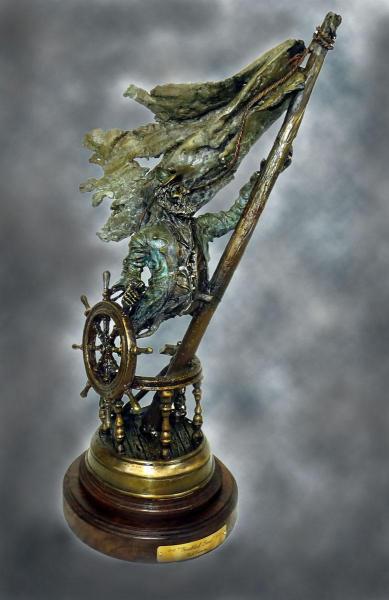
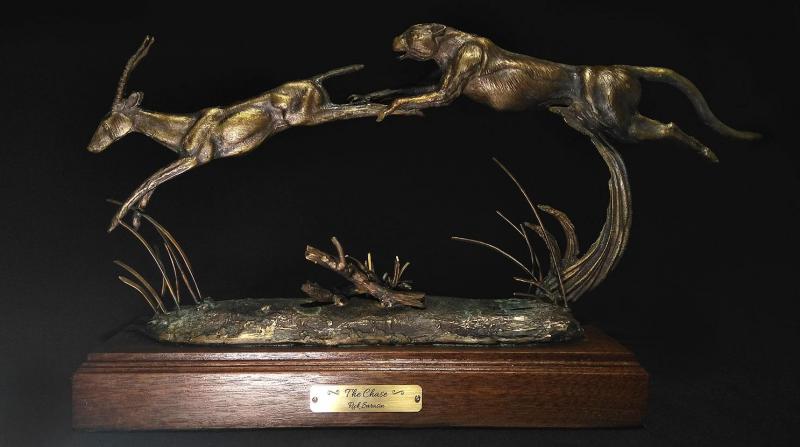
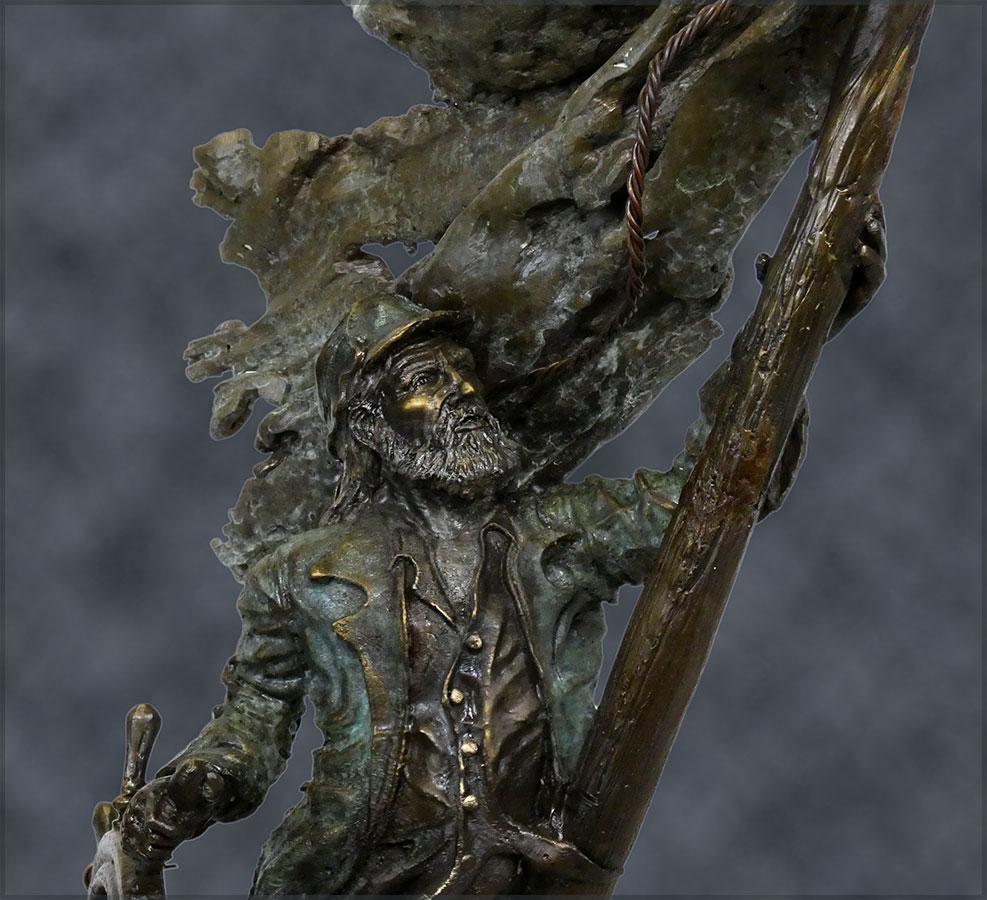
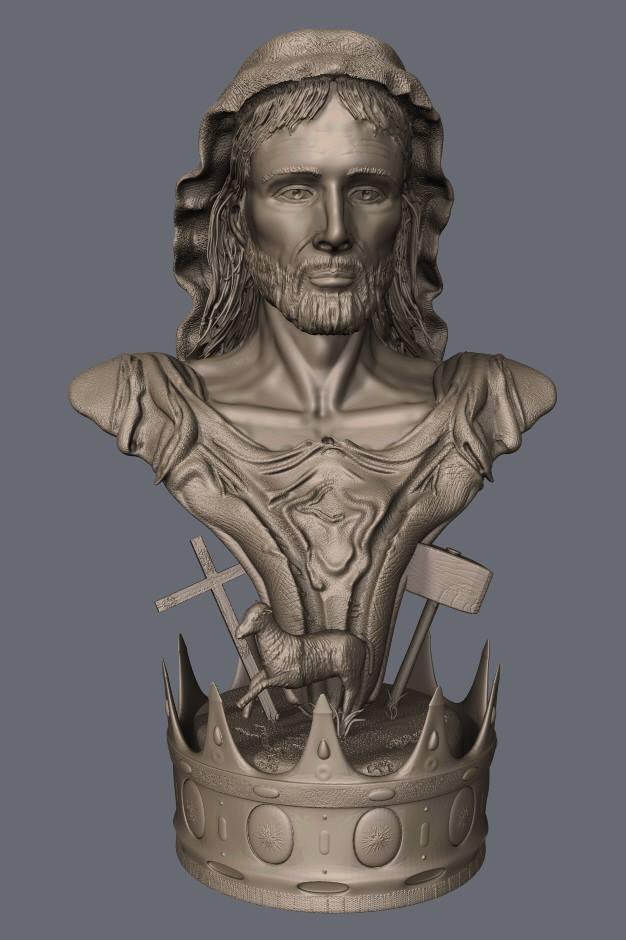
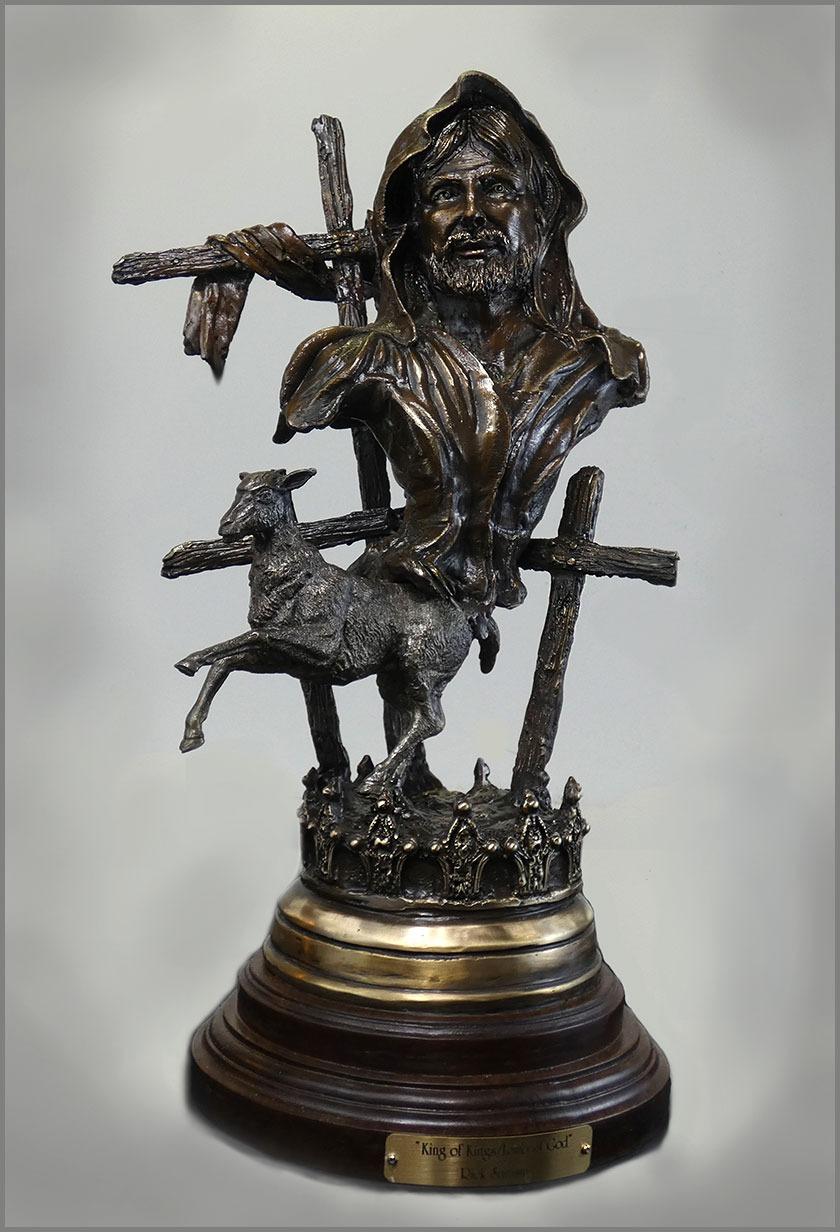
I don't know if any of you are interested in turning your 3d printed sculpts into bronzes, but that's what I have done over the
last couple of years.Actually I use a combination of clay,wax and 3d prints to create the originals, then I make a silicone
rubber mold and pour a wax copy etc. I won't go into the entire casting process because it is rather extensive and there is
plenty of info. online if you want to learn about it. With the help of my parents, my wife and my son we built our own
casting facility through which we cast our own work.It is a resurrection of the foundry my Dad and I built years ago.If your
thinking about casting your own sculpts you may want to contact your local foundry because building your own foundry is
costly and labor intensive and not worth it if you are only going to do one offs and not sell multiple editions of the
piece.The cost of casting will vary depending on your location and the particular foundry you use.Where I live, (North
Carolina), I have been quoted anywhere from several hundred for a small uncomplicated piece to several thousand for a
more complex piece.It's not cheap but it may be worth it if you value your art and want to preserve it forever.
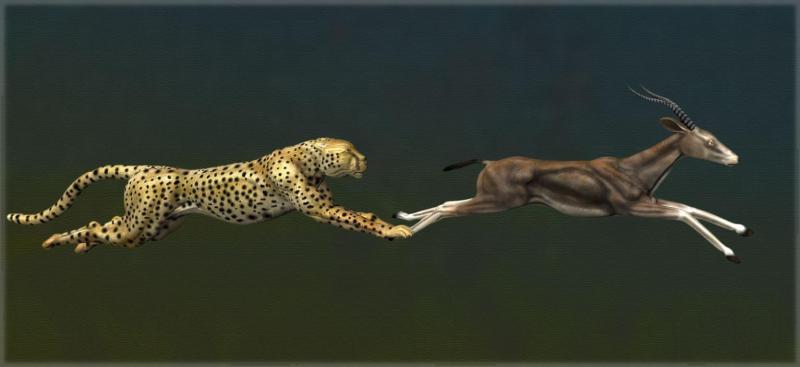
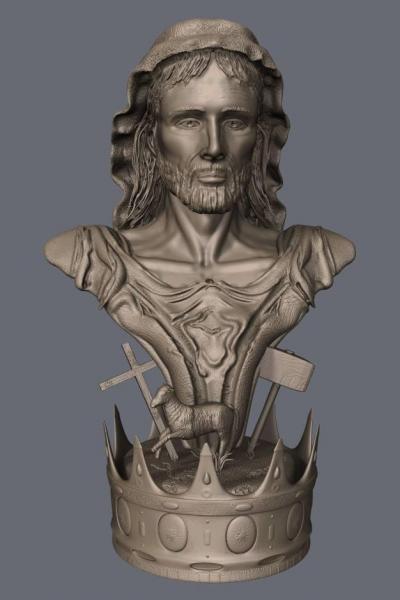
Casting my own work has saved me thousands but like I said it's not for everyone.Some of you may remember some of these compositions I created in 3D Coat years ago, which were subsequently reworked in Zbrush
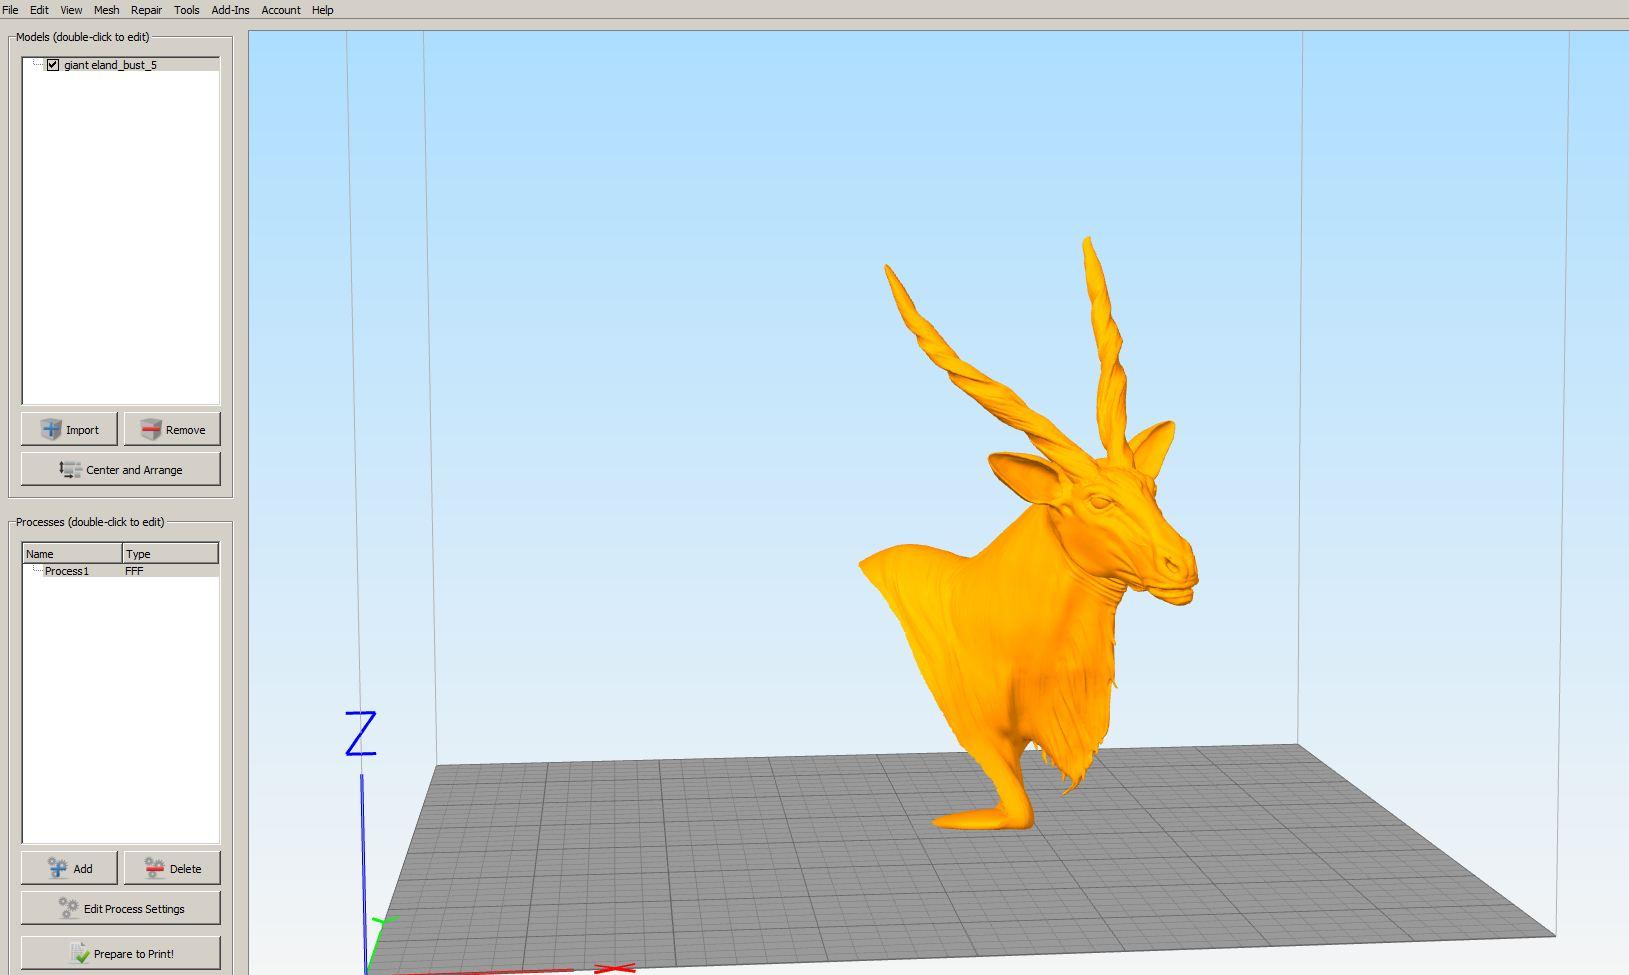
and printed on my 3D printers.There are many advantages to doing the sculpts in a modeling program rather than in clay,
a couple of the main ones are that you are able to enlarge or shrink the work depending on your needs.Also the work doesn't sit
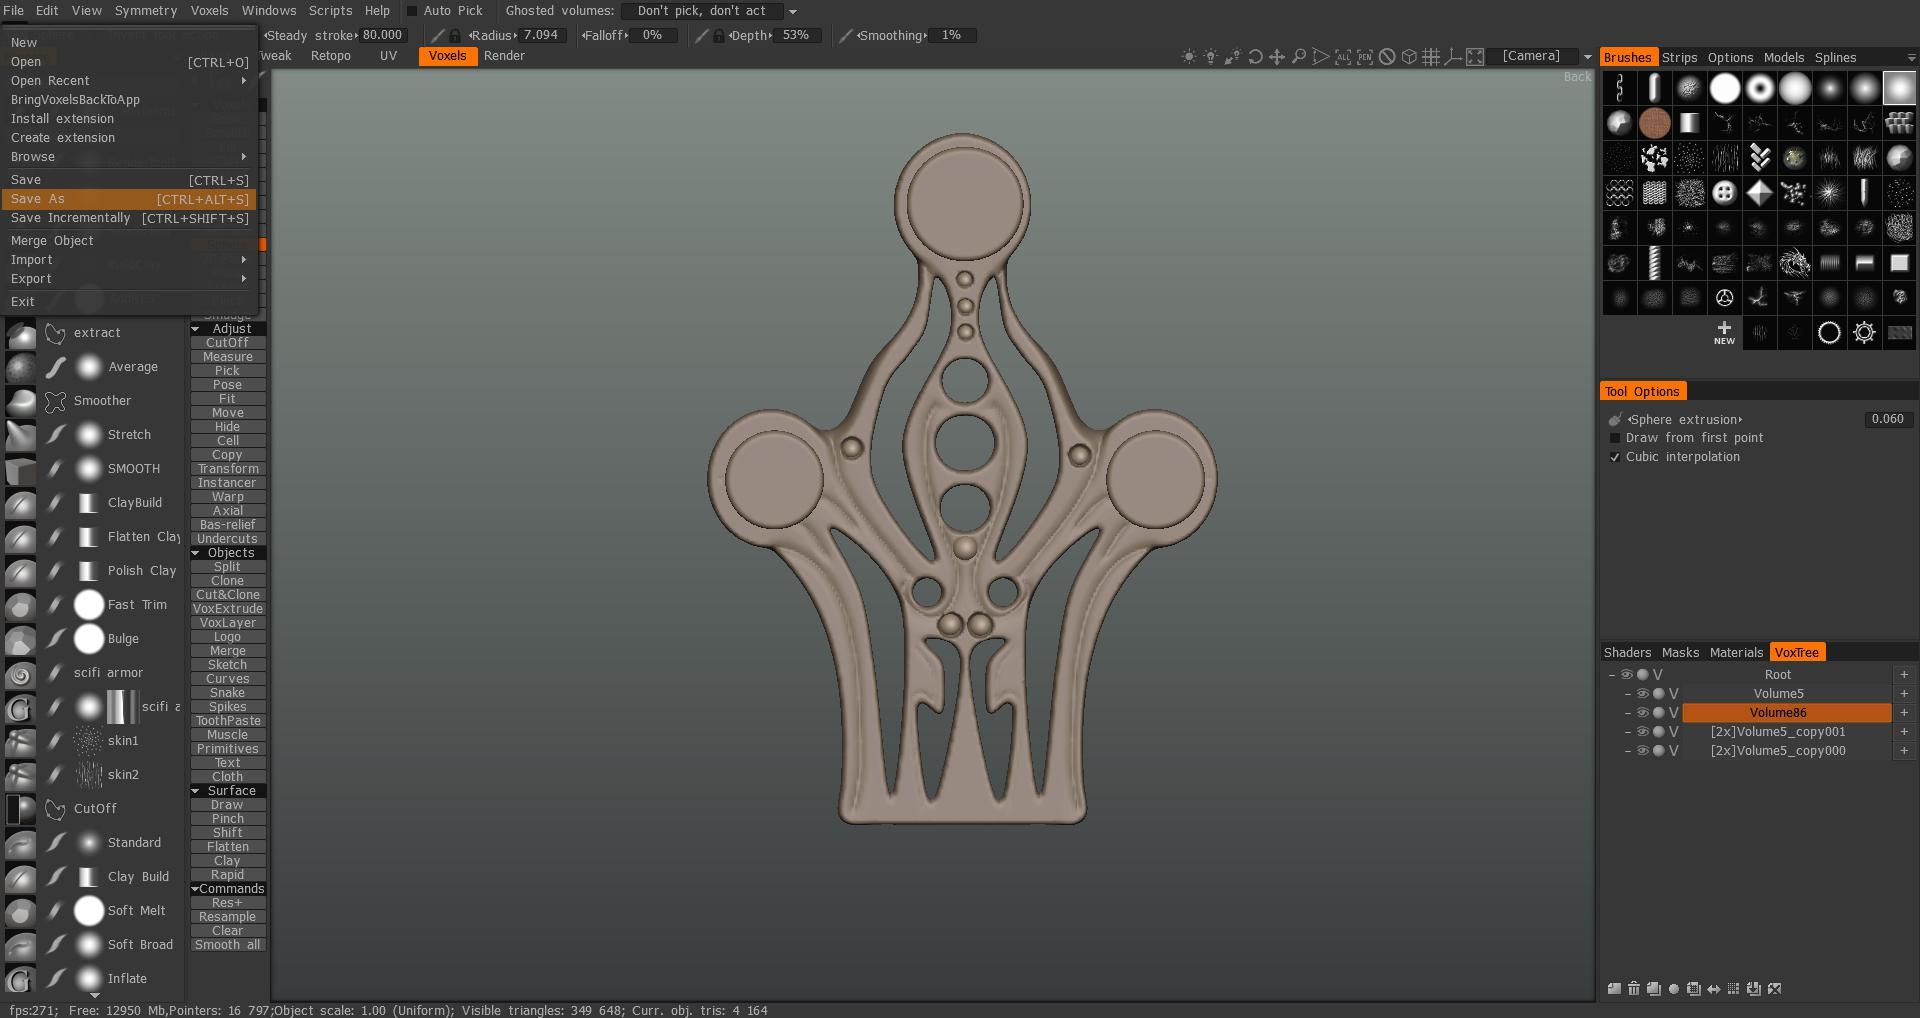
around in a studio taking up space and perhaps getting destroyed waiting to be cast.I mainly use 3D Coat as a concepting
tool these days, it's perfect for quickly hashing out ideas before 3D printing or creating a clay of the concept.Anyway I just wanted to share with you how I have used 3D Coat as a tool not only for concepting but for creating bronze
sculptures through 3D printing. I would also like to share with you my new website and to thank Andrew and his team for
reigniting the sculpting spark in me which has lead to me getting back into creating bronzes.It has been a lot of work getting
to this point and hopefully it is just the beginning of a long line of work to come.I have many new works in progress and will
post them on my site as they emerge from my studio.My site is in its early stages and needs a lot of work, but it's a start.If any of you are interested in casting your work or have any questions on the process let me know I would be happy to chat
with you.Email: lookerfortruth@yahoo.com
Take care and Merry Christmas to you all.
Rick(tree321)
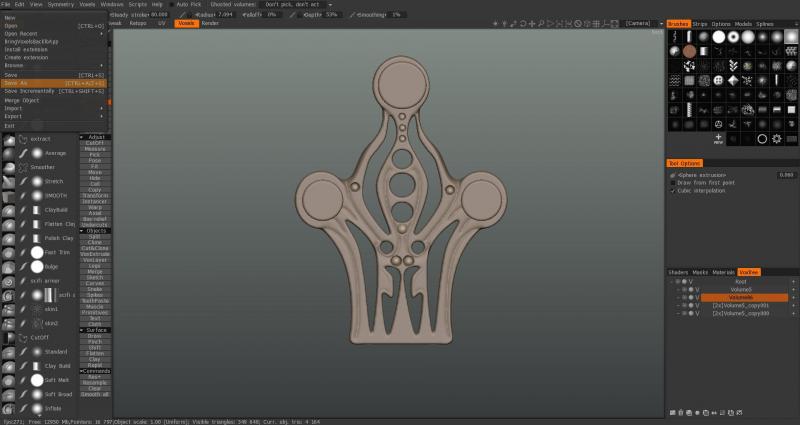
P.S: These 3D Coat sample sculpts were created in a very early beta stage of 3D Coat (2009) when there was only a few basic brushes in voxel mode only so forgive the crudeness of the sculpts.


-
 2
2
-
 2
2
-
-
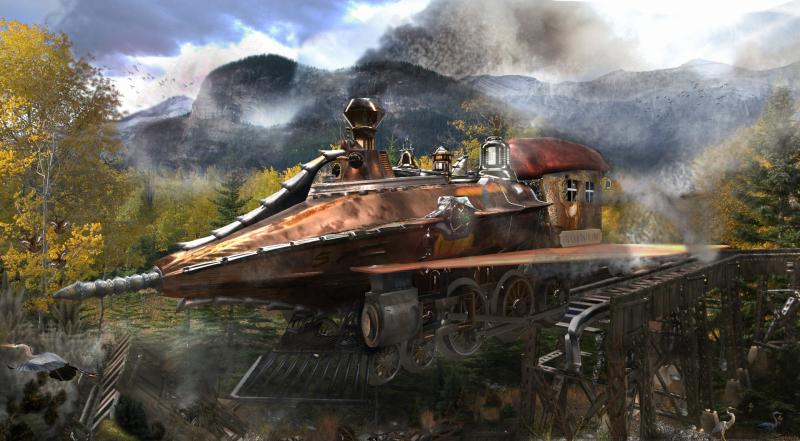
Final compositions
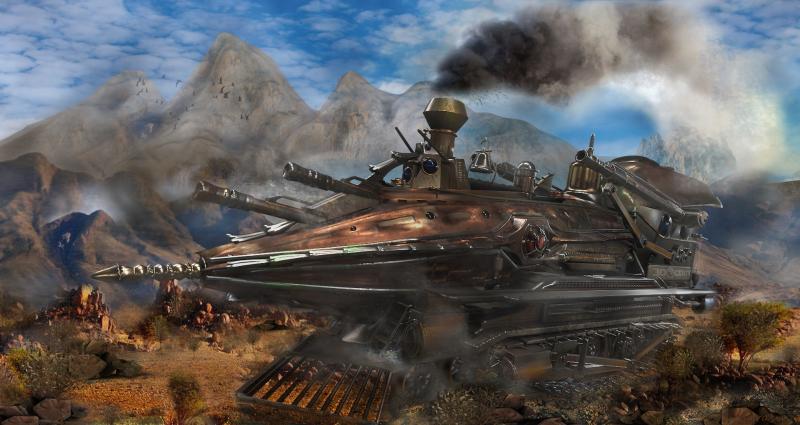
"End of the Line"
(Flying train submarine).
This composition combines several unique types of machines into one.The first is a 19th century steam locomotive, and the other is a submarine based off the Nautilus, from the novel Twenty Thousand Leagues Under the Sea published by Jules Verne in 1870.(Walt Disney movie 1954) Add on some Chitty Chitty bang bang inspired wings and you have a flying train sub.(Suspension of reality required)
Composition 2
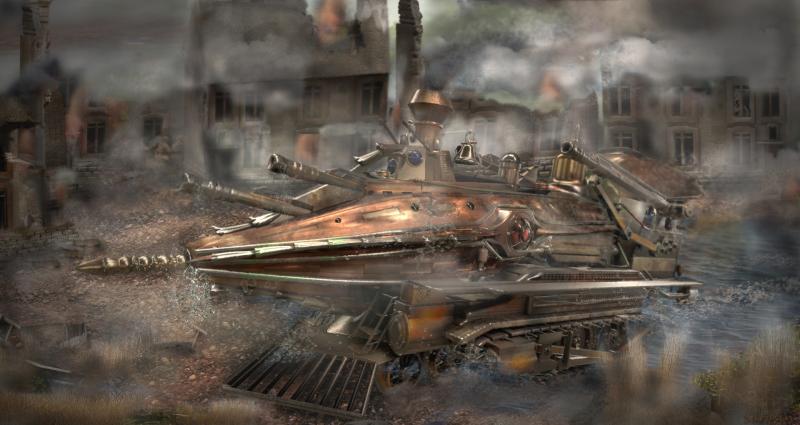
"War_Machine"
This steampunk vehicle combines the steam locomotive and sub. but omits the wings, and adds a military inspired tank to its design.
Thank you to all of those involved in holding this contest.This was a challenging contest in which I pushed 3D-Coat to the limit.I used 3d-Coat for the majority of the modeling and texturing, as well as rendering,composite was done in Photoshop.
-
3
-
-
Just a couple more assets before I post the final images.
-
2
-
-
That's true Tony,I did make some gravel with the 2d-Paint voxel feature, but the scene got really heavy.Anyway I abandoned this route for this project.
-
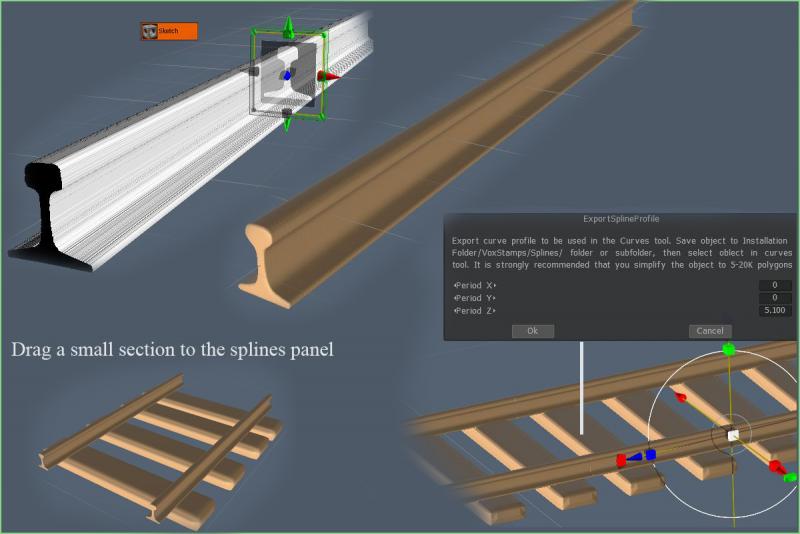
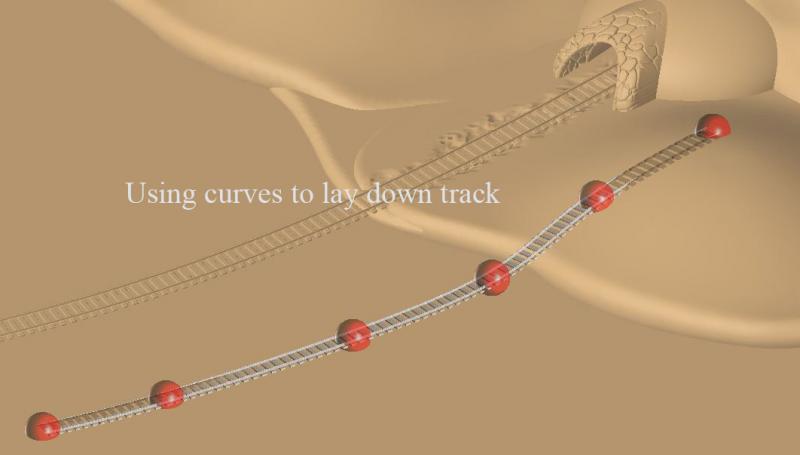
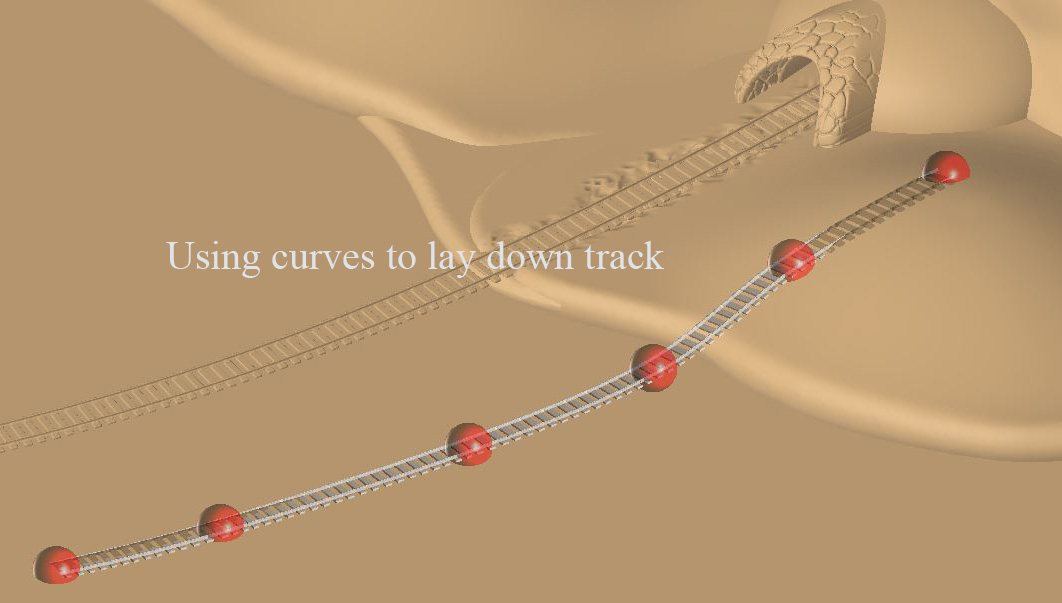
RR Tracks
Laying down RR track the easy way.(No heavy lifting required)
I used the sketch tool with a simple B/W profile image to create the track.
Then make the wooden RR ties with a cube and assemble the pieces.
Drag the small track section to the spines panel, and then you can lay track from one side of the earth to the other without breaking a sweat.
-
2
-
-
Thanks Tony, I think I used 8X. Of course it should be decimated if using multiple copies in a scene.
Take care
-
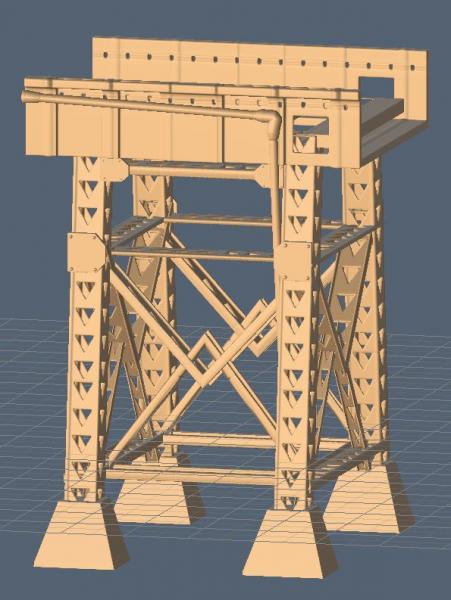
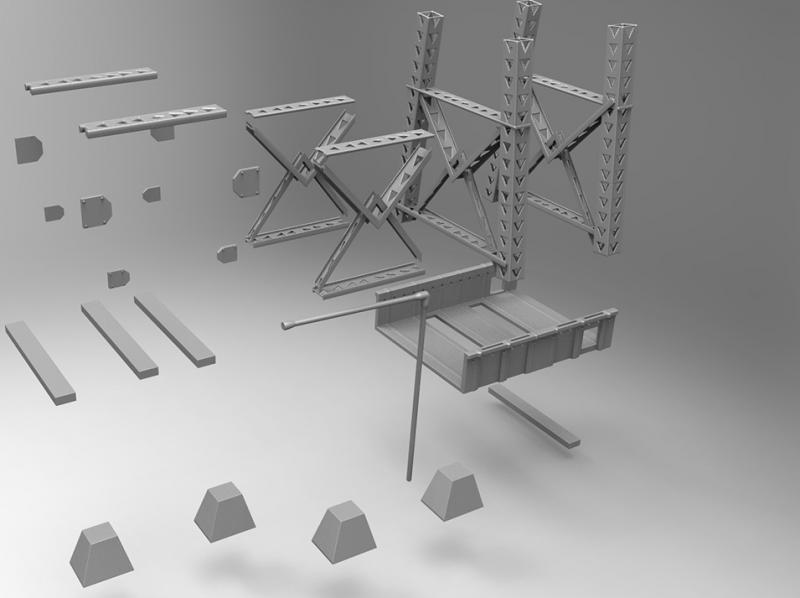
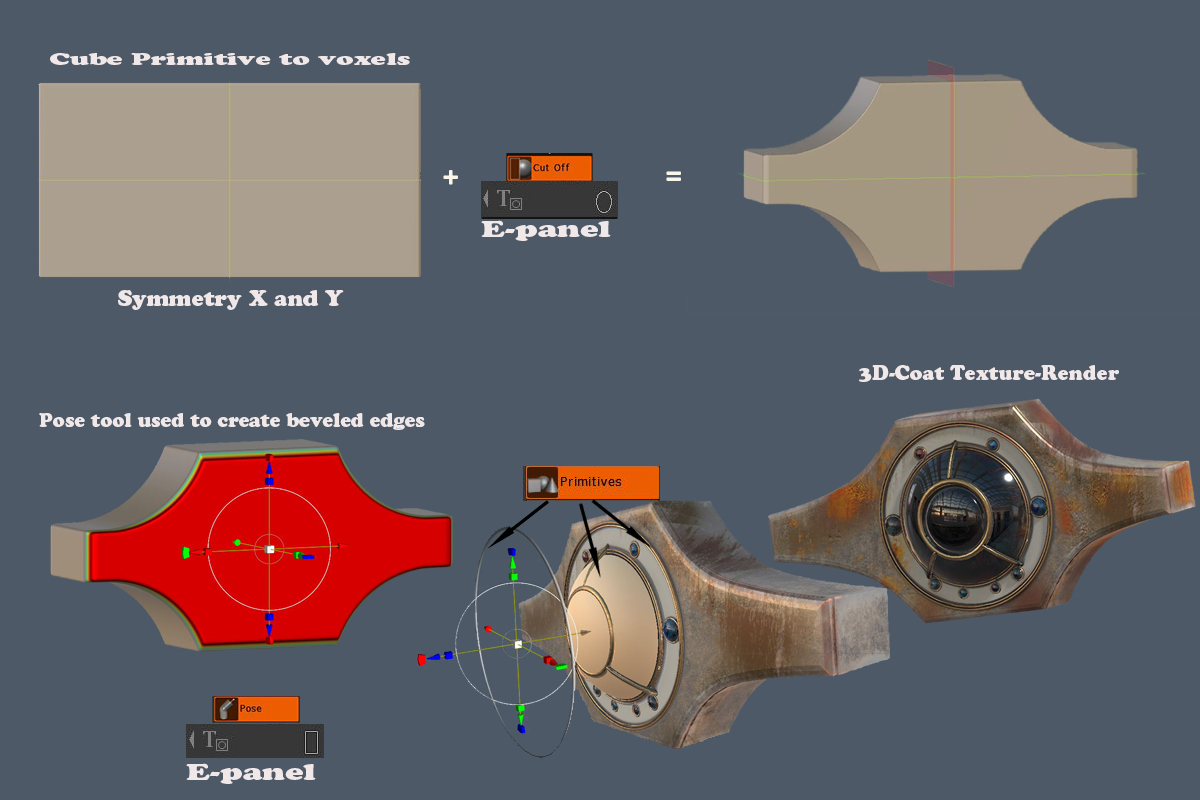
RR Bridge
Mostly cut off tool
-
3
-
-
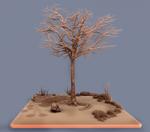
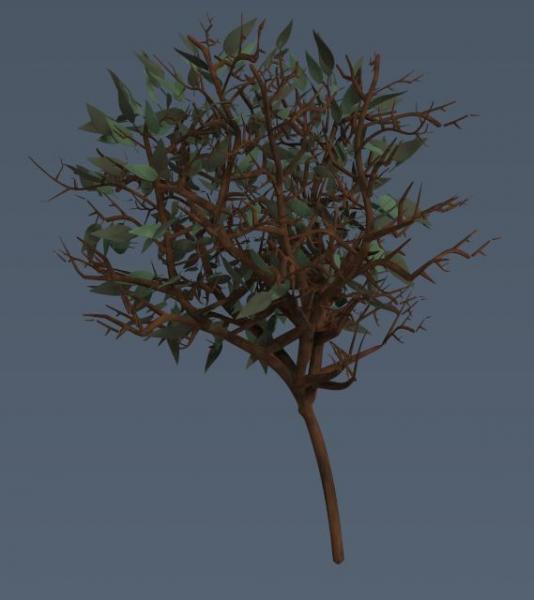
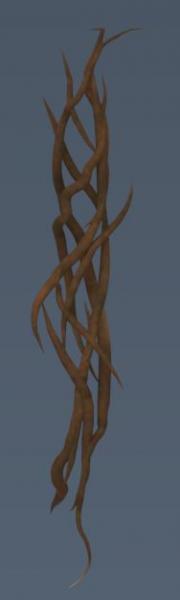
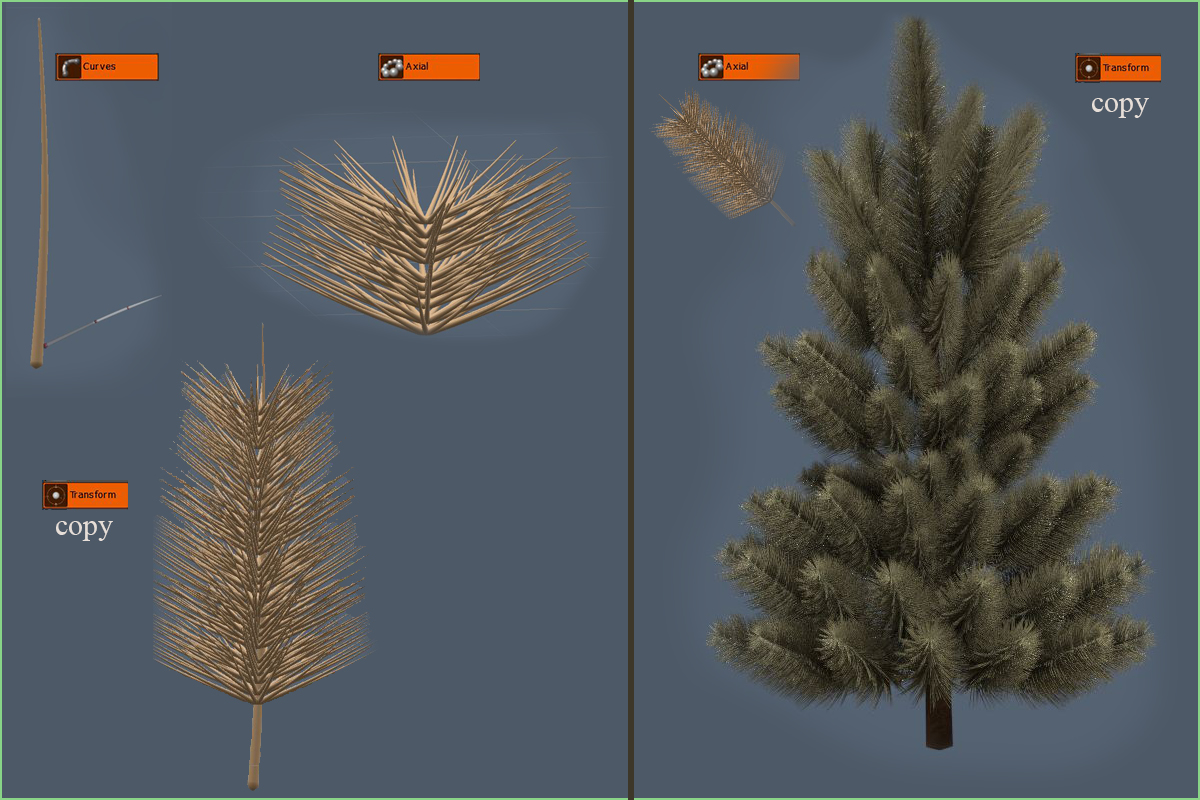
Tree
...only God can make a tree
But this is good enough for me
. I think that I shall never see
A poem lovely as a tree.
A tree whose hungry mouth is prest
Against the earth's sweet flowing breast;
A tree that looks at God all day,
And lifts her leafy arms to pray;
A tree that may in summer wear
A nest of robins in her hair;
Upon whose bosom snow has lain;
Who intimately lives with rain.
Poems are made by fools like me,
But only God can make a tree
-
4
-
-
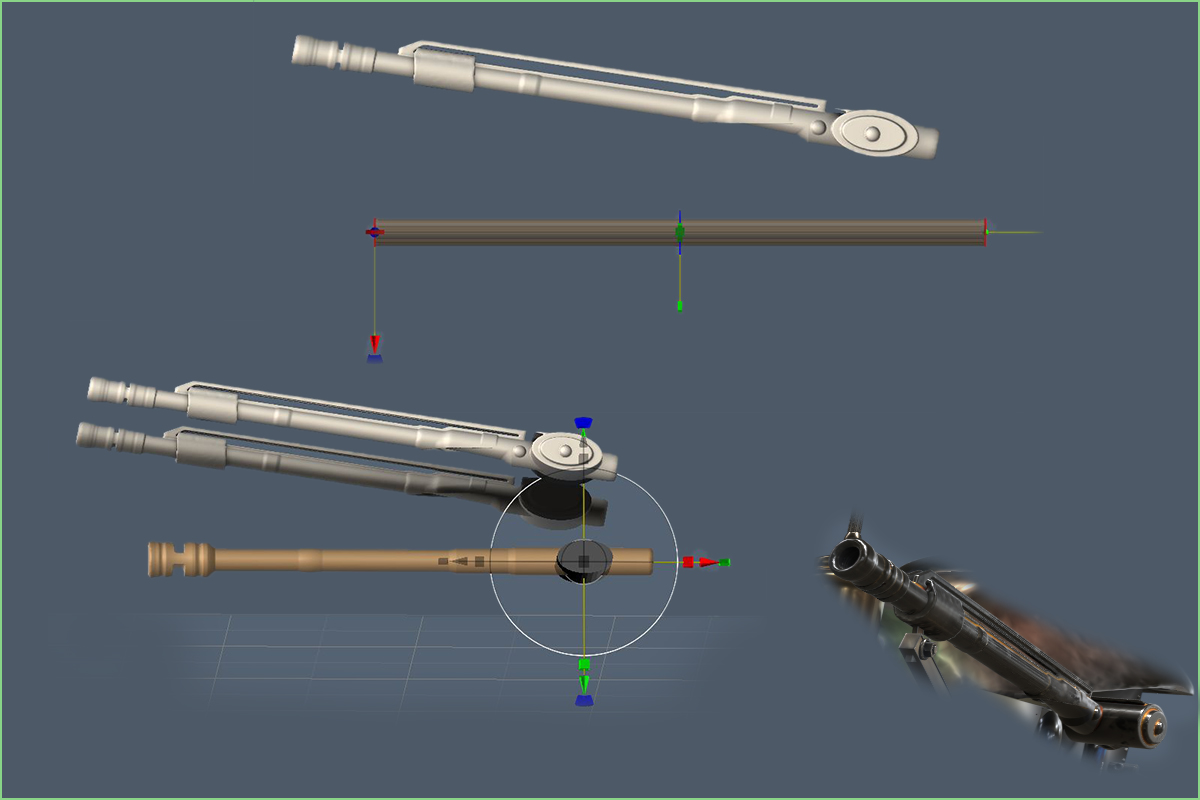
Fire Power
For peaceful purposes only.

-
2
-
-
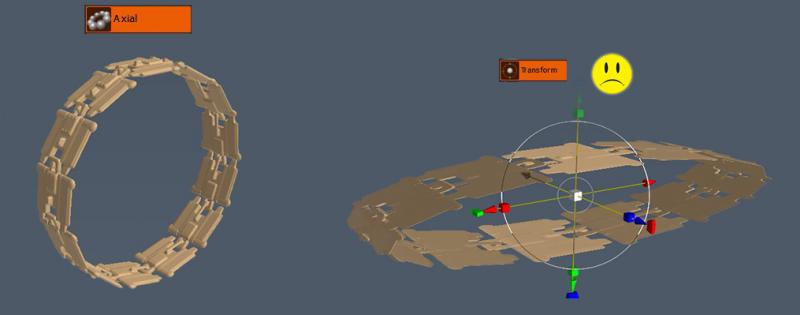
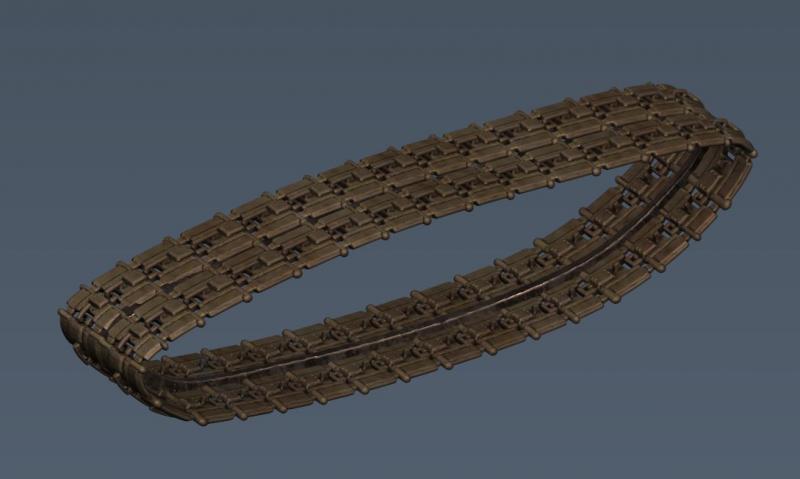
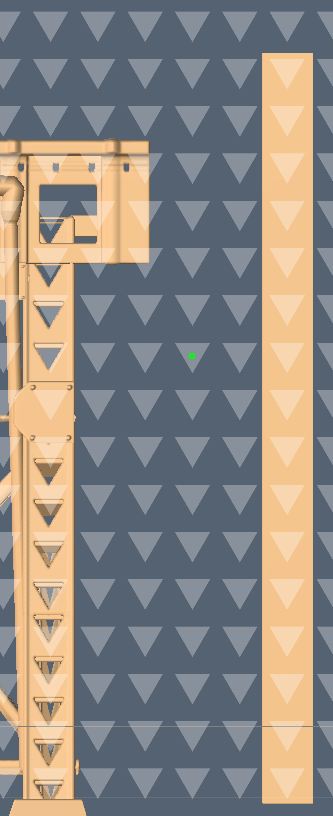
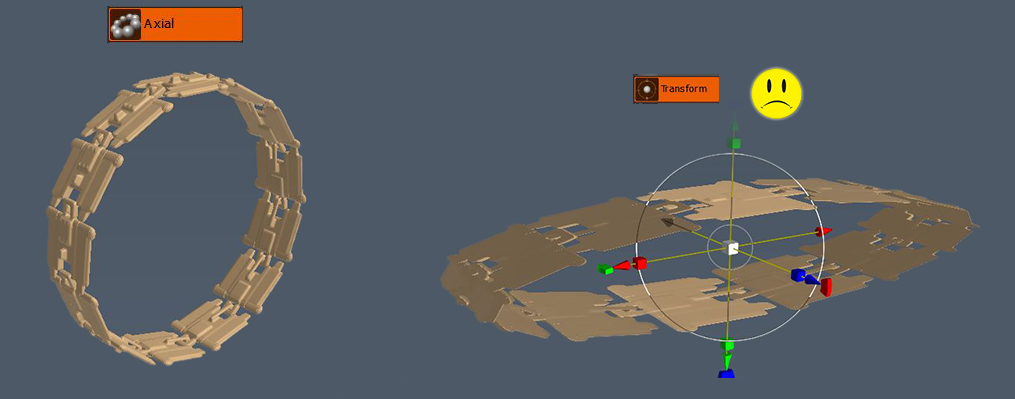
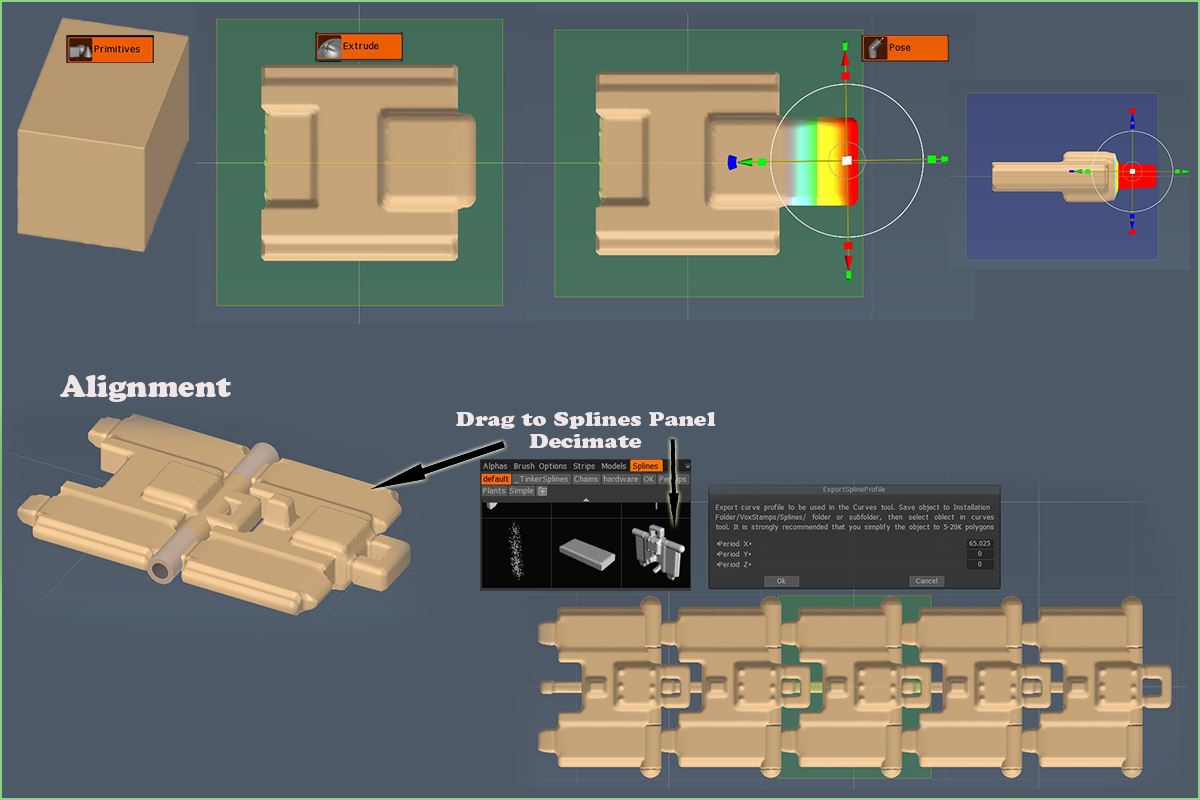
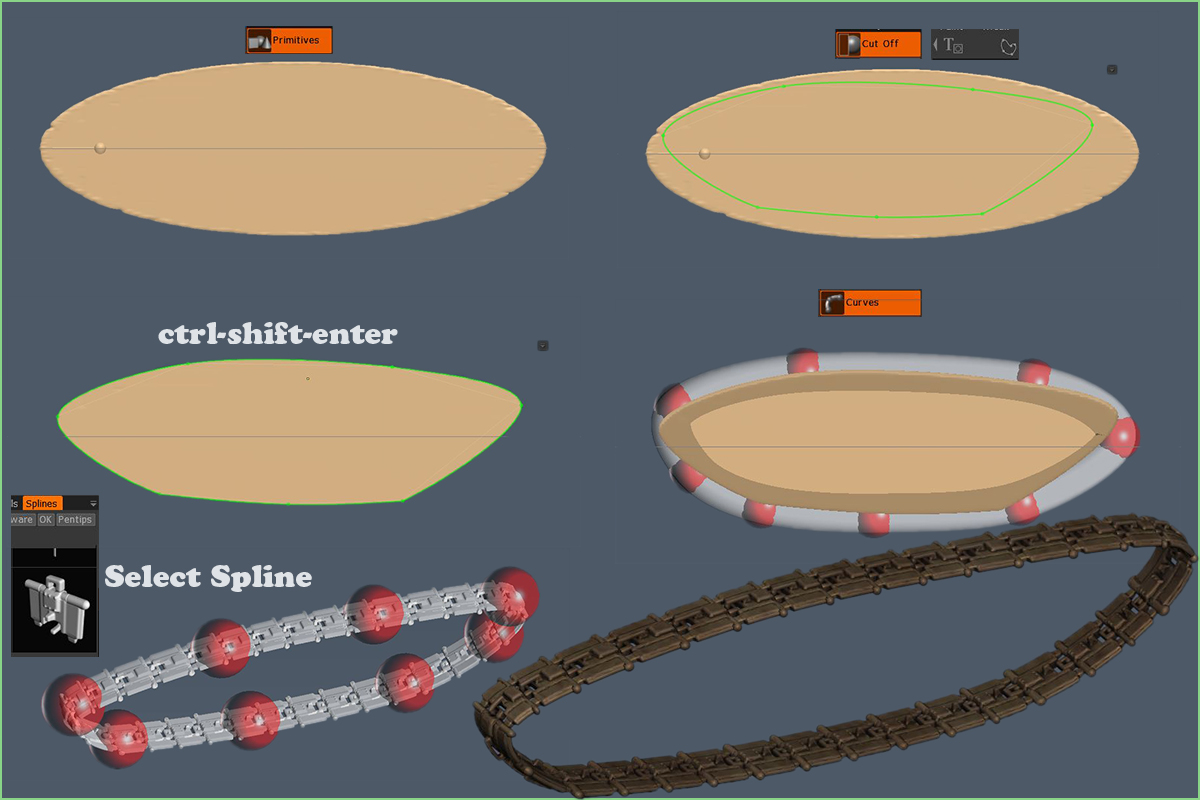
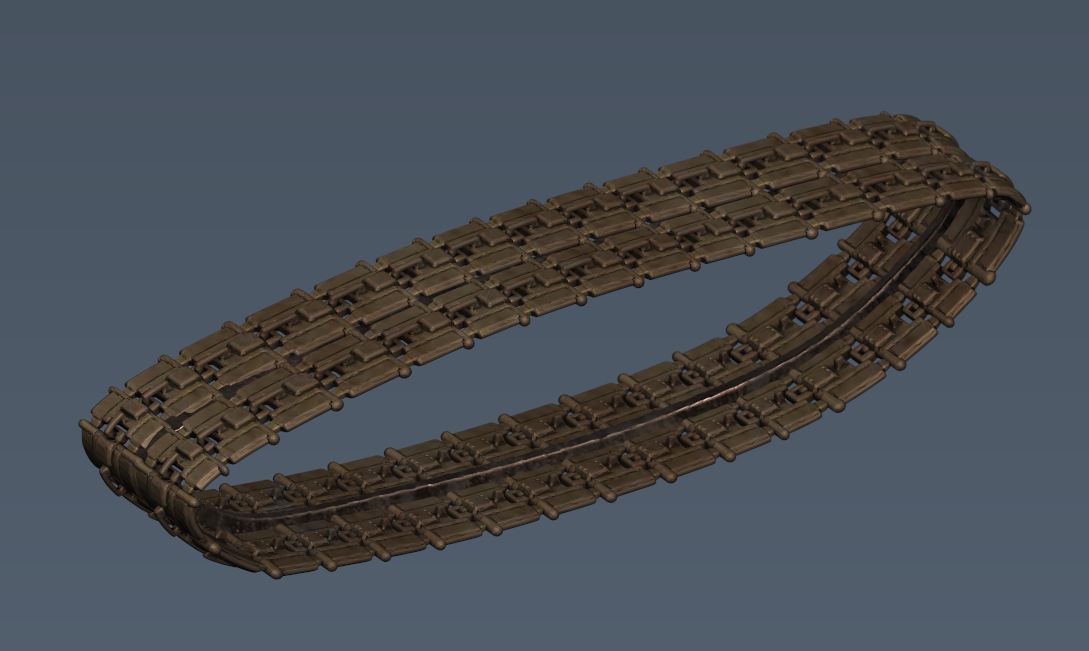
Tank Treads
This is how I did them.


-
3
-
-
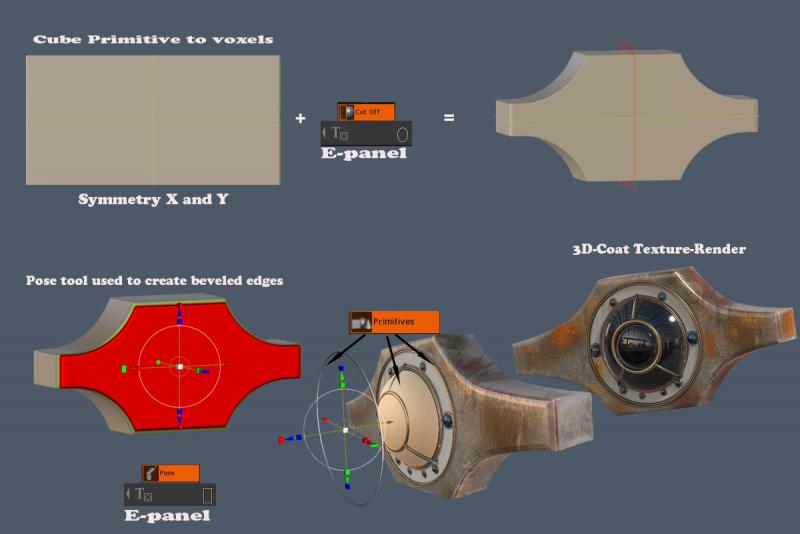
Escape hatch/manhole
The hole is greater than the sum of its parts.
-
2
-
-
Submarine turret/Bridge
This submarine is based off the nautilus, from the movie 20,000 leagues under the sea.I have scaled it down to fit my composition
-
3
-
-
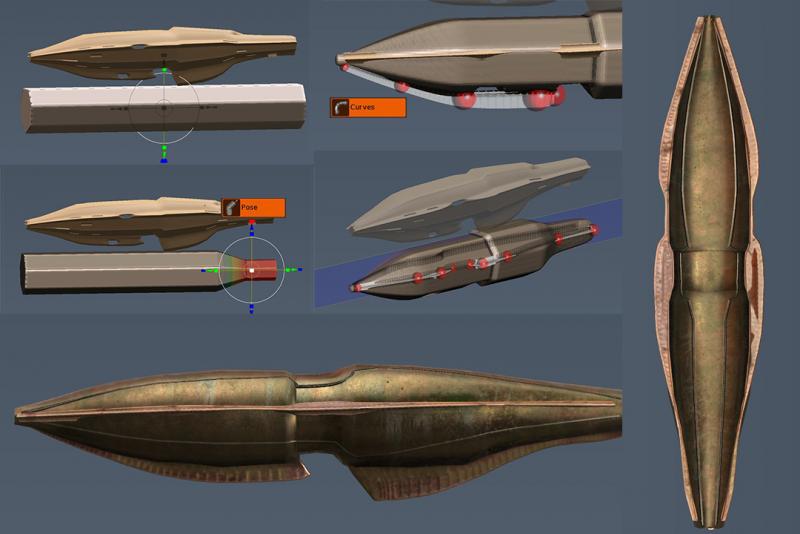
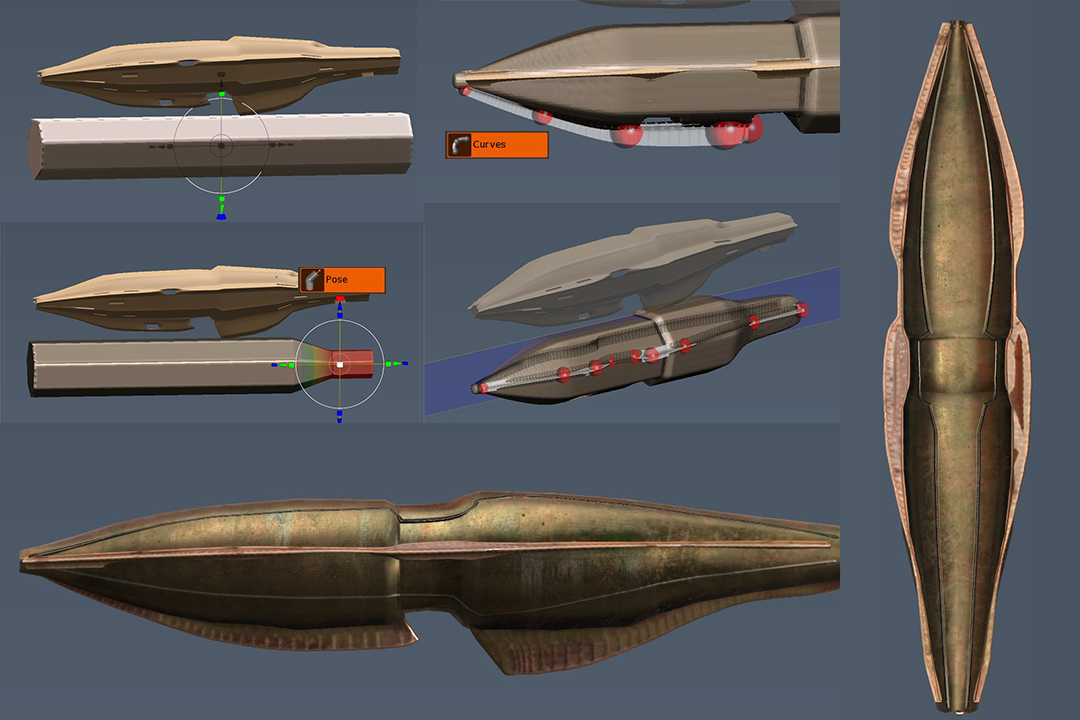
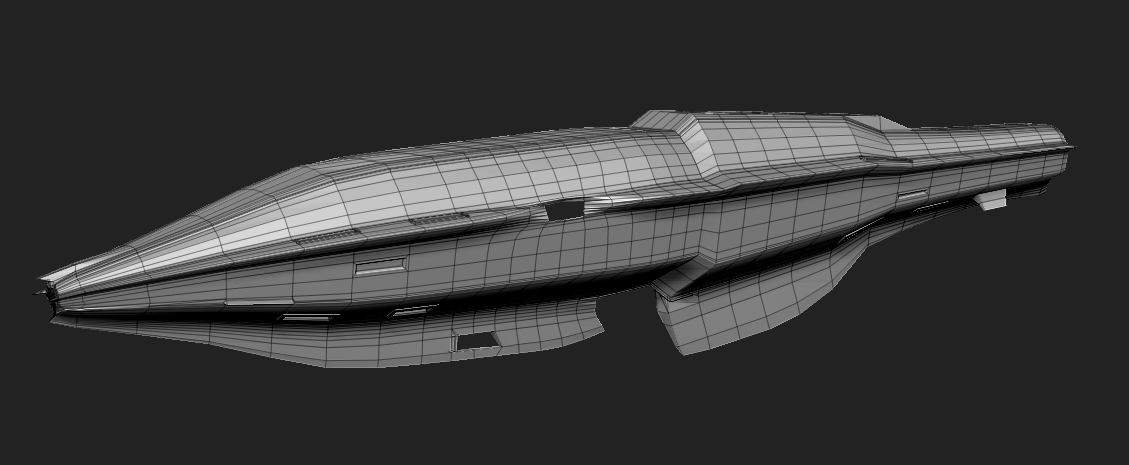
Ship Hull (actually a submarine hull)
What? A ships hull?But I thought you were making a train.I must have lost my train of thought.
Well I originally made this model for another contest some years back and thought I'd try to replicate it in 3D-Coat,but I'm not really happy with the results.
I layed out the original forms in voxels, then retopoed it and tried to use the retopo tools to define it, but really the low poly modeling tools need more robust features for this model.(or I just need to figure them out). Anyway... I think I will just use the original low poly mesh for this piece.

-
1
-
-
Thank you AgentSam, I appreciate you stopping by.
I have actually finished the project for the most part, but thought I'd take the extra time to make this a process tutorial as well.I know there are a lot of new users who could probably benefit from these tips.
Take care!
-
2
-
-
Tanks and Hoses
Not sure what these do, maybe bleed moisture out of the system?
Mainly curves and cylinders detailed with the extrude brush.

-
1
-
-
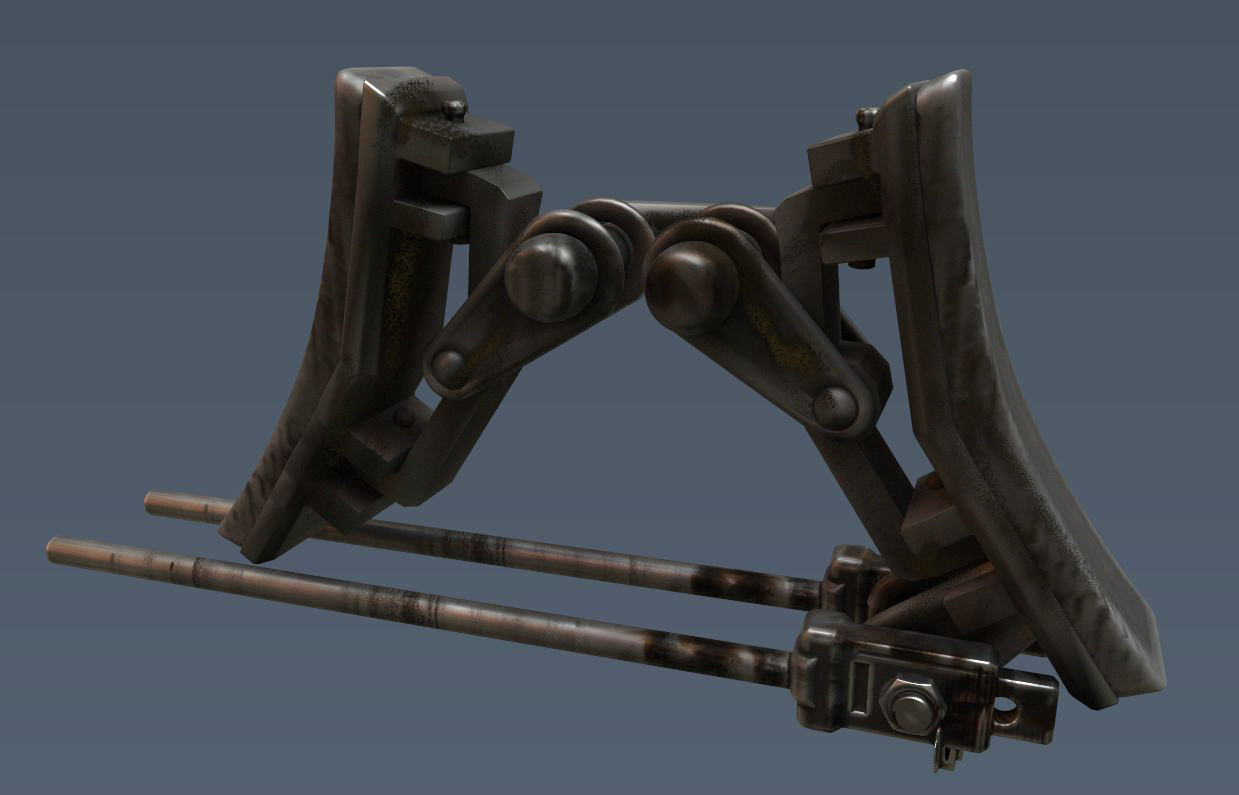
Break Assembly
How ya gonna stop that thing?


-
1
-
-
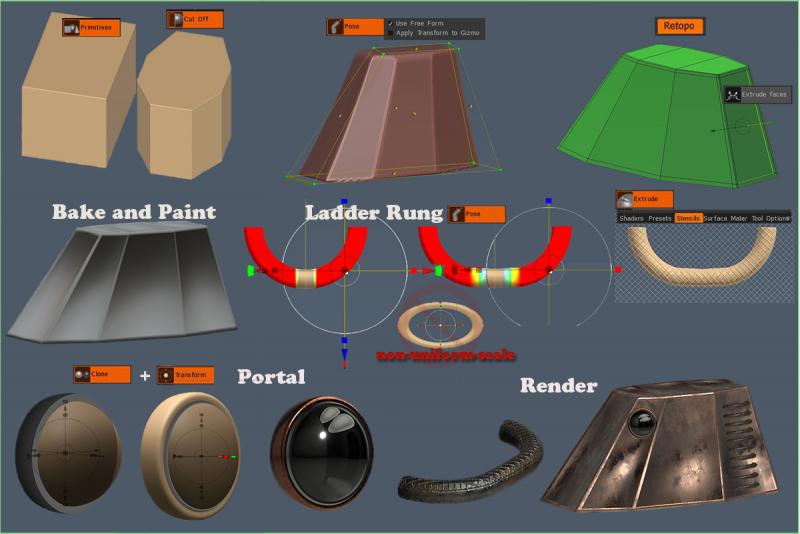
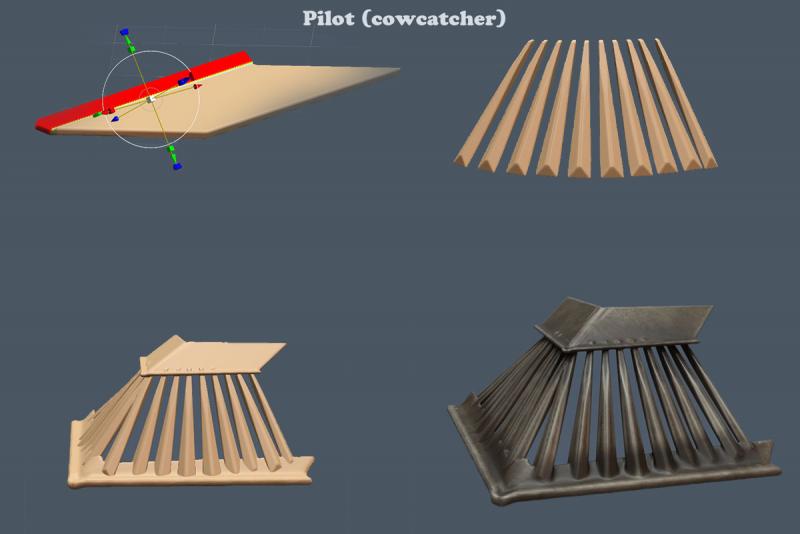
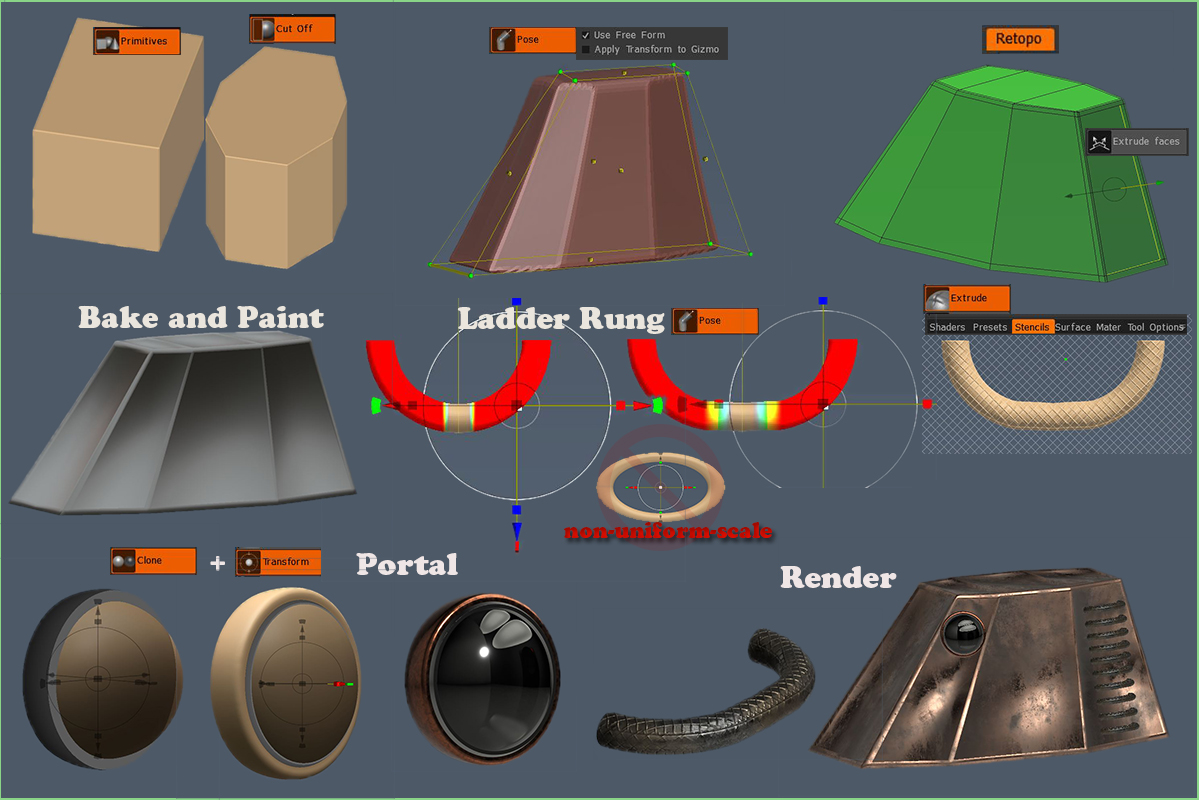
Pilot (Cowcatcher)
In railroading, the pilot (also known as a cowcatcher or cattle catcher) is the device mounted at the front of a locomotive to deflect obstacles on the track that might otherwise derail the train.(wikipedia)
Pretty self explanatory for this one.Used the pose tool to bend the main frame.
Cut out one support bar and copy, adjusting with the transpose tool and the pose tool till everything is in place.
-
2
-
-
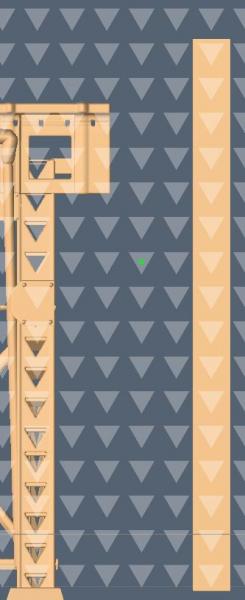
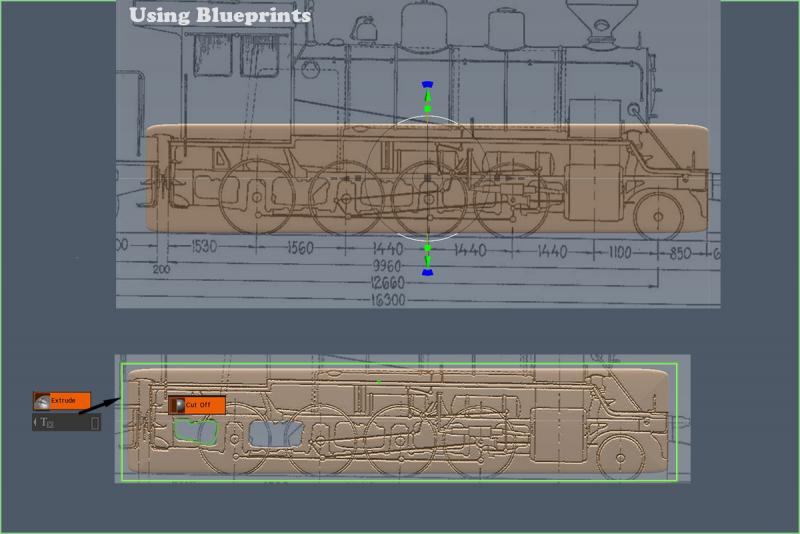
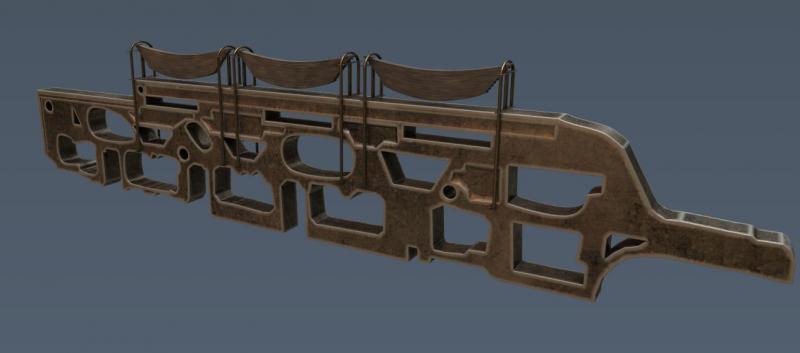
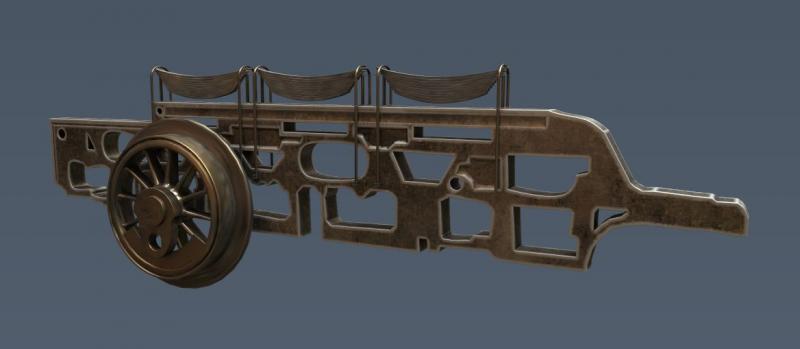
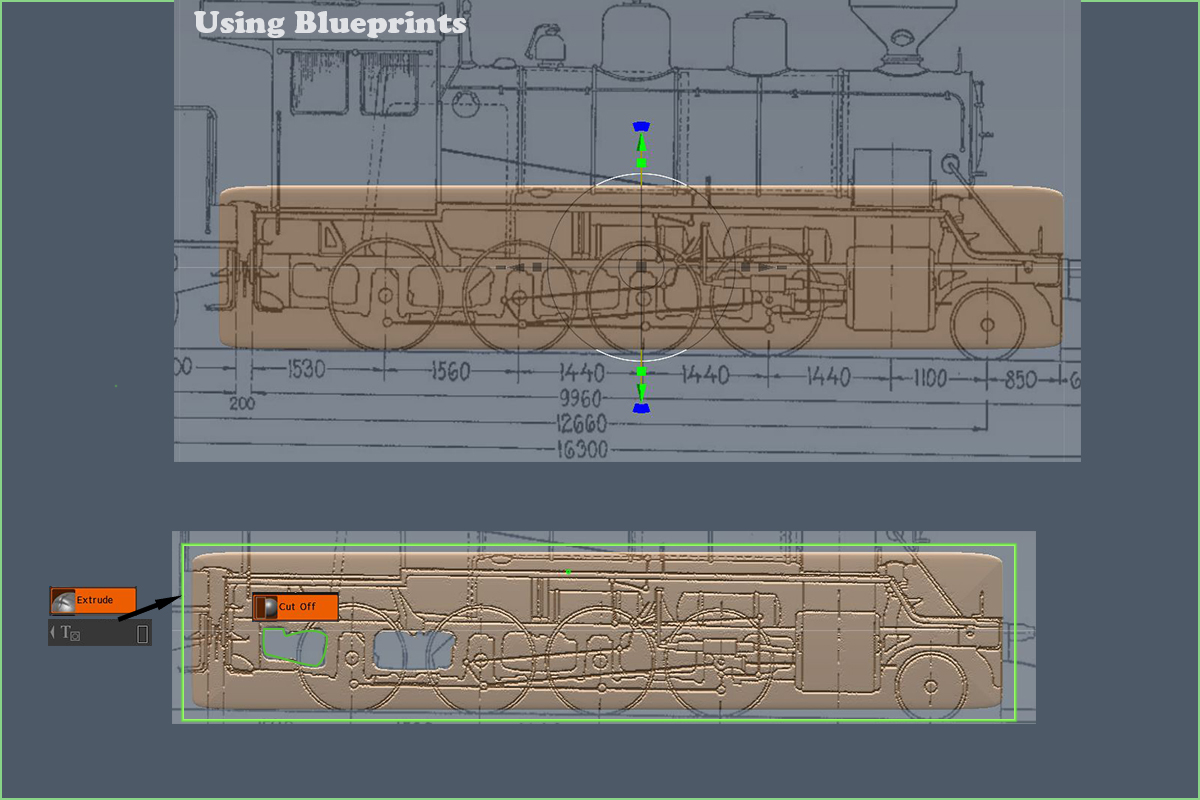
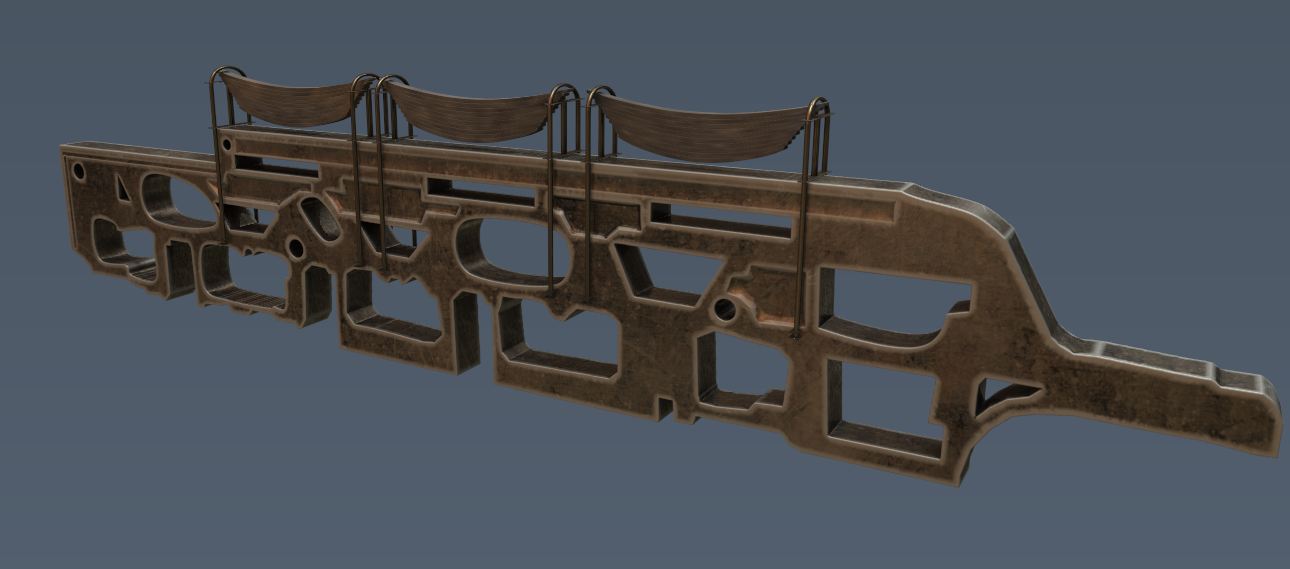
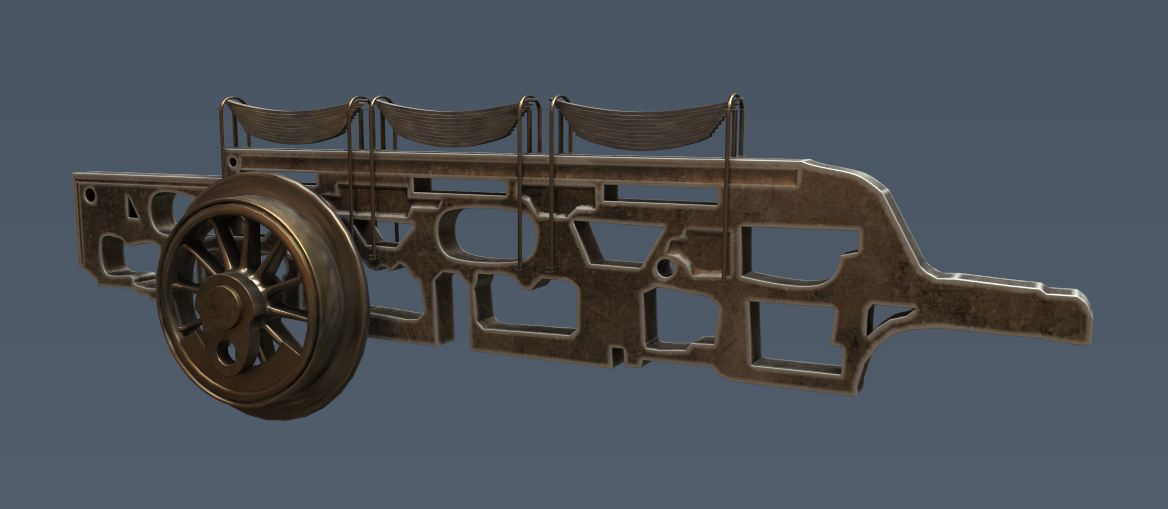
Chassis
Carrying the load
To make the chassis, I download some blueprints online and drag them to the Stencils tab.I then create a rectangular shape from a primitive cube and voxelize it. Then increase res. to 8x.
I click on the blueprint stencil and use the extrude brush with the rectangle lasso in the E-panel to transfer the depth of the image to my voxel object.
Then using the cutoff tool I define the shapes.
I add some leaf springs and support brackets, as well as a test wheel.
-
3
-
-
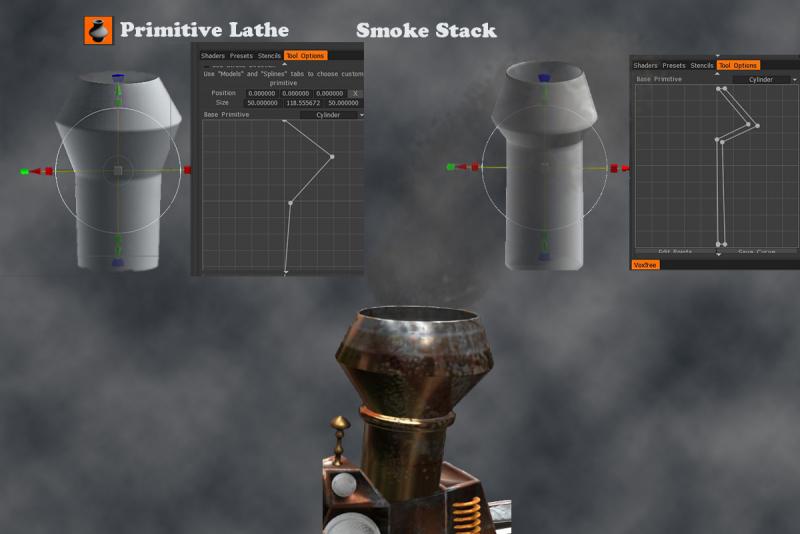
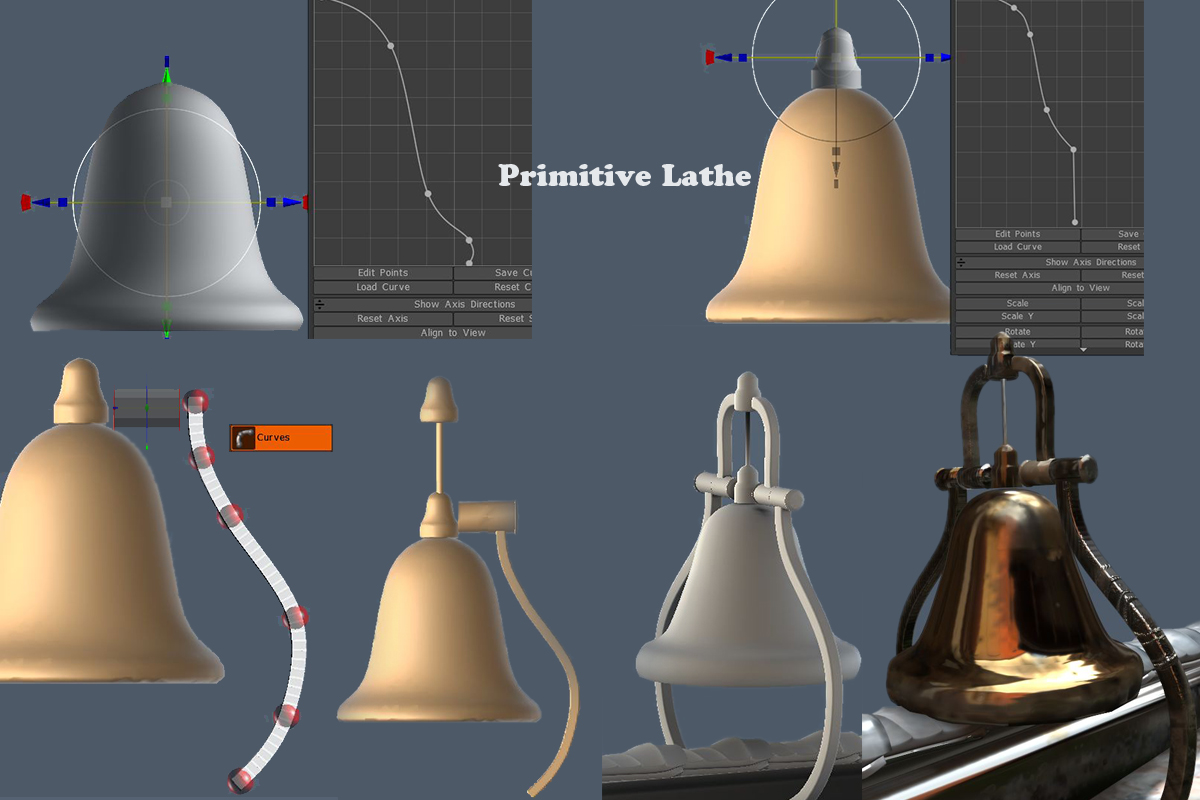
Bell Curve
Using the Primitive Lathe tool again to create a bell.

-
3
-
-
Smoke Stack
If you're gonna smoke do it outside.
Using the Lathe tool located in the primitives tab.
If you need a "hollow tube" you need to double up on the points.
-
3
-
-
You're welcome Percevan!
-
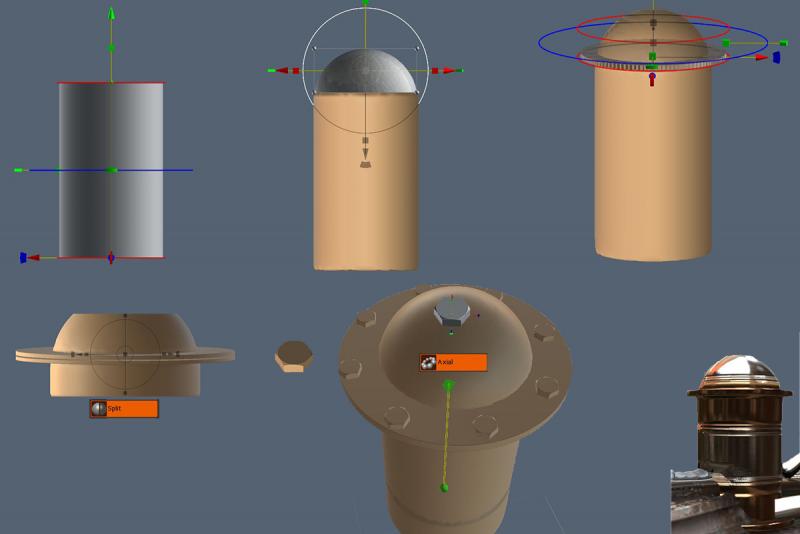
Creating the Sandbox dome
Old steam locomotives use sand sprinkled on the tracks for added traction.This container sits on top of the boiler to help heat and dry the sand.
Same basic techniques as previous.
-
2
-
-
6 hours ago, tree321 said:
-
3
-
-
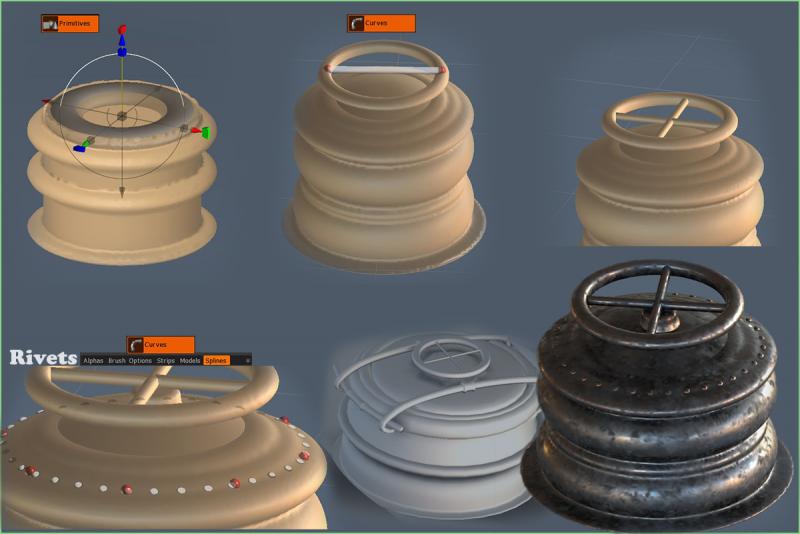
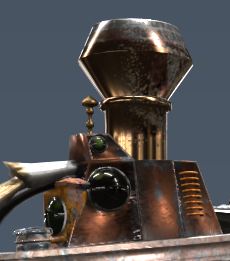
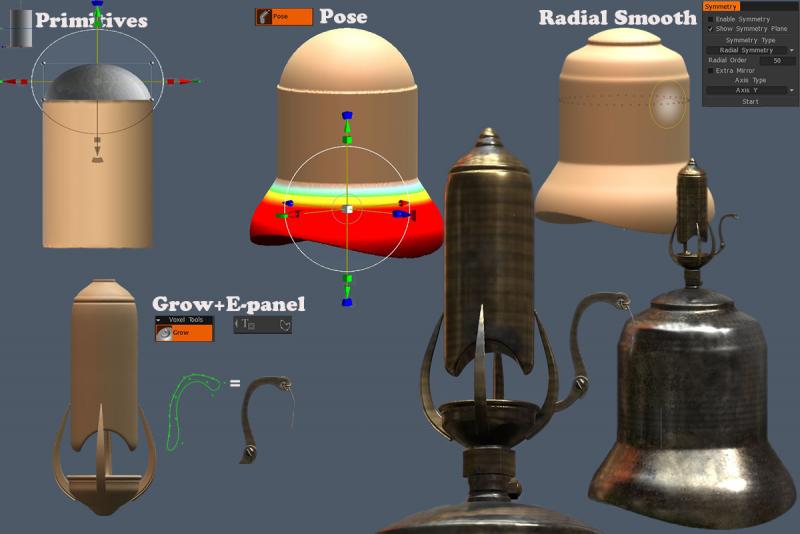
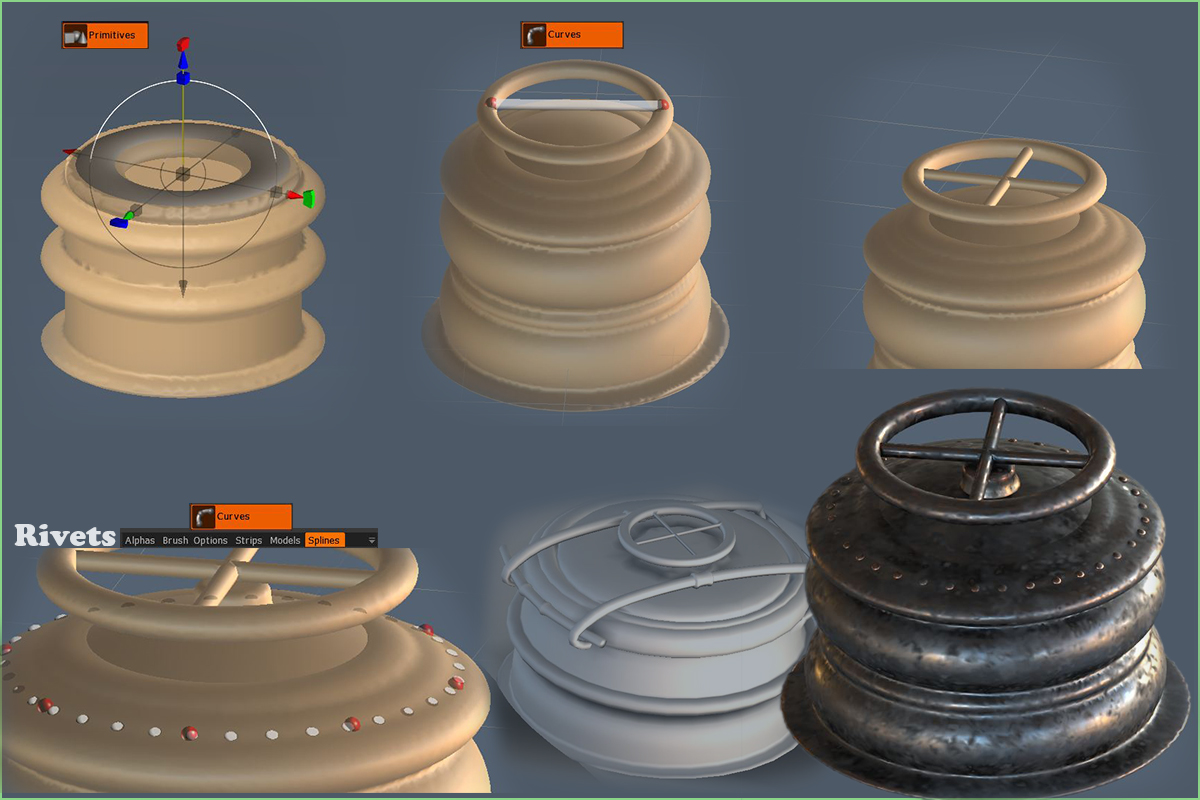
Creating the steam dome and whistle
Again starting with basic primitives I rough in the forms
I use a combination of the pose tool and cutoff tool to refine the shapes.
Using smooth with radial symmetry helps refine the forms.
Using the E-panel spline tools makes it easy to create more complex forms.
After entering the paint room I apply smart materials and use custom alphas for further detail.
Rendered in rendered room.


3D Coat to Bronze
in 3D Printing
Posted
Thank you mroek, i appreciate that!