


Forums
-
Development
-

- 840
- posts
-
- Update to the Curves tool in 3DCoat
- By Mihu83,
-

- 50.1k
- posts
-

- 3DCoat 2026 GPUPPP Development
- By gbball,
-
- 3.5k
- posts
-

- LKS 3DC Tools cExtension Edition
- By Carlosan,
-

- 610
- posts
-
- NCCA Graphics Library (NGL)
- By Carlosan,
-
-
General
-

- 71.6k
- posts
-
- Should You Use 3DCoat? | Arrimus 3D
- By Carlosan,
-
- 13.6k
- posts
-
- Carbon Game Engine Open Sourced
- By Carlosan,
-
-
Tutorials, Tips and Tricks
-
- 960
- posts
-
- How to export 3DCoat UVs to Zbrush
- By Carlosan,
-
- 396
- posts
-
- 695
- posts
-
- Sculpting concept | Blencoat
- By Carlosan,
-
- 259
- posts
-

- Invert Selection?
- By DustyShinigami,
-
- 316
- posts
-
- 550
- posts
-
- Hand Painting Swords | Mila
- By Carlosan,
-
- 56
- posts
-
- 163
- posts
-
- Concept Art Timelapse | Dao Vi
- By Carlosan,
-
-
Artwork
-
- 17.3k
- posts
-

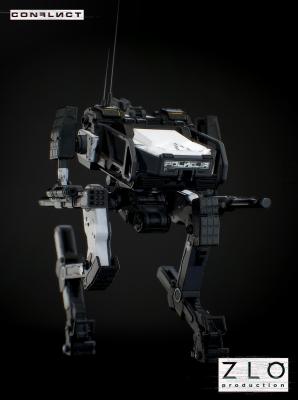
- Sky Patrol Flying Car
- By kenmo,
-
- 3k
- posts
-
- 2026 REALLUSION 3D CHARACTER CONTEST
- By Carlosan,
-
-
Market
-
Who's Online 5 Members, 0 Anonymous, 24 Guests (See full list)
- Carlosan
- HarryAxior
- PalePixel
- philnolan3d
- XRumerTest
-
Topics
-
- 0 replies
- 1 view
-
- 2 replies
- 77 views
-
- 0 replies
- 2 views
-
- 0 replies
- 3 views
-
In Voxel Room, Smooth shows "Hidden layer is selected" in Surface mode, but other brushes work
By Tezuka, in New Releases, Bugs Reports & Development Discussion
- 14 replies
- 415 views
-
- 0 replies
- 125 views
-
- 12 replies
- 388 views
-


-
Posts
-
-
By Carlosan · Posted
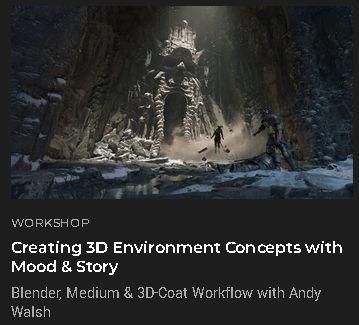
https://www.thegnomonworkshop.com/workshops/high-fidelity-environment-design Design an immersive world using Blender, 3D-Coat, and Photoshop with this 3-hour workshop by Senior Artist Jannis Mayr. This intermediate to advanced-level workshop reveals Jannis’s techniques for creating fantastical worlds, detailing the creation of a final keyframe in detail, from start to finish. This comprehensive tutorial delves into both his creative and technical processes so you’ll understand the whys as well as the hows. -
By gbball · Posted
I will try that out. But I'm curious if anyone else is having the same experience. -
By DustyShinigami · Posted
Ahh, there it is. Thank you. Was looking at every option except the icons at the top of the screen. ^^; As to the second method though, I don't appear to have that under the Selected category. This, again, is with 2025.17. I have Faces selected, but Invert doesn't appear there; I only have Invert Hidden. -
By Carlosan · Posted
Painting over a single square with one face, got this result. Some squares dividing the UV space and a diagonal line appear. The effect is more noticeable if you select View > Show Displaced Mesh -
By Carlosan · Posted
To invert your current face selection in the 3DCoat Retopo room, open the Select tool, ensure Faces mode is active, and click Inv. Selected in the top bar options. Select the Select Tool from the left-hand panel.Ensure your filter in the top bar is set to Faces. Make your initial selection on your mesh. Go to the top horizontal settings bar and click Inv. Selected (Inv. within the current retopo group) or Inv. All Selected (Inv. across all groups). or Access the Selected Category on the left-hand tool panel within the UV workspace. Select Invert from the list of commands -
By DustyShinigami · Posted
Hi Is there an option, tool, or shortcut to invert a selection of faces? I've tried looking through the list of tools and the Edit, View, and Mesh tabs, but couldn't see an option. Unless there's a specific shortcut? Thanks -
By Carlosan · Posted
The issue is related to this ? In 3DCoat, pressing the V key (the default hotkey for the Eyedropper) can be used to pick a color in two ways: Single-tap: Selects the exact flat color directly from your 3D model. Double-tap (or hovering and tapping again): Samples the color from the screen space, which includes lighting, shadows, and post-processing effects. -

By Sal_GC · Posted
Recently tried out the new 2026.07 build and found some issues with node previews. I share here what I found. Hope it helps. 2026.07-build-node issue.mp4 -
By gbball · Posted
I'm having an issue pressing 'v' to colour pick while doing hand painting. It's picking up grey colours and not the colour on my layer. Sometimes if I press it multiple times, it will eventually get the correct colour. This is on versions 2026.06 and 2026.07 using ppp on a uv'd mesh. Edit: I'm guessing it's at times sampling the layer as a mask vs the actual colour. I think this needs to somehow be clearer. Also, editing the curvature map and ao maps is great...but there should be a non-destructive way to do it. -
-
By Carlosan · Posted
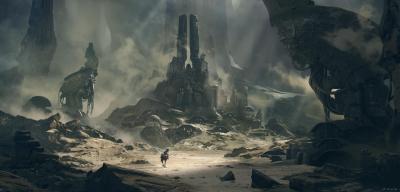
https://www.thegnomonworkshop.com/workshops/creating-environment-concept-art-for-games Creating and developing production art for games demands not only a deep understanding of the needs and goals of other departments in a game studio but also the consciousness and knowledge of technical restrictions. This 3-hour workshop covers these essential topics in a real game-dev context to share with you how you can visually communicate ideas with other departments in a studio while also understanding their needs and limitations. -

-
By Carlosan · Posted
Please check if this options are activated - Node Editor - Windows > Panels > Extensions -
By jammer42777 · Posted
Node Room bug with the color picker that has persisted since 3dcoat 2025. -

-
By carrots · Posted
3DCoat 2026.07 RC portable zip 3DCoat-2026-07.exe 3DCoatTextura-2026-07.exe 3DCoatPrint-2026-07.exe - Holding Ctrl over a knot in components with the NGVoxel behavior now correctly previews its effect on raymarching - Added support for applying Node Graph presets from the NGVolumes category directly to volume objects, automatically creating the necessary Voxel layer if it doesn't already exist. - Significantly accelerated the rendering of node previews and channel viewing (via CTRL+hover), while eliminating lag, unnecessary loading popups, and fixing bugs with black material previews and layer masking. - Fixed an issue where a connection between knots could not be established on the first attempt. - When saving a NodeGraph, the same category and folder used when loading it are suggested by default. -
By Sal_GC · Posted
Hey! Found what seems like a bug in 2026 RC2. Pressing CTRL for preview in the node room is not working. Thanks for checking it out! 2026.06 rc2 - texture preview bug.mp4 -

By CoordinatTasarım · Posted
I just bought 3DCoat too and am trying to get used to it. This feature needs to be added as soon as possible. The developer is going to make 3DCoat more aesthetically pleasing. We are waiting impatiently. -
By Sal_GC · Posted
Got it carrots! Thank you, I will be testing it out. Thanks!
-