


-
Market
-
Who's Online 3 Members, 0 Anonymous, 145 Guests (See full list)
- Mykyl
- JordanHanco3
- Carlosan
-
Topics

-
Posts
-

By Elemeno · Posted
could i get an image or video or this .. -

-

By nobackup · Posted
I'm sure this has been mentioned before, but I swear this one simple change would make modelling 10X more enjoyable. Currently when you have a mirrored object and try to move them, it behaves as if they are grouped together and moves both objects as one. To get true mirrored movement you need to switch to the pose tool, draw your selection and then make your move. It's so tedious. A simple toggle like 'respect mirror' would solve this issue. -
-

By Britain · Posted
Fixed. Newer version Blender 4.5. Object needs Shade Auto Smooth, Click ignore sharpness and apply the modifier. Now can be used in 3dcoat (using 3dcoat applink). There maybe other ways (hardops) but this works for me. -

By Little Eiffel · Posted
Hi, new to 3D Coat 2025. There does not seem to be applink for Blender 4.5. Please advice, thank you. -
-
-

By Richard A. · Posted
That worked mostly. The issue with UDIM's in that the head usually has more poly's so the effect left me with allot of fixes, the Power Smooth works pretty well as long as you have allot of real estate to work on. There seems to be a bug in the Super Smooth as when I'm working on smaller areas like finger tips and areas like that the brush seems to leave weird whited out areas on other areas. So say I'm working on the pinkie to smooth out the pore overlay the Super Smooth will smooth that area out fine but it will leave this swath of white on the thumb. I thought I was imagining it so I hit CTL Z a couple of times to undo the pinky smoothing and the swath of white went away on the thumb. Tried again, same issue. SO not sure if this needs to be reported or if it's a known bug?? -
-
-
By Britain · Posted
On another note with Blender 4.5.3 you can still use exported objects as .obj and 3dcoat can still use them. -

By webmaster · Posted
3DCoat Paint Tools: Picture ToolView the full article -
By Carlosan · Posted
Hi To add Custom pattern to Fill tool is useful for you ? -
By Dmitriy Nos · Posted
This version no longer exists. -
By Britain · Posted
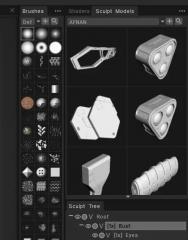
I did a fresh install Blender 4.5.3. The app is broken. I'm using 3dcoat 25.09. Using the cube as a simple import it appears in 3dcoat (Per-Pixel Painting) it appears as if base color or normals are missing. Import by Microvertex Painting it appears as a sphere (no sub added). Smart Material is broken using imported object. Everything works in Blender 4.4. Attached screen shots from 3dcoat. First picture 3dcoat image Blender 4.5.3 Second picture 3dcoat image Blender 4.4 Third picture 3dcoat image Blender 4.5.3 -
By Richard A. · Posted
So I had to take a few days off for health and work stuff. I come back and can't remember exactly what I did with the brushes for the figures roughness channel. So as much as I'd like to spend time trying to recreate the effect I did for the head UDIM I just don't have the patience nor the memory of what exactly I did. So my idea is to create a full body fill of sorts but not sure how to go about it. I want to pick a "pore" type of alpha and apply it throughout the entirety of the figures UDIM's so Head, Torso and Limbs. I know there is a way, probably a smart filter but the setup box that comes up has me confused so thought I'd reach out for some guidance. Thanks so much Richard -

-