


lowedennis
-
Posts
68 -
Joined
-
Last visited
Content Type
Forums
Calendar
Gallery
Posts posted by lowedennis
-
-
If you want to do breathing in max use a sphere Displace space warp and animate its strength. I use shrinkwrap alot and ive never seen it mess up mapping. It should be going anywhere near that data.
Id check that your low res model is set not to render in the scene as it could still have your displacement map on it, causing it to poke through the high res model in places.
Thanks for that tip Roger - I never even thought about that way of doing things, I've dumped my animation (of vertices) and gone for the Displace warp and it works brilliant. A case of not seeing the wood for the trees.
The low res was hidden and not renderable so the search goes on, it's one of those niggling things that keep me awake at night.
Anyway the rendering is on it's way and tomorrow I'm hoping for a nice little present from my renderings.
-
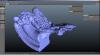
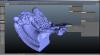
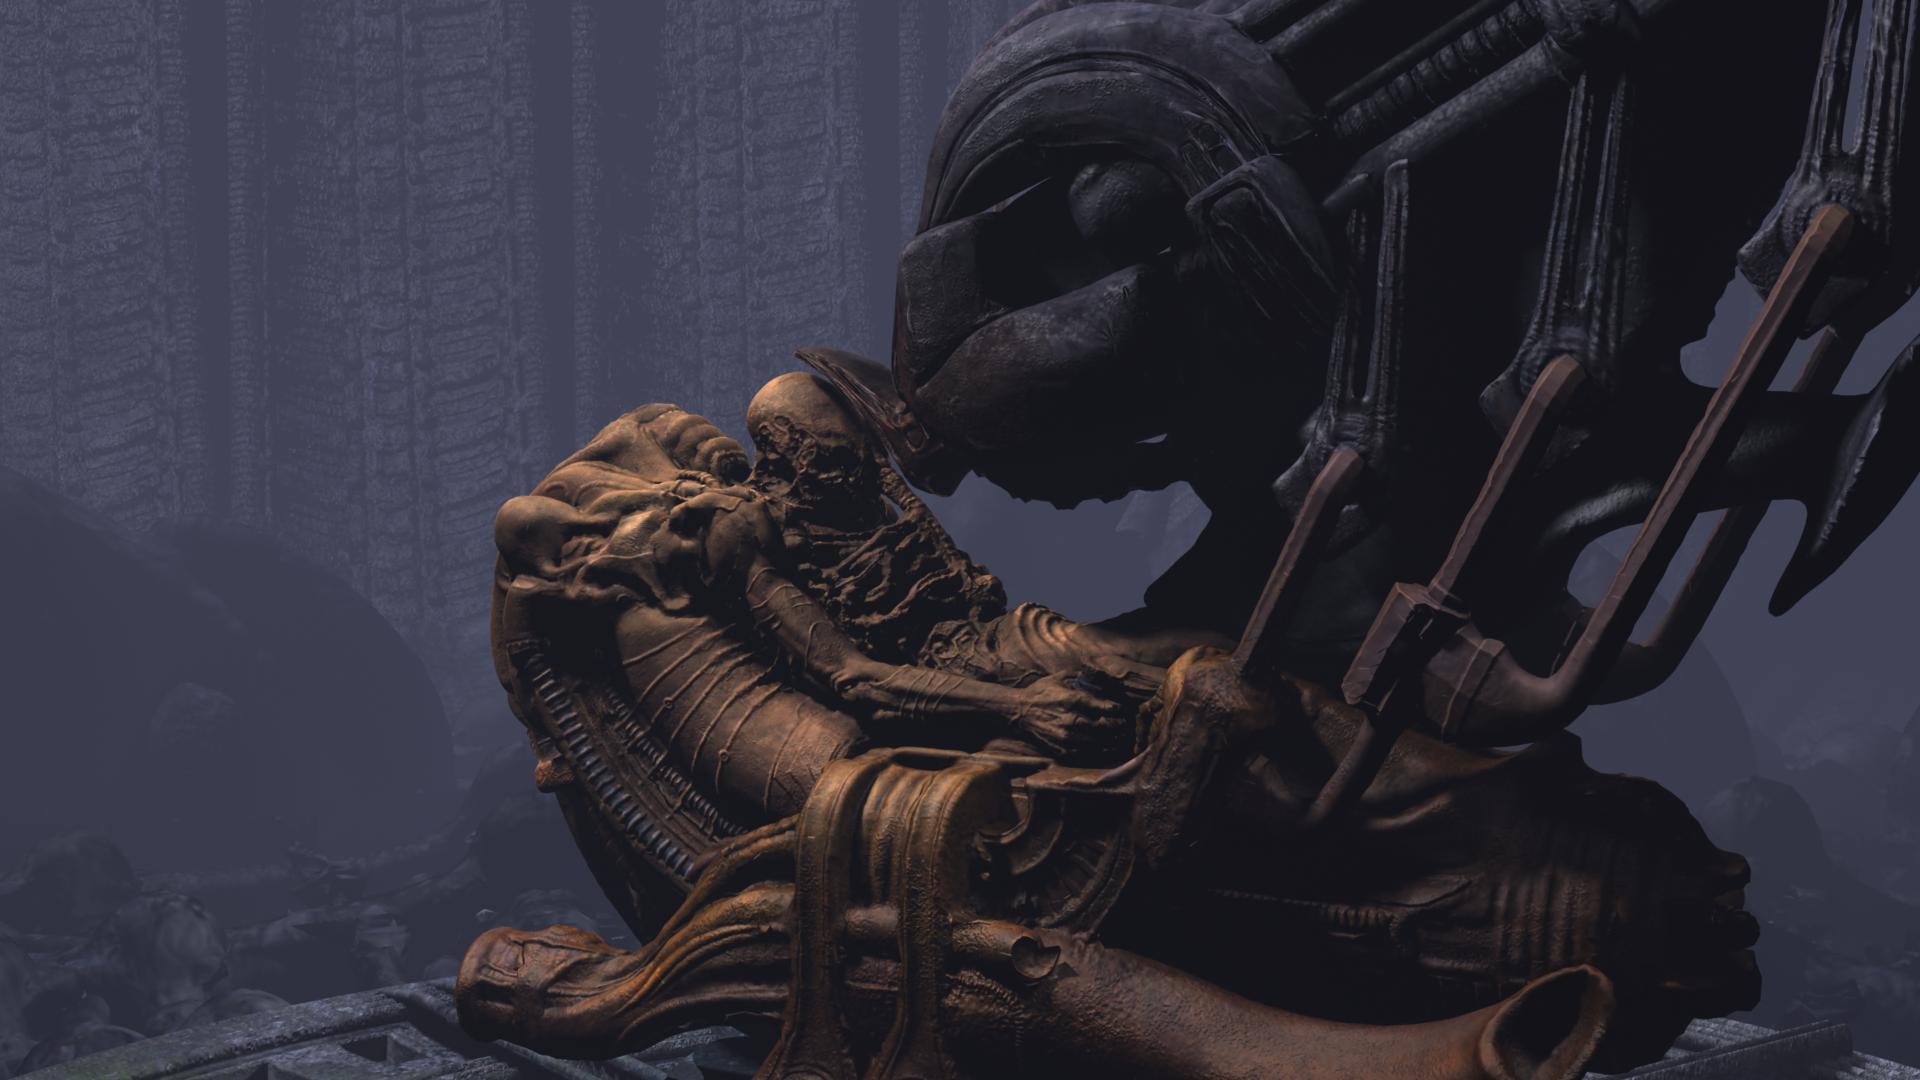
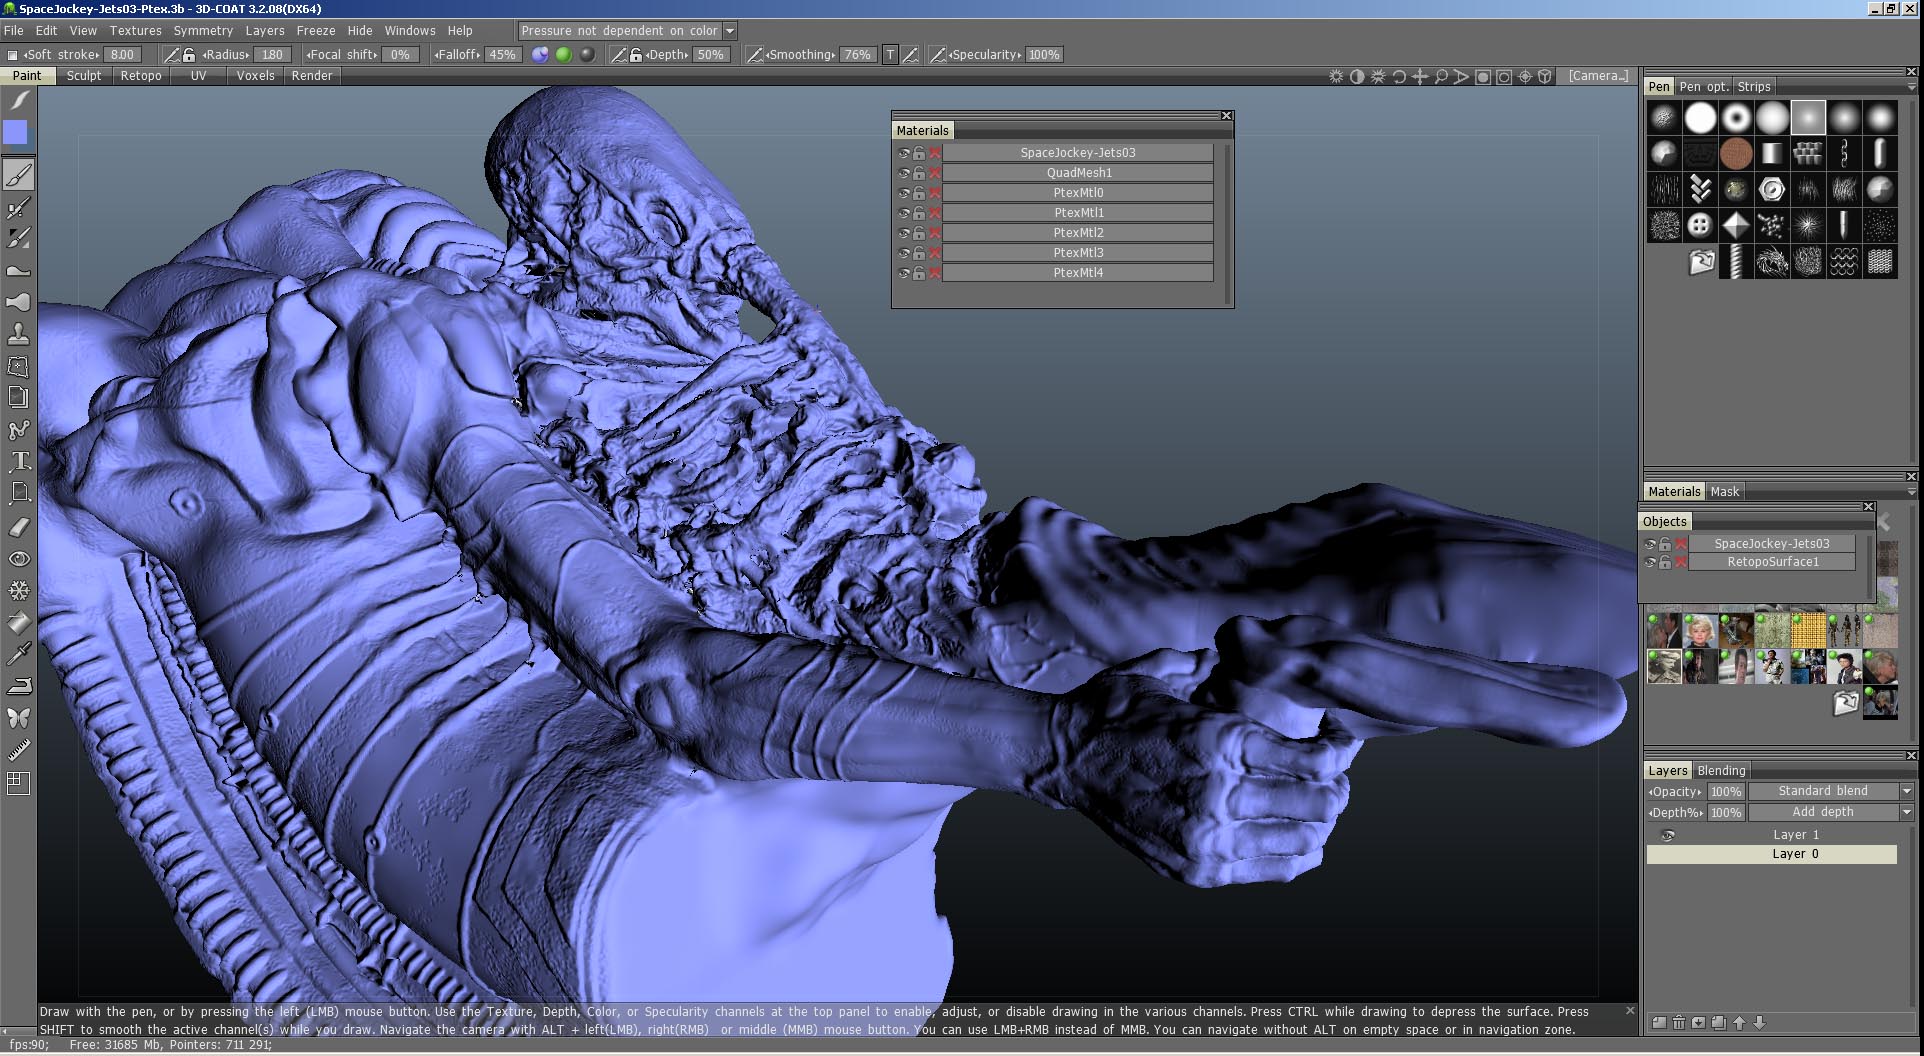
Well the SpaceJockey model is pretty much there and as this was my first attempt at Ptex I finally worked out the 5 layers of maps (each for normals, bump, colour and specular)- Phew....my disk is filling up. The rest of the structure I did with Microverts as they were more simple in the texture realm.
On to the animation and I made a low poly version (I use Poly Cruncher) to animate the vertices at the sub object level. I went through the pain of the SKIN modifier in 3D MAX and found it too crude to get the vertex weights correct - not subtle enough.
I went for animating the vertices on the low poly model and all went well as I only needed a breathing movement, I applied the skin wrap to the high res model and pointed it to my low res model.
All went well and I did a test render to find that the mapping was destroyed.

I know that this does not relate solely to the Ptex techniques as I had a similar problem when I was animating other models after using Microverts and really never got down to how the problem could be fully solved, I managed to fudge it but I easn't reaslly happy with the result.
I am now on the search for any ideas of how to correct this problem.
My normal maps are tangent space (I've tried all the other alternative normal maps space configs) and I believe this is right for animated models, but admit I am no expert on the normal map scene.
Any ideas?
-
Great work! This will be something to see in its final image...
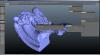
I'm working on the lower section at the moment and I think I'll finish sculpting in 3D Max for the more precise engineering parts.
My computer is starting to slow down now that there are two voxel objects in the frame
-
Excelent! That is the beauty of Ptex. Some parts with high detail, some parts with medium and low and it looks like a one piece. Is it picture of Jackie Chan
in materials windows?
It's John Hurt - I needed some reference for the 'Kane' sculpt from Alien.
-
You should make a tutorial digman as I think there will be a lot more of detailed scuplture work in the future and I think people will be more confident to undertake the projects if there is a definite guarenteed workflow, especially now I see the benefits of Ptex. I haven't begun to scrape the surface of what's ultimately possible yet but I can definitely see it's advantages from my small efforts.
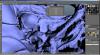
BTW here is the latest paint work as it stands now.
-
I really do hope it helps. Like I said I didn't even realise I'd found a 'trick' until replying

Well SUCCESS........
Here is the workflow I tried.
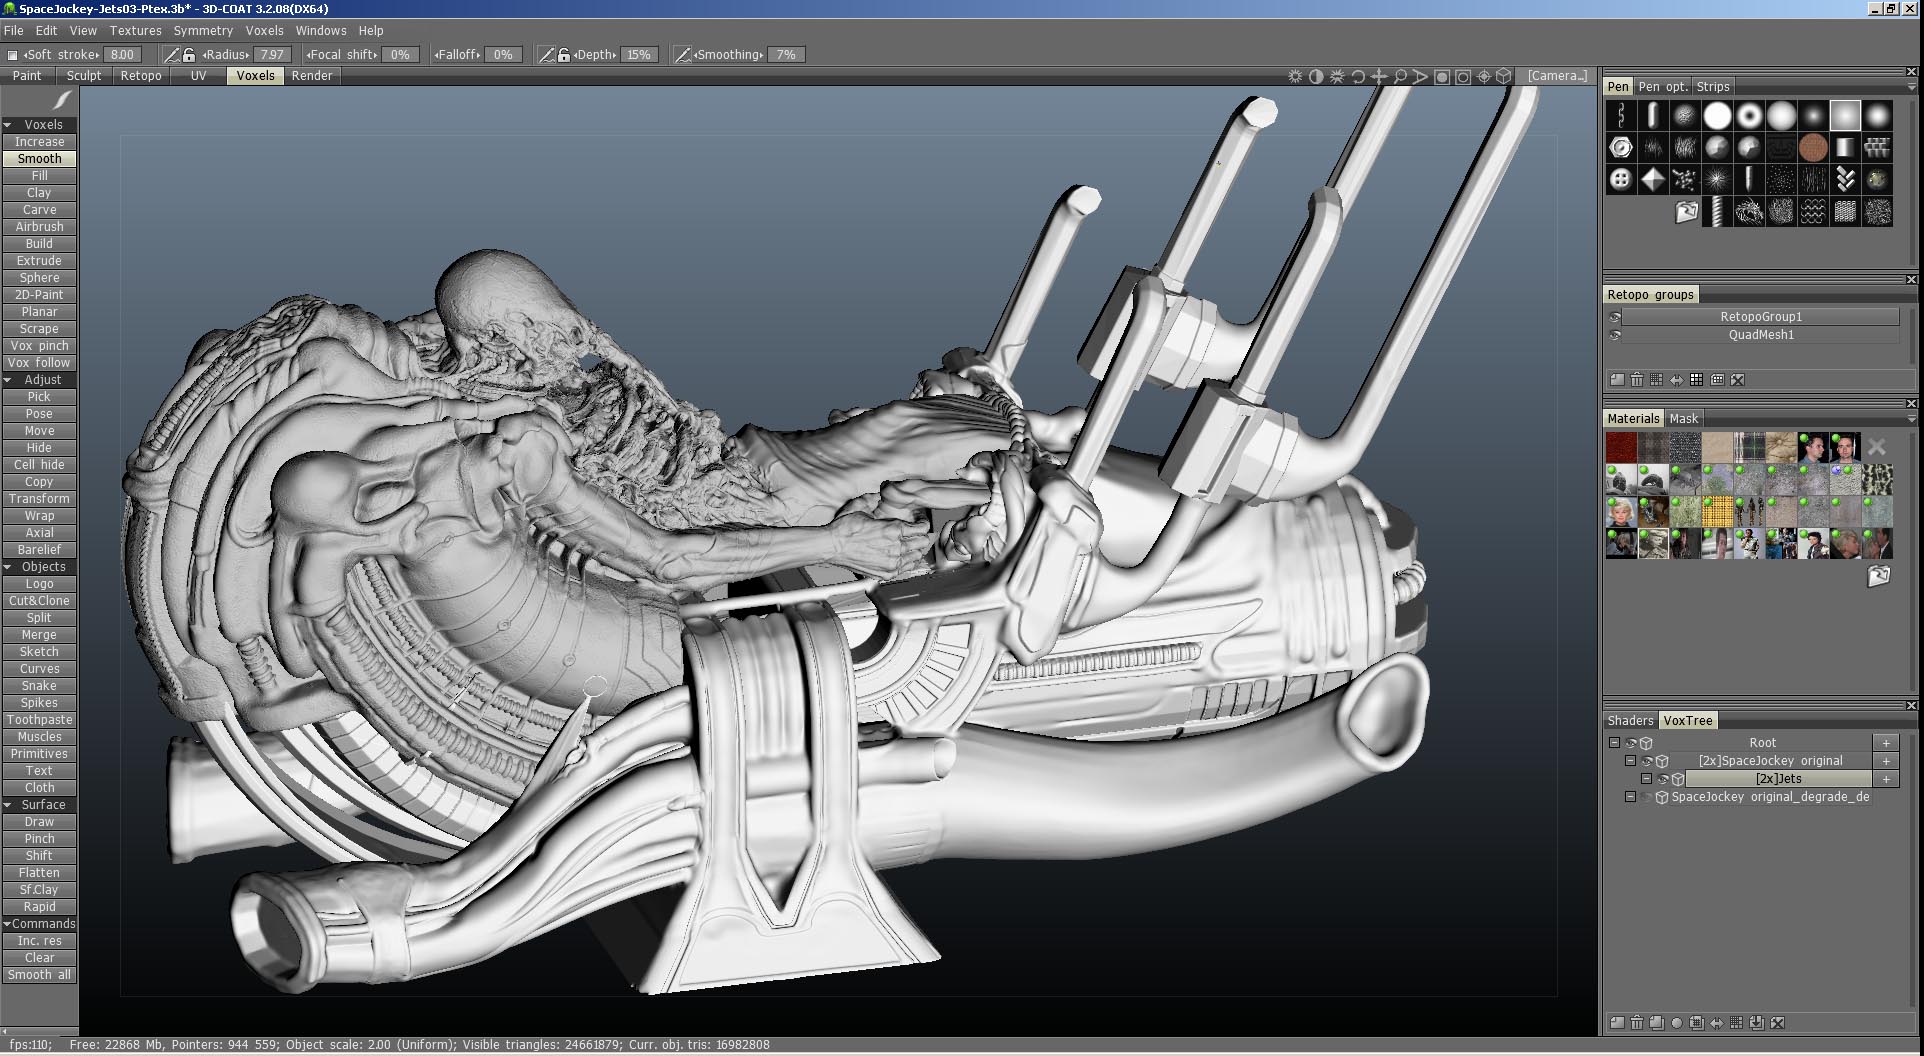
I remember in a previous problem I had with the 'Derelict' model (older post) that Andrew suggested that I 'clone and degrade' my original sculpt, then 'clone and degrade' the copy - hide the Original voxel sculpt and hide the first 'clone and degrade' process. So here is a workflow that did it for me.
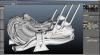
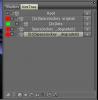
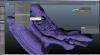
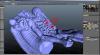
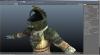
Below is the voxtree: the red dots are from the original (at the top) and the green dot is another object in the scene that I hid as it is not required yet until I sort out my workflow. The top red dot is the original, second red dot down is the first 'clone and degrade, third red dot at the bottom is the 'clone and degrade from the one above.
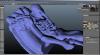
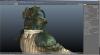
After that I hide everything except the last 'clone and degrade' and applied 'smooth all' twice to get this
then with this layer selected I did 'Quadrangulate Object' and accepted the defaults.
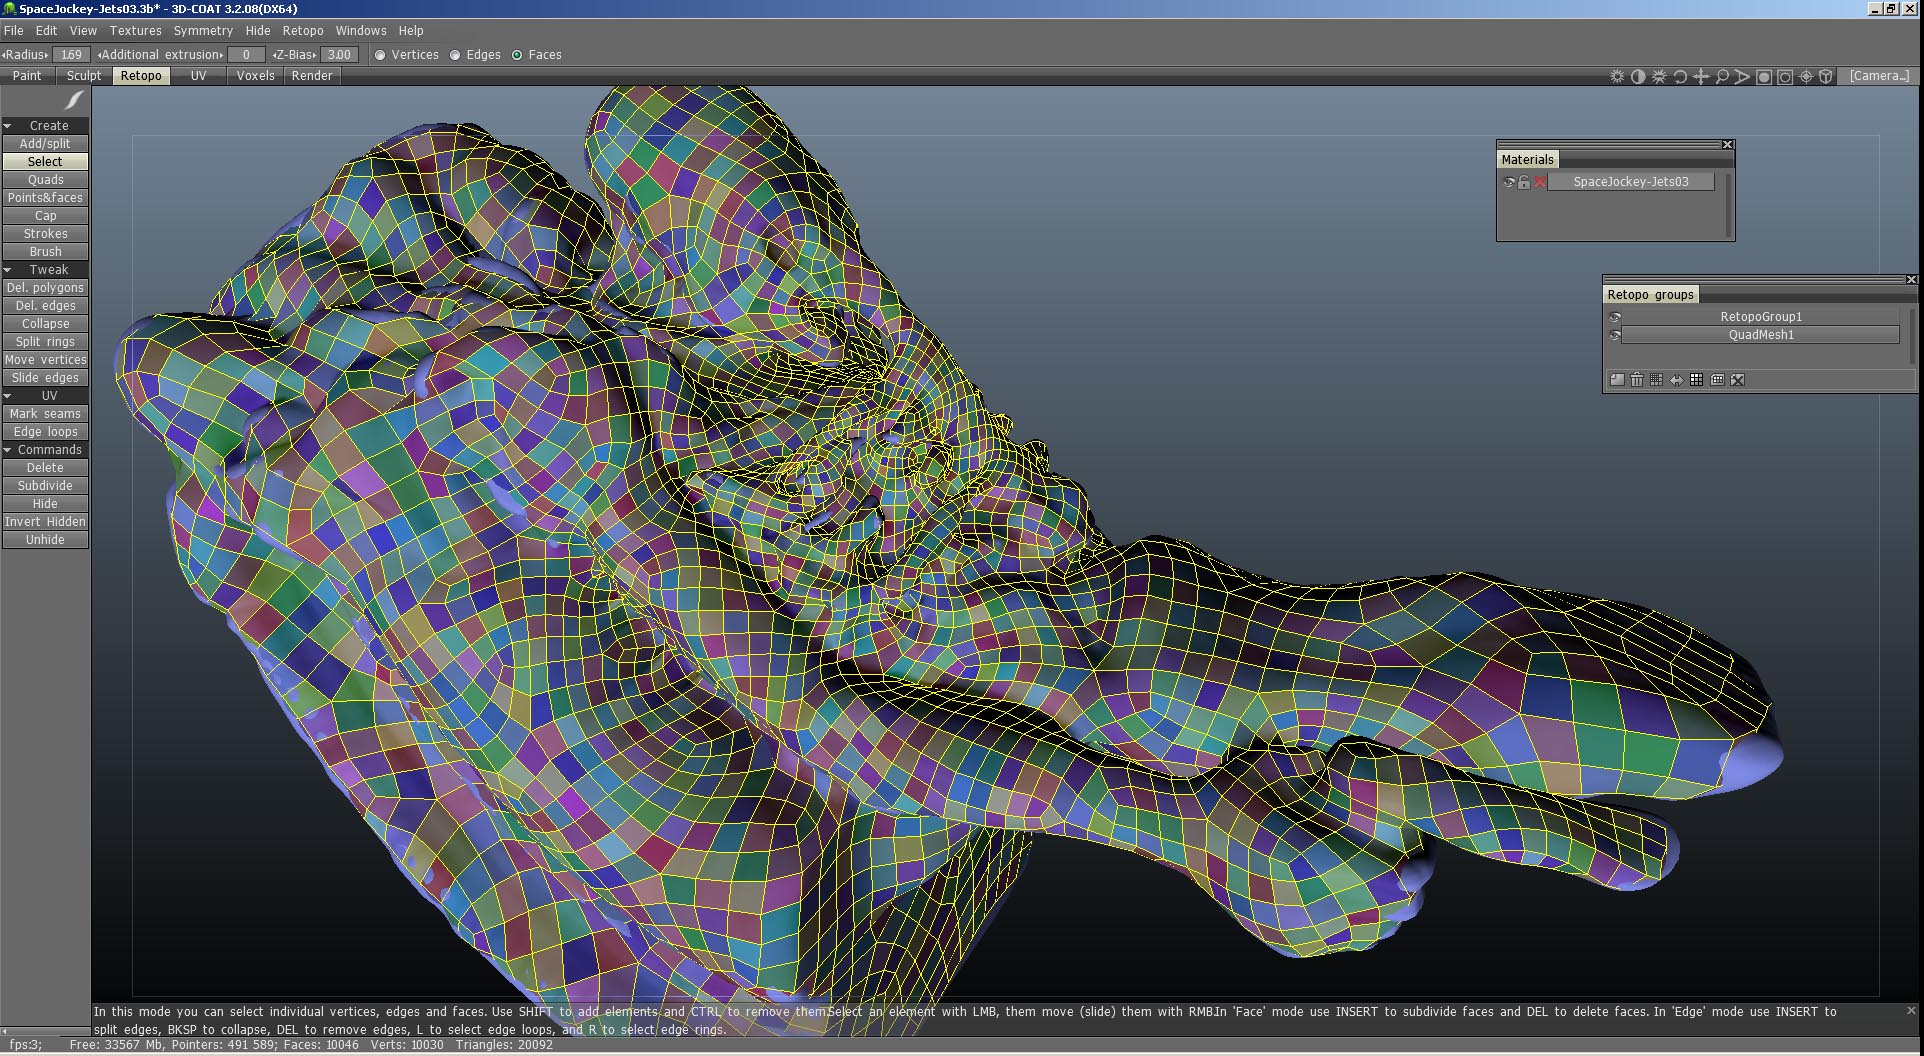
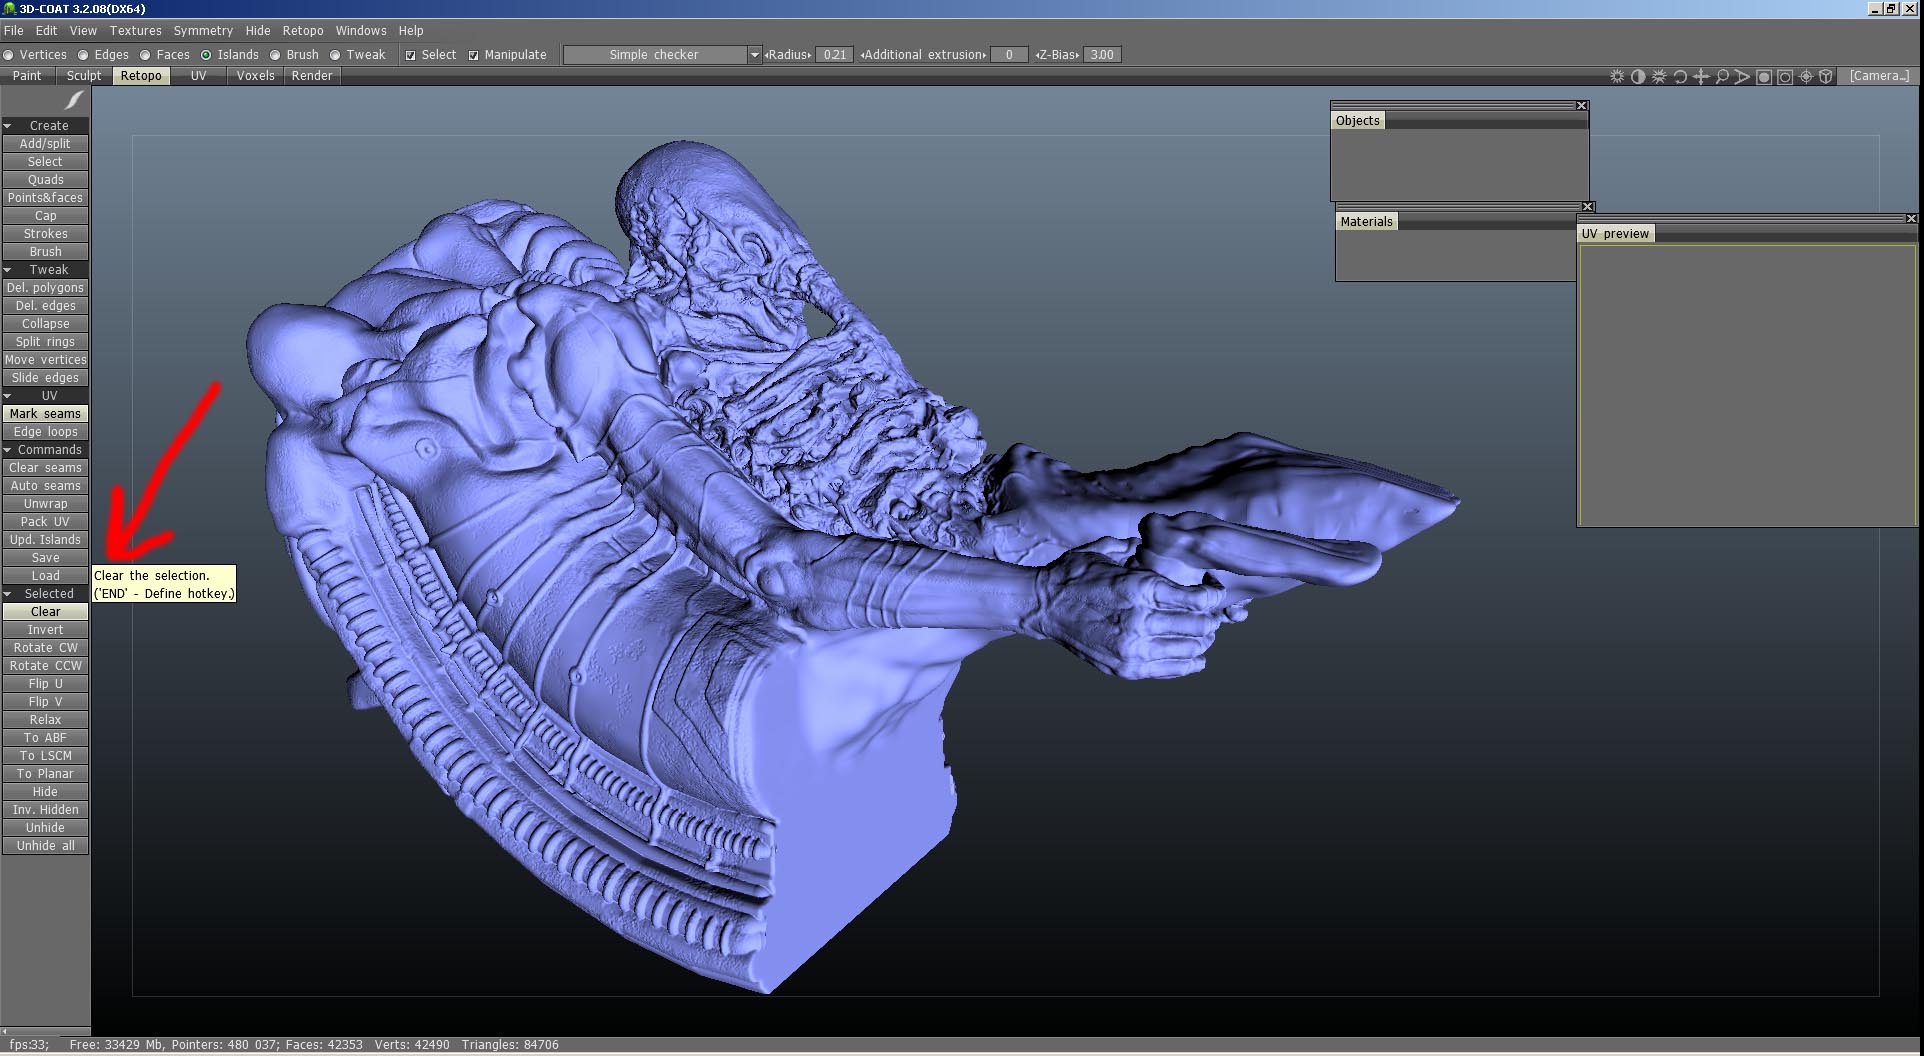
After that had finished I end up in the retopo room here
digman suggested that I hit 'clear' to get rid of the UV that was produced as the mesh is only needed for Ptex (I think).
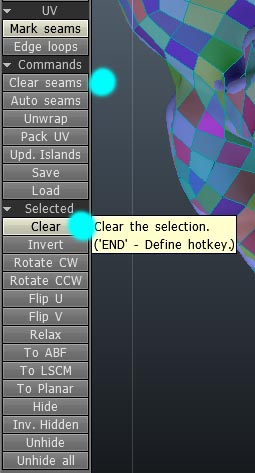
I had to click 'Mark Seams' to get the clear button to appear

I hit'Clear' and also 'Clear Seams' just to make sure.
Then *VERY IMPORTANT* - I don't want to use the clone and degrade and smoothed copy there before I 'merge for Ptex' so I go back to the Voxel room and hide the last cloned and smoothed copy and unhide my original voxel sculpt at the top of my previous list.
Go back to the Retopo room and select the 'RetopoGroup1' layer and then click 'Merge model into scene with Ptex' and accept the defaults.
The conversion took about 3 mins and finally ended up in the paint room -Yipeeee....
There some small artifacts but that's to be expected I suppose given the undercuts and general organic nature of the sculpt.
I'm off in the garden as I can now see the Sun coming out (or has it been out there all the time and I hadn't noticed)
-
quadmesh1 and quadmesh2 is an almost daily thing for me and always caused by my experiments with taking a mesh from voxel to perpixel via auto quadrangulate, not being happy with the result and trying again, but forgetting to first delete via this process:
1) paint room, objects tab: Hit red X to delete everything. (i.e. do it once, return to objects tab, do it again)
2) retop room, delete layer. that will leave quadmesh1. create new layer, it will be called Retopgroup1. Click again on Quadmesh1. delete it.
You have now cleared from memory everything, BUT the voxel room information is INTACT. Now you can quadrangulate or retop room again.
i.e. the trick I use is the create the new un-needed layer in retop as that then allows me to sneakily delete quadmesh1
Sorry it's something I made-up but didn't even realise it was useful for others as silly as it might seem now.
That is so important, thank you Ghostdog, thinking that once I had deleted the objects and materials in the paint room (layer0 seems to want to stay there also)and then seeing that Quadmesh1 in retopo would NEVER delete I thought it was obviously meant to be there otherwise the Universe would collapse!
-
If that's a free model from the net, I'd also love to be able to play with it!
His name is Sean Kennedy and you can download his model here:
http://www.planit3d.com/source/poser/sparky/sparky1.html
If used for commercial you have to ask him, if not please give him credit if you use for non profit.
-
I will await your pm for the file...
edit:
I had to blast out the door. You can make a mesh closed upon import, check my last pic in the other post. It is in the merge dialog box.
I'm having another try with the mesh closed, the link has been PM'd.
-
Well so far no luck as the program is not responding again, the trouble is probably in the mesh then, we should get someone to write a script that fills in any holes inside the mesh like 'cap holes in 3d Max.
I'll try pulling it in max to check it out - looks like another day ahead of fun......
-
Here is some info on merging for voxels your imported 7 million polygon file (obj or stl) that you created.
The picture has the details.
"a mail from Andrew suggests it may be objects inside my mesh"
Yes, Andrew is correct, as I was stating the same thing...
I had to scale my 7 million obj at x2 to get near to my original and I'm now in the retopo after quadrangulation process, so far so good. It's looking good as there is only one Quadmesh1 in the retopo group box.
So now I'll just merge for Ptex using the defaults.
-
Yesser, it can get confusing trying to type so you understand, the nature of communicating by written word, the man that can explain clearly in written languague is a rare sight, example all the written manuals that leave your head spinning. I will try again.
This is a way you can start off with a clean slate.
The easiest method if you have enough ram is to export the voxel model (from the vox tree) all 7 million tris as a obj or stl file. ( You should be fine as I see you have free 33,420 mb)
Close 3DCoat and then import the obj or stl model as a new merge into the voxel room. "Do not use the same 3d file you were using" You might have to resize on merging for voxels to get the resolution up to 7 million tris again.
Then just quadrangulate, In the retopo room, check the mesh and merge for ptex.
I'll give that a try, I've sent you a PM as I'm uploading to a server I use for video, as soon as it's done (2 hours says my ftp client) I'll PM you with a link.
I have 12 GB ram on my system so I'm not thinking it's my memory yet, a mail from Andrew suggests it may be objects inside my mesh, I've had that before by importing obj files that are not completely clean and looking inside the voxels reveals all sorts of rats nests that when I delete them, they then affect the outside. That's another discussion I feel.
-
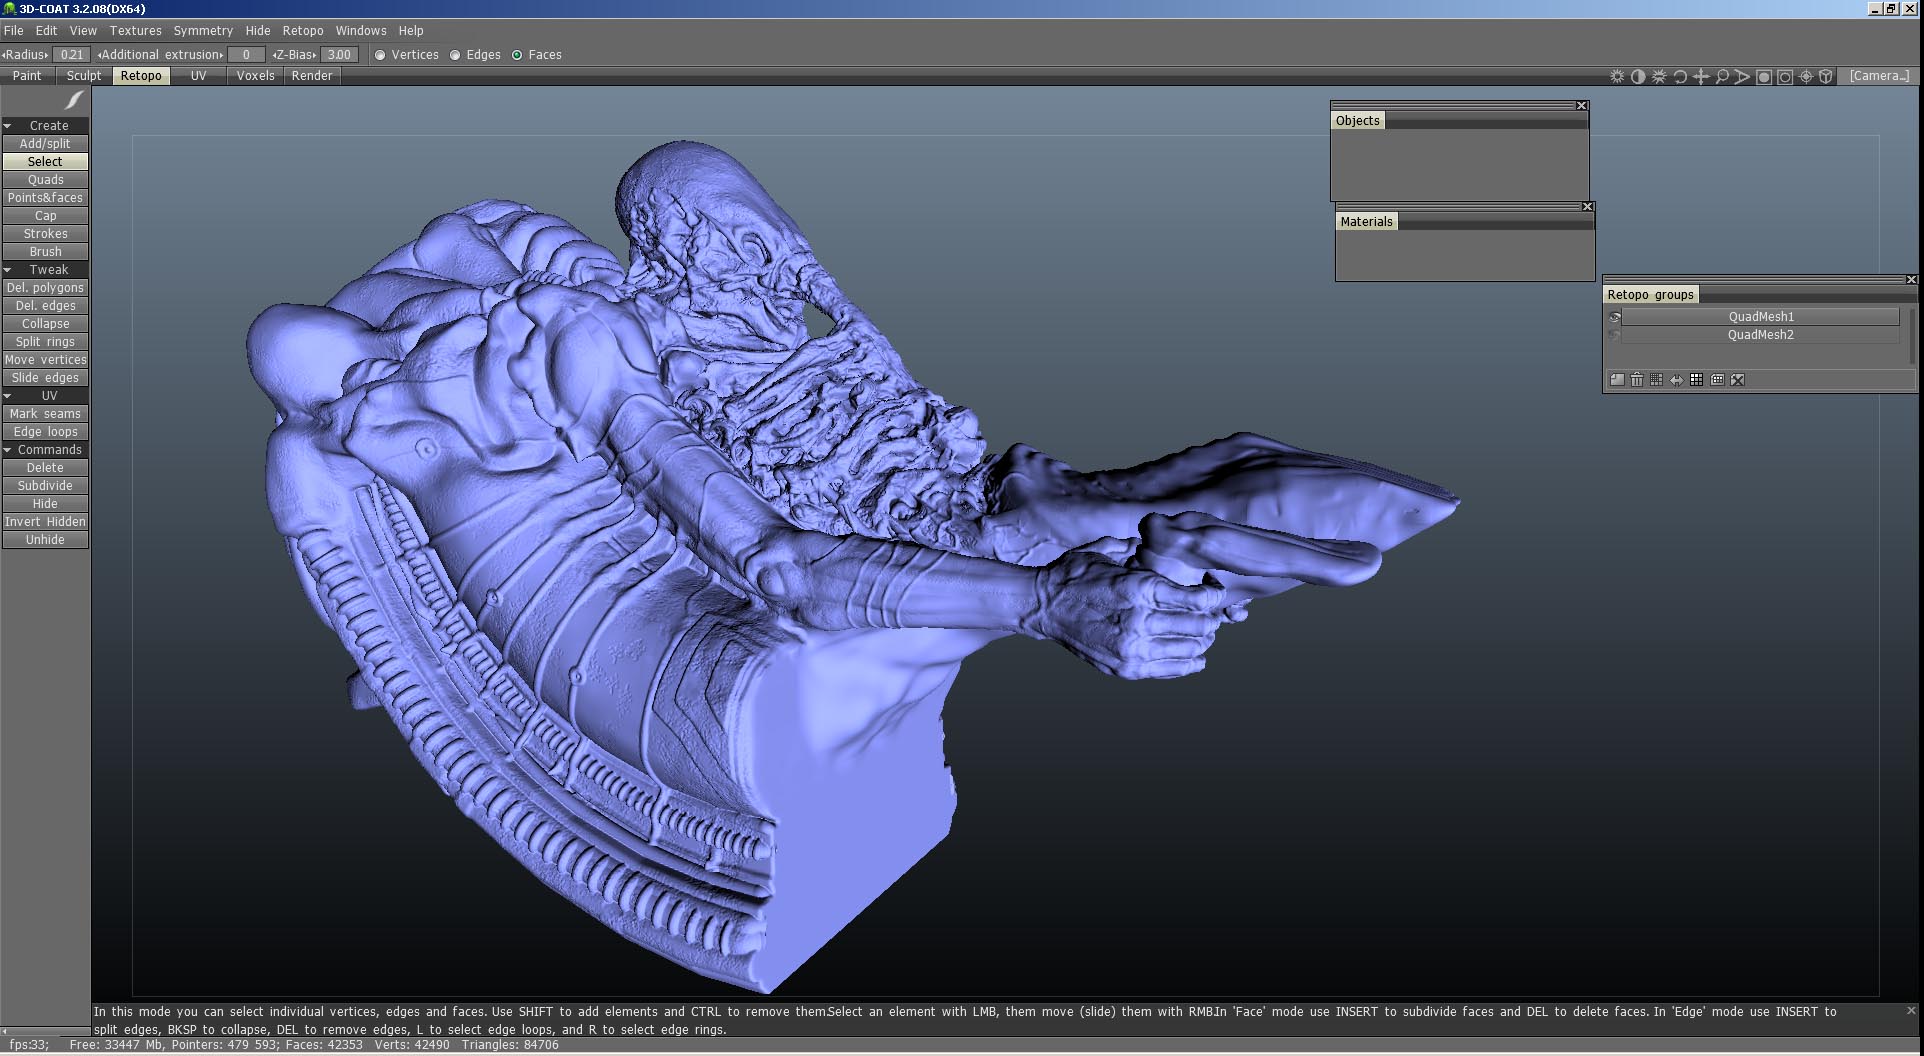
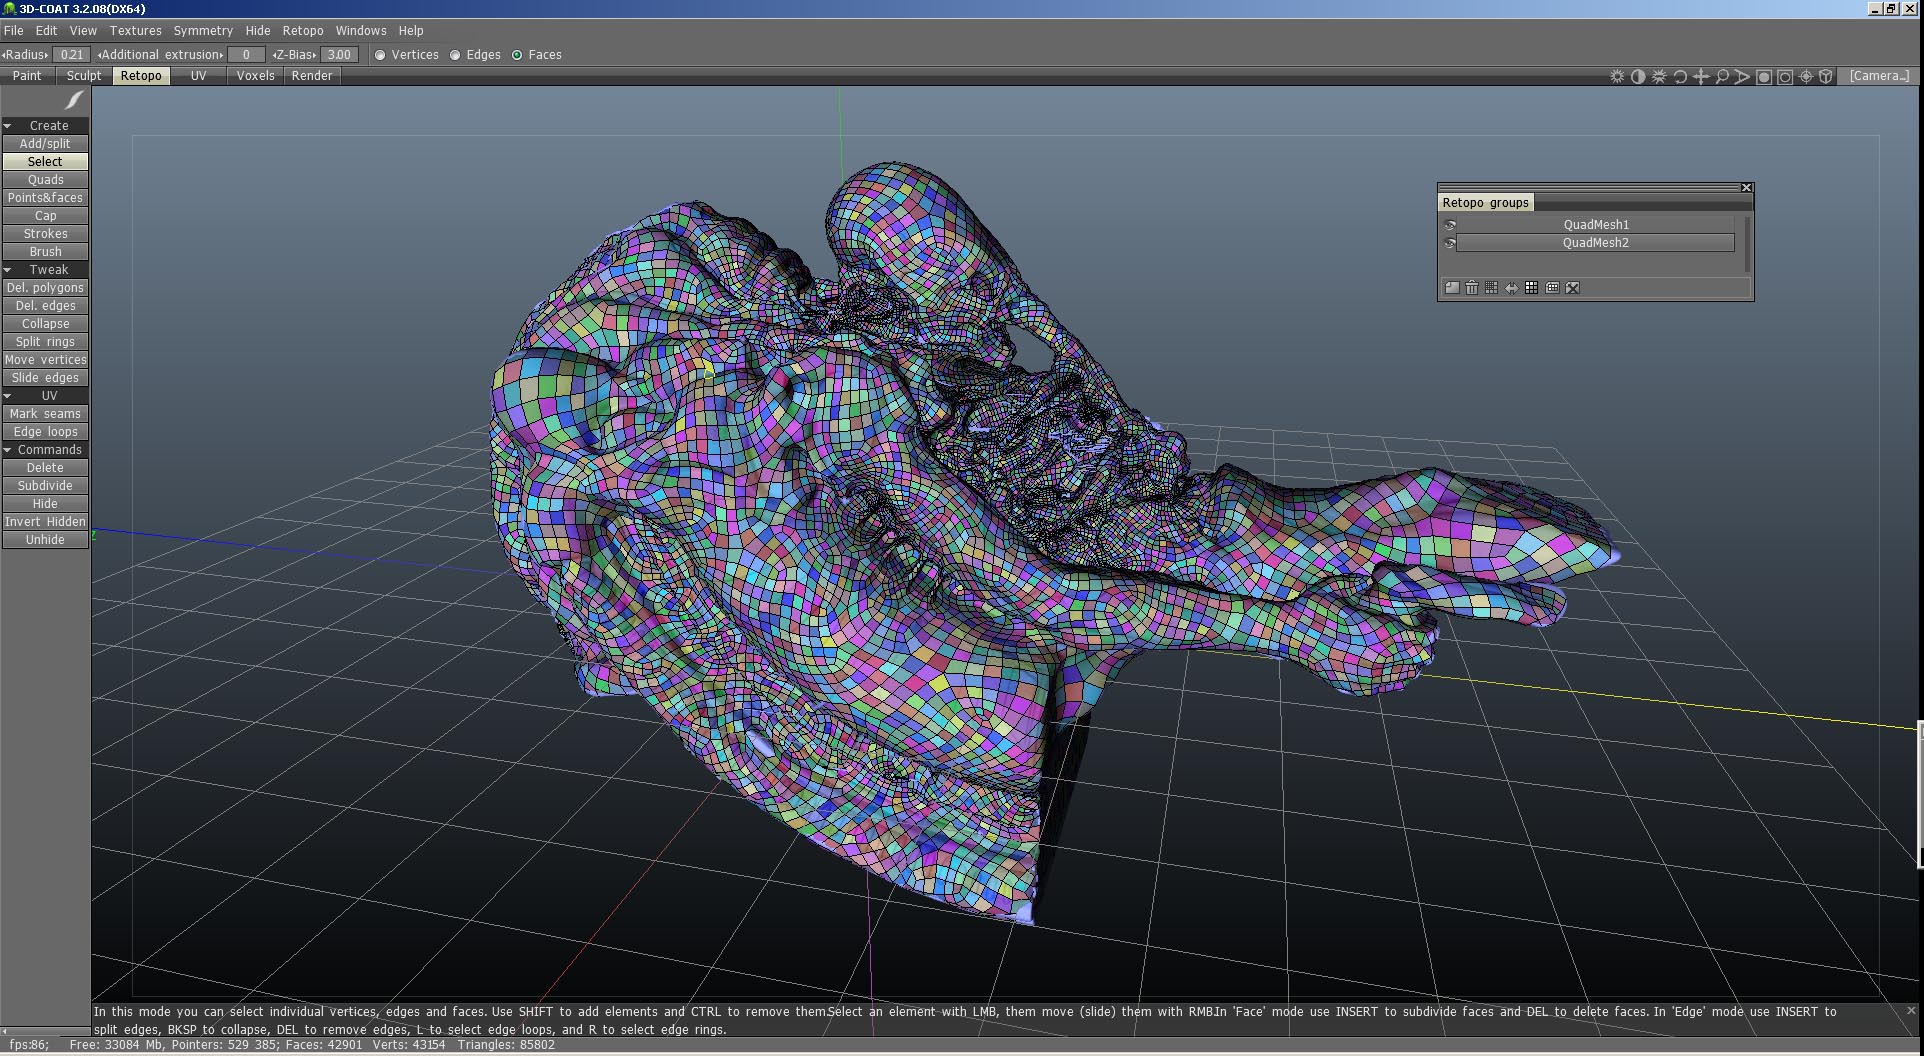
ok, I think I know the cause of the multi-color mesh. You might not have deleted the original quadranqulated sphere mesh in the retopo room. I did a test which was not to delete the original quadrangulated mesh, then ran the quadranqulated feature again from the voxel room and vola I got a multi-colored mesh...
Could be reason that your ptex stops responding as you now have two seperate meshes from different models in the retopo room but still that is only a guess...
John: yep it's a great feature of ptex and you can export the obj from the paint room and 3dcoat will create a uv map (square tiles) for it so you can use in your rendering program. sweet...
So what you're saying digman is that I should kill Quadmesh02?

and just leave Quadmesh01?
and kill using this button? which I have to hit 'Mark Seams' to make it visible?
I select Quadmesh02 and hit 'clear' and the quadmesh02 is still there staring at me! - I have to delete it from the retopo group window.
and I am left with the Quadmesh01 again
and I get the dialog that 'model is empty'
Sorry but I'm totally confused here
-
Hi
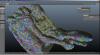
Before I start, thats one sweet model man really cool. The polycount doesnt look tooo huge but you do have a very multi coloured mesh, which kind of makes me think your UV Map might need sorting out. I think your model might be too complex for the auto mapping feature.
Besides that have you tried exporting the retopo mesh to an obj file, then importing it into the paint room? I realise that you should be able to do both at the same time while in 3D Coat but you might be having memory issues. When yuo are doing the export to the paint room you have (I think) a pretty high res voxel sculpt, the retopo mesh and then you will be adding to that another copy of that mesh for the paint room.
I would export the mesh to an obj file, close 3D Coat, start it up again with a new document and use the file, import options to import your obj file to the paint room.
I hope that helps, let me know how you get on.
John.
Thanks John, I've been using a model from the net as a start point and adding the extras and re-jigging in the voxel room.
I started the painting via Microvertex (it went well) until I found some rogue areas that were too big on the texture size (no detail could be painted on those sections) so I thought I would dive into the Ptex side as it didn't need the dreaded UV map and all the troubles that come with it.
here is where the undercuts and real detail is on the model so I thought going the Ptex way would be appropriate, plus that I hadn't even tried that way before as I don't have much luck with the other alternatives without spilling blood.
-
I tried experimenting with a simple voxel sphere and just accepted the defaulte to get into the Ptex paint room - all went well.
I then pulled in my model (7 million odd tris) and did the same, all went well and ended up in the retopo (like the sphere test) and I accepted the defaults.
I noticed that now I have Quadmesh1 and Quadmesh2 in the retopo group window, anyhow I accept the defaults and the familiar 'not responding' pops up on top left - do I leave this overnight to complete or is this a normal situation? is it a quick process or a long one?
-
QFA,3DC seems to be growing outwards rather than up. I haven't been able to use it at all on my latest models because it just cant handle the texture resolution i need. Its not a case of my computer not being up to the task either. I love 3DC but i wish more time could be spent refining whats there rather than adding new features and neglecting the existing ones.
Another issue that bugs me is that 3DC's retopo while being totally awesome, lacks the ability to see a simple preview of the smoothed mesh.
I second that, Although I'm a newcomer to this application I spend at least 90% of my time fighting to get from one room to the other and end up killing the app and trying a different approach (which usually doesn't work).
Unless you're a top expert in retopo and UV bodging then you are out in the cold.
There's simply not enough information for artist types that just want to sculpt and paint - it's still in Beta testing I feel.
-
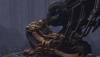
Thousand thanks!Yes the character has a lot of details...I've in progress other... Do you like Kenshiro Hokuto no ken? You' ve a nice day!
That is absolutely fabulous Michele, I really love the quality you've captured on the bio-mechanical skin.
Have you started to animate it yet? if so I like to see it move as it would be a shame just to leave it as a static object.
Well done, I'm very jealous!!!!.....
-
hi
im not Max user but heres my thoghts:
thats a question of normal maps of course and seems fixed but i guess for animated meshes youll always need tangent type so i dont know if it will work.in Unity for instance spec will be alpha of color map and height(or displace?)will be alfa of normal.then im very confused by that spec in alpha normal that 3dc does.never heard about before and woud like to know whats for?
I read that tangent maps were the ones to use as well (especially when the mesh is animated) and they were the first that I tried but for some reason they just didn't work and broke up.
It seems that I have more success with world maps.
I don't pretend to completely understand this whole normal map process and find myself just trying to get the result by eye.
The normal map creation process in 3DC really confuses me as there are very different ways to create and lots of traps to fall down (especially a newcomer like me)
Thanks for your comments moska.
-
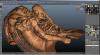
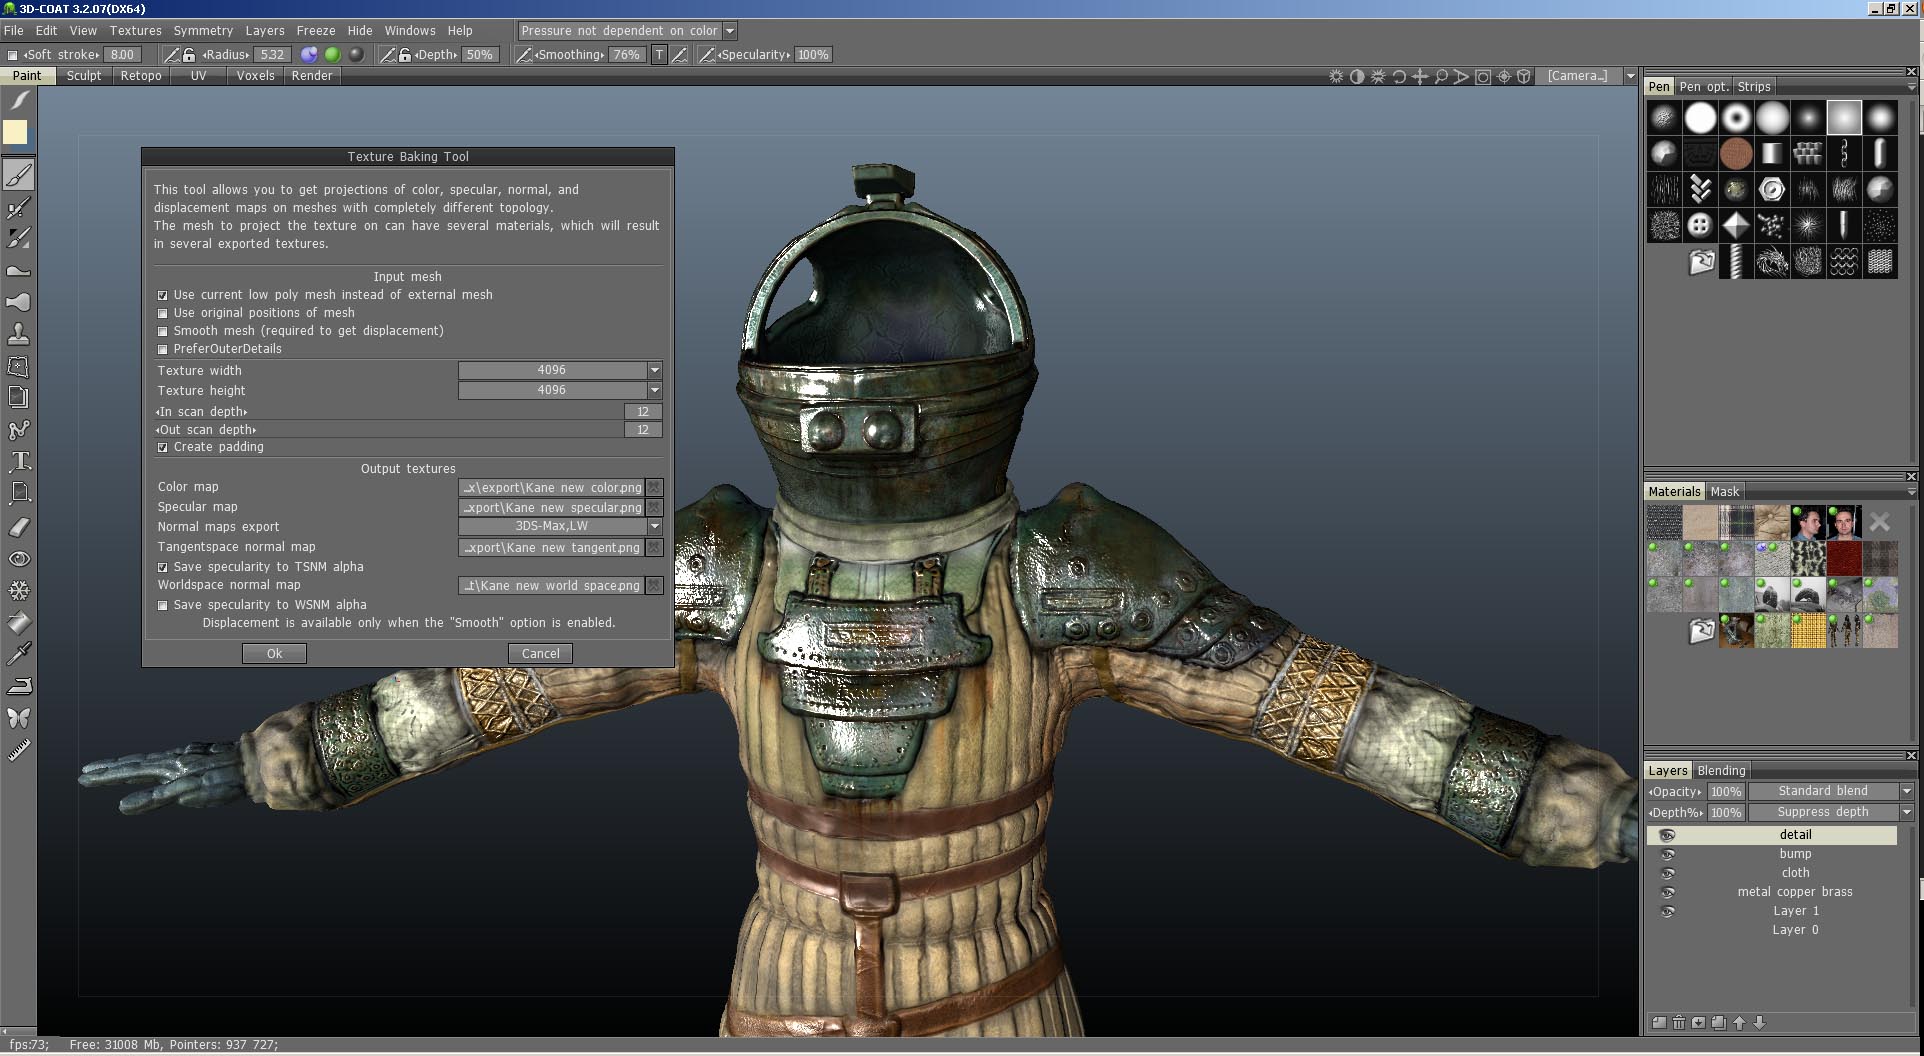
After a bit of playing your suggestions were very welcomed digman, I changed the preferences in 3DC
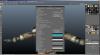
and baked texture with these prefs
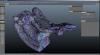
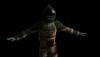
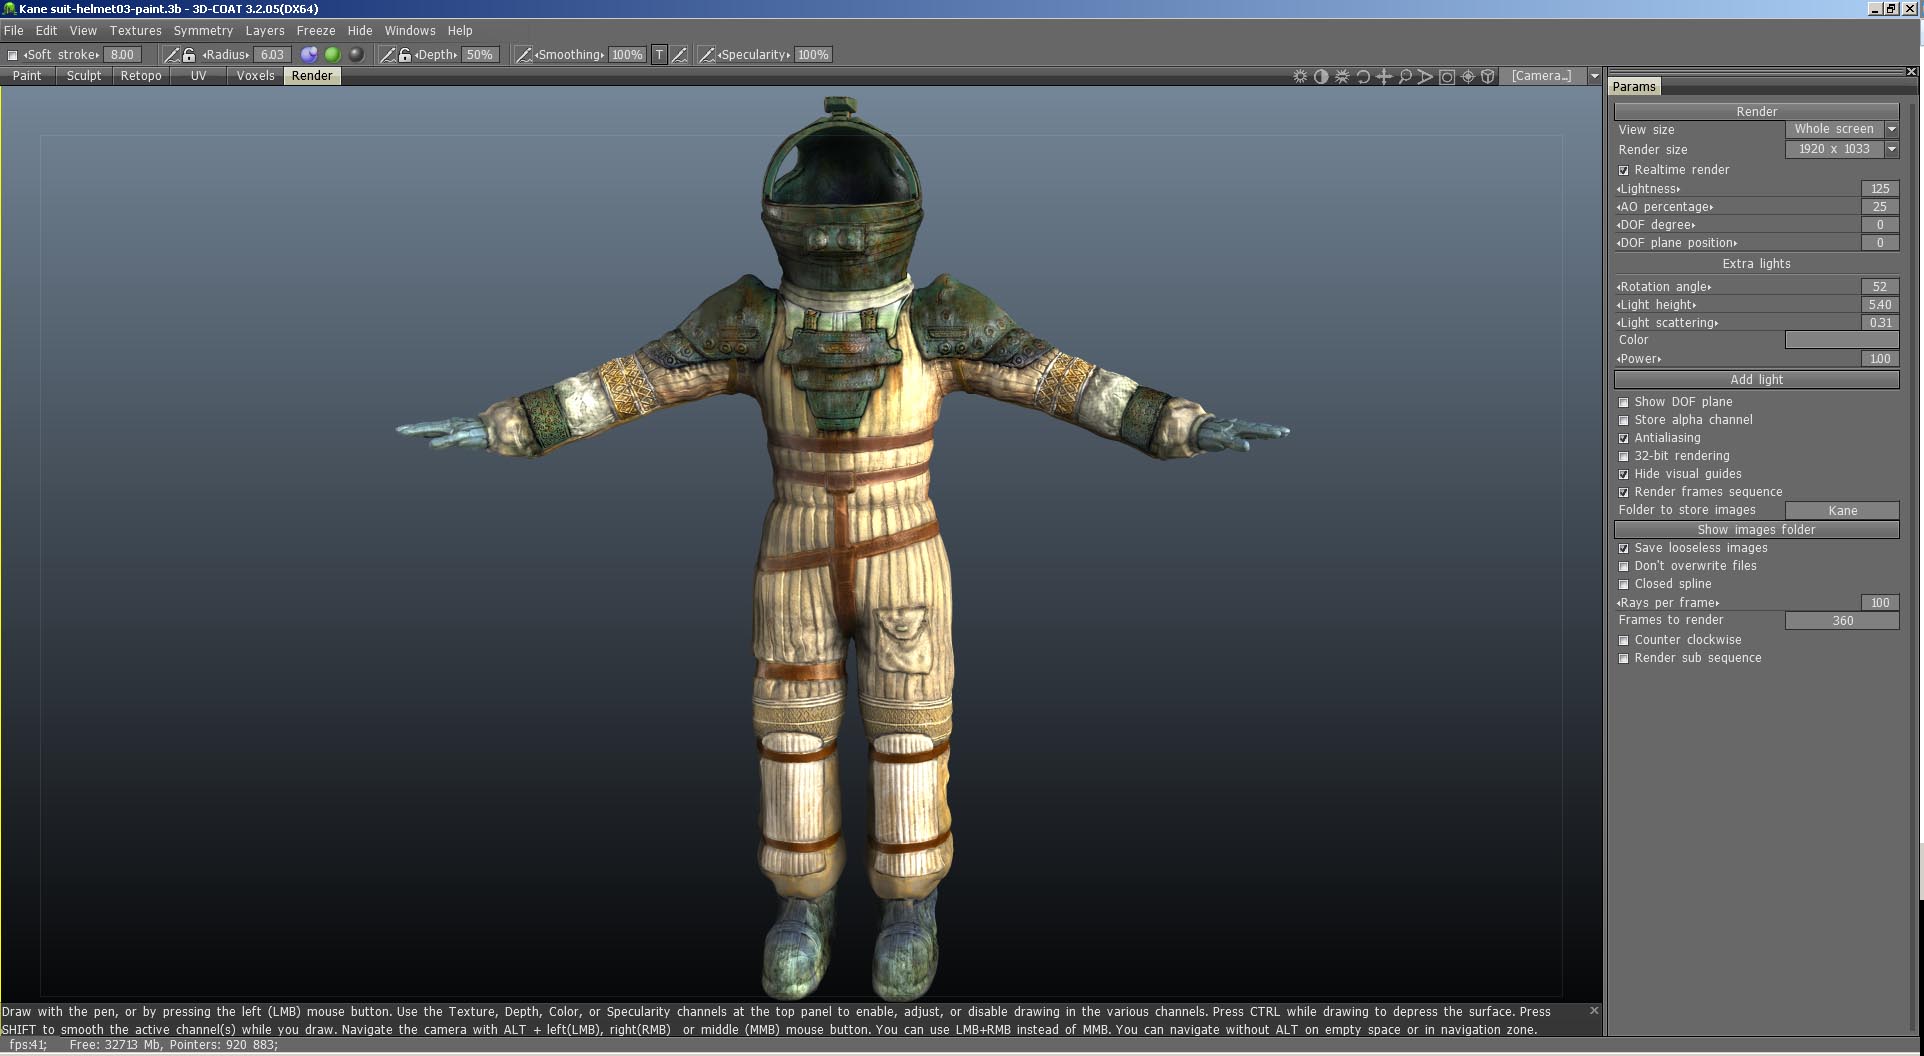
and found that the World Space normal map worked the best (so far) so now here is the latest render test


but used as a world normal map seemed to loose the specularity so moving it to the 'Screen' mode seemed to retrieve the specular map again

at least it's a 1000% better and I'm still fiddling
-
I'm not a Max user, we do have several here that hopefully can fully answer your questions but here are a few areas to check out in 3DCoat.
Since I'm not sure how you saved your normal map out of 3DCoat here is some information to chew on. Hopefully it might provide some help but not being a Max using I really don't know...
Edit: The texture baking image you see is setup for a displacement map not a normal map,just showing you the areas you can try and adjust if you have not done so already.
Thank you digman for those pointers, I'll experiment with them. my stomach told me something was wrong as the renders were not quite reacting to the light sources I was using.
-
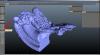
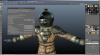
I finally got to the stage whereby I'm jumping through the hoops of character animation in Max.
As this is the first time I've dabbled with Skin and Skin Wrap modifier I'm beginning to run out of ideas of where my problem lies.
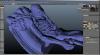
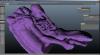
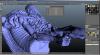
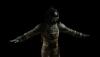
Here is the model as I would like it to look
I've been through the process of making a low res copy and attached the skin modifier and using biped to do the animation - done.
I then attached the skin wrap modifier to the high res and is driven by the low res, then fiddled it to look acceptable but the texture now has lost it's specular quality and generally looks dull.
I've used these settings for the normal map plus an added bump map

My biggest worry is when I come out of 'figure mode' on the biped and see that all the mapping has gone to pot.

I've fiddled with all the mapping modes from tangent, XYZ, screen and world but nothing hits the spot.
Is there a modofier that I need in my workflow that I'm not aware of that corrects this?
Maybe I've rendered out the wrong normal maps?
-
Awesome sculpt and Texturing. Well done... I'm looking forward to seeing more of your work...
Thanks digman, I'm into the rigging and animation now - looks like another week ahead of me !!!
-
I finally realised that it would be easier to add an extra page to my website to preview the video.
I've posted the topic in the 'Finished Works' room but here is a quick link to it:
-
 1
1
-
-
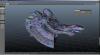
Here is the latest project I've been spilling blood over this past week.
A short orbital video is at the bottom (linked to a page on my website)
It was inspired by a search for reference and I landed on this website:
http://www.gameartisans.org/forums/showthread.php?t=6432
I was so impressed that I had to use this guy's work as a reference (it saved me a lot of work trolling through the net)
Here's the video from an orbital camera:


Ptex to MAX - problems with Skin Wrap
in CG & Hardware Discussion
Posted
I remember it when it was 3D Studio.