

SteveH
-
Posts
10 -
Joined
-
Last visited
Content Type
Forums
Calendar
Gallery
Everything posted by SteveH
-
Yep. A big +1 from me too. I'd really like to see this implemented.
-
Got swamped with a zillion projects and couldn't get around to trying this until now. Yesterday installed Blender and spent 12 hours getting up to speed. After several false starts, I ended up exporting just the diffuse map and a tangent space Normal map and wired that up in Blender as per the attached. This worked pretty well. It baked down to a single diffuse map really nicely. Pretty slow though, since I was using 8K textures and I think Cycles is not yet using the GPU for baking which is a waste of my nice Quadro. More research and practice to do, but it seems to work well. A huge thankyou to Digman for pointing me in the right direction. Hmmmm - now for some reason I can't attach an image to this post except by uploading it and linking to it. Oh well here it is. Thanks, Steve
-
Digman, Thankyou so much. That is exactly what I needed to know. I'm out of the office today but I am looking forward to trying it tomorrow. I'll let you know how I go. Many thanks for describing the process so clearly. Steve
-
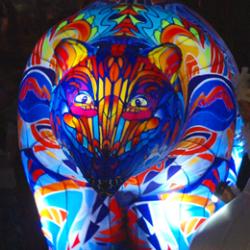
Hi Tony, I'm doing a fabulous job of not explaining myself very well ;-) I'll try again and see if I can do a better job. I make large scale inflatable sculptures and costumes. I model the object usually in Tsplines, then UV map and texture it in 3dcoat. Then I move to another program and flatten it out into patterns (just like a clothing pattern, but more complex). Then these patterns are nested to match the fabric size. Next this is rendered out and printed on large format digital printers. The resulting prints are then cut out and sewn or welded together to recreate the 3D object. This all works just fine with something that it just textured with a diffuse map only. The problem I am trying to solve is how to add bump and specularity. If I have a bump map applied, when the flat patterns are all arranged for printing their orientation no longer matches reality and it obviously looks truly bizarre. So what I need to be able to do is set up a lighting scheme then burn the lighting, bump, spec and diffuse maps all down to one map in the same UV space. In other words, "render to texture" as 3DSMax calls it. I suppose I can just go and buy 3DSMax, but it seems overkill for one function. Cheers, Steve
-
Thanks Malo, I figured as much The reason is that I am building physical objects ie. not screen based. Last time I checked there wasn't a high powered GPU creating the sights we see ;-)
-
Thanks for the reply Malo. I didn't explain it very well. I have a limitation in the process I use that I can only use the diffuse map for the final output to go to the digital printer. So what I want is some way to burn the effect of the bump and spec maps onto the diffuse map. Then I would have the extra detail from the bumps and spec. Think of it as a render of a static scene with all that you see recorded on the diffuse map. Maybe there is a way to combine the various maps in Photoshop using layer blending modes to simulate this?. I know it's a weird request but if anyone has any ideas I'd be very grateful. Cheers, Steve
-
Hi All, I was wondering if there is a way in 3DCoat to take the depth, colour and glossiness maps of a PP painted object and burn/bake/'render to texture' the whole lot down to just a single colour/diffuse map based on whatever lighting I have set up. The reason I need to do this is that I make costumes that are actually in the real world ie. we digitally print fabric and then put it all together. So I want a static texture with the bump and specularity "locked in". Currently we get away with it by using photographed references and paint them into the model. I can't just export the separate maps because the process of flattening out the individual panels means that the light is no longer accurate. I've attached an image of a typical set of patterns (a giraffe in this case) to give you an idea of what I'm dealing with. If it can't be done in 3DCoat has anyone got any bright ideas of a workflow? Oh, and while I'm here - let me say what a pleasure it is to use 3D Coat. Fantastic work. Thanks, Steve
-
Aaaah, very cunning. That's very helpful. Thanks Carlosan. Steve
-
Hi Polyhertz, Thanks for the reply. Yes that will sort of do it, but that's only projection painting. The Deep 3D approach was really nice because it followed the mesh as you painted on the model. In other words it's the same effect as if you enabled a tiled material on the texture map and painted that in but in Deep 3D you do that directly on the model. Obviously, in both scenarios, the tiled pattern will only line up while you are in one UV island, but that's to be expected. No biggy if it's not possible, as I can just paint directly to the texture map for that effect. Just thought I'd ask in case I was missing something. Maybe a nice future feature? Now I've got an unrelated question, but I'll start a new thread for that. Thanks, Steve
-
Dear 3Dcoaters, I have recently migrated to 3DCoat from Right Hemisphere's Deep 3D which I have used for years. Glad I did! The 3Dcoat UV mapping is sensational and it's a complete joy to work in. 99% of my work is now per pixel painting 8K and 16K texture maps. Hence the move from 32bit Deep 3D to 64bit 3Dcoat (plus the fact that Deep 3D is unfortunately a dead duck and no longer supported). However I have a problem. I do a lot of tiled patterns One Deep 3D feature that I cannot replicate is tiled brushes. In Deep 3D I could create a seamless texture with colour, bump and specularity (in PS or filter forge) and then use a feature called "clone tile paint" in the Deep 3d brush settings to allow me to paint a seamless pattern onto the mesh. This effectively clone stamped with a set origin so you could paint a seamless pattern and keep adding to it perfectly even if you broke up the brush strokes. I've tried dab settings and spacing in 3Dcoat butf I'm failing miserably. In fact I've found that if I click dabs to on with spacing set to on, as soon as I start painting dabs becomes unselected. I'm probably doing something wrong, so any help appreciated See the linked video to show Deep 3D in action painting a tiled clone brush with colour, bump, specularity and alpha onto a previously texture mapped mesh (the giraffe head was texture painted in 3D coat you'll be pleased to know). https://www.youtube.com/watch?v=r-pX8CYEfWo Any thoughts on how to do this in 3Dcoat? many thanks, Steve

