


ace63
-
Posts
34 -
Joined
-
Last visited
Content Type
Forums
Calendar
Gallery
Posts posted by ace63
-
-
I also think emissive should have its own sphere up next to specular and its own dedicated texture.
I also do not think it makes sense to seperate specular color into a blending mode. Why not enable us to paint specularity with colors activated? When you do not want color you simply paint black and white,
and if you do you choose a color. Workflow wise this is much more intuitive and user friendly.
-
I strongly agree with this statement. I have good idea how to improve clone & smudge tools without using rendered projection. In so way smudge/clone tool quality will not depend on screen resolution.
Is there any hope of also improving "normal" projection painting? It basically suffers from the same problem.
-
Current cloning code in 3D-Coat has to be rewritten from scratch to allow sub-pixel precise cloning to make the cloned data look exactly like the photo original. This is a must have, because current 3D-Coat clone tool blurs the pixels and clones with data loss,
in 3D-Coat 3.7:
ORIGINAL_AREA_pixel_data != CLONED_AREA_pixel_data
you do not get the original photo-data, but a compressed/blurred copy of the original photo now.
You could argue that onto a model that has bad stretched UV-s - plus painting farther parts not directly under the camera - you cannot project a sharp texture, because it will be blurred, stretched. We need to be able however to save a super-sharp cloned texture (new 3D projection engine) within the UV boundary and see this sharp texture in Photoshop. Blurring, stetching, viewing angle differences (user painting the sides of the model) must be eliminated by always making the brush to "paint" (rather project brushed-pixels) perpendicular to the poly surface. Write this data to the texture- memory. Handle paint brushes when they touch the models surface farther from the camera like they are always directly under the camera. Create a "multiple view-angle paint engine" so if user also paints the models edges, 3D-Coat internally "turns the projection camera" to set its facing right over the brush and projects perfect perpendicular-to-poly surface pixels onto the texture map. The user does not see this, he only sees, he is painting far, the sides of the model. So there will be NO stretched/blurred/cloned pixels because of not ideal camera-toward-surface angle projection.
If 3D-Coat could:
1. do excellent projection painting delivering exact original pixel data, where original photo area and cloned area is 100% the same
2. At least would be able to allow voxel painting/photo_source texture cloning on two resolution levels, going higher TEXture res if user wants: this only because of MARI and Mudbox do it as well. :-/
3. have a per-vertex deformable - not like the current! per-brush deformable - projection paint mesh
I think if you could make this a reality, 3D-Coat could become a market leader in texture painting, voxel/LC sculpting and retopo.
A set of sharpness-regulator buttons for the render room would be really good, since a lot of 3D-Coat users maybe will want to save the voxel-painted, rendered surface to be used as 2D texture. So it can be used in Photoshop.
This. THIS. THIS!
I cannot say enough how important and awesome such changes would be. A lot of texturing work relies on projection painting which always results in a blurry texture in 3d coat. This needs to be adressed!
-
UVs will definitely NOT become obsolete with that feature. Image you have to export your painted textures to another application - you will definitely need to bake your textures onto a layed-out uv map. The main use of direct paint on voxels will be to postpone the retopo and uv process to a stage past the initial design, so you can get faster feedback from your client/director. It will also be great for illustration and rapid prototyping.
-
I also feel this should be possible - that is what vector displacement is for after all.
-
 1
1
-
-
Andrew, the Crashes with Stamp are still there here.When I download I still get the August 7 version of Win 64 Cuda...maybe an oversight?
I can confirm this - LC still crashing when using stamps.
-
I didn't even notice the part about 1.3 million polys. I'm surprised you could even load that, the Paint room isn't meant to handle such high res meshes.
Ah there maybe a missunderstanding here.
I exported a decimated mesh from the voxel room because we did not want to work with displacement here.
The decimated model was 300k triangles (the new decimation algorithm kicked it down from 4 million without loss of quality - great!).
So I went ahead and imported that into PPP, but the cavity painting did not work here - which I needed badly - I guess because it only
reads the cavity values from the normal map, which I did not have.
So I imported it into Microvertex Painting, and the carcass resolution set itself to 1.3 million triangles. Cavity painting
did work, but the whole process was veeery slow, as I already explained above.
-
The problem with painting them on seperate layers is that it makes the scenes even slower and bigger (I think).
I thought of a system where you can select your spec, depth and color layers in seperate lists simultaneously.
I think the problem here is that even if you do only paint color an a layer, the depth and specular for that layer is still stored in the file, resulting in 3 maps
per layer, even if only one is needed.
-
I just finished a job which was mainly about creating digital chocolate and packaging for that.
About 70% was in 3D Coat, while I modeled the rest in Softimage.
So after using 3D Coat for the third time in a commercial job, I have to say there need to be updates to the painting room.
While the functionality is fine the speed is not.
It takes a minute to fill a simple 2k texture with the rectangle tool - this should happen in the blink of an eye.
It took nearly 5 minutes to export 4 2k layers to photoshop.
Any kind of painting larger than a few pixels wide is ultra slow even on simple meshes.
Projection quality needs to be raised a lot aswell.
But the main problem is the speed and filesizes - I had a simple 1.3 million triangle mesh (Microvertex Painting) and a single 2k texture on that,
and the filesize was already at 300 megabytes. There was nothing else on that scene.
Waiting for 3D Coat took more than 2 hours a day while working on this stuff and almost killed me at the deadline - please do something about it.
Oh and please seperate depth, specular and color layers. It is a mess when you have to guess from what layer that specular is coming from, especially
when it takes half a minute to switch a layer on and off.
-
this & specular colour would be fantastic
THIS! We definitely need specular color aswell!

-
-
The problem is that laying polygons onto a hp mesh with no idea how it is going to smooth and retain volume really doesnt cut it. You need to be able to see a 100% Opaque smooth subdivided mesh as you work. Having to hide the high poly, subdivide the mesh and then undo, and unhide the high poly is alot of work just to see if your support edges are holding your shape.
I often have to export to silo so I can see how the mesh is working. Its a complete pain.
My suggestion would be to have live subd in the viewport and an opaque preview mode bound to a sticky key.
This is exactly what we need. While it is fine that you can bake down your voxel details to your retopo mesh and retain all details, it simply does not work so
easy for any other retopo work. Don't forget that you do not only retopo voxels but imported meshes aswell.
I once tried retopo on an imported car model - it was impossible because I only could guess how well it
would hold once subdivided. I don't understand that this has not been requested more often considering how important it is.
-
While I did not understand a single word from Tinker
 I just wanted to say that symmetry across multiple axis at once and radial symmetry are strongly needed features!
 -
Hey guys,
I just wanted to show you one of the latest pictures I made.
The fish was completely sculpted and textured in 3D Coat, rendered in Softimage and a little postprocessing
in After Effects. Enjoy

-
2
-
-
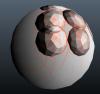
Here are the artifacts I am getting with any kind of cavity painting - the lines are equal to the wireframe of the object.
Win7 x64, 3D Coat 3.5.17 CUDA on the latest Nvidia Driver.
This did not happen a few versions ago.
-
"Paint in cavity" is also different (still have kind of wireframe artifacts).
Good luck for testing and fixing issues. I'll try to test as much as possible.
I am also having wireframe artifacts while doing cavity painting - gonna post some screenshots tomorrow.
-
I was about to post something similar about the split issue - this is really needed to speed up things - could have saved me at least saved me two hours of work on my current project.
-
Ok thats indeed quite hidden - I never used the select tool because its quite cumbersome and not really intuitive.
Now if we had some better selection tools....
-
Ah thats nice - we will probably be using unity for our next project at university and this will surely help me out!
-
Gotta push this thread - this is a much needed function!
-
Of course, I think that is what is was primarily made for
In your voxtree rightclick the object you want to auto retopo and you'll find several options for auto retopologizing your voxel objects.
-
I can Confirm this.
3.5.09A on Windows 7 x64
-
Solved!
It turned out the Softimage exporter really messed up the file - I deleted my User folder and settings and now everything works fine,
so no 3D Coat bug.
Move Along
-
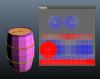
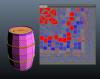
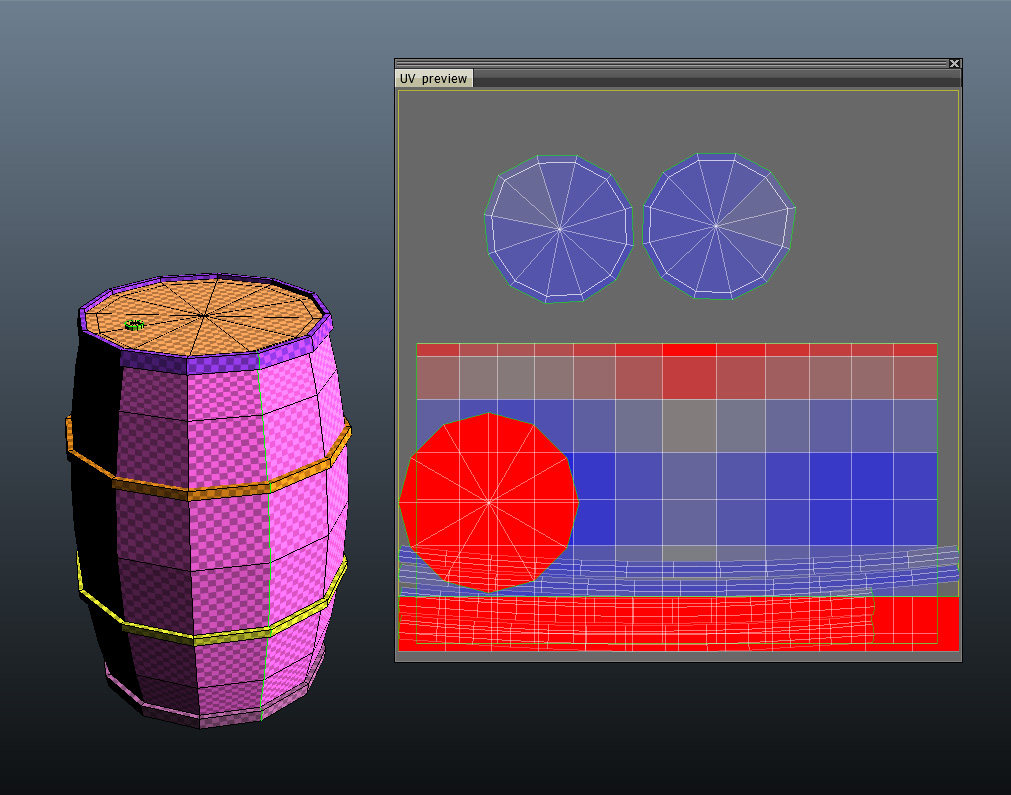
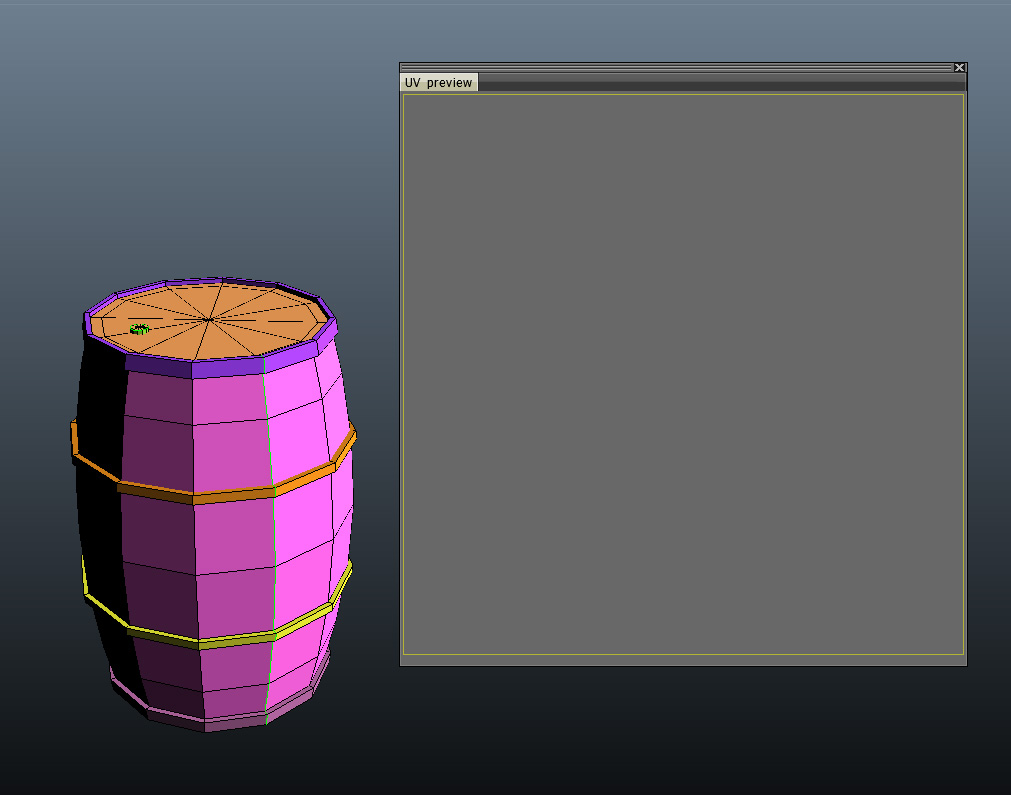
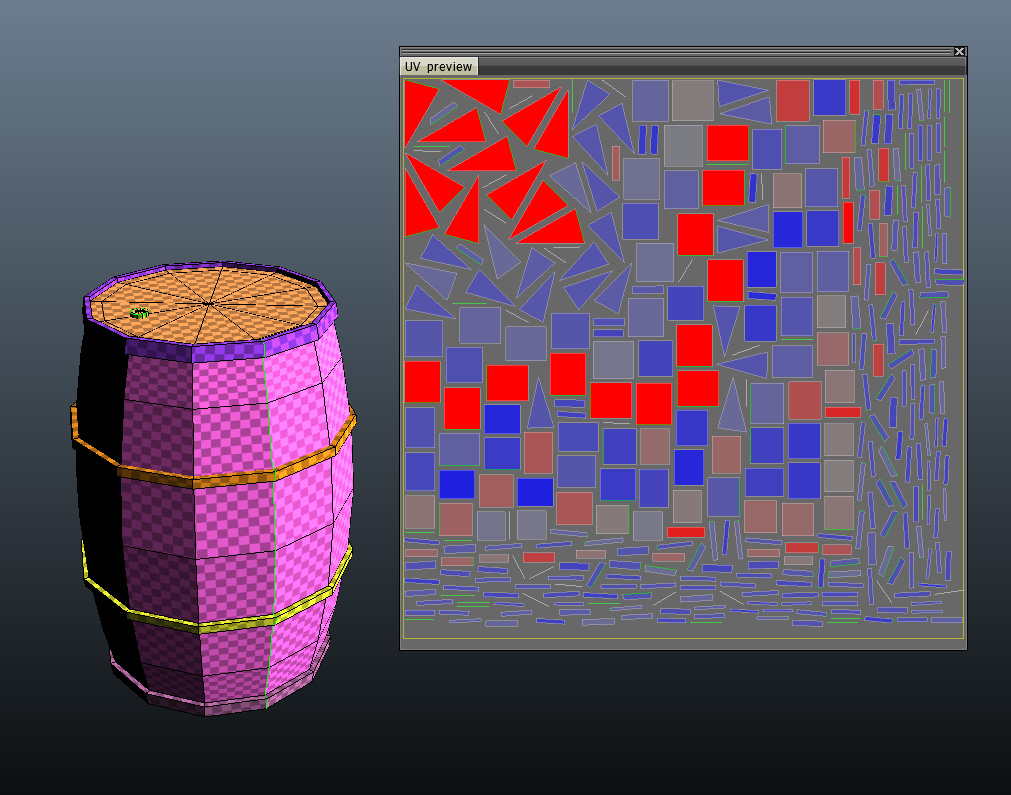
Hello everyone,
it seems I am running into huge trouble when using the Auto Scale or Pack UV or Pack UV2 function in the UV room.
I tried importing a mesh with overlapping UVs to automatically pack scale and pack the Islands and paint my textures.
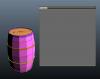
In Screenshot 1 you can see the imported mesh and the UV set.
When I hit Auto Scale it seems to delete the UVs, as there are no more UVs visible, but
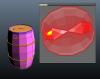
when I hover over the polys there is a totally messed up island showing in the preview window (Screenshot 2 and 3).
Finally, when I hit Pack UV instead of auto scale the whole UV set explodes and each face gets a PTex-like planar Projection
(I am using Per Pixel Painting mode and NOT PTex! - Screenshot 4).
This happens with each and every object I import either manually (.obj) or through the Softimage Applink.
All the meshes only have 1 UV set.
I know this worked some versions ago, as I used this method for scaling and packing my UVs for my last project - it seems
it stopped working on one of the newer builds.
BUILD: 3.5.09A without Cuda
OS: Windows 7 x64
STEPS TO REPRODUCE: Import a mesh with a UV set present, go to UV room, hit either Auto Scale or Pack UV


[Solved] Increase the quality of the projection for external edition (just as Blacksmith3D)
in General 3DCoat
Posted
Wait wait wait - does this mean we finally get high quality projection painting? I've been waiting for this ever since I owned a license.