

piacenti
-
Posts
36 -
Joined
-
Last visited
Content Type
Forums
Calendar
Gallery
Posts posted by piacenti
-
-
Looks good, I like it. I often see people saying that you can't get a polished high detail look in 3d coat sculpting but I just haven't found that to be true and I have also used zbrush. I can see some nice high detail on your model too.
-
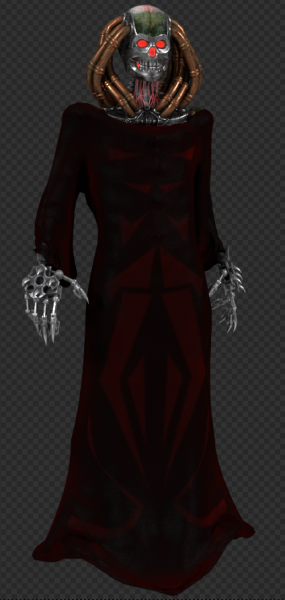
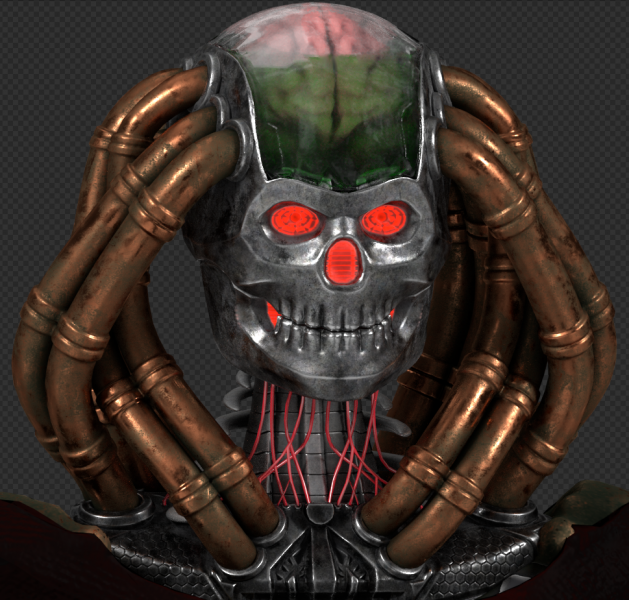
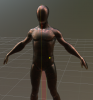
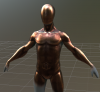
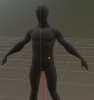
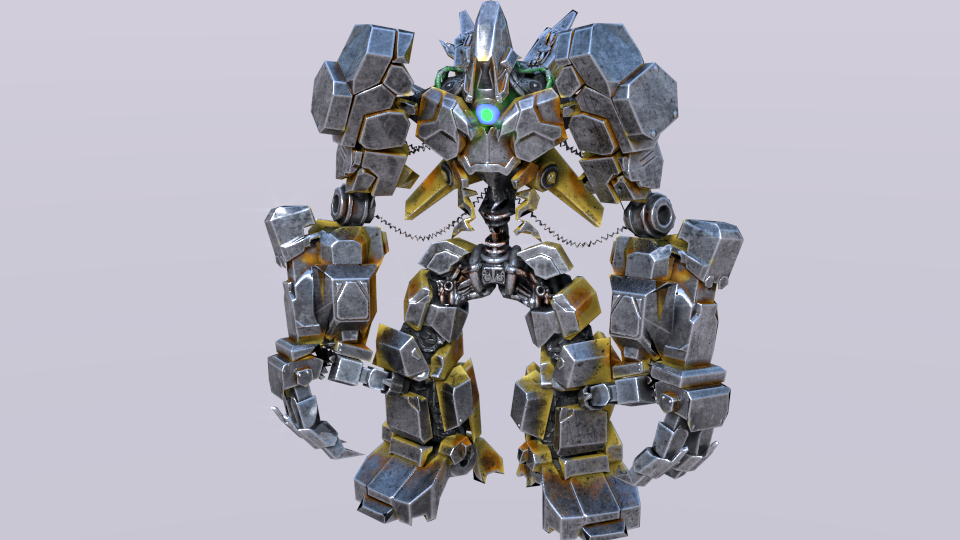
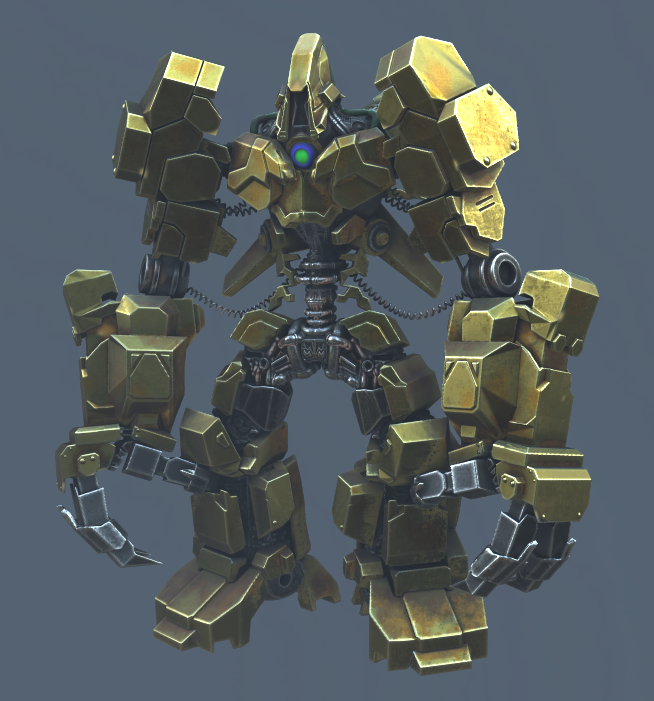
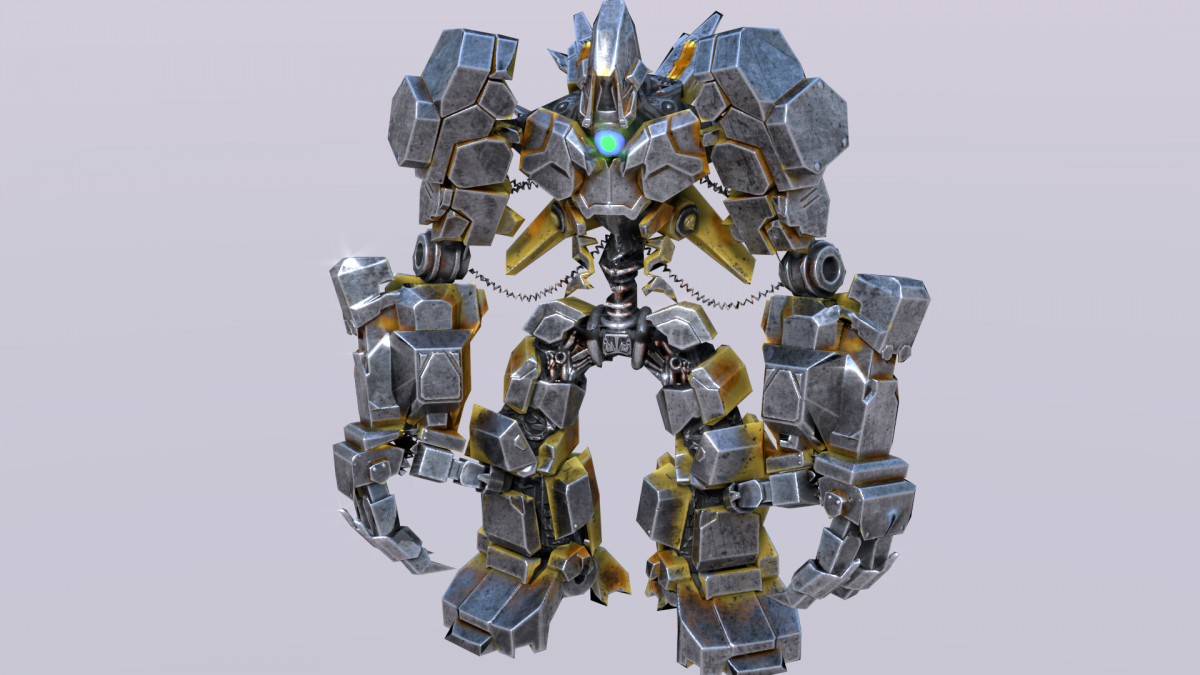
Here is my concept of a typical human then.
George, a 323 years old average person, like most of his age he got rid of his body which was withering away and got an enhancement that keeps him alive while making him stronger. Too bad that George had so much debt that he had to get a used version of an older model of human enhancement and survival equipment. On top of that it seems like the previous user custom made it to fit his liking of Halloween, so not the usual model but cheaper because of it. Maybe after he pays all his debt he will be able to get a new model that is not beat up.
-
 3
3
-
-
Oh and I was wrong, you can have multiple UVs in 3d Coat so ignore that con. Also 3d Coat supports up to 16k texture resolution.
-
I use both and here are the Pros and cons of each in my opinion:
3D Coat
pros:
you can get PBR from painting directly on the high poly models without needing UVs which is really nice to see what things will look like quickly before baking and stuff like that.
it is really easy to customize and add to the smart materials and I find them friendlier to edit than the substance painter ones which sometimes need some digging into the materials to figure out what parts to change.
like Carlosan said hand painting is much better than in substance tools due to precise controls you may use when painting such as splines, text, text along splines and so forth. It is always annoying in substance painter when you need a precise shape and you need to create alphas to just for that. And if you would want small variations of that shape in various parts of the model you would have to create variations of the alpha too since the alpha transformation in substance is lacking.
has amazing UV unwrapping capabilities
for the price, you get much more than just a texturing program
has PTex if you need something like that.
cons:
the smart materials that come with the program is basically what you get, no centralized place for sharing user created smart materials
as far as I know you can't switch texture resolutions (without losing your work) like you can do in substance painter
masking capabilities not as complex as substance but splines can help some there
everything is in a single UV set
Substance Painter
pros:
masking features
easy to change texture resolution on the fly
multiple UV sets
substance share and substance source are great for getting a variety of materials and smart materials
got particle painting system which is helpful in several situations
cons:
cannot UV unwrap
not as good as 3D coat for hand painting in many situations
no text tool to use in texturing
cannot paint on non "UVed" mesh
______
I might have missed some stuff but at least for me these are the main pros and cons of each. Also some of the cons are things I know are being worked on at least from 3D coats side. I find that 3D coat most of the time get me to the look and feel I'm looking for pretty fast while I end up using substance more if I don't need much hand painting or if I need to use the particle system or more specific materials such as elm Japanese wood. Also the main reason I got the substance indie package was because it also includes Designer and B2M. B2M is very nice for creating materials from stuff you have sitting around without having to go to Photoshop and manually create all the separate textures.
-
Autoretopo routine got upgrade! Much better quality and stability! Just result of non-sleepy evening ideas + 2 days of work.
His vacation didn't take very long did it? Amazing news.
-
1
-
-
I fixed the problem by exporting all layers and then just saving the ones I needed individually from photoshop. It seems this problem only happens when working with the gloss/specular workflow even in version 4.5.0.2 (at least for me) but not when using metalness/roughness workflow.
-
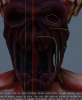
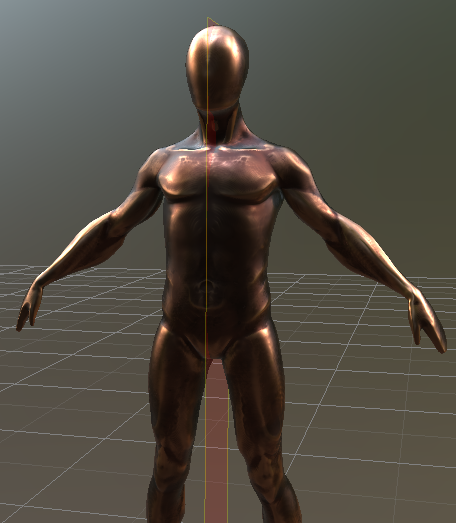
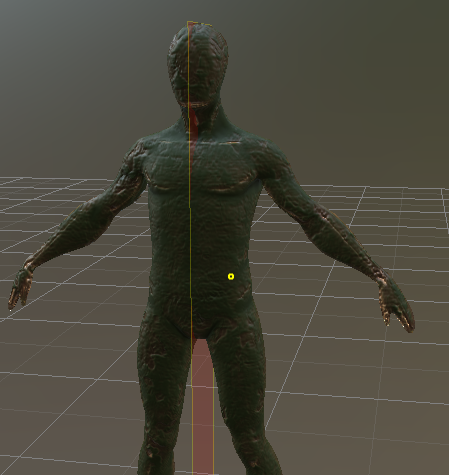
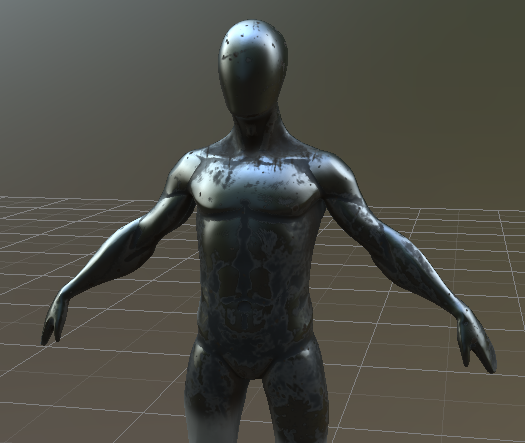
A couple problems I found with some PBR. Under metals, the second and third copper materials and the metal_painted_dark material seem to have a very different result if you do a per pixel painting vs on a retopologized uv unwrapped mesh. Here are the results:
After messing around more with the settings, specially degrees on the material. I was able to fix the issue I had for the retopo mesh which was the one not looking so good previously.
-
A couple problems I found with some PBR. Under metals, the second and third copper materials and the metal_painted_dark material seem to have a very different result if you do a per pixel painting vs on a retopologized uv unwrapped mesh. Here are the results:


-
I recently handled 30M polys all in voxel and it was really fast even when doing things such as moving parts of the model with the move tool. As far as my experience has been it is a lot faster than dynamesh in zbrush. I am using the beta though, not sure if it makes that much difference in regards to this.
-
Sounds awesome!
-
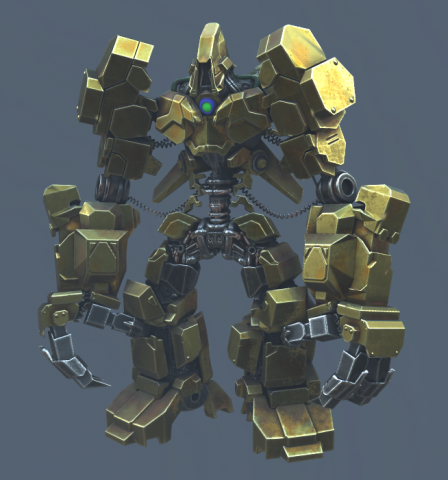
Hi all,
My name is Gabriel. I recently decided to try 3d coat and after only watching one navigation tutorial to get used to the interface I was able to make what you see in the picture below (the rightmost one is a dumb down version of the model rendered in cycles in Blender). Needless to say that I switched out of zbrush after the experience. I started a base model in Blender but with quite a few parts missing and was able to create all the missing things in 3d coat and looking back I feel like I could have done the entire thing in 3D coat. I said I switched out of zbrush after the experience and here is why. As a test I moved over the base model to zbrush and only dynamesh got me anything workable but it was super slow because it needed such a high resolution, thing which 3D deals with much faster with voxels than zbrush with dynamesh. Zbrush's auto retopology (zremesh) for hard surfaces pretty much doesn't exist so I was stuck having to use dynamesh. In 3D coat hardsurfaces was a breeze and the painting was insanely easy, I felt I was cheating really bad. Needless to say I can't imagine how much longer it would have taken in zbrush to get the same result both in the sculpting and painting side of things. You guys are awesome, this program is incredible.


-
1
-
-
Blending modes when using PBR seems to be ignored for export, I posted the issue here.
-
My wify also likes the second one better but it is using a different renderer which I'd like to use to render both versions before I decide which one to use. I just got version 4.17 but the problem still happens. I'll probably report it as a bug.
-
1
-
-
I have tried now a few times to export my texture that I made using PBR materials but for some reason the blending modes don't seem to be taken into account when exporting. The image on the left is the original which had the PBR material in a overlay layer over part of the yellow color, the right image is what I get when I set up the mesh in blender. Am I missing some option?


-
I tried what you said and I got a little better result but still couldn't get something that worked for the thin hole on the side. In the end, I just ended up using a decimated version of the mesh and it worked fine enough for the animation that I wanted to make.
-
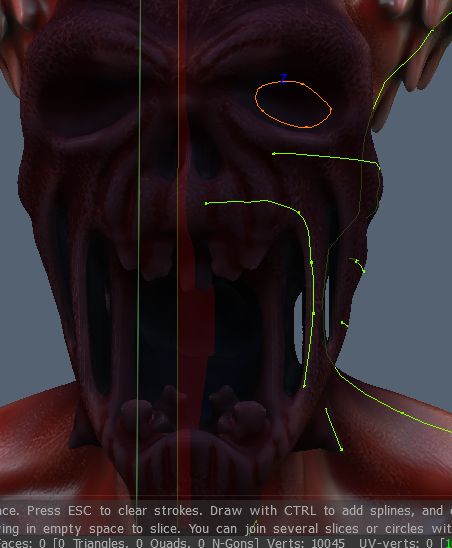
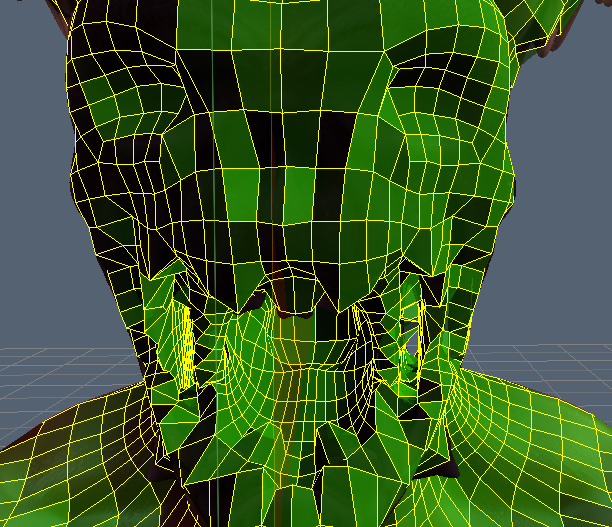
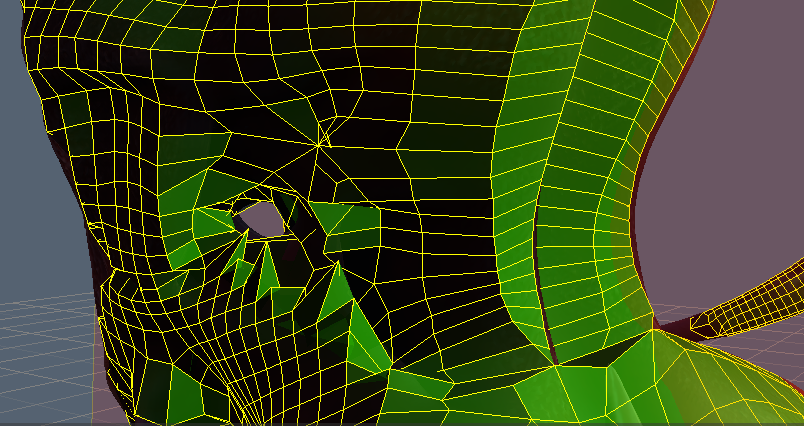
I'm trying to get a retopology done out of a model that has some close together holes in the head but I keep getting bad results. I've tried the stroke lines shown in the picture below and slight variations like putting an edge loop around the thins pieces of skin but every time I get I similar result to the one shown in the picture where at least one of the holes is completely covered and the back part of others have those spiked polygons. I've also tried cranking up the poly count for the auto retopology but had the same happen. I've also tried to add more guides but it seems that if I try to add more than the amount I have shown in the pictures the whole thing goes crazy and the topology becomes really bad all over the model. I've seen people get some really good results from complicated meshes like this but I haven't had an auto retopology that seemed good enough so far.
Is there something I'm doing wrong?
PS: I'm using version 4.5 BETA 15


-
I've had the same problem but with shorter lines than that, like around the eye
-
Thank you a lot, you guys are super helpful.
-
4.1.17D
-
I got it to work with a different retopology but if possible I'd still like to know how to make the original one work since it was a better retopology which is probably the one I would have kept had this been a real project.
-
I tried your suggestion but the program is still crashing. In addition I confirmed that it is when I try to unwrap that the program crashes. I tried unwrapping after setting the seams with auto seams and the program crashes right away. Would the long error message be of any help?
-
This link should work
-
I'm using the demo to make some experiments and I'm finding that whenever I try to use the auto unwrap on my retopologized model the program crashes. Other than using PTEX bake I haven't found a way to get it to work. Am I doing something wrong?
I have also tried running, Cuda, non cuda and DirectX/OpenGL.
I have the file in my google drive in this link.


A couple improvement Ideas
in General 3DCoat
Posted
I think it would be super useful to get some type of search option for the many asset windows. Looking at the various icons may be helpful but sometimes it isn't, specially for user added content so searching by name would definitely speed up things. Another improvement that would be nice to have is to be able to edit the distance of elements on a model spline curve. Currently only when we first create the curve/spline we can set the distance but it would be nice to be able to change that distance when needed to make the curve more reusable like it can be done in Zbrush and Blender. I believe that would also allow to rotate the orientation of the model propagated along the curve which would also be nice in many cases.