

Pimpmymonkey
-
Posts
108 -
Joined
-
Last visited
Content Type
Forums
Calendar
Gallery
Posts posted by Pimpmymonkey
-
-
heh heh!
hope u don't mind if i update again!

I just thought I really like the ink sketch filter it looks like an "old style" comic book to me
Hi kay,
I really like your sexy new avatar

What is this sketch filter that you refer to? Where do I find it?
Thanks in advance for your help.
P. Monk
-
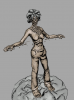
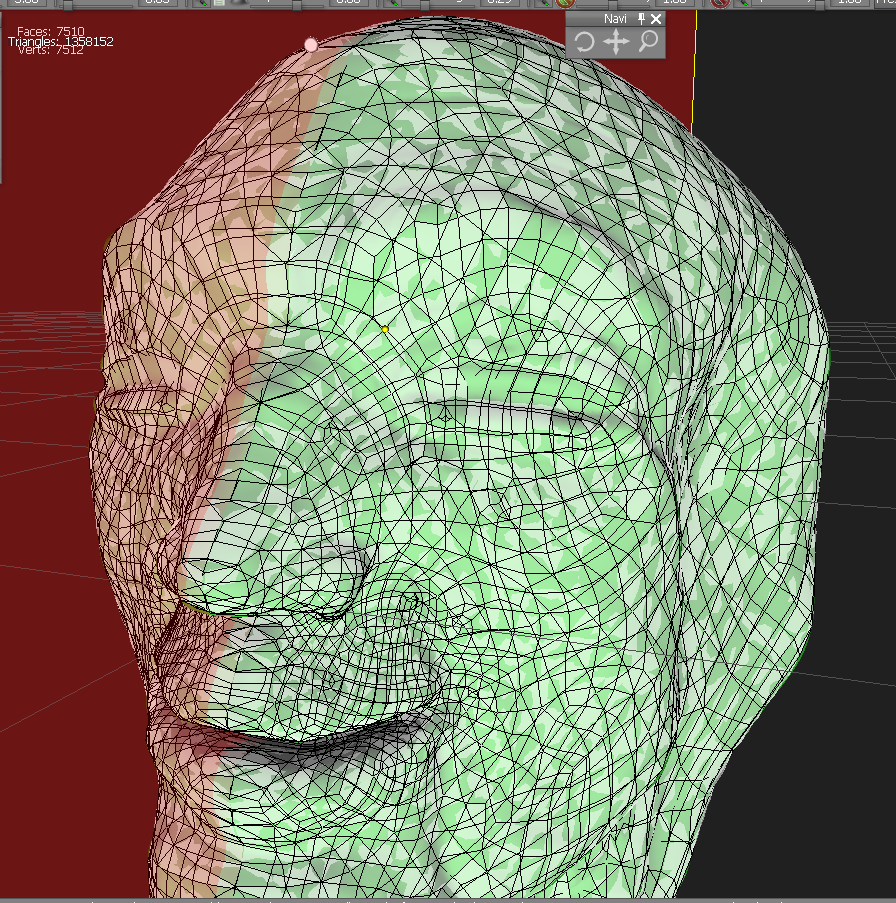
What I'm trying to do here is correct the anatomy proportions using transpose tool, however if I use it I get these voxel artifacts.
Artifacts...yes I have the same problem with the move tool.
Artifacts aside...She's looking good. I think though... even though she is emaciated that her upper rib bones are a little too prominent.
P. Monk
-
I'm leaning towards the Gts 250. It shouldn't overload my powersupply.
Funny that you should mention the GTS 250. I just took delivery of this model yesterday afternoon:
So far so good!

P. Monk
-
Hello, i have a little question
Can i unfold mesh with import only rference object ( and not import classique obj)
i try but when i want to apply in my object i have a message error
best regard
philippe
I've never tried it.....but....I think you have to merge your reference mesh into the scene first....I'm just guessing.
-
I'd like to be able to export FBX files in addition to importing them. I use Cheetah and Unity and prefer to use the .jas or .fbx formats. Since Cheetah and Unity both support the FBX format this works out well. However to write over my original FBX models which I painted in 3DCoat I have to export as OBJ, then open in Cheetah and resave as FBX. That's an extra step which breaks my workflow and seems unnecessary.
Jeff
It's none of my business but why can't you just save your UVs painted in 3D-Coat and open them in Cheetah and Unity. I guess what I'm saying is I don't
understand the need to export an obj. Unless of course you are doing the UV mapping in 3D-Coat.
-
I agree with Phil and I like this one most
+1 Everyone knows this manipulator.....The only problem that I have with it is universal scaling in orthographic view and possibly
the thickness of the rotation circles....if you are zoomed out they can be difficult to grab.
P. Monk
-
my first post here...been dwelling in the dark for to long
i think the biggest problem with manipulators is not the look, but the lack of control. the merge manipulator is good and simple, but there is no control. maybe i missed something but here is the problem in my view.
1. no control, you move something or rotate it...but how much? give us a channel box for every transform that updates the values, so we know exactly where stuff is in world space.
2. local object space transforms...i cant find out how to switch to local space. would be nice with a little switch button on the manipulator
3. easy snapping like maya (hold "v" for snapping to vert...drag only x arrow in combo with "v" for constrained snapping in x only to nerest vert, "x" for snap to grid "c" for curve.
4. easy move pivot like maya "d" key
i have to say i have not used 3d coat in a while now so maybe some of this things is already in there. if so i am sorry
i think curves have the same problem...inconsistency. retopocurves look one way, some curves have big red balls, some have manipulator some do not. i think get rid of the BIG red balls and make normal balls or squares for CV selection only(not scaling)...and use manipulators for scaling and translating
BTW keep up the good work!
looking forward to the paint on lowpoly stuff!
QFA I can not agree more!
Welcome manne3d. Excellent first post.
P. Monk
-
Here's a little video of the cloth sim in action. It's You Tube, sorry for those of you that can't get that site:
Thanks Phil....nice video
P. Monk
-
@ lc8b105
Wow you are fast.
P. Monk
-
Thanks Andrew you are the man.. My next stupid question is, where do I find the voxeltree?
Hi Scott,
I hope this helps.
P. Monk
-
You're welcome.
Have fun,
P. Monk
-
When setting millions of polygons prior to paint it is written
"number should be greater than texture pixels"
How do I calculate that?
Is it like 4096 x 4096 = 16 777 216?
The maximum of the slider is 10 millions so I cannot set it to 17 millions...
could anyone provide me a little "help table"
like 2048 =....mil polys
4096=....mil polys
That would help me alot to understand proper settings.
thanx in advance

artman
But you can type in 17 million polys. 2048 x 2048 = 4,194,304 poly quads
4096 x 4096 = 16,777,216 poly quads
P. Monk
-
Press the 'Clear' button.
I'm not sure if that's what you wanted. Or did you mean that you want 3D Coat to start up with an empty work space?. If so - a default sphere is good for people that are new. It can be intimidating being new and having to root through strange menus just for a basic shape to work with. And add to that the fact that 3D Coat's process of adding shapes to the workspace isn't the most conventional method.
I personally would like to see 3D Coat start up in Voxel mode with a sphere screaming "sculpt me dammit!!". I reckon it's the voxels that are now 3D Coat's main feature.
So yeah, think of the noobs!.
QFA "sculpt me dammit!!" :lol: NO! NO! Sculpt me!
I do think tough that we could use a few more user preferences. Perhaps a default mode for new users and a user defined mode for people
to be able to work in a manner that suits them the best.
P. Monk
-
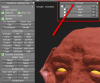
More fooling with 3DCoat and Wings3D.
Old models ... new 3DCoat setting and render.
Lots of fun.
Cave made with hand subtracted from sphere.

Nice work! Great concept.
I agree with your old models statement. I have been trying some recycling myself.
Your concepts are quite impressive. I lean more to character creation myself.
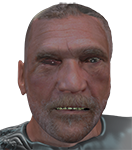
Thank you for your kind words about my avatar...he is a work in progress....I've learned a lot from him.
I agree with you about Hexagon....so much promise and so little development.
Have you tried sculpting in Blender.....it's better than the sculpting in modo and the polygonal sculpting in 3D-Coat.
For doing quick mock ups it is sometimes easier for me to rough them in in Blender sculpt and then drop them into Vox Sculpt.
Anyways...I like your work...keep it up,
P. Monk
-
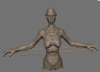
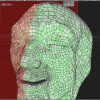
quadrangulation is messed up in alpha 56. It appears to do quadrangulation twice, as you have two meshes afterwards, furthermore it takes twice as long to calculate and shows twice the poly amount.
Otherwise the new tools ar great!
QFA I can verify this problem. On my machine the meshes appear to be of differing resolutions.
Whether or not that is true I can't prove but either way the meshes are not identical.
P. Monk
Here is an example of the problem. I used no Gum brush or any other surface tool.
-
When importing the specular channel, on the shaders tab set specular and hardness to max. Then map the specular texture to "Spec" and "Hard" with the multiply blend mode. This will make the GLSL viewport and render match exactly (apart from SSS). Mapping to hardness as well is because 3d coat seems to do this in the viewport, and this emulates that effect well.
Thanks so much for taking the time to do this tute. I have been over looking the hardness button. Duh!
Thanks again,
P. Monk
-
Nicely done. I like the concept and the design.
Very well done,
P. Monk
-
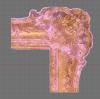
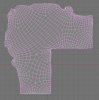
As the saying goes: "When all you have is a hammer, everything looks like a nail". You could do that with voxels, sure, but it might be easier to import the image and paint a displacement directly on it, with alpha around the edges. Go file > Import image plane.
Otherwise you're going image>voxel>retopo>displacement on mesh>paint color+specular
With import image plane, you're going direclty to the displacement stage, with the color already there. You could base specular off a photoshopped version of the photo (try using the select color, save selection, and merge channels functions)... or you could use curves.
Well, of course you are correct in every thing you say. But the original poster at CGSociety was looking for a way to model the frame.
He didn't say what he was going to use it for. Maybe he wants to recreate it in real life on a CNC machine, who knows?
All I was trying to do in a very fast manner was show of the endless possibilities that voxels present and give a little free publicity to Andrew
and his fantastic new voxel and quadrangulation system.
Thanks for your interest.
Maybe you could post your ideas to the original poster at CGSociety, the link is in my original post.
P. Monk
-
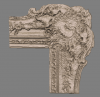
I forgot to post the reference photo:

-
I was at the CGSociety Forum today and I came across this post:
http://forums.cgsociety.org/showthread.php...ghlight=3d-coat
So, I had a little time to kill and I decided to see if voxels would be a good solution to this problem.
Here is what I came up with in about 30 minutes time. Yes it could be better but it's just a proof of concept.

-
beta 51 Same transpose Bug with select pen
I have the same problem as well. Thanks for the good video Juan.
P. Monk
-
Ohhh! Well first I never would have guessed a two key combo, thanks. Second I must have misunderstood. I was thinking it was something like hitting Tab in Photoshop where all the pallets, menus, everything but the work area disappears.
Yes, me too. In Blender no matter how you have your work space divided, 4 views or whatever, all you have to do is
hover your mouse over which ever view you want to work in and hit: shift+spacebar and shazam you have your entire
screen to work with. Very handy. I've thought of asking for a feature request but there are other things more important
at the moment I think.
Best regards,
P. Monk
-
I remember hearing that there was a key to press that would hide the interface but I don't remember what key it is. I tried searching but the words "hide" and "interface" are too common. Can someone remind me?
Alt+Enter works for me.

Yet I find it a little disappointing in that it doesn't clear all menus.
P. Monk
-
I am using own idea (based on mix of existing methods), slightly related to constrained Voronoi clustering. I have read the article you referred, it s also under experimenting.
Thanks for the quick reply. I'm excited to see what you come up with.
As always, thank you for your hard work.
May God be with you,
P. Monk


Mac Bear
in Finished Projects
Posted
Increible!!!!
P. Monk