

Glitch Gremlin
-
Posts
38 -
Joined
-
Last visited
Content Type
Forums
Calendar
Gallery
Posts posted by Glitch Gremlin
-
-
I hope this is where im supposed to post stuff like this here, but i just wanted to post these as a small way of thanking you guys for answering so many of my questions over the past year or two. i hope you guys enjoy these alphas as much as i have! "btw i don't know if 3D Coat users call em Alphas or just Textures, ive always called em Alphas due to my ZB background before i got 3DC"
Also Happy New Years Guys!


-
 1
1
-
-
1 hour ago, Oleg_Shapo said:
Hello! Sometimes enabling this feature gets in the way.
Ok! ill try it and let you know if it solved my problem or not. hopefully this is what i was looking for. also i noticed changing the setting to "Snap to Nearest" seems to work quite well too. it doesn't Snap to the other vert thats in the same Axis anymore when i change it to that. i figured id mention that for anyone else who might be having this problem in the future like me
-
Hey Guys, im still pretty new to how 3D works "well, for Video games" i mainly do 3D Printing, so my question is.. what is a really good Workflow for Hard Surface with 3D Coat?
like, are there any Tutorials on how to Retopo hard surface things you guys could link me? i can't seem to find any to be perfectly honest but Google isn't what it used to be.
Also while im at it: when i try to do Retopo on a square or something flat, the Vert will "Snap" past the ledge of the Square lets say for instance, and it'll be on the bottom of the Square. is there a way to stop that? so i can get the Vert to the exact edge of the Square "or whatever it is" without it snapping past into open space and then to the other side of the model?
thank you for answering any questions you can by the way. i know you don't gotta and your time is important, but anyone who can help me on my 3D Journey will be greatly appreciated
-
3 hours ago, AbnRanger said:
Perhaps I am missing something in your question, but I think you are asking why does the model (for Live Smooth option in the MESH menu of the Retopo/Modeling Room) have triangles in it, correct? That is because all meshes that are in the Sculpt workspace, get triangulated (Surface mode). Part of the reason for this is because Surface mode has Dynamic Subdivision built into the brushes and some of the tools, such as Cutoff. It also is more interchangeable with Voxels than a Quad mesh would be. With that said, Andrew has stated that he may add quads in the Sculpt Room at some point. He is currently refining the Live Boolean featureset, and probably will need to turn his focus next to making some major UI improvements, as that was a stated goal of the 2023 cycle. So, it may be a while before he can get to the quad mesh option for the Sculpt Room.
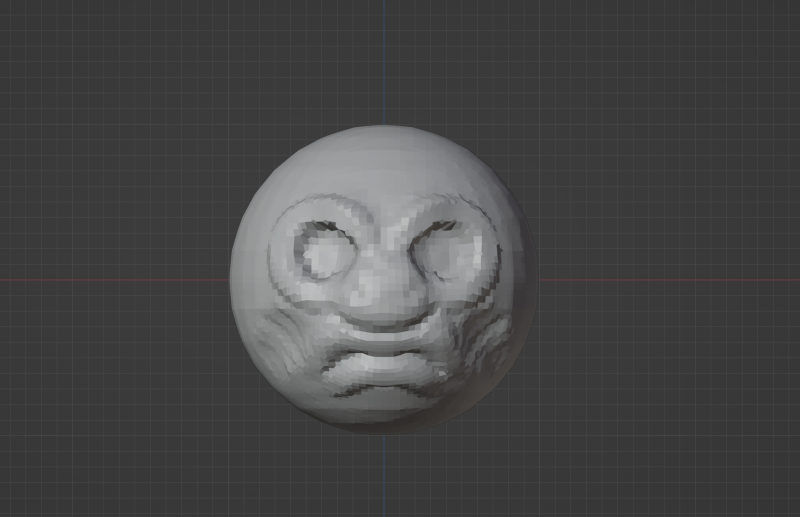
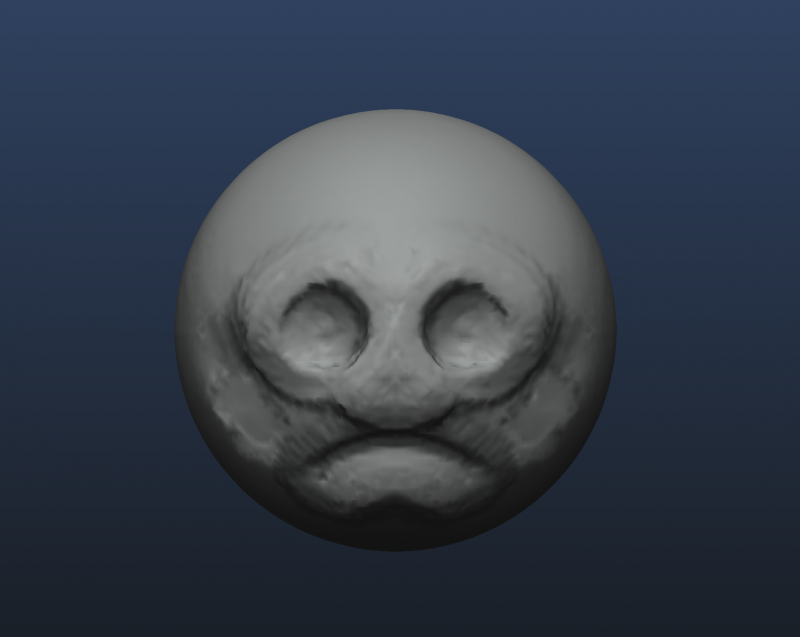
Oh ok, well it wasn't a huge problem or anything, i was just wondering if there was a way to keep it from Triangulating the model when i unlinked the mesh for sculpting, but if there isn't currently then i don't feel like im missing something. basically when i make a poly object i wanted it to be as "Flat" as possible, and the extra edges effect that its shading "or at least it does when i use the light over the model in sculpt room" but maybe im just over thinking things.
keep in mind like i said im still very new to poly modeling so
-
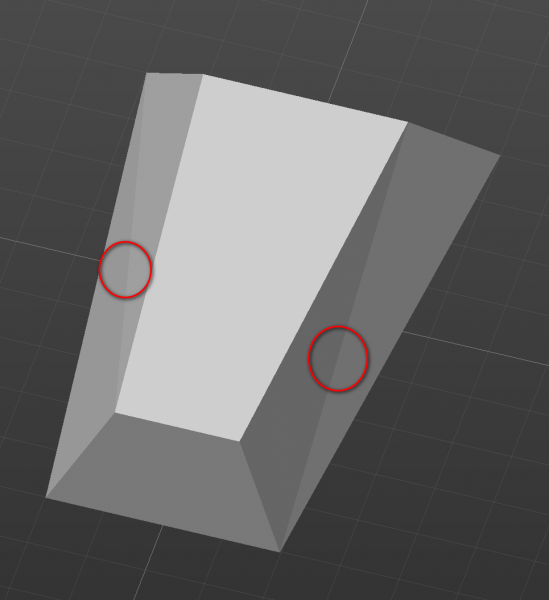
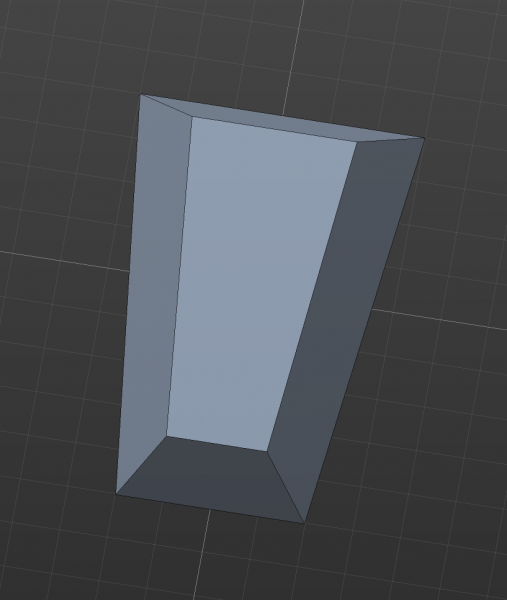
Btw i tried to edit it so the bottom picture is shown first, but for some reason it just keeps making the second picture the on the list the first picture shown. so just keep that in mind that the blue one at the bottom is what im starting out with, and the top picture is after i unlink the mesh, and it adds the extra edges.
-
Keep in mind im still pretty new to all this, but basically i wanted to make a Model i could sculpt on top of that didn't have any extra edges that i didn't model myself. the edges throw off the shape of what im trying to go for, though i guess since its low poly i could just keep it low poly, but i figured id ask cause if it can be done i would like to know how to do it, regardless, right?
Ok ive uploaded pictures here but basically i was just wondering if there is a way to keep 3DCoat from adding extra Edges when i Unlink Mesh, or if im going about this wrong?
any help will be greatly Appreciated.. i can't seem to find anything on Google about this subject sadly.
Thank you to anyone who can help me in any way btw.
-
Has this ever been updated? im trying to figure it out cause i keep getting lost in my Retopology lol
-
 1
1
-
-
On 5/12/2023 at 1:09 PM, Carlosan said:
found it, is a bug
Thanks for point it up
Oh wow, really? THATS AWESOME! LOL i mean... its not awesome there are bugs to be fixed of course, but ive never found a Bug and helped fix one before! thats great! hahahah i just sorta helped my favorite 3D program get better, by accident in a way i guess!
-
 1
1
-
-
On 5/12/2023 at 10:37 AM, Elemeno said:
youve not really helped , you havent posted any examples(pictures or videos) you havent posted your file so we can try to replicate ...
give us abit more information so we can try and then maybe helpI will record a video in a bit and show the problem, ive just learned how to use OBS so it didn't occur to me to do that, but yeah, i will try to get that done and posted here soon. thank you for the advice.. i honestly don't know why i didn't think to do it sooner
EDIT: Ok so i Googled the same problem but for Blender, which has a LOT more Tutorials for it because i mean, its Free. so of course it's gonna have Billions of Users, right? so i figured maybe it would be an issue that would be cross platform, since 3D Coat, Blender, 3DS Max/Maya, they all use Similar Poly Modeling "To an Extent i mean" right?
Come to find out my Cursor was too big. the Yellow Circle Pointer was too big, so when i was moving the Verts around they were trying to Snap to the other side of the Model. least that's what it seems like the issue is to me, and that's what another user on Blender was told the problem was. i turned the radius WAY down and seemingly the problem is fixed, so i just wanted to post it here in case that is indeed the fix and if anyone else has this problem they can find it too.
thank you for the help as always, though.
-
1
-
-
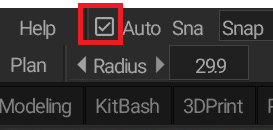
On 5/13/2023 at 3:43 AM, Oleg_Shapo said:
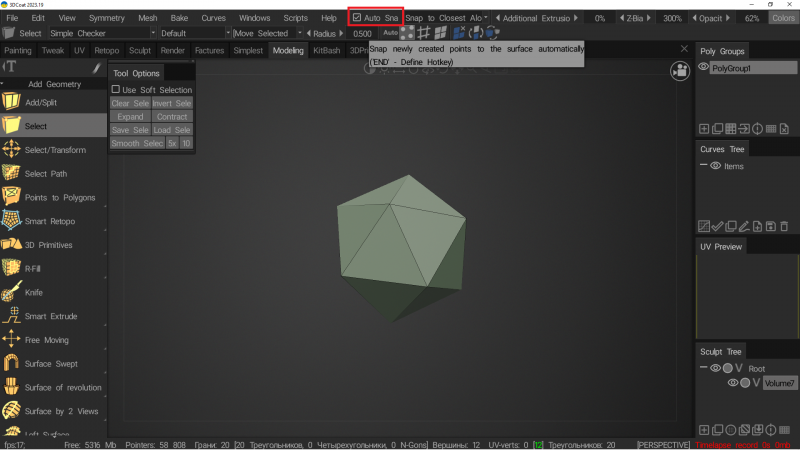
sometimes it happens if this is enabled
Yes, ive tried Auto Snap. you don't need to be condescending about it, its not like i enjoy asking questions here, its more of a last resort when ive tried to figure it out on my own for a few hours, googled and read through forum posts/searched the forums here and come up with nothing.
-
1 hour ago, Carlosan said:
Why you need to scale inward ?
 any primitive can do it.
Anyway, change the scale1 value. 3DC cant surpass 0 distance

I was trying to scale inward, meaning "Back and Forth" to get the Primitive where i wanted it, i didn't mean scale inward as in like... until it disappears or anything.. lol
-
Update... Ok, Weird... it seems to only be doing it with that one Primitive? that is so odd... the other Primitives seem to work fine? id love to know what's causing the issue but i guess it's not a "SUPER" Emergency like i thought it was before. i can still model my assets, just gotta...work around that one i guess... unless i go back to 3DC in a sec and the others start acting up of course, which isn't at all unlikely considering my luck with posting on forums LOL
-
Man.. i was hoping this would be an easy fix lol... it sucks ive ran into two really bad problems the last few days using 3D Coat, i mean it doesn't make me not wanna use it anymore of course, but i wish i could figure out what im doing wrong.. ive googled it so many times and nothing comes up..
-
This is a video of what im having problems with. basically when i try to scale inwards, it only wants to scale outwards. only quickly "Swiping" inwards will make it work, and if i just hold the green square down it will endlessly scale outwards. i have NO idea why its doing this so any help as to what's going on would be very helpful
-
1
-
-
Hey, so of course im still very new to Retopology and the like.. but ive encountered a problem. when im doing Retopo, ill move Verts around and sometimes they "Snap" to the other side of my model im working on. say im doing a face and im working on the nose, the verts will snap and Wield to the back of the head. what can i do to fix this? do i just have some setting turned off or on by accident? ive googled this a few times and i cant really find an answer that works. i have my setting as "Snap to Nearest" ive tried it and snap to surface and neither seem to work?
-
I Swear, i love this program so much lol. and i love how googling questions is actually working now. i just had this problem this morning.. for some reason one side of my poly group wasn't "Mirrored" like it should have been. so i just hit the "Make Symmetrical Copy of this Layer" in the Poly Groups Tab, problem fixed instantly.
also ive been learning how to actually Retopo.. i normally only 3D Print, but let me tell ya. even for sculpting/modeling knowing how to Retopo for clean edges and stuff is a MUST! so this program has been an Absolutely WONDERFUL!
-
1
-
-
4 hours ago, Koray said:
Right click on the shader you are using, select edit current objects shader ( or other if you want a permanent change),
and click Flat Shading.
cheers,
Thank you for your help my friend. it means the world to me. the more i learn about this program the more i see how perfect it is.. its actually amazing.
-
1
-
-
Nobody? i can show you a better explanation of what im going after if i need too. those were just ultra quick doodles to show what i mean by how 3DCoats Voxels are Smoothed out, even when extremely low resolution
"Edit: Not sure if my internet acted up and i didn't see the Reply, but i wanted to edit my comment to state that i didn't see your reply until 4AM my time lol"
-
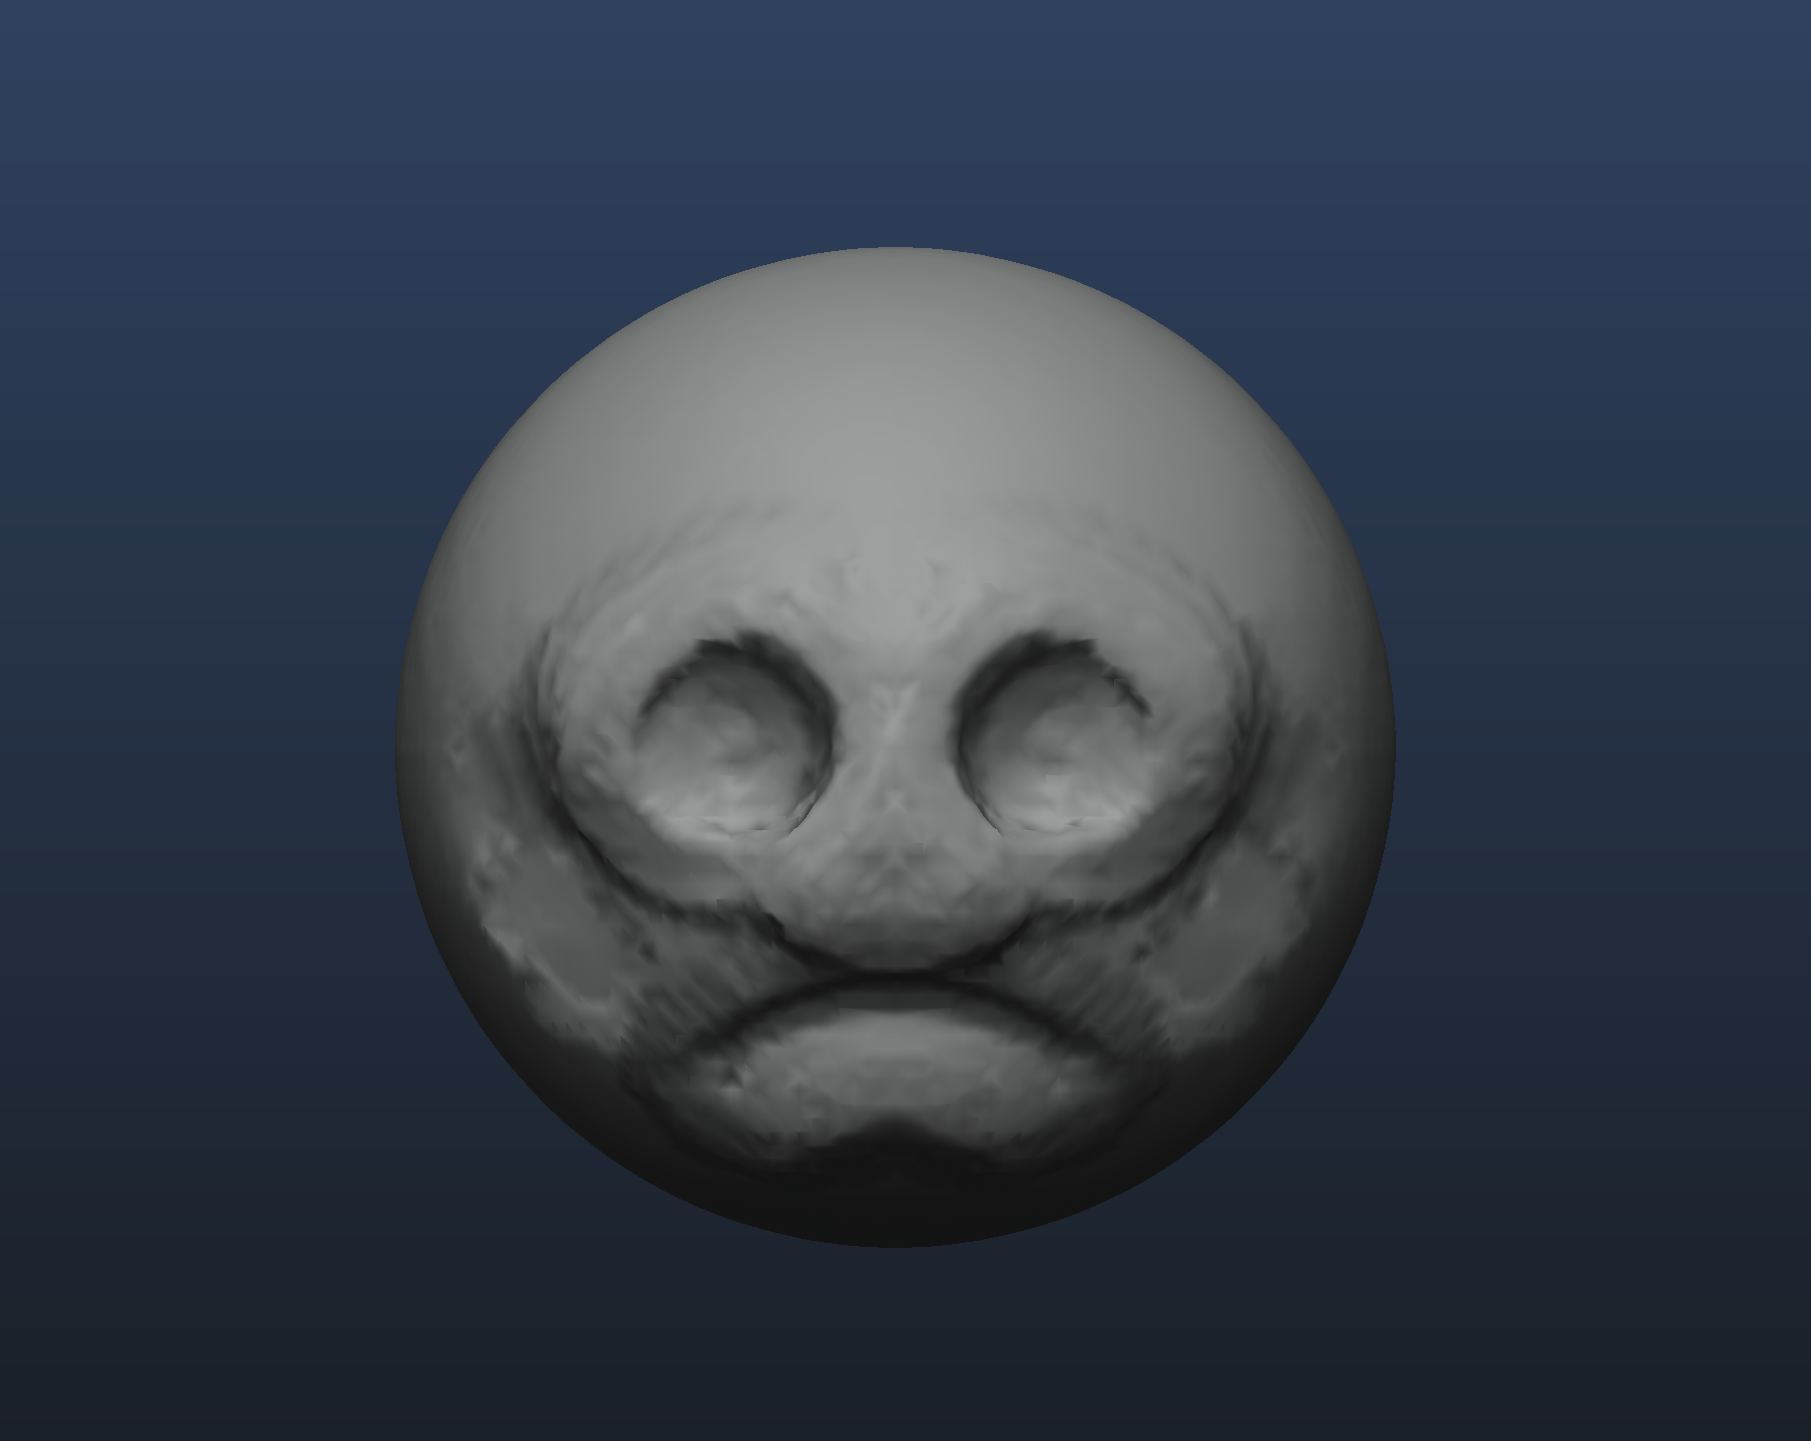
Ok, basically i want the Voxel Mode to look like Blender's Voxel Quadriflow, or whatever its called, or Kodon's. where the Voxels look Raw and Sketchy, not constantly Smooth no matter how low i go in Resolution. even Zbrush has the sort of "Pixel" looking surface when you go low enough, i use that sort of look to help "Feel" my sculpt.. if its always Smooth i don't get that same feeling. ill post a picture here of the sort of thing im talking about, if the option exists in 3DCoat im not sure, but that's why im asking.
either way thank you for any help or insight anyone can provide!
-
Dumb question i know, but is there a straight forward tutorial that explains the best workflow? there are a few things i can't figure out
like for starters, i want my Shader to be Flat Grey without a big Light pointing at it "Shining off it" is there a way to do that? ive tried turning the light, but then its too dark to see the sculpt im working on at all..
also are there any brushes that i need to download sorta like how there is in Zbrush? if so could someone give me a link to where to get em?
thanks for any help you guys can offer..
-
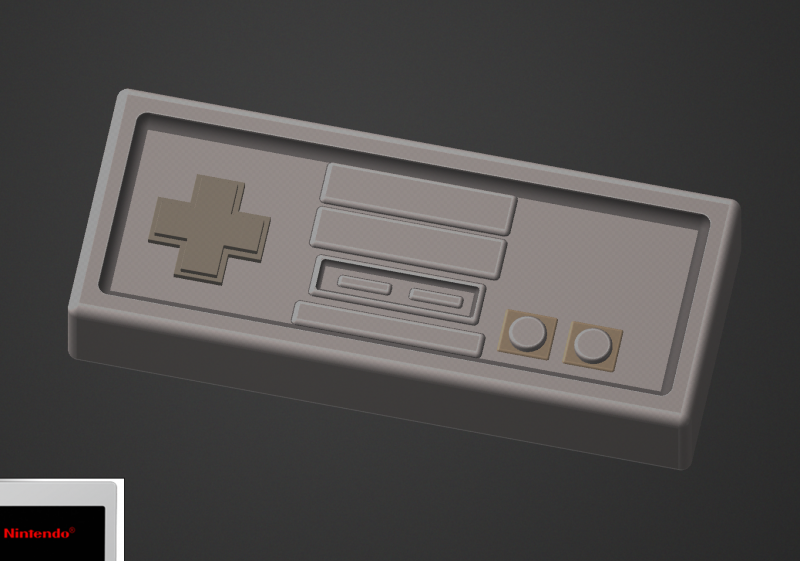
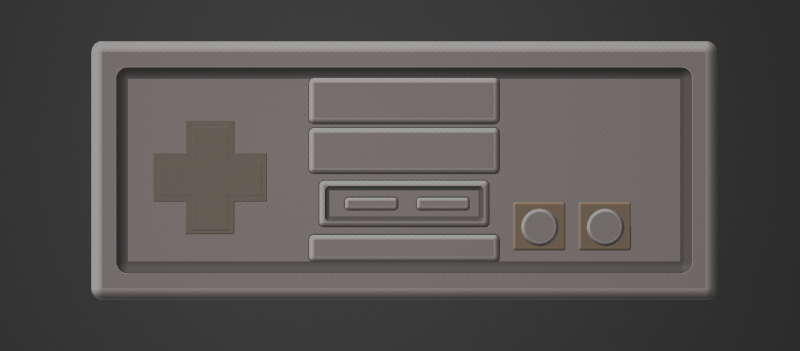
Tonight i felt like i had learned enough in 3DCoat to actually try to make something, so i tried something i believed id never be able to make in any way. an NES Controller. this took me around an hour or so, just using Poly Modeling, Booleans and Primitives. its not finished yet of course either, but it just boggles my mind that im able to make something like this... i know my Mom if she was still alive would be absolutely amazed that i was able to make something like this "even though of course we all know absolutely incredible things are made in programs every day" but more over that "I" was able to make it.. i actually feel like im getting somewhere with something for the first time in my life. and it's an amazing feeling.
-
4
-
-
Ok ill give this video a try, i don't think ive seen it come up in my search history on youtube so this might be one i haven't seen yet!
-
I Feel like im getting the hang of how sculpting works in 3DC, but if there are any Tutorials online that give simple overviews on how things work, like how to block out a character with Voxels, when to switch over to Surface mode, how Resolution works, that sorta thing it would be super helpful
one of my issues is no matter how high i go in Resolution, it seems like in Voxel or surface mode when i use the Smooth tool i get lines in my model, sort of like a tree's rings almost, stuff like that.
-
On 1/10/2023 at 9:26 AM, Fluffy said:
Without more of an idea of which brushes you're using and the type of result you're trying to achieve it's a little hard to know where to start (how to use brushes/alphas in 3D Coat is a pretty broad subject and would probably take a while to get through).
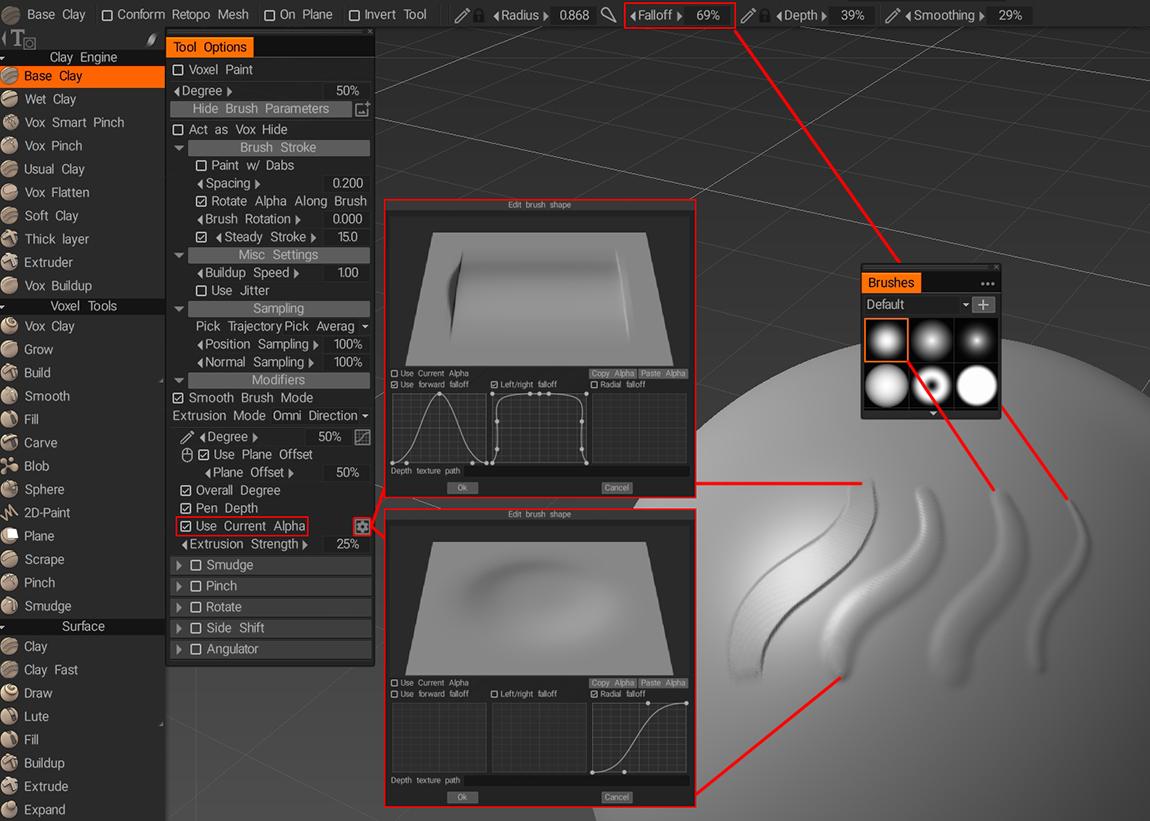
Tools like Grow in the Voxel Tools panel incorporate smoothing automatically and will give you very smooth, organic results without any need to tweak the settings, but if you're working with the tools in the Clay Engine panel here's a couple of settings that may help...
Using the Base Clay tool as an example, if you look at the Tool Options you'll see a checkbox for Use Current Alpha and next to it a gear icon. While the Use Current Alpha option is disabled you can use the gear icon to access the Edit Brush Shape options window where you can modify the brush shape for the current tool. Alternatively with the Use Current Alpha option enabled you can select any brush/alpha from the Brushes panel and additionally you can further vary the edge blending by changing the Falloff value. Here's a screenshot with the various settings and the resulting brush strokes...
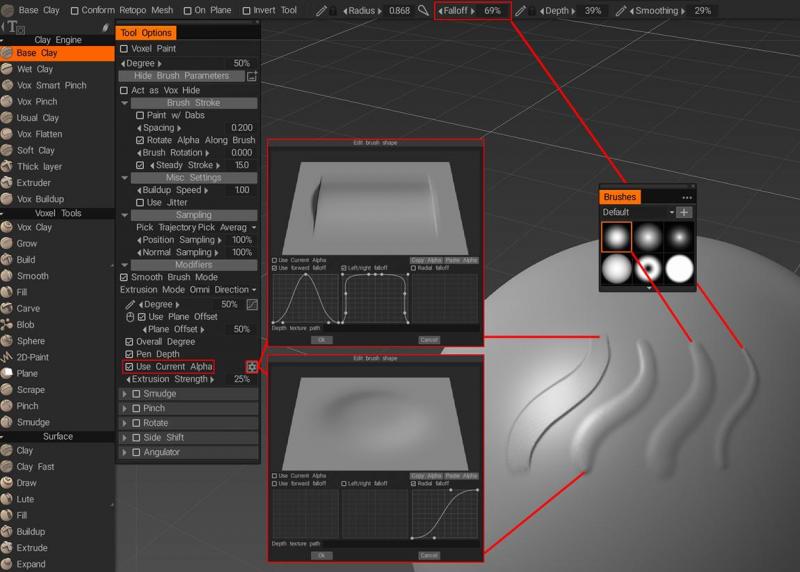
YES! This is EXACTLY the help i needed. i wanted my brush strokes to look like this, more inline with how they'd look in Zbrush or Blender.
Question though, how do i SAVE this custom alpha, or setting or whatever its called?


How do i Upgrade to 3DCoat 2024?
in General 3DCoat
Posted
I currently have free updates until 15.09.2024, but i cannot figure out how to update it. i used Update Manager and it didn't update to 2024?
unless im just missing something i mean.