


Paint Guy
-
Posts
262 -
Joined
-
Last visited
Content Type
Forums
Calendar
Gallery
Posts posted by Paint Guy
-
-
Not to take away from your well wishes, but you guys know this thread is over a year old right?
Doh! I didn't realize that. I saw the new thread and thought Andrew just had the baby. lol. Well Congratulations anyways.

-
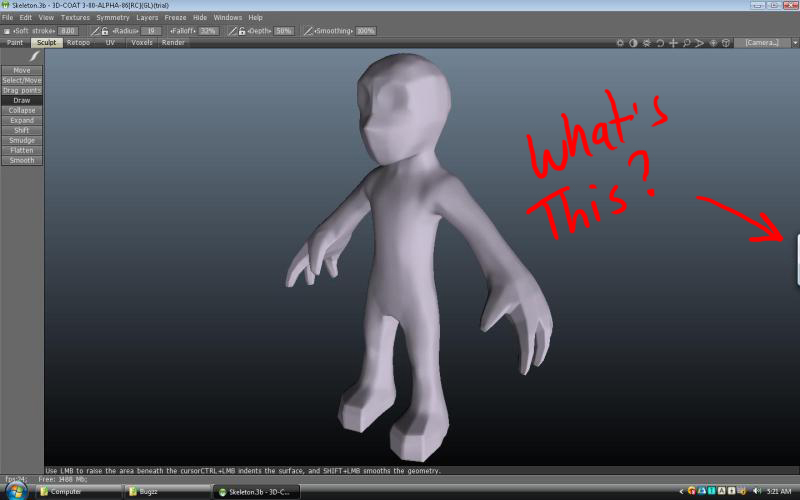
The tab in the corner has nothing to do with 3DC. It's a vista thing that I cant seem to get rid of.
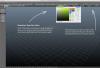
If you look at the first pic, I imported the model without smoothing. It gave me hard edges, so I took it into sculpt and used the smooth brush to soften the hard edges around the chest area.
I then took the model in to the paint panel and if you look at the chest you can see the wire "protruding" from the mesh. Its a cool effect but not desired.
Yeah just wondering what that little tab was. I was hoping Andrew added a popout menu or something to the UI but no such luck. lol.
I am on a mac so I didn't know what that was for. Thanks for the explanation! -
Updated to V87 (excuse, only Win version)
- I made common selected button style for tool parameter panel and for left tool selection panel (it was far not so quck to do as I expected)
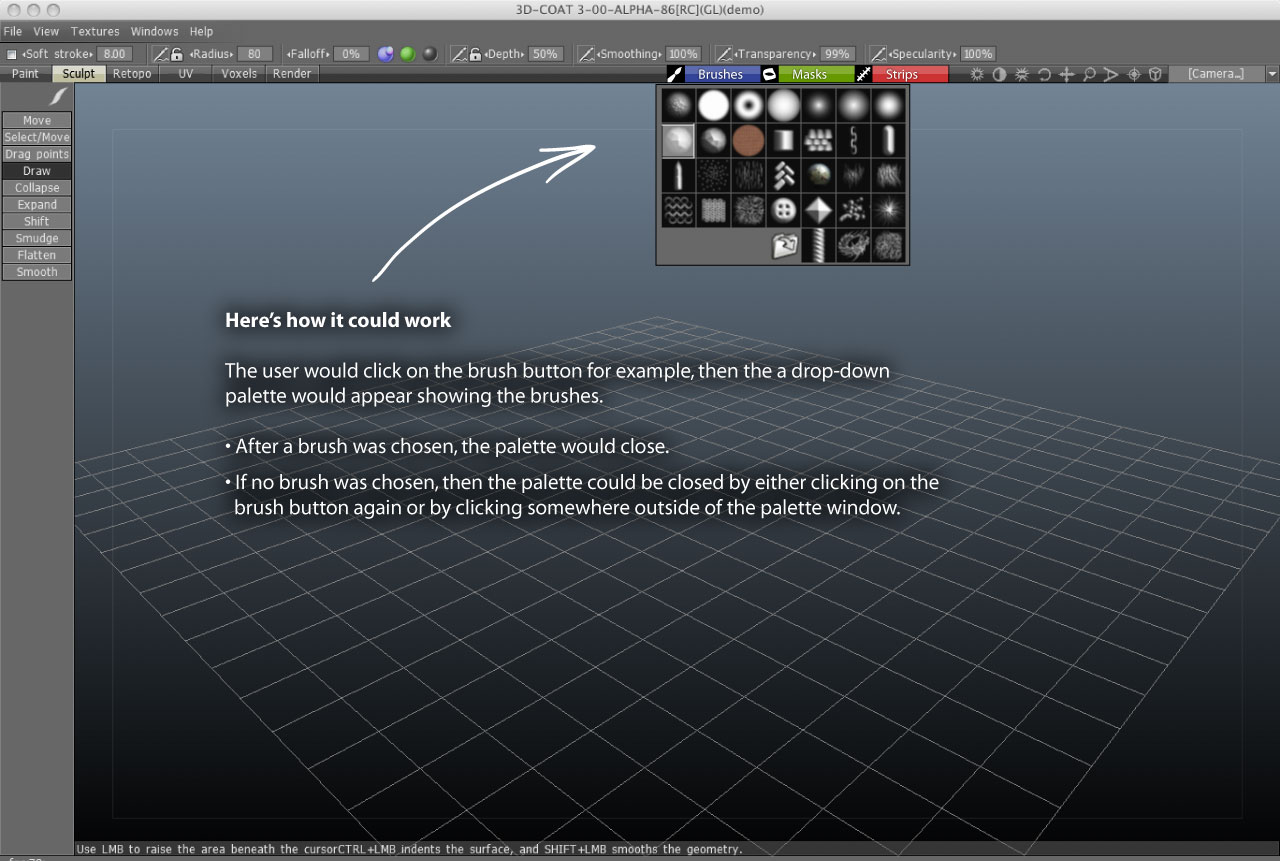
Not sure what this means, but are there any new palettes in the Sculpting work area?
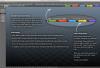
Also this looks interesting, I am on a mac and ver. 86 doesn't have this. What's this shiny thing? (see image) Thanks
-
@Paint Guy - I like it except "close tab" button in right -bottom corner. I think right-top corner will be better.
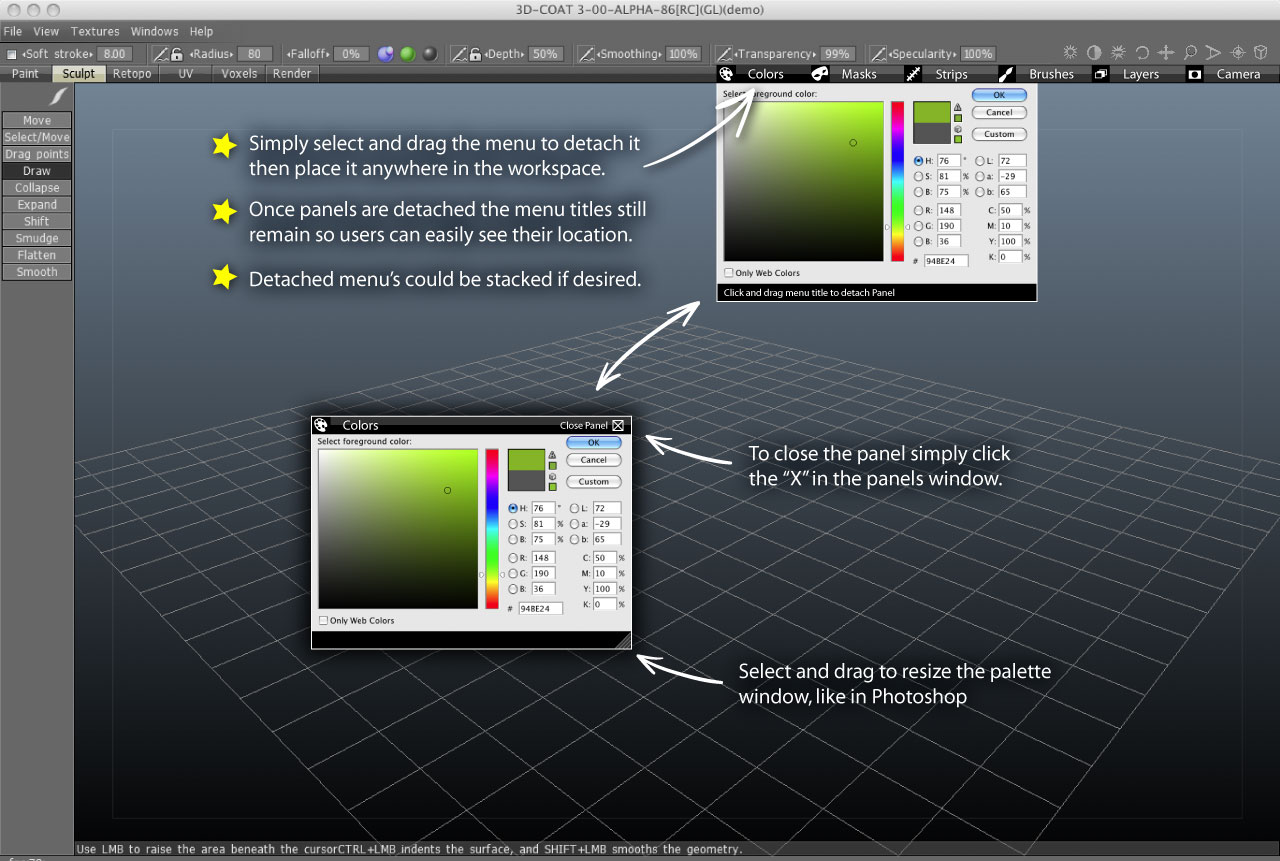
I agree blugenwitz. I moved the close location to the top. (See New Image)
I also thought the possibility for the panels to be Resized or Stacked if need be like in Photoshop would be helpful! I also changed it so you would click and drag the menu "Title" to detach the panel, rather than clicking and dragging the lower part of the panel to detach it.
Don't know if Andrew likes these ideas, but it seems like a few people do.
Would probably be a lot of work to implement these features though, but I can only hope they eventually get added to the UI as it would really speed things up and be be more intuitive IMO.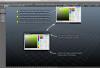
-
Hi all!
"Release" 3.0 is done! But not of 3D-Coat
It will be slightly later.My wife has born third son today. All was very good and fast, health of my wife and newborn child is very good. 50 cm, 3.250 kg
Congratulations to you and your wife Andrew!, I also have 3 boys and like Phil Nolan said I am in the Post production stage as they are 10, 12, and 15. Enjoy them while you can they grow up fast!
Children Are A Gift From God
by Sandra Tolson
God sent me three packages
That needed special care
"Take care of these tiny gifts
For they are very rare."
"Watch over them with all your love
And let them feel your touch
Take care of their every need
For you are needed very much."
"These gifts will grow up very fast
As you soon will see
Love them with all your heart
And let them be what they will be."
"When these gifts have fully grown
Look at Heaven up above
Know they exist because of God
And all his precious love."
-
Yeah, but what about multiscreen users ? If you can't detach those 'dropdown menus' its a waste of workspace, and furthermore: i would totally hate to click on a drop down, see my color palette, then select my color, when i can do it with one click in docked/float mode, samething for layer, if you tend to work with lots of it it makes the task tedious... If this is used as in photoshop (you can dock AND stack in the bar) its ok though.
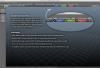
Update! (See Image Below)
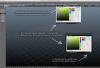
I don't see why both couldn't be incorporated. So you could have the drop down menus, and they could be detachable too! So if you clicked on the "Brushes" button for e.g. the palette of brushes would drop down, then you could detach or tear it off and place it anywhere on your screen, but the "Brushes" button would still remain at the top. If you wanted to close the detached "Brushes" window you could just select the "X" in the detached panel to close it. Since the buttons would always stay at the top of they would always be visible and easy to get at.
See the image for a better explanation.
-
Hi, Phil, I found out about 3DCoat about a year ago and have been following it ever since. I wasn't too keen on it for version 2.17 but I bought it 2 weeks ago so I could start to learn 3DCoat before ver. 3 is released. Version 3 rocks BTW!.
It's funny you asked if we are posting 3DCoat images elsewhere on the web because I was thinking about this very thing last night. At ZBrush central someone was requesting a feature for ZBrush 4 and they mentioned they would like better topology tools like 3DCoat has. It was a nice change to see someone asking for a feature in 3DCoat. Hats off to Andrew!
I think once some people start posting some really good images made in 3DCoat then the word will spread very fast. Now that 3DCoat is quickly maturing as an application with better UI, workflow and better tools we will see more works posted using 3DCoat in the near future. I would like to post something ASAP but I am still learning this wonderful app and probably won't post something until I have a good handle on version 3.
-
For some reason I keep coming back to superheroes, or villains in this case. Still a WIP, this is the result of the first pass tooling around in 3DC.
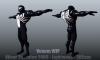
This is great Oliver! I'd love to see some closeups and a wireframe.
-
Thanks for the new depth picker. I was worried this would be difficult to add, and as usual Andrew delivers with style.
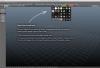
I think Paint Guy's right about the lack of palettes outside the paint room. I noticed this while using the sculpt tools last night. Sure you can't change layers in sculpt, but hiding/locking of sub-objects and materials still works, so I loaded them up while I worked. For regular users this is not a problem, but it might be helpful if some more palettes were added to the default state for the vox and sculpt rooms to help new users get up to speed. I really like the spacebar pop-up added with the new UI, maybe Andrew could come up with something similar for pens, strips, masks, etc (maybe a user-defined mix? like the presets panel)
A shaders palette that we can use in vox mode would be awesome too if it's not too difficult to add; such a fundamental vox feature shouldn't be hidden in a rmb menu imo and a thumbnail preview would really help.
I'm not sure adding buttons to the top row is the right answer, but as I was working I thought, boy wouldn't it be great and a whole lot quicker if I was able to visually see the Brushes or Pens Button and the Mask and Strip button, rather than having to search for them in a menu somewhere.
When I am sculpting I find I am hiding and showing objects quite frequently. I am also hiding and showing objects a lot when I am painting them so I think adding a button for the "Layers" and one for "Colors" too! would also be very helpful as I've described in my image and I would like to see it added to the Paint window as-well-as the Sculpt window if possible.

-
Andrew,
Hi, great suggestions here to help improve 3DCoat. I thought I'd add my suggestion to the mix!
I was working in sculpt mode in Alpha 86 (great improvement BTW) and I noticed the default UI had no Panels/Windows for the Brushes/Pens, Masks and Strips. I noticed this because I have been using the 2.17 version and they are there by default.
Now I understand they can clutter up the workspace and that's probably why it was decided to remove them, but to manually load them I had to load the Pens, Masks and strips by going to (Menu > Popups > Masks) etc. manually.
Sure you can save your own UI layout, but it would speed up your workflow and be more intuitive if you could instantly see and use the Pens, Masks and Strips right away in the default UI?
Please see the images below for more explanation.


I'm not sure adding buttons to the top row is the right answer, but as I was working I thought, boy wouldn't it be great and a whole lot quicker if I was able to visually see the Brushes or Pens Button and the Mask and Strip button, rather than having to search for them in a menu somewhere. I think it makes sense to add the functions that would be most used and leave others that are used less frequently where they are.
When I am sculpting I find I am hiding and showing objects quite frequently. I am also hiding and showing objects a lot when I am painting them so I think adding a button for the "Layers" would also be very helpful as I've described in my image and I would be helpful if it were added to the Paint window as-well-as the Sculpt window if possible.
Thanks
 I think grey colored buttons that turn green (below) when selected fit the current UI better.
-
Andrew,
Hi, great suggestions here to help improve 3DCoat. I thought I'd add my suggestion to the mix!
I was working in sculpt mode in Alpha 86 (great improvement BTW) and I noticed the default UI had no Panels/Windows for the Brushes/Pens, Masks and Strips. I noticed this because I have been using the 2.17 version and they are there by default.
Now I understand they can clutter up the workspace and that's probably why it was decided to remove them, but to manually load them I had to load the Pens, Masks and strips by going to (Menu > Popups > Masks) etc. manually.
Sure you can save your own UI layout, but it would speed up your workflow and be more intuitive if you could instantly see and use the Pens, Masks and Strips right away in the default UI?
Please see the images below for more explanation.
-
Feature Request - More Sculpting Brushes
Hi, I have been playing with 3DCoat's sculpting brushes recently and I have a few questions and comments.
I may be mistaken, but as a former ZBrush user there it seems to me that there is a lack of sculpting brushes within 3DCoat. I see there are 4 basic sculpting brushes in 2.17. The "draw with pen", "expand", "flatten" and "smooth" brushes.
I realize 3DCoat is in it's infancy and so to expect too much in the way of brushes at this point would probably be unfair, but I do hope this area of 3DCoat is seriously looked at and improved in the near future. Here is a link to some of the sculpting brushes in ZBrush.
http://www.pixologic.com/docs/index.php/Brush_Types
Now I am not saying 3DCoat needs tons of brushes, but there are a few brushes that I found I could not live without in ZBrush like the "Standard", "Magnify", "Pinch", "Rake", and "Clay" brushes. I think it would be great if 3DCoat had some similar brushes to allow for better sculpting.
Andrew, it would be invaluable for you to purchase a copy of ZBrush and try the brushes for yourself to see how helpful they are in the sculpting process. Do you think this an area of 3DCoat you would be able to improve in the near future?
Thanks
-
1) Import model
2) Let 3DC create the UV map
3) sculpt on model
4) paint on model
5) export low-poly OBJ with 3DC created UV map
6) export displacement/normal map
7) import 3DC OBJ into C4D (it has the UV map you need for your Displacement/normal maps)
Thanks Tony, I figured it out.
-
And please tell what is misunderstood in my previous post. I tried to explain carefully all aspects. English is not my native.
Andrew, I thank you for your good explanation, but sorry if I don't always understand. You have helped a lot. Thank you!
-
In general, exporting displacement is not trivial thing because of displacement represents normal displacement, along normals. But during sculpting you are moving surface not only along normals. So, in general baking procedure is required to get correct displacement. This is not required if you have painted displacement with paint tools or sculpted only with "Draw". But if you have used other sculpt tools, correct displacement export for low poly mesh is more complex.
(Using 3DCoat 2.17)
Thanks Andrew, sorry but I think the language barrier is preventing me from understanding your answers but I am trying
OK, you said if I use other "tools" other than the sculpt tools, then I need to bake the displacement for it to work. So let me see if I understand you correctly. If for example I were in "Paint" mode and using the "Depth" tool then that would be a situation where I would need to "Bake" the displacement? Is this correct?
So Andrew, if I am sculpting ONLY in the "Sculpt" mode and using ONLY the brushes in the sculpt mode, then I shouldn't have to "Bake" the displacement correct?
I know in ZBrush for example you don't need to "Bake" the displacement map before exporting it, so I was hoping to not have to do these extra steps in 3DCoat either.
Andrew I really appreciate the help but please answer my questions specifically so I can fill in the gaps. I have asked some other questions above which I didn't get answers to. Thanks
All I am trying to do is get an understanding of the steps required to take a model from Cinema 4D into 3DCoat, then Unwrap the model, Sculpt it, Paint it, save displacement and then export it so I can use it in Cinema 4D but without any workflow documentation it's like trying to get somewhere without a roadmap.
 I really like 3DCoat, but with no roadmap per say, I am really finding 3DCoat difficult to learn.
Could someone please look at my steps above and fill in the gaps. I would really appreciate it. I am getting closer!
Thanks
-
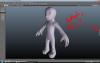
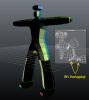
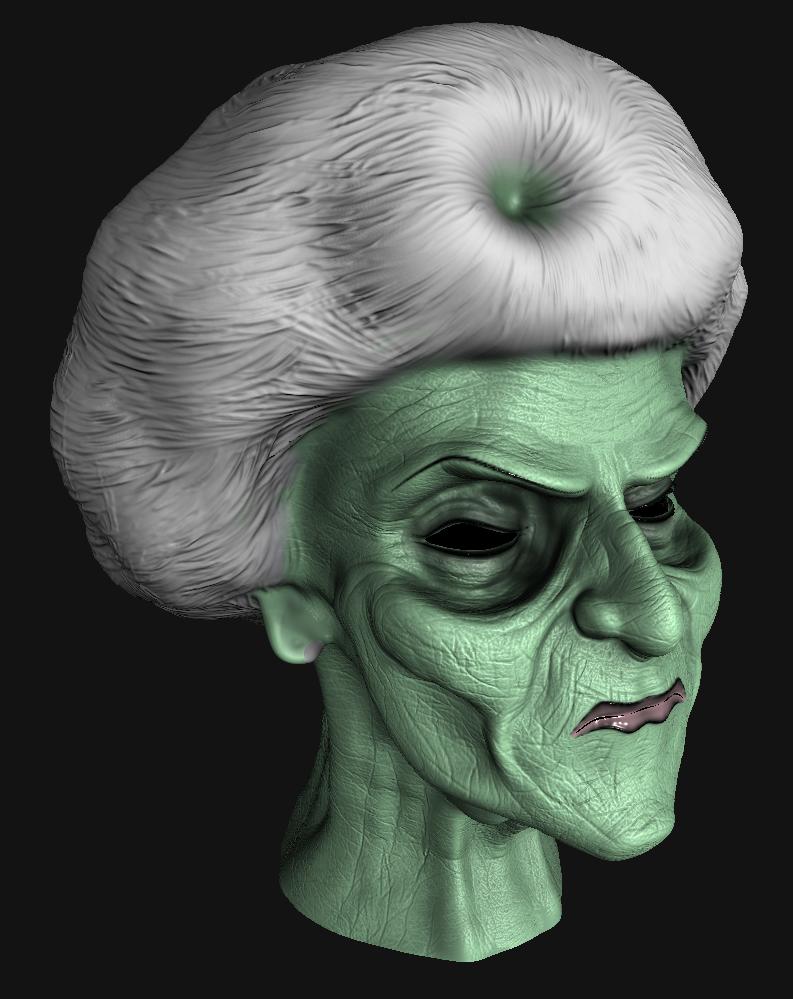
Hi, here is a test I am working on. Sorry if it looks a bit evil that is just the way it turned out after doing some random sculpting. I have gleemed the basics from the forum here and have gone over the manual, but I have more questions than answers right now.
In a nutshell, I imported a model into 3DCoat and then painted it, created the UV map and then did some sculpting too. I then exported the sculpted head and then imported it into Cinema 4D and applied the UV map.
Now I am confused. I want to export a "low" poly model out of 3DCoat and not the high poly model, but I am not sure how to do this. I mean in ZBrush you can lower the subdivisions to the original low poly after sculpting on the high poly model, then you apply the displacement and color map to the low poly model.
Question
So how does a person can export a low poly model out of 3DCoat?
Question
Also if this is the correct order of things, then when do I save my displacement map? and do I need to save or export my sculpted .obj file or just the displacement map?
Please make some sense out of this for me.
Please explain in detail as it's really hard to read between the lines if you know what I mean. Thanks1) Import model
2) create UV map
3) save .uv file
4) sculpt on model
5) paint on model
Question
At what point do I create the displacement map? After sculpting in step #4 or some other time.
Important!! Now please tell me if I am understanding this correctly. I bring a low poly model into 3DCoat, then after I sculpt it in 3DCoat I export it again, along with the displacement map. Now in my 3D application I don't load the sculpted high poly model I sculpted in 3DCoat but only the "original" low poly model and the displacement map I exported out of 3DCoat. Am I correct?
Thanks
-
Hi, I downloaded the codec for mac from techsmith and the video still won't play. Anyone know why?
http://www.3d-coat.com/forum/index.php?showtopic=2592
Christopher, do you think you could tell me what I am doingwrong? (see link above) I am creating my UV map in 3DCoat but I can't seem to get the steps correct. If you could possibly help I would appreciate it!
Thanks
-
Well, after the UI revamp I think that the best thing Andrew should do, is to improve what is already there, instead of adding new features.
And so I mean of course the brush engine, improving the feeling of the sculpt experience, organizing tools and options of voxels in a better way, making a good clay, plus the ability to go up and down in voxels resolution.
I couldn't agree more. Here is my wish list.
• The ability to go up and down in resolution like in ZBrush.
• Add more brushes like ZBrush
• Improve the feeling of the sculpt experience like in ZBrush.
• Allow users to rotate, select, scale and move unwrapped UV maps so they don't overlap and s o they can fit better on the UV map
• Continually looking at ways to keep the 3DCoat UI simple, intuitive while still remaining powerful.
-
OK... found the option...seems to work much better when importing into Vue, C4D or Hex...
Thanks muchly....
http://www.3d-coat.com/forum/index.php?showtopic=2580
kenmo, hi it seems you have a pretty good idea of what you're doing in 3DCoat so I was hoping you could possibly give me a hand with my questions here as I have a project I need to do urgently and I have not had an answer to my questions.
I am also using Cinema 4D and Vue.
Thanks
-
The only time you would save out a separate UV file is when you want to apply those UVs to another object (lower res version, another file entirely, etc.).
After you finish up your retopologization and unwrapping your UVs, What you need to do if you want to save the UVs out with the object, is simply hit "Export" Or go up to "Retopo>Export Raw Object". Either way it's the same. Name your file and select the file type, and you're done.
Thanks Oliver and geothefaust!
1) OK, so I select "Export", but where is the Export? (I am using the beta 3.0 version 82)
2) After I select Export, what are my file save options, will it allow me to save as a .tiff and a .psd?
3) How do I save out a displacement map to use in Cinema 4D? Please tell me what I do following my last step. Step #6
I really appreciate it!
-
Hi, I am just trying to get the process down of importing my model, unwrapping it and then sculpting it and exporting a displacement map to use in Cinema 4D. I am not worried about topology or if I have marked the seams correctly at this point as I first want to get the correct steps down so I can get it all working.
1) Imported model
2) I selected "Mark Seams" to mark the seams.
3) I then selected "Unwrap" to unwrap
4) I then select "Apply UV Set" which applies the current UV map to the model.
5) I select "Save" to save the UV map as a .uv file.
6) Select (File > Export UV Set) then export the .obj file.
Question #1
Are my steps correct.? If I have missed a step or a step is not in order please tell me.
Question #2
Now what do I do? What should my next step be?
Question #3
Am I doing this right? I am supposed to create my UV's before I sculpt right.. So do I sculpt now and then how do I save or export my "UV" map from 3D Coat to use in Cinema 4D?
Question #4
When I selected "Save" from the UV menu it saved my UV map as a .uv file. I can't open this in Photoshop to paint on it. What am I doing wrong. I want to be able to paint on my UV map in Photoshop?
Thanks
-
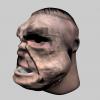
Nice model, but it seems that wrinkles are too rare. Too "young" skin between wrinkles.
I guess it depends on the direction Phil is taking. There are two ways to simulate the wrinkles and both are valid.
1) One method is to sculpt only the "main" wrinkles and then add the finer wrinkles using either a "Displacement" map or add them in the final texture if they are quite fine. (this method is used a lot for games)
2) The other method is to add all of the detail to the sculpt using masks etc. Both methods are great but the first one can look as good if it done right and the model is a lot less cumbersome.
Phil Great progress on this guy and I look forward to seeing it finished!
BTW, how did you do the turntable? Can this be done in 3DCoat? -
I finally figured out how to take a printscreen on a macbookpro running windows (has no print screen key).
Fn+shift+f11
So here is the most recent painted version:

Nice wrinkles on this! Did you know you can use "Grab" to take screenshots on mac? Very easy!
-
But anyway I will not be able to do it until release. As always, some features like CUDA on OSX will be included in one of free updates.
64 bit & OSX is more essential problem. Apple has given the WORST-est dev tools for 64 bit
Why do you think there is no Photoshop 64 bit for OSX?I really hope they will change the situation under pressure of programmers from all world...
Andrew, excellent job with the development of 3DCoat 3 beta.
I have one request, Please release the Mac and PC versions simultaneously! There are a "LOT" of us mac users out here and there's nothing more frustrating to us than having having software for our platform released "After" the PC version. I know this was the biggest reason I left ZBrush. Thanks!


decimation master zbrush
in CG & Hardware Discussion
Posted
Yes this would be a huge plus IMO too! With this you can save your model out with all of the fine details in a "low poly" model. This is a win win situation. I hope Andrew looks to add something like this and improve the brush and sculpting in 3DCoat so it feels more like ZBrush.