


John
-
Posts
41 -
Joined
-
Last visited
Content Type
Forums
Calendar
Gallery
Posts posted by John
-
-
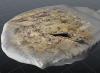
Could you show us the uv set, please?
This is really pp painting? Because it looks like vertex gouraud shading.
By the way: You should metion the program version you are working with.
Sadly I am at work now, so don't have access to the model. The UV Set is just an auto generated map made in 3D Coat, everything is nice and flat, even if it is fragmented into a lot of islands. The map is also packed fairtly well, the part top part I've painted on is a single island, taking up aproximately 1/4 of the map. So 1024x1024 of the total 4096x4096 map.
I am working in the latest release of 3D Coat 3.3, using the 64bit CUDA edition.
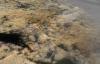
I tried your suggestion of upping the resolution in MicroVertex mode, which did improve things. However I simply can't get my head around the way 3DC transfers textures onto the model.
John
-
Are you working in per pixel mode or in microvertex mode? The UV set seems not to be right placed, too. If you are working in microvertex, you should increase the model resolution.
That one is in Per Pixel, but I have tried Microvertex as well, seems they both return similar results.
John
-
Hi People
Hope you can help, I am probably doing something daft but I have to ask anyway

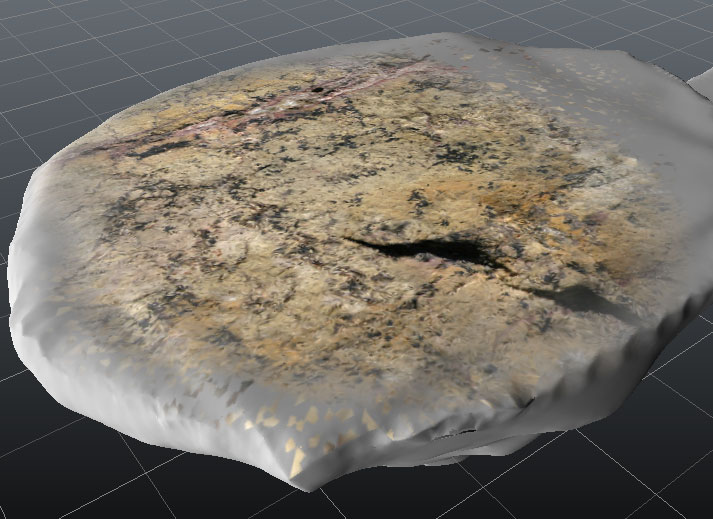
When painting onto a poly mesh using a material which I have imported from a high res image, the results look ok from a distance, but zooming in a bit soon shows up pixelation. How do I get the texture to transfer at a higher res, to improve the detail close up.
The UV map is 4096x4096
John.
-
Panic Over, just had to delete my profile files
 , a shame but not the end of the world.
John
-
Help me please
I was using it earlier, attempting to uvmap an object and got a crash. Since then I have not been able to run 3d coat at all, despite a reinstall and reboot.Errors with
tool : StdPen
.PDB file missed of stack failed
Anyone got any ideas?
John
-
I'm not sure of your workflow as to how you imported or merged your model so here is one way...
If you mean by bump map, displacement map use the texture baking tool under the textures menu at the top in the paint room... Choose Zero level is black, not normalized or normalized depending upon your rendering software...
I created the vox model, retopologised it, uvmapped it. That gave me a pretty flat mesh, shich when I painted in the per pixel rool I added some depth with a leather texture I had created.
Exporting the model from the file menu exports me a Bump map, but it seems to have a mid level grey as Zero, I need it to be black.
I did wonder whether useing the displacement options would prodice me a map I could use as a Bump, but I'm not sure, I will experiment
John.
-
Hi All
Anyone know if I can get a bump map out of 3DCoat with Black as the Zero Value?
Cheers
John
-
I'm running a free session on Voxel modelling this Saturday, you can find details here
http://3dhobbymag.com/component/seminar/?task=3&cid=3&sem_midx=0&sem_jidx=0
Hope to see you there
John.
-
Thank you for the reply John and the kind offer of help. I won't be able to make it over to 3D Hobby tonight but perhaps others can. I will probably wait and hope the course is repeated rather than take up a spot when I am not sure I can fill it.
No problem mate, I will be doing other courses, even if I dont repeat this one
John
-
I have never been to a live training course (videos mostly) - Is there anything I need or need to know about, besides needing the program of course?
you dont need much, the desktop sharing is through a browser so it might ask you to install a control or something. Though it did not do that on my machine.
Voice is done through Team Speak 3, which is free and easy to use. We tried some other apps but they were complicated and unpredictable.
The guys over and 3d hobby are very helpful, and I'm always about at this time of night to help out. We are on team speak at the moment so you can get it installed and test it out in advance if you like.
John.
-
Yes, ptex works very well in 3.2.08 beta. (my version: win32 non-cuda)
It should not take very long to merge into scene the quadrangulated model from the retopo room to the paint room. but somewhat longer if you increased the carcass level.
--------------------------------------------------
You might be doing some of these steps already.
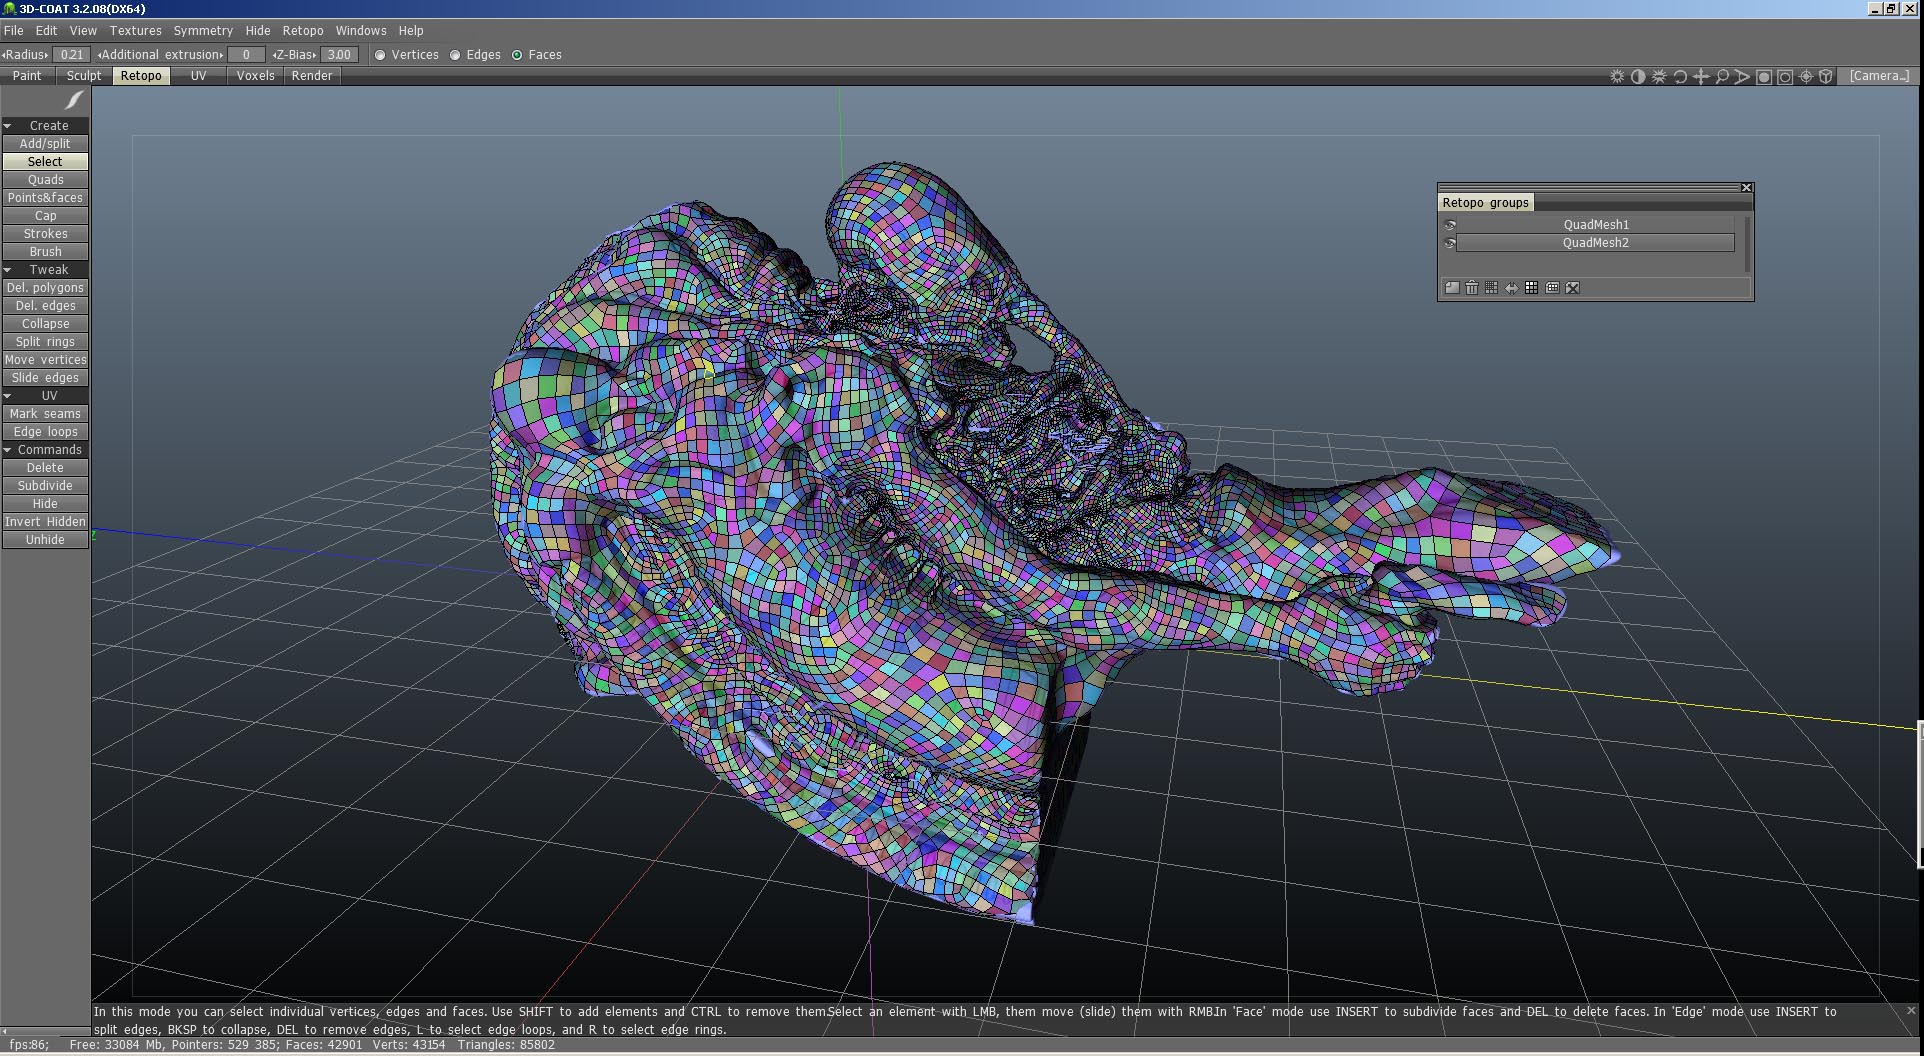
The extra quadmesh you have is just left over from your first sphere, you can delete it from the retopo dialog box. When clearing a voxel in the voxel room it does not delete the quadrangulated mesh in the retopo room, Use the clear button (left menu)to that in the retopo room.
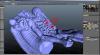
I did get that mulicolored mesh to come up in my testing but not quite sure how I did it yet, Its not the normal look of a mesh in the retopo room and I don't think you uv mapped it which as you know is unnecessary for ptex.
I can take a look at the 3b file if you can upload it here if it not too big or a link where I can download it.
Really tight areas sometimes cause problems but can't tell just from the pictures.
you really dont need a uvmap for the ptex room? well you learn something new every day
-
Thanks John, I've been using a model from the net as a start point and adding the extras and re-jigging in the voxel room.
I started the painting via Microvertex (it went well) until I found some rogue areas that were too big on the texture size (no detail could be painted on those sections) so I thought I would dive into the Ptex side as it didn't need the dreaded UV map and all the troubles that come with it.
here is where the undercuts and real detail is on the model so I thought going the Ptex way would be appropriate, plus that I hadn't even tried that way before as I don't have much luck with the other alternatives without spilling blood.
The Per Pixel and Microvertex painting options are quite similar as far as I can tell. Except with the microvertex it subdivides the mesh to give better results in bump, displacement and normal maps. As far as I am aware a UVMap is required for both rooms, so you may have to venture into that. When you are in either room have a look at the UV Texture editor (on the View menu) if you click teh wireframe option you will get a good idea of what it looks like.
Ny suggestion would be to use the uvmapping tools in the UV Room to add a number of seams to your model (seperate it into a number of parts). When you define a region it will seperate itself into an island and give it a unique colour. Your mesh is covered in different colours at the moment meaning you probably have alot of very small islands. When its split into 4 or 5 islands click the unwrap button. This will arrange all the parts of your map into a nice map. On the UV Islands you will see a number of red and blue regions, you definately don't want the red ones (not sure about the very blue ones). Experiment with the mapping options (relax is a favourite of mine) to minimise the reds. The stronger the colour the worse the distortion.
You can add more seams and islands if you want but the general idea is to have as few seams as possible. Though judging by the mesh you might need a few more than normal to get the map flat.
Let me know if you have trouble
John
-
I tried experimenting with a simple voxel sphere and just accepted the defaulte to get into the Ptex paint room - all went well.
I then pulled in my model (7 million odd tris) and did the same, all went well and ended up in the retopo (like the sphere test) and I accepted the defaults.
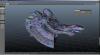
I noticed that now I have Quadmesh1 and Quadmesh2 in the retopo group window, anyhow I accept the defaults and the familiar 'not responding' pops up on top left - do I leave this overnight to complete or is this a normal situation? is it a quick process or a long one?
Hi
Before I start, thats one sweet model man really cool. The polycount doesnt look tooo huge but you do have a very multi coloured mesh, which kind of makes me think your UV Map might need sorting out. I think your model might be too complex for the auto mapping feature.
Besides that have you tried exporting the retopo mesh to an obj file, then importing it into the paint room? I realise that you should be able to do both at the same time while in 3D Coat but you might be having memory issues. When yuo are doing the export to the paint room you have (I think) a pretty high res voxel sculpt, the retopo mesh and then you will be adding to that another copy of that mesh for the paint room.
I would export the mesh to an obj file, close 3D Coat, start it up again with a new document and use the file, import options to import your obj file to the paint room.
I hope that helps, let me know how you get on.
John.
-
Hi Guys
I'm running a beginners course on 3D Coat this weekend. In it I'll go through creating a Voxel model, adding a mesh through the retopology tools, creating a UVMap and finally painting a simple texture.
It's aimed at people starting out with 3D Coat, to give an overview of the main tools I use and a look at the workflow I use.
More importantly this session is free, though there is a 5 person limit on the class. If it becomes oversubscribed I will run it again (probably the week after).
If you are interested, the Class is being held as http://www.3dhobbymag.com, who are kindly letting me use their facilities. If you would like to book a place look down the right hand side to find the events calander, click on the button on the 10th and book a place.
Hope to see you there.
John
-
Right now I don't think there is a way to create multiple materials. I have put in a feature request for this myself. Perhaps you might be able to export your model, create the materials or surfaces in another program, then import it back into 3DC.
Thanks Phil, thats not a problem, was just hoping I could do it in 3D Coat.
John.
-
Hi Guys
Hope you can help, I have made my model, added the uv seams and now have a couple of uv islands. The question is, can I assign those islands to different material groups?
Ta
John.
-
A big wish and work in progress... as I know.
oh well
I shall wait with baited breath -
ok so my brain has turned to mush but Im sure the option is here somewhere.
In Voxel mode I know there is the hide tool, which will hide polygons, but is there a tool that will let me paint a mask onto a model, like the freeze tool in paint mode? I'm sure I've seen it used but I may be confused on that score.
Thanks in advance
John.
-
Is there a way other then the hide tool to paint masks on the model and invert them? (Not by using an alpha but a standard brush?)
In the paint modes you can use the freeze tool, that uses the selected brush to hide parts of the model/texture. The Freeze tool also has an invert option.
John
-
Thanks for sharing those. they were clear and easy to follow.
No Problem
-
http://www.youtube.com/user/Fugazi3D
35ish minutes in 4 parts
making a pair of shorts -
While I am certainly looking forward to Javis' (Geothefaust) upcoming 3DC training webcast and DVD, I'd like to encourage/ask others here who have a decent grasp of the program, or certain aspects of it...and feel they can contribute, to consider helping others (especially those who have downloaded the demo and feeling/trying 3DC out) get up to speed quickly in 3DC by recording some of their own video tutorials. FWIW, I'm still trying to get comfortable with it myself, and will try to pitch in as soon as I can...
It can be workflow tips...especially in reference to your host application (Lightwave, 3ds Max, Maya, XSI, C4D, Modo, etc.), explanations of the UI and different rooms/modes, pros and cons of each mode, etc. The competition has plenty of training materials, and if this community pitches in and works together in this effort, the only glaring weakness of 3DC (training) can quickly become a strength and asset.
This will help the program thrive and the more it does, the more manpower Andrew can commit to keeping up this phenominal pace of development and squashing bugs. I can only imagine what v4 will bring! Let's do what we can to expedite that and help the community grow.

If you are on a PC, here is the link to Windows Media Encoder (free), and then a brief video tutorial on how to use it:
http://www.microsoft.com/downloads/details...PqHywb7sg%3d%3d
Your wish is my command
first couple of parts, though the youtube quality is aweful, the original is great
John
-
I've just modelled a cloth item in 3d coat for a bespoke figure in under half an hour, with a half decent uvmap.
Man I love 3d coat right now
the retopology tool rocks, it would have taken me twice as long to get a much higher poly version in Max. Not to metion 3d coat not even stuttering once while max would have had a fit.John.
-
email Andrew, support@3d-coat.com
Thanks loads


Texture Painting Resolution
in General 3DCoat
Posted
Right ho, I'll have a look when I get home from work.
John