

Displacement Map in 3DCoat
In this article we will describe some very important texturing aspects based on the example of the 3DCoat.
Displacement Map and Normal Map are two very important tools without which any textured objects would not look completely realistic.
First, let's try to understand what Displacement Map is.
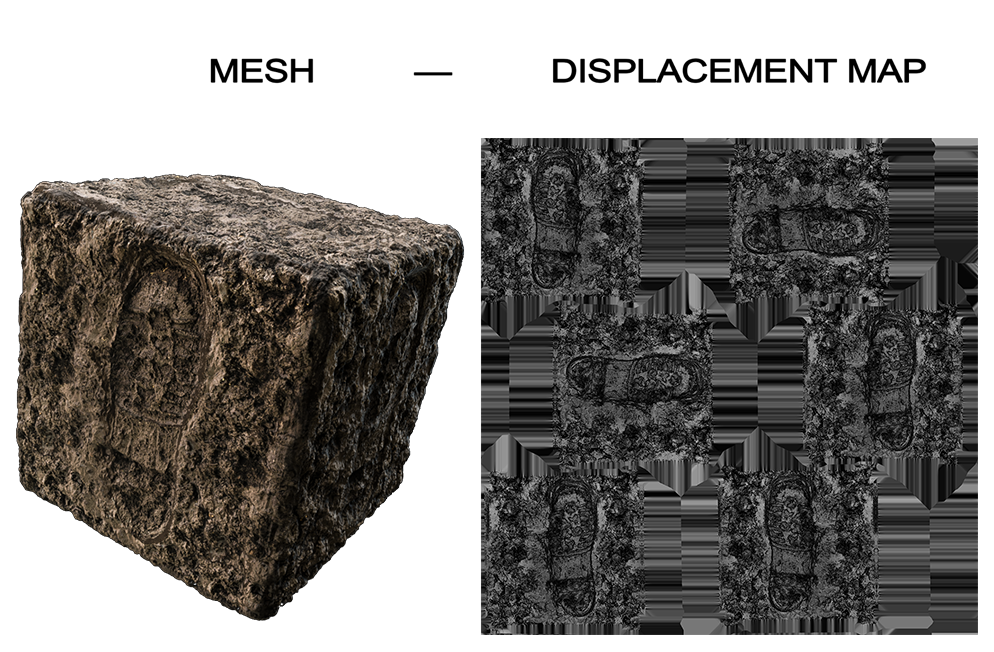
Displacement mapping is a texturing method that is different from parallax mapping, normal mapping, and bump mapping in that it uses a displacement of points (mesh) on the textured surface to create a depth and relief effect. That is, the polygons that you have on the object will move based on the map of height or depth map.
It gives new opportunities for textures:
- Shadows
- More detail
- Silhouettes
- Better sense of depth
HOW TO ENABLE DISPLACEMENT MAP
Download the depth map in the Smart Materials Editor.
Activate the displacement map via Show Displaced Map in the View tab, so the program will create a 3D displacement map using the depth map.
There are several ways how you can set the intensity.
In the Smart Materials Editor adjust the Overall Displacement Scale.
Or adjust the slider opposite to the downloaded Depth Map.
You can also adjust the power in the brush settings.
NORMAL MAP
Normal map is a map used to fake lighting to get depth and bump. This map is well suited for adding details to a model that does not have many triangles. You can use this map to significantly enhance the low-poly model, add more detail to it. This map is generally generated from a high-poly model and overlaps the same low-polygonal model.
In 3DСoat you can read the normal map 3D texture in the Sculpting Room in the shader settings or alternatively in layers in the Paint Room.
DISPLACEMENT MAP ON VS DISPLACEMENT MAP OFF
Displacement Map On:
Displacement Map has advantages over in that it has more features that help it look more realistic. So here it will look better: shadows, adds more detail, adds silhouettes and a better sense of depth.
Displacement Map Off:
But for the displacement map to look good you need a high-poly model. On a low-poly model, the displacement map will hardly be visible. Therefore, for low-poly models it is better to use other methods with bump map depth and other.
There are handy tools to edit the displacement map in 3DCoat.
-
With the Height Adjustment Tool you can adjust the height of the displacement map on any part of the model.
-
You can use the Shift Tool to move textures.
Once configured, you can export the 3D displacement map. To do this, go to the Textures -> Export -> Export Displacement Map tab.
So displacement map is a very powerful tool for creating realistic textures.
3DCoat has many options for creating quality patterns and textures.
