 Slovenčina
  English
 Українська
 Español
 Deutsch
 Français
 日本語
日本語 Русский
 한국어
한국어 Polski
 中文 (中国)
 Português
 Italiano
 Suomi
Suomi Svenska
 中文 (台灣)
 Dansk
Dansk Türkçe
 Nederlands
 Magyar
 ไทย
ไทย हिन्दी
 Ελληνικά
 Tiếng Việt
 Lietuviškai
 Latviešu valoda
 Eesti
Eesti Čeština
 Română
 Norsk Bokmål
How to non destructively re-import a different UV layout for your mesh without your texturing breaking
3DC project layer paints & materials onto the model to be able to re-project in case of UV layout changes.
Do you have a painted mesh…
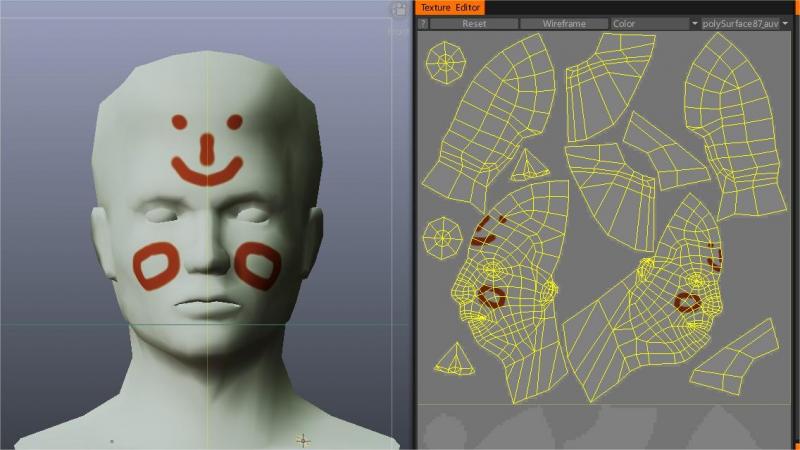
…but need to replace the geometry because UV layout changes ?
Follow this steps:
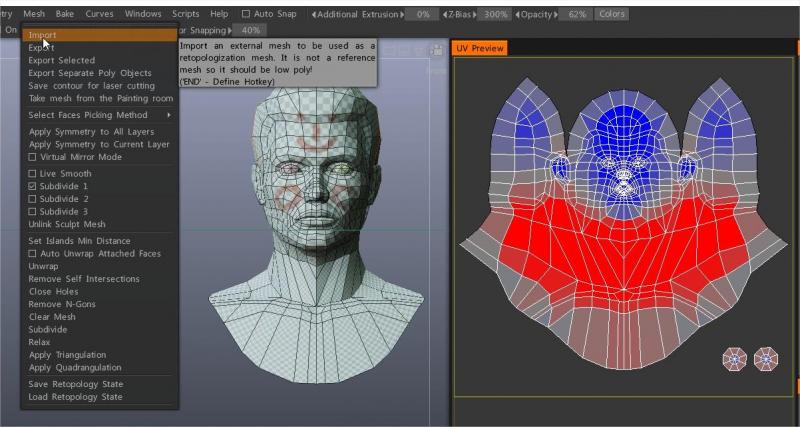
– Switch to Retopo Room and Import external mesh
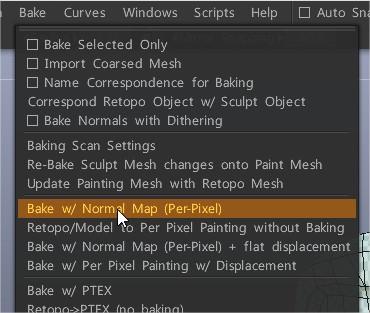
– Bake object for pixel painting
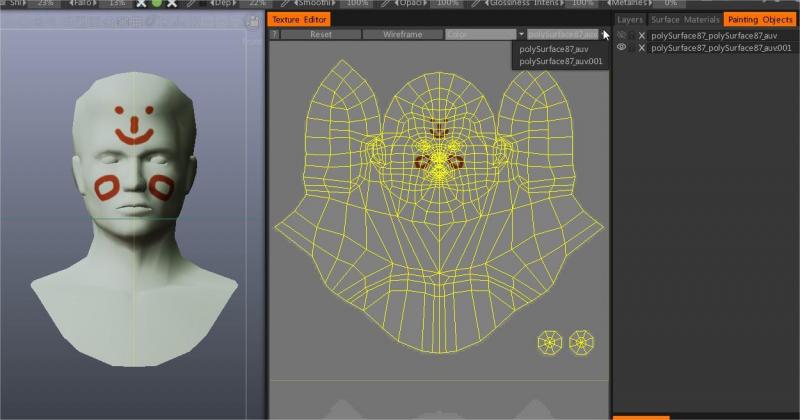
– Switch back to Paint room, now you can see 2 UV layouts with old textures projected into the new mesh
– Delete the old mesh and continue working
Am I able to get the previous paint work from the old model onto the new model with UVs fixed ?
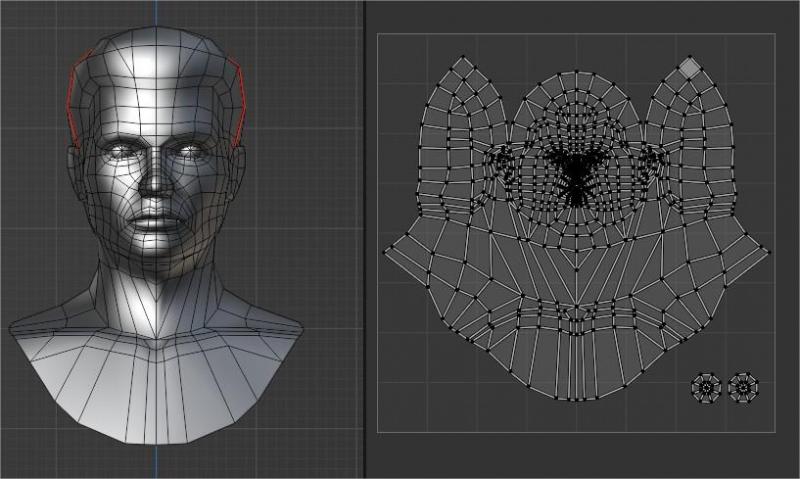
Suppose you created the model and loaded it to 3DCoat for uv mapping. After marking seems on most of the object noticed that the model had some duplicate mesh stuff going on.
So saved the UV map with the Save button in the UV room, went into external app and fixed the error by deleting some faces.
Started a new 3D project and imported the mesh again.
Went into the UV room and used the load button, chose the UV map you had saved.
When it loaded all seemed to be good, until you noticed that it loaded the old model with the duplicate geo.
One solution will be:
1) Go to the Retopo Room (to do our Mesh Editing) > from the Retopo Menu, choose “Use VISIBLE Paint Obejct as Retopo.” This will bring the object into the Retopo room for mesh and even UV repairs/modifications.
Clear any duplicate meshes > check to see if the UV’s are good to go in the Retopo Room (has a mirrored set of UV tools and no need to click APPLY UV CHANGES like you do in UV room).
If everything is ok in Retopo room, you can get the modified mesh back into the Paint Workspace one of two ways:
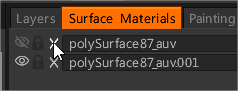
Go back into the Paint Workspace and delete the problem meshes (so we don’t have duplicates) from the Paint Objects or Surface Materials panels. Once you do this, at the bottom of the (Paint) layer panel, the last icon on the right will clear any unused paint layers. This is all a house cleaning measure.
Now we are ready to merge the modified mesh to the Paint room. Go to the Bake menu and choose “Retopo to Per Pixel Painting.” This sends a copy of the mesh directly to the Paint Room, and you should be good to go.
Another solution will be:
If you desire is to create seams, not adjust a model with a uv set already created, previous method is good and very valid on your current problem.
This method starts with a clean mesh, so for future work it could be a better option that going to the uv room first. This depends upon your workflow of course…
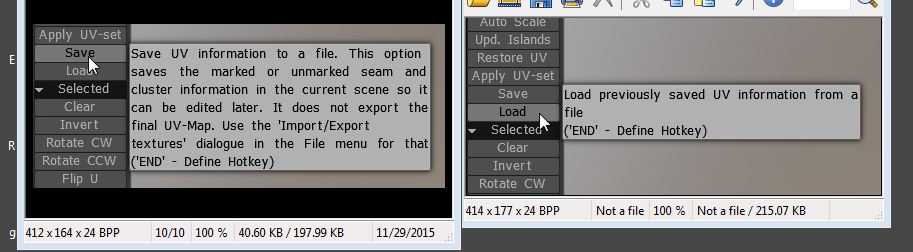
To fully understand the function of the Save and Load functions in the UV-Room, look at the picture with the tool-tips. The save function here is mainly for keeping your uv seams selections in a special file.
Notice the special extension “UV” and is not a regular obj file.
So there is a better workflow for creating seams for models that do not have a uv-set.
The method uses the retopo room instead instead of the UV Room. The UV room is good for adjusting a model that already has a uv set and textures.
Say you need a better uv-seam layout. You create your new uv seam layout and save that layout, it is updated in the Paintroom and the textures are transferred to the new uv set without destroying them. Special care though has to be taken if there is normal map information with the model in how you rearrange your uvset but that is not the topic of this post.
The below works best for creating a uv-set for a model that has no prior uv set creation. In this method, make sure your model has no errors.
Use the Perform Retopology under the New Menu. Look at the 4 ways of importing the mesh closely. One of the top two are the best in this case.
Next go to the Retopo room, Import your mesh using the import function under the Retopo Menu. Choose no on snapping the retopo mesh, there is no need of doing that in this case.
Create your seams and unwrap.
Side Note: if you have errors in the mesh, yes you will have remove the error mesh from the retopo room and re-import the corrected one. You of course will lose your former seam selections. 3DC assumes you have a clean mesh to start with.
Export the model and its Done.