


Pix Jigsaw
-
Posts
201 -
Joined
-
Last visited
Content Type
Forums
Calendar
Gallery
Posts posted by Pix Jigsaw
-
-
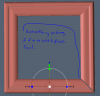
I've been having fun with the lathe tool.
This doodle is all 3D coat. Used Lathe for the cookie jar and lid. Text tool for the text + move tool and transform for fine adjustments to the text letters. Curve tool for the tentacle using 3D Coat tentacle spline. I painted each vox layer in the paint room. If I made this again, I would up the rez level for the text. They ended up a little jaggy.

-
@ Philnolan: I would say Digman made a Wangleblat. Or maybe it's a Phufsnuffer.
@ Digman: Thanks for pointing out the details slider. It helps a lot. Glad you finally got the lathe in the Linux version.
-
Khay, a picture of your problem would be helpful. Can you post an example of one of the pieces that isn't working well A before and after picture if possible. Maybe there is a simple work flow that could be developed to meet your needs without you having to become an expert in 3DCoat.
-
Those fins look great!. This one is really progressing well. The 3D seas will not be safe for swimmers when this guy is finished.
-
I think the expression on Jean Reno's face is that of a person deeply contemplating the plight of the blobfish. Nice work on both pieces.
-
@ LucidMovement. No obvious lack of observational skills on your part. There is a lot going on in 3D Coat in terms of tools, settings and features. For lathe, you have to go to the right room (vox), go to the right tool (primitives), and press the right button (lathe) just to see it the controls.
@Andrew and Wave of LIght. Thanks. Appreciate the kind words.
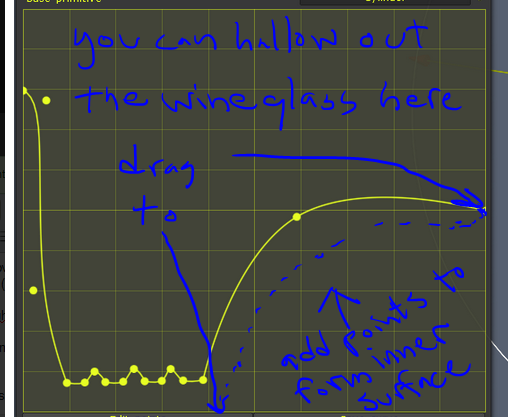
@Denis. Thanks for posting that up. Your post proves that the lathe tool really qualifies as a lathe too. You have to be able to make a wine glass for a 3D programs lathe to be worthy of the name. I see you took the practical approach of subtracting a primitive to make the inside of the glass. A really good approach. You could also modify your curve to achieve a similar effect.

@ Anyone. Where is the details level slider that Andrew mentioned in his post? I can't find it. I'm using version 4.0.5
-
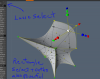
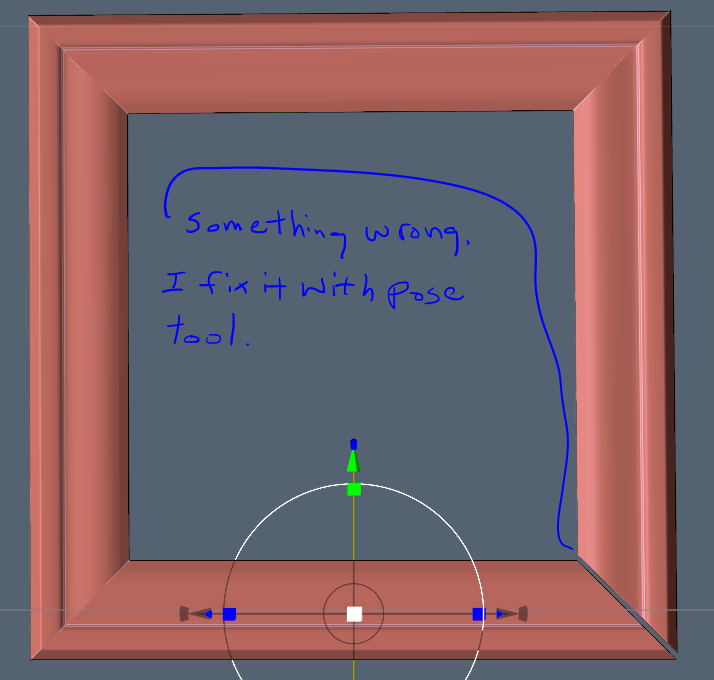
@ Tony Nemo Thanks! Lathe tool is a great addition to the tool set. I'm thinking lathe for a simple primitive shape, then move tool and pose tool will be really powerful for sketching out quick ideas.
Here is a quick hat primitive and the curve that made it (with my notes for improvements next time).
Edit.... Same song, different verse.
-
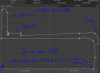
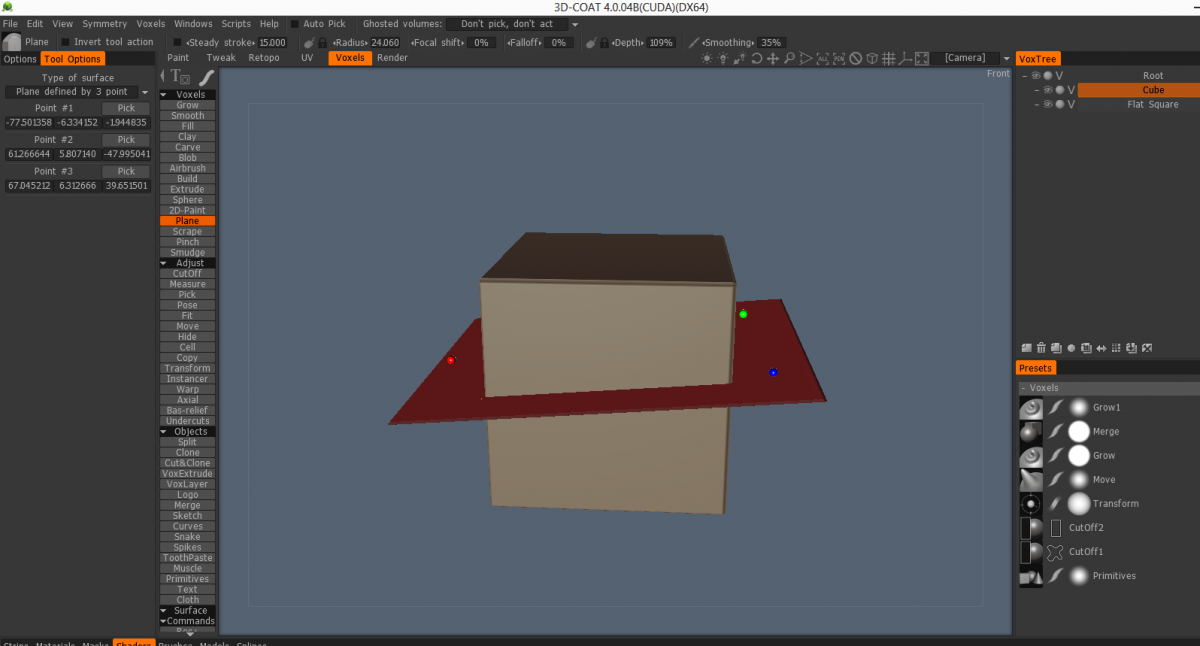
Here is a method for making architectural moldings using the lathe tool to shape the profile of the molding. I use it in the illustrations below for making a quick picture frame.
1. Working in surface mode, I made a profile using the lathe tool
2. Then I use the cutoff tool to get rid of the parts of the shape I wasn't going to use.

3. Next I cut 45 degree corners on the molding using the cutoff tool and the 2D grid.

4. I brought the piece into vox room and used the axial tool to create the other three pieces of molding and position them into a frame. There was some imperfection and I could not line up one corner perfectly. I used pose tool and cut and clone to fix it.
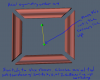
5. Imported a 2D image I had made in the past for the picture. Textured the frame using vertex paint. I set the material in the paint room to a photo of some wood I had taken and just painted over the frame quickly as a test. Nothing fancy. Overall the work went very quickly and the result is not to bad, at least as a test project.

-
 1
1
-
-
I have found that the lathe tool is more responsive and less laggy when used in surface mode. I use it there now and bring the shape back to voxels if needed.
-
@ Fantome Looking forward in seeing this project develop. Your last one turned out well.
@Garagarape Very funny!
-
@ Existe. Here is a post from someone who imports a base mesh from another program and then works in 3D Coat. Beautiful work. I think what he is talking about there is relevant to some of your questions. http://3d-coat.com/forum/index.php?showtopic=11258&hl=
-
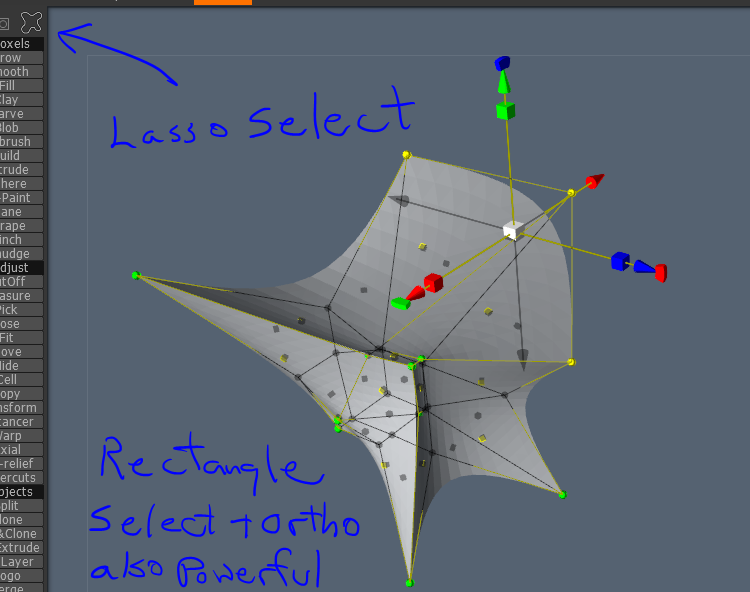
@ Tony and Stu. You can lasso multiple elements of the lattice to select them. Go up to the e-panel and select the draw contour mode. Works just like a lasso.
-
1. I am by no means an expert in any 3D modeling package, but as I am gaining experience, I find some things are easier or more fun to do in Blender and others are easier and more fun to do in 3D Coat. Personally, I love working in the 3D Coat Vox room. On the other hand, if you have developed a lot of skill in some other modeling program, you can leverage that by building the base mesh in that program and then importing to 3D Coat.
2. The subdivision thing is this balance between having enough resolution to handle the level of detail you are sculpting without having so much that your computer bogs down and performance becomes unacceptable. In a perfect world you could just work with massively high resolution all the time with zero lag. In the real world you have to compromise and find the subdivision sweet spot.
3. I don't do much organic modeling and don't work in surface mode that much. So for me, vox room tools/brushes I use most are Grow, Smooth, Extrude, Pose Move, Transform and Primitives. I'm starting to use curves much more lately as it slowly dawns on me how powerful the tool is. I use invert tool and do a lot of cutting to create my models. Block in with primitives and hack away using invert tool and e-panel modes like the rectangle. I work in ortho mode a lot while doing this.
Things I wish I knew when I started Wish I had spent time exploring the e-panel options right from the start. You will never harness even a small fraction of 3D Coat's power without having a solid grasp of the e-panel modes and settings. Another one: I wish I had understood how powerful the Move tool was. I also wish I had known about select with pen mode in the Pose tool combined with the e-panel rectangle mode and the e-panel boarder width setting.
Good luck as you gain skill with the program. It is very much worth the effort.
-
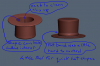
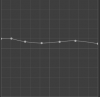
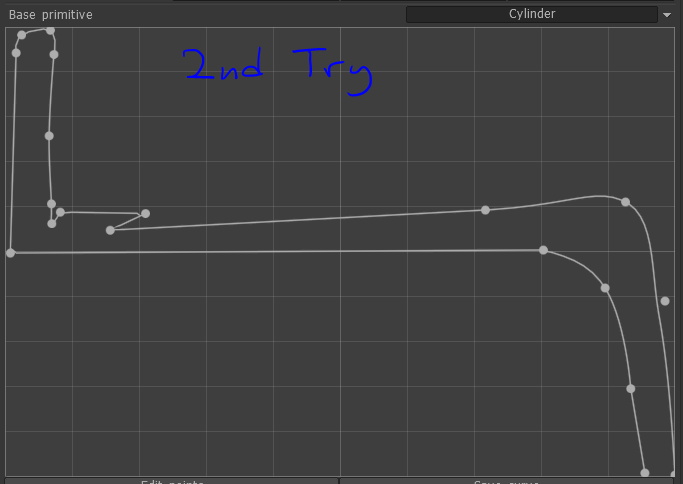
I'm finding the lathe tool very useful for hard surface modeling. Here are some things I have learned:
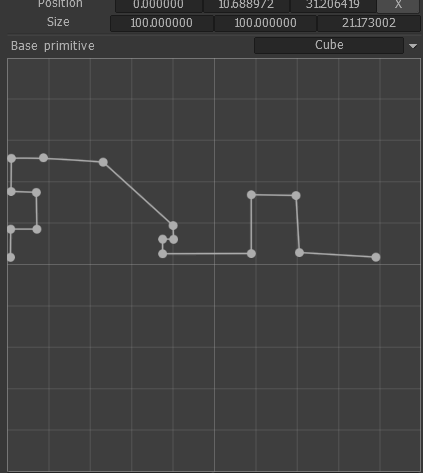
First tip: Try right-clicking on the points in your curve. It changes the shape of the lines between the curve points. One mode gives you straight lines between points. It is not the default, but it is very useful if you want to make grooves and channels in your object. It is also useful for making chamfers. Here is an object and the lathe curve used to make it.
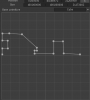
Note, that while creating the curve, you also have the transform tool in the 3D window to modify the shape of the object before you press apply. You can scale it on the X, Y, or Z axis to adjust the shape of your object.
If you want to place points in your curve more accurately, make the Tool option windows big. That will make the grid you draw your lathe curve on larger and you will have more room to place points accurately.
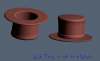
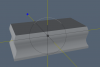
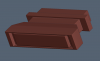
Here is an example of some simple door hardware made with the lathe tool.

One other thing to remember with the lathe feature: You can perform Boolean functions by setting the primative tool option to add, subtract, intersect, etc.
One problem I noticed with the lathe tool is every time you move a point on the curve, 3D-Coat recalculates the entire orbject, to show a preview of the shape. This is good for visualization with simple objects, but if the object has several million voxels, moving curve points becomes very laggy and difficult. It would be nice if there was an option to turn off the preview so you could make a complex curve, then turn the display back on to preview the object.
Has anyone found the lathe feature useful? Do you have any tips, ideas, or examples?
-
2
-
-
The new lathe features in the primitives tool works really well for adding fillets, bevels, and other decorative touches to cylinder shapes. It has Boolean capability. Very nice.
I also agree that pose tool is extremely powerful, but its power is not quickly seen. A lot of things have to come together before it comes into its own. You need to think e-panel modes, border width setting, paint with brush mode in the pose tool itself. The result is so very dependent on the selection you make, how sharp or blurred the border of the selection is, etc.
-
Welcome! Would love to see a tutorial on your workflow.
-
What? You don't like the indoor tanning feature of 3D-Coat?
-
Great work. Very inspiring.
-
That which is hidden must nevertheless exist, the code of the obsessive-compulsive 3D modeler.
-
1
-
-
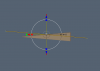
This is all vox and shader. Blade is made with the plane tool.

-
1
-
-
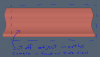
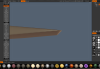
Credit to AbnRanger for the idea of making sharp vox edges with the 3 point plane tool.
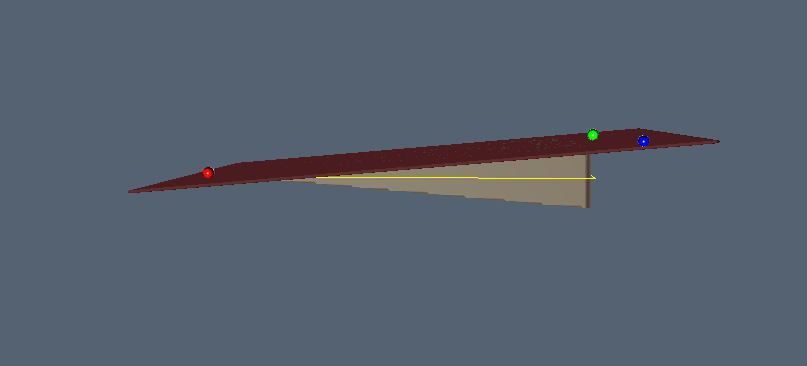
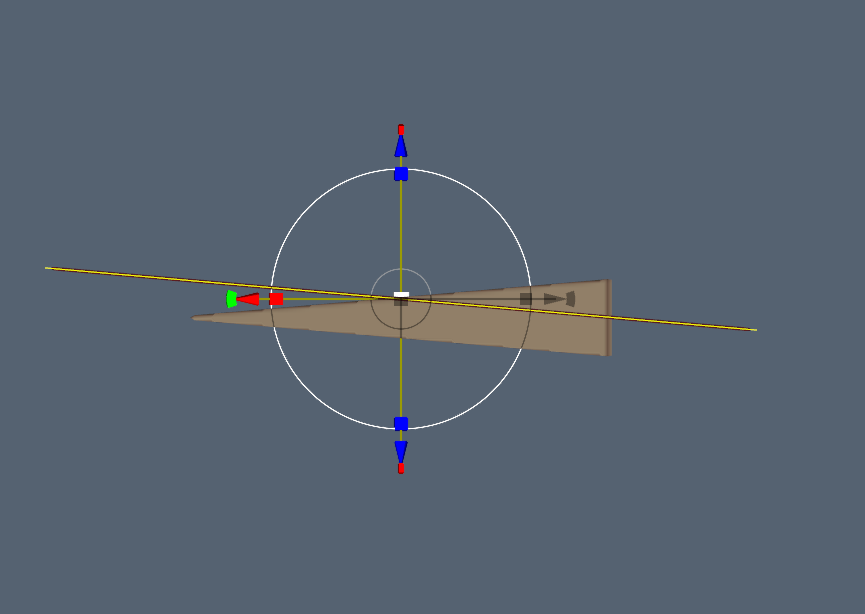
Here is a method I'm developing for making a sharp vox knife edge.

The red shape is basically a jig. I manipulate it with the transform tool to where I want it. It lets me easily visualize where the plane tool will cut. It also lets me quickly place the three points that define the plane. Here I have it set to 5 degrees of angle. I use symmetry in this case so it only takes one cut to sharpen each side.

When I'm done cutting the first side, I rotate the red square 180 degrees with the transform tool. Now I use it to set up the next cut with the plane tool.

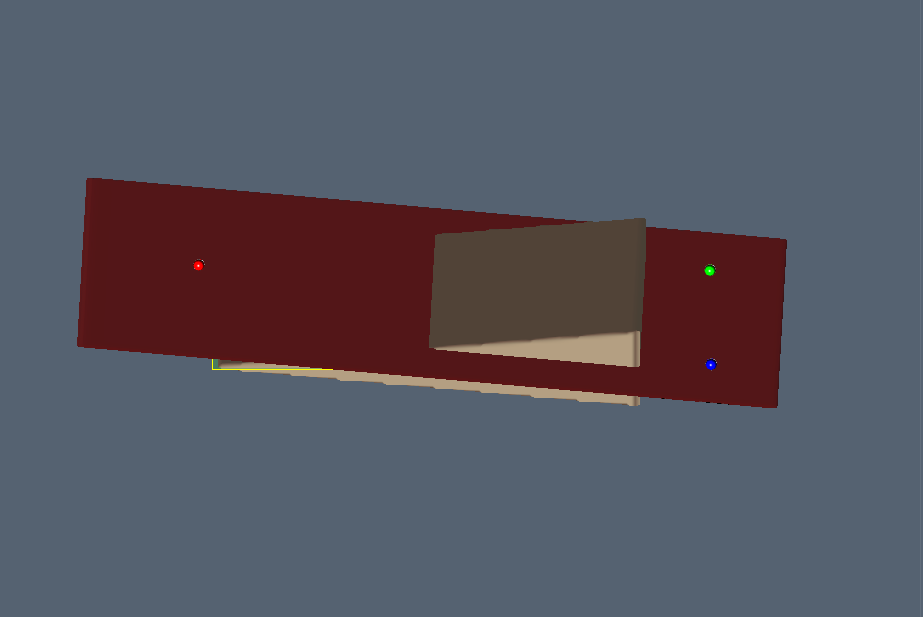
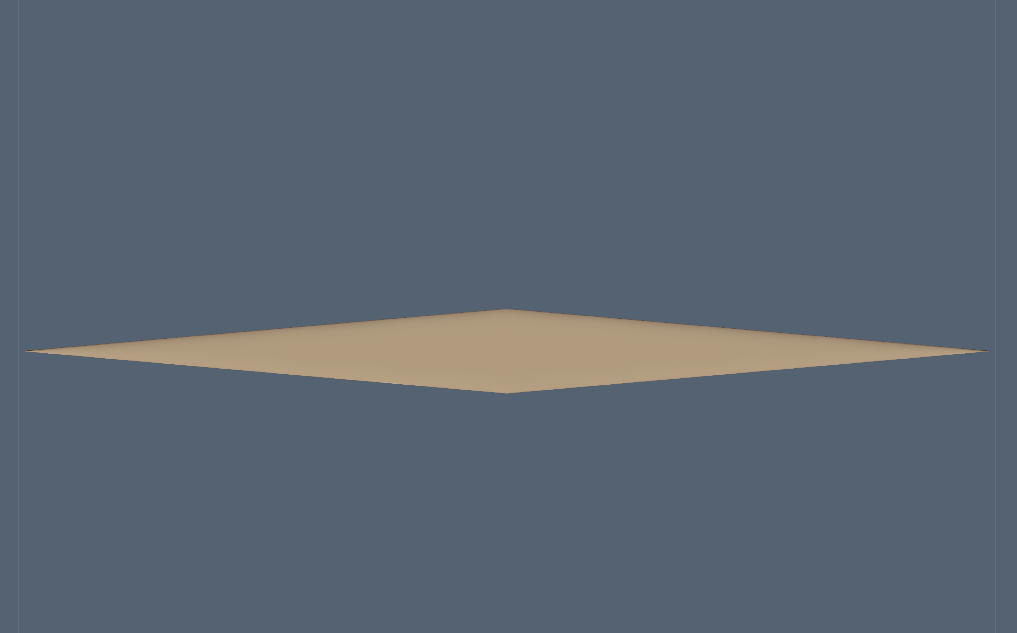
Here is the final results

-
1
-
-
@ tony. Thank's for the info on Reference Image. I'm giving the demo a try. I like the way you can work through the image. Great for cutting out things.
@garagarape Thanks for your kind words. I've been getting inspired by your WIP thread, too. Here is another look made from that 3D render, above. I made it very simple.

-
Kenmo. Blender has NURBS modeling. That and polygonal modeling with subdivision surface. It's free, so it's worth a try even if you ultimately choose something else. It, combined with 3D-Coat makes a pretty awesome tool set.
Here is a Porsche 911GT3 RS car tutorial for Blender. Maybe see if you like that way of making a car: http://www.youtube.com/watch?v=o9STM6bje9Y. You could still use 3D Coat for painting, UVs, adding fine details, etc.
-
Really nice work. The texture looks fantastic. I'll take two loaves and a half-dozen croissants, please.


Gbball's sketchbook
in Finished Projects
Posted
Nice work. I admire the skill you have.