


lord_quas
-
Posts
65 -
Joined
-
Last visited
Content Type
Forums
Calendar
Gallery
Posts posted by lord_quas
-
-
Yeah that fixed it, thankyou Taros!!!!!
-
This is as close as I can get.
Im using the latest beta btw.


-
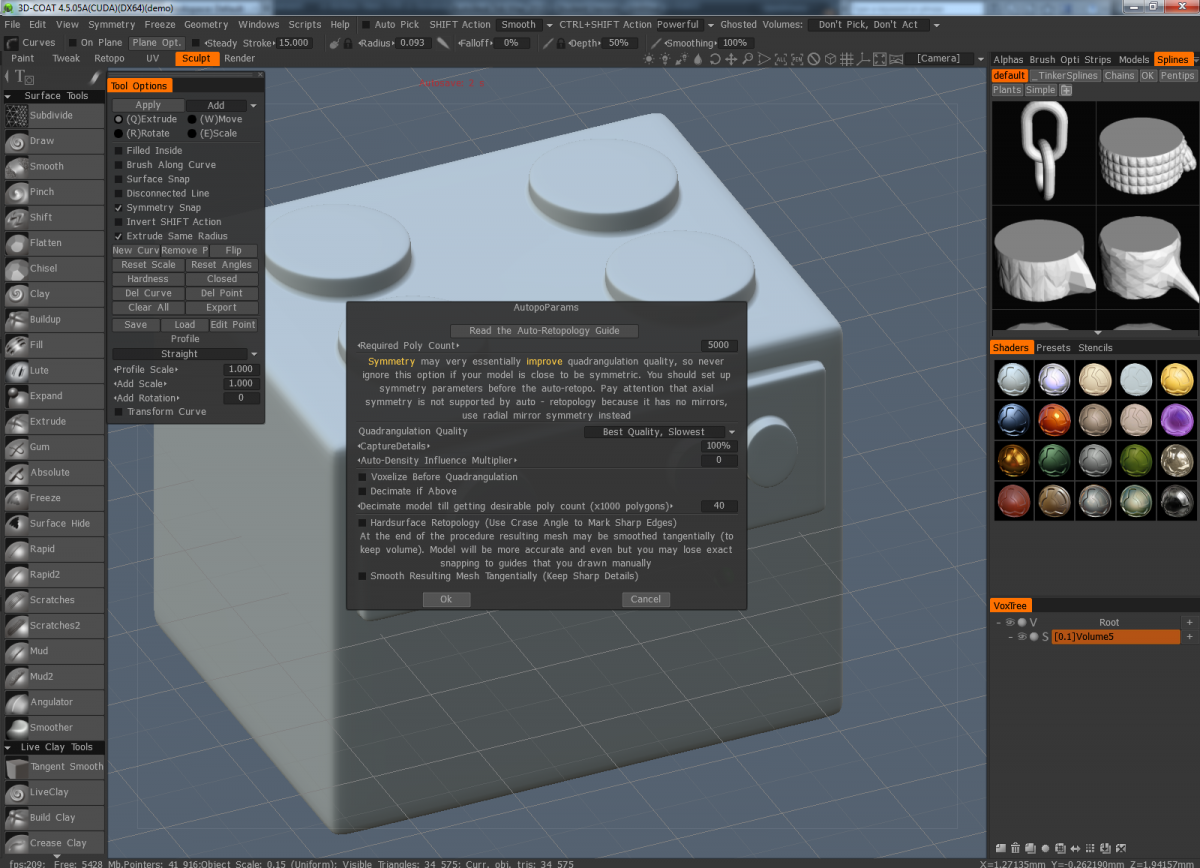
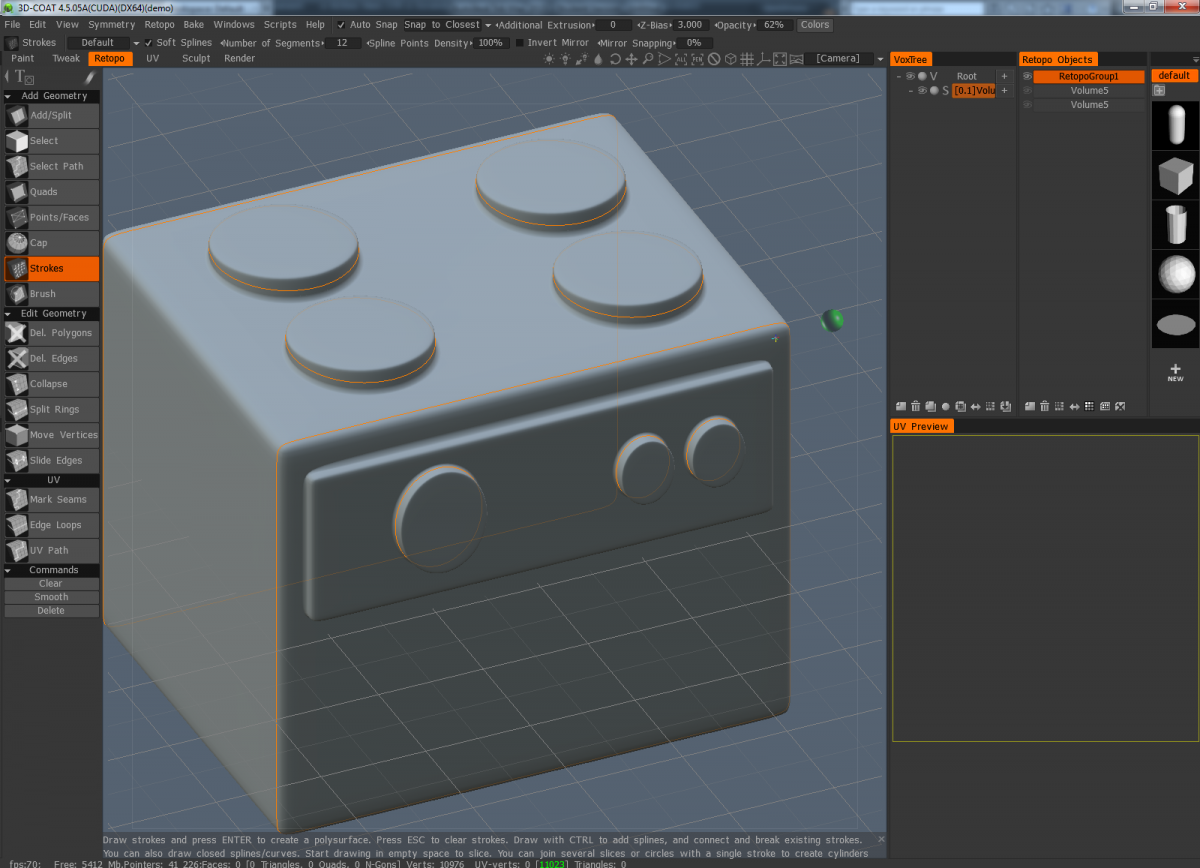
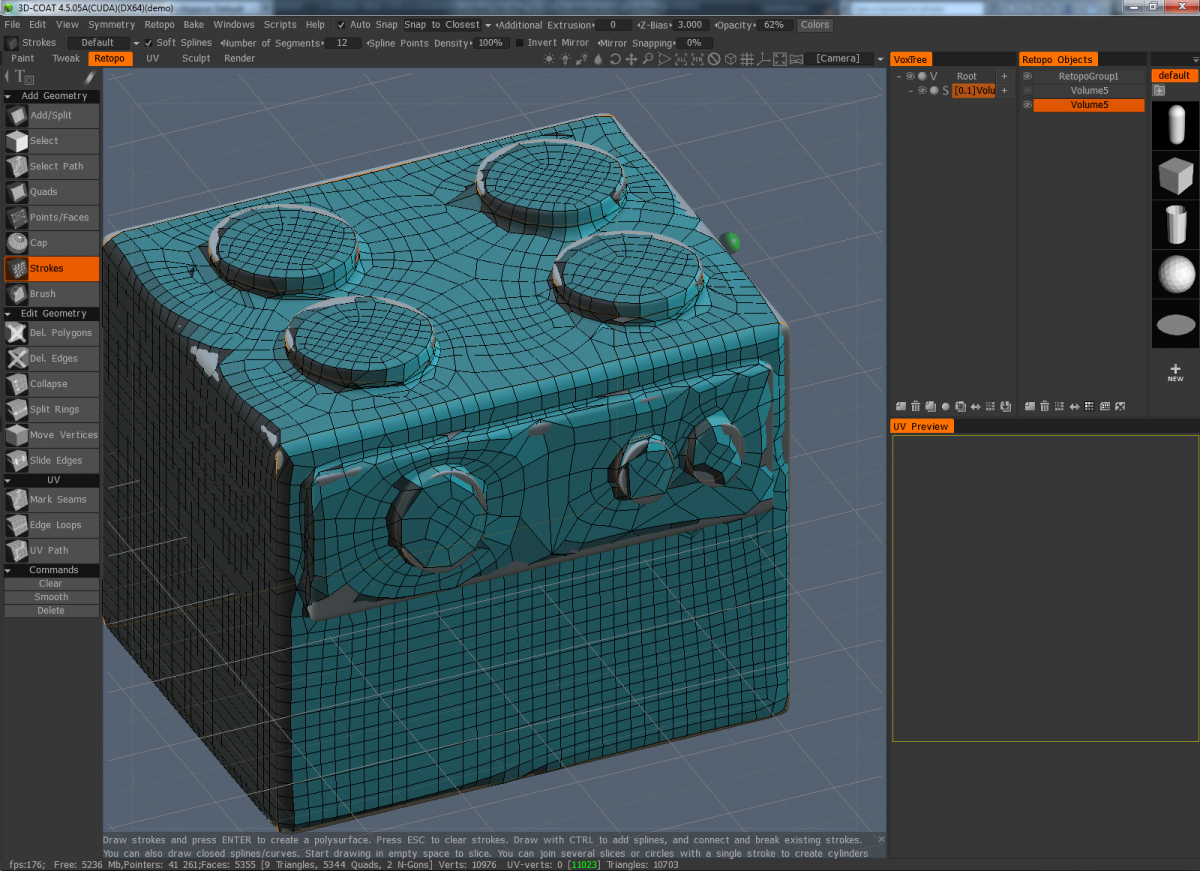
Hey guys,
I seem to be having some real noob problems with the autopo tool from the sculpting room.
I cant get any clean results.
I can get it in zbrush but not coat. I have attached the mesh I made in modo that im just playing with so if anyone can give it a whirl and tell me how to get the same results in Coat I would be realllllly appreciative.
thanks guys.
p.s yes its a boring oven

Adding curves doesn't seem to help either
-
Hey Tony,
Scaling down is on the Y is available but if you try it its very unpredictable and doesn't scale down to 0 it actually fluctuates in either direction and is a science to get it to flatten them out. I would like something easier to use and more accurate like in 3D max.
Click on Transform tool and scale down i the Y axis. Also, with images, select "More Reply Options" next to "Post" and upload your screen capture.
Example attached
-
-
I really need a work around for this bug, Its causing me porblenms in the studio. I have another example at work that I need to modify an external normal map on the model.
How far are we away from a fix on this?
If there is no current fix yet or work around, can we increase the severity of the mantis bug to high from minor?
Thanks
-
As this issue is stil open on Mantis that means the fix for this is not in 3D-Coat 4.5.02? is that correct?
-
Hopefully its not a big fix code side. Once its in Mantis, is there a estimation of time given?
-
I believe I can confirm this because I can't find a way of erasing parts of external normal map too. (BETA20)
That is exactly my issue, When importing an external normal map you cannot erase it using the erase brush over the model like you should be able to. Can you confirm and is there a way to solve this
-
Starting with the obvious is the best place.
So layer is selected, im in 4.5 and using the Erase tool with normal selected.
If you import a normal map then try and erase it using the brush tool on the model does it work for you
-
Hey guys,
We have 3D-Coat at work now and im blocked on a asset im creating so wonder if you can help.
Steps:
1. import normal map into 3d-coat
2. Attempt to use erase tool with normal map setting and use brush on 100% on model
Result: Nothing happens or a very light effect, not 100% erasing.
Expected: Using the erase tool deletes all under the brush when passed over the model.
If I create a new layer and paint with normal then use the erase tool it works correctly.
Thanks
Matt
-
For my most recent hard poly modelling its been:
3dMax (low poly, crease the lines, duplicate then turbo smooth then export high res)
3D-Coat (on turbo smooth results bring in as surface and use live clay with the Curve tools to put in lines and details) and paint a id map
Substance Designer (create a base coat of metal and scratches with the filters)
3D-Coat Use the PBR effects to paint damage or wear
Create low poly retopo in Max and import as retopo in 3D-coat then bake all (the only software package I know that transfers all maps to another model(inc roughness and metal) with different UV's)
Im still happy with its results. Also got my company to buy 2 floating licenses.
8900 Triangles

1400 Triangles

-
Tell me if this is already available but I would like the ability to move the verts of the retopo mesh whilst im in the quad mode creating polys.
This is so I wouldnt have to change tool to the SELECT tool to select a vert and move it.
It would really speed up my time.
Thankyou
-
HAHA, now dance!
-
Hey Carlosan can you repeat the question.
Smartened it up in Marmoset and refined the render for my portfolio
bipmatt.com
Voxel/surface model, retopo, uv and normal map creation in 3D-Coat
Texture substance in Substance Designer and render in Marmoset Toolbag.


-
 2
2
-
-
Taken me abit more time that i initially thought but I really polished it. Theres still a couple of things I want to go back and tweak.
Voxel surface modelling in 3D-COAT
UV unwrapping in 3D-COAT
Normal map Painting in 3D-COAT
Texturing in Substance Designer
Render in marmoset toolbag 2


-
3
-
-
Nice, nice pices
what was the surface count on this final one?
Some progress...

-
Hard Surface Modelling completed. roughly 17 hours its taken me. Is that a good time, how long would you estimate guys?
-
2
-
-
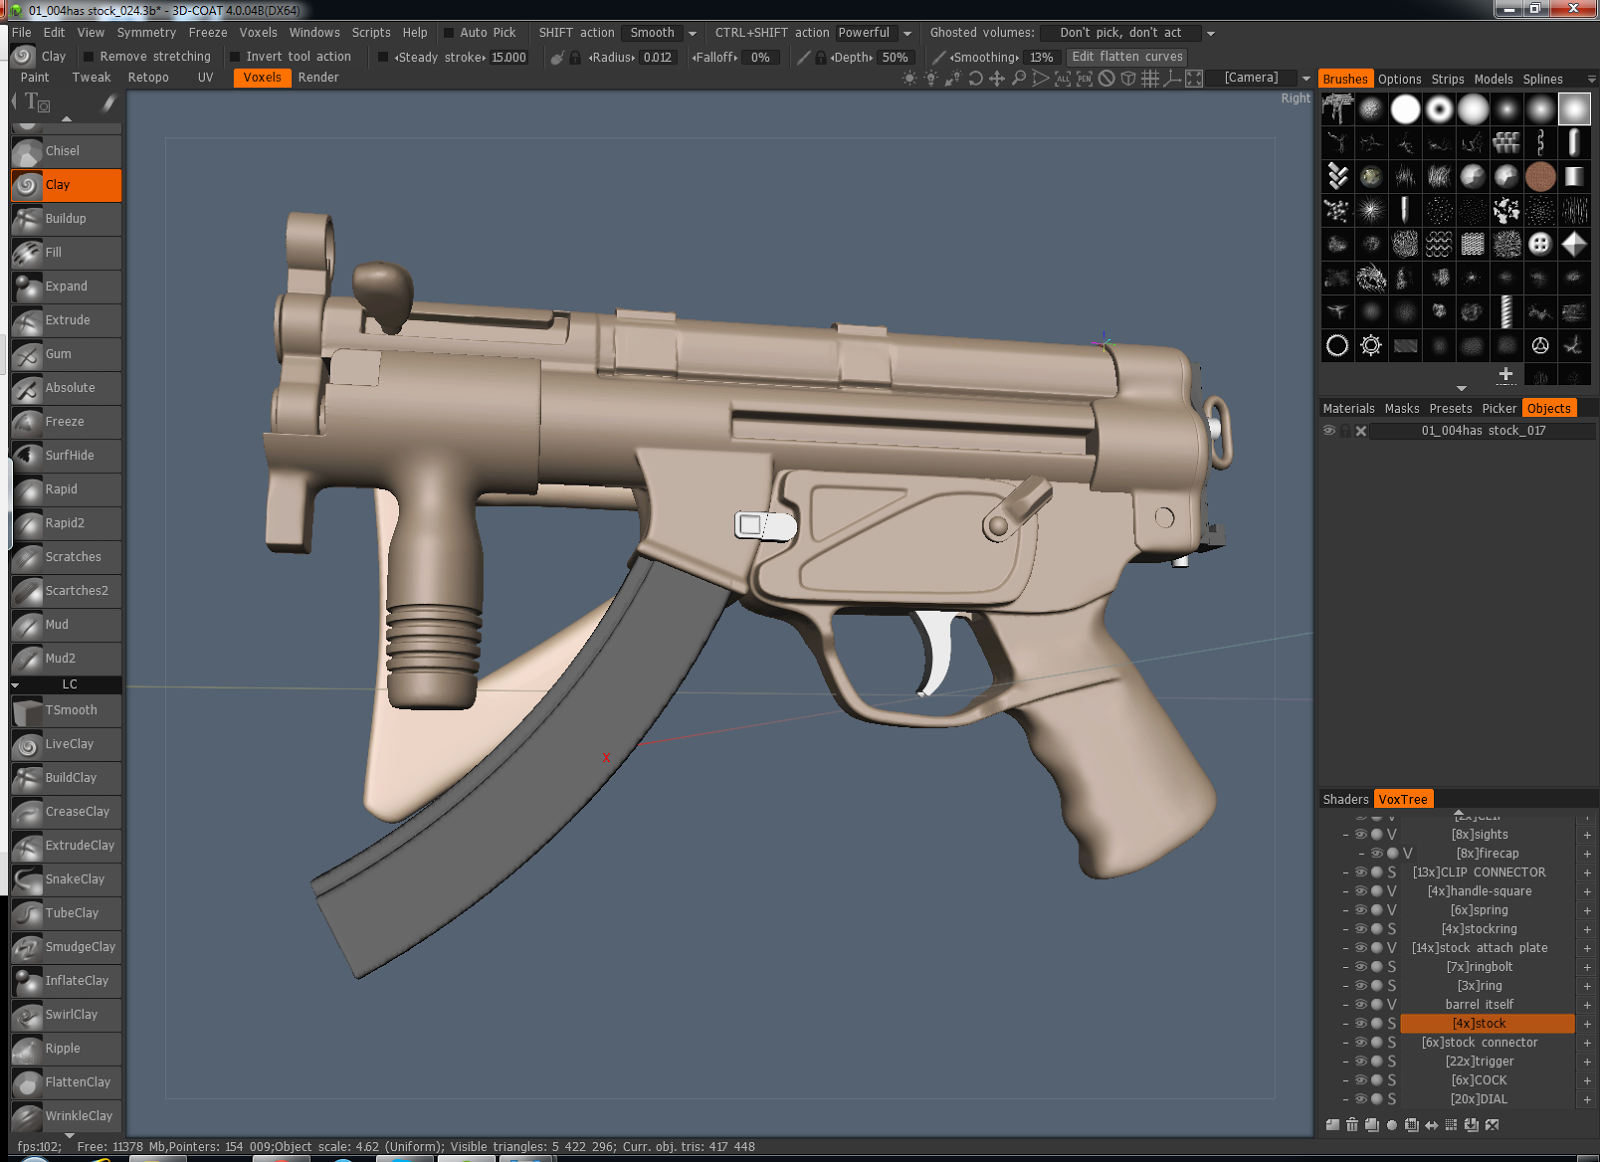
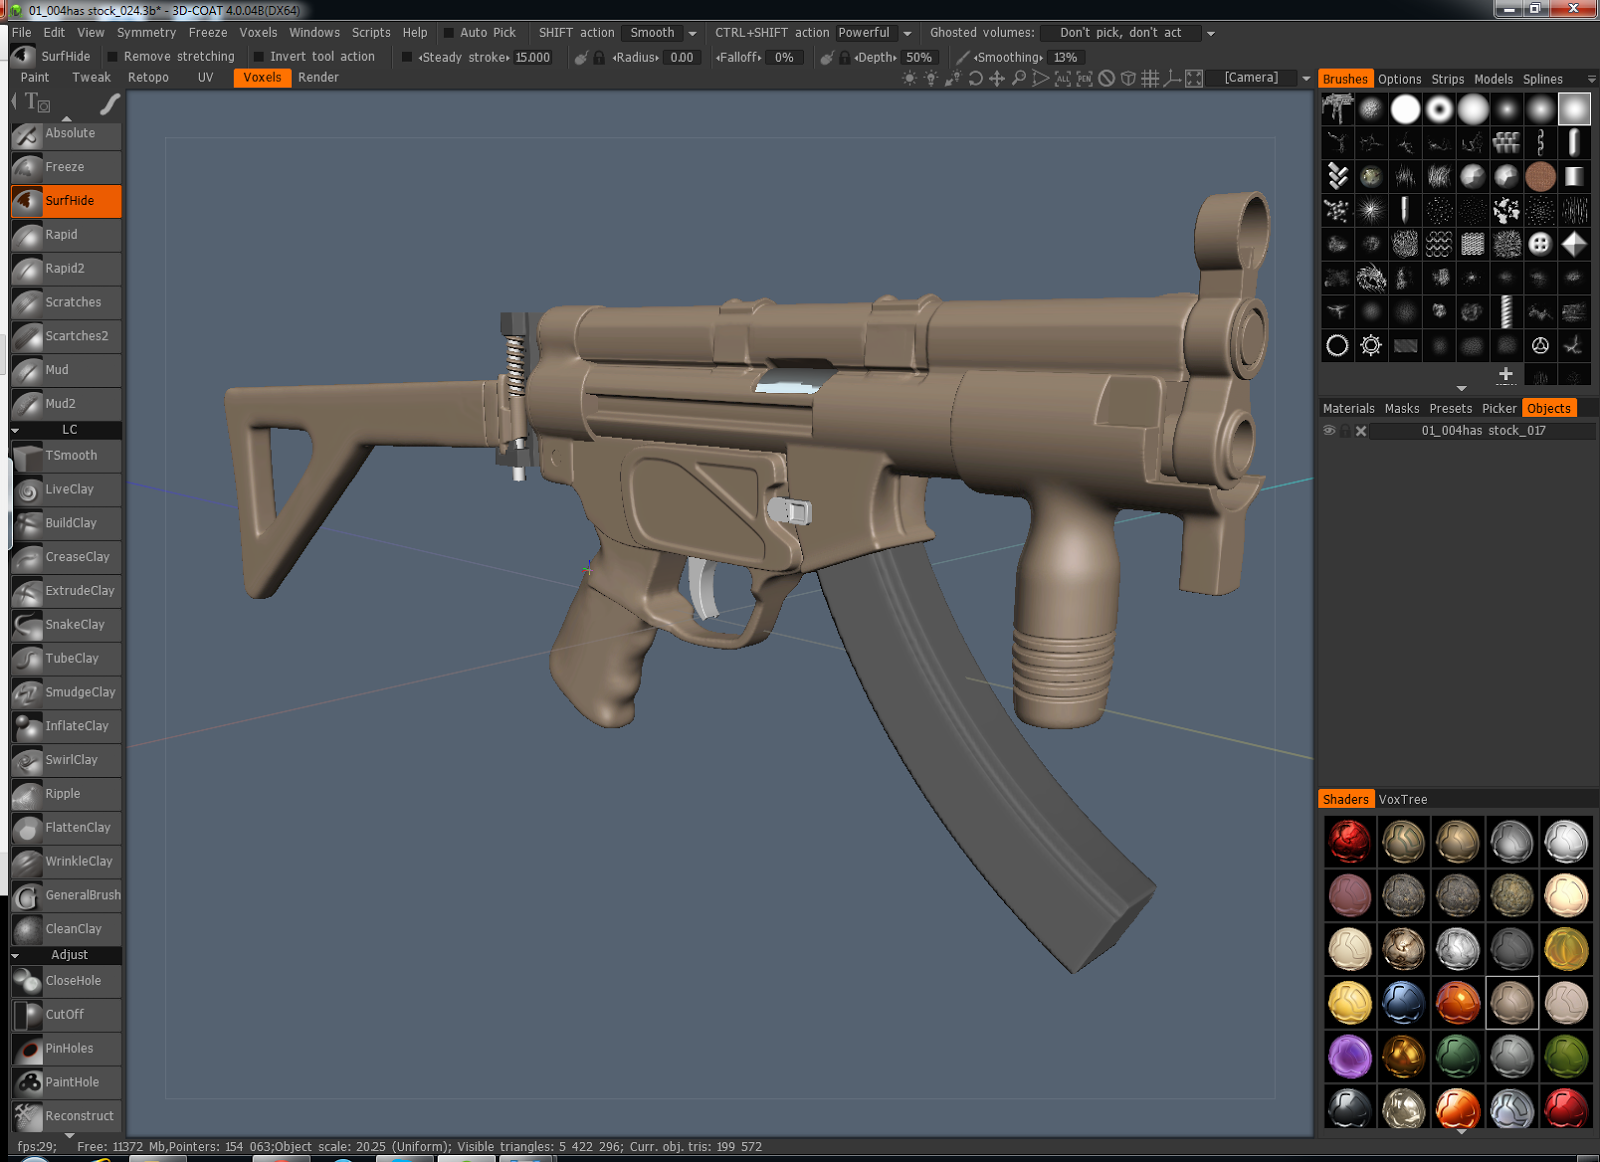
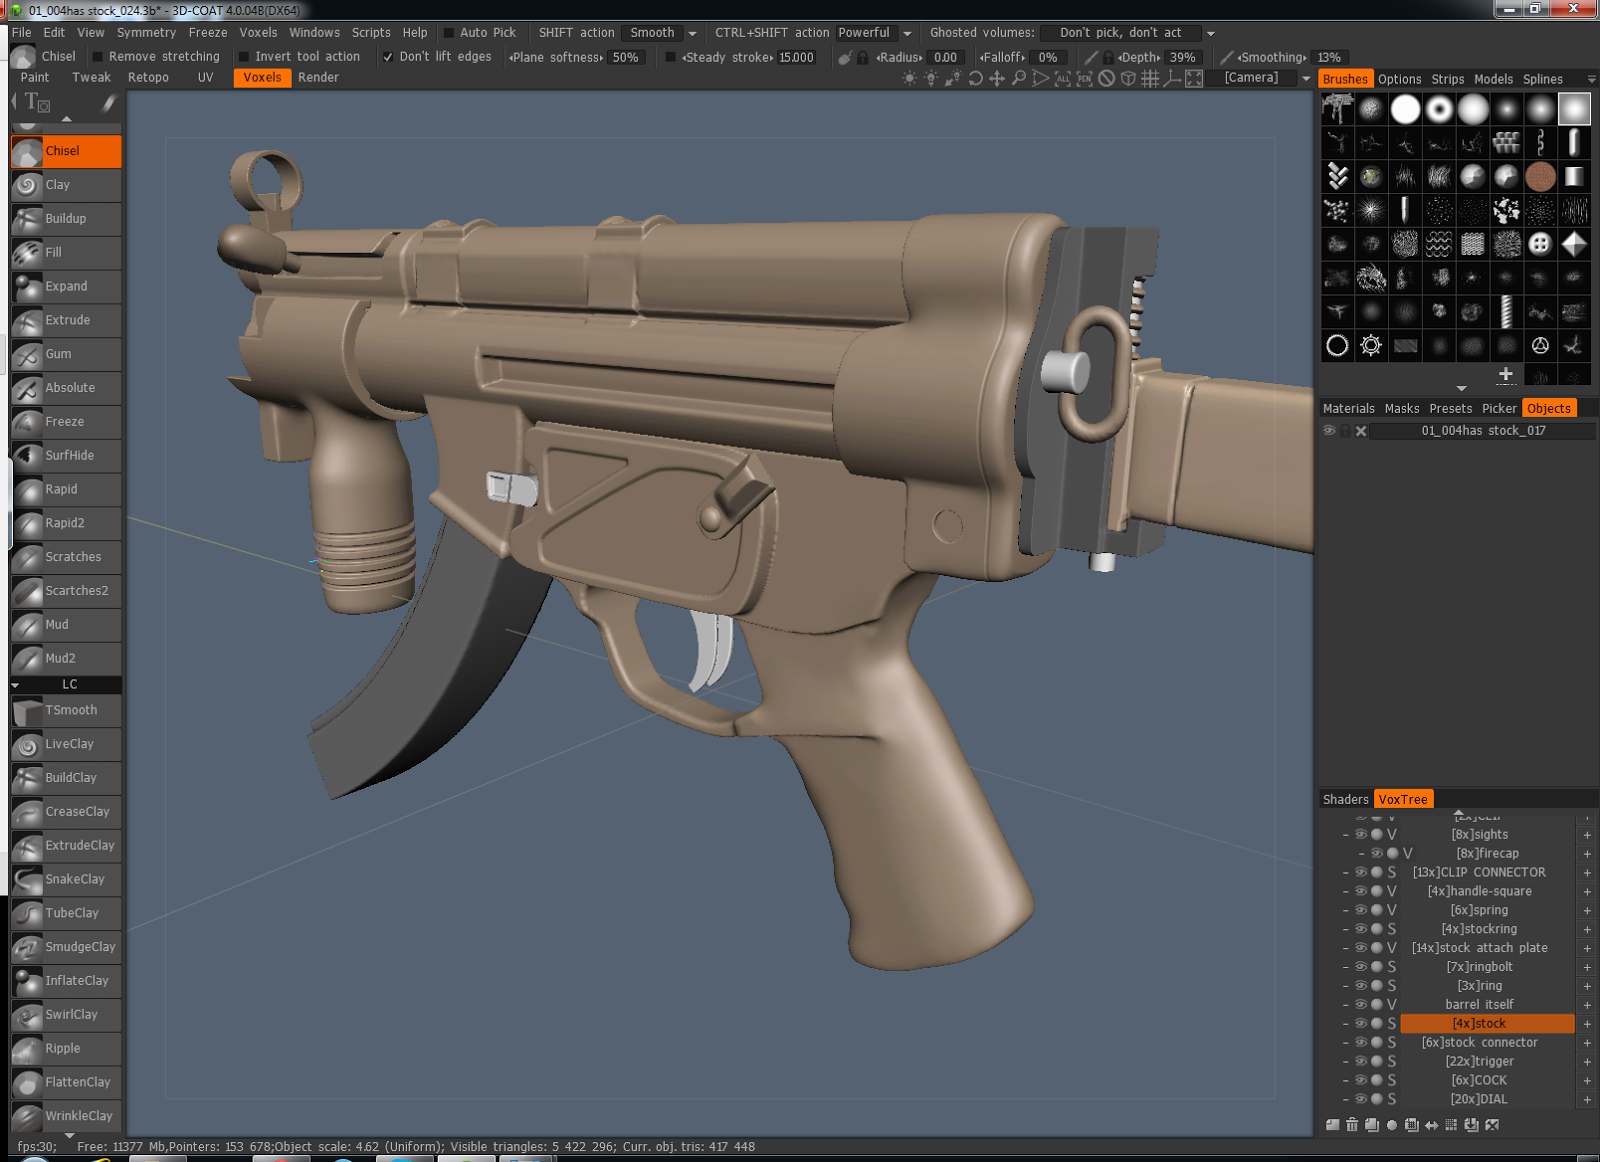
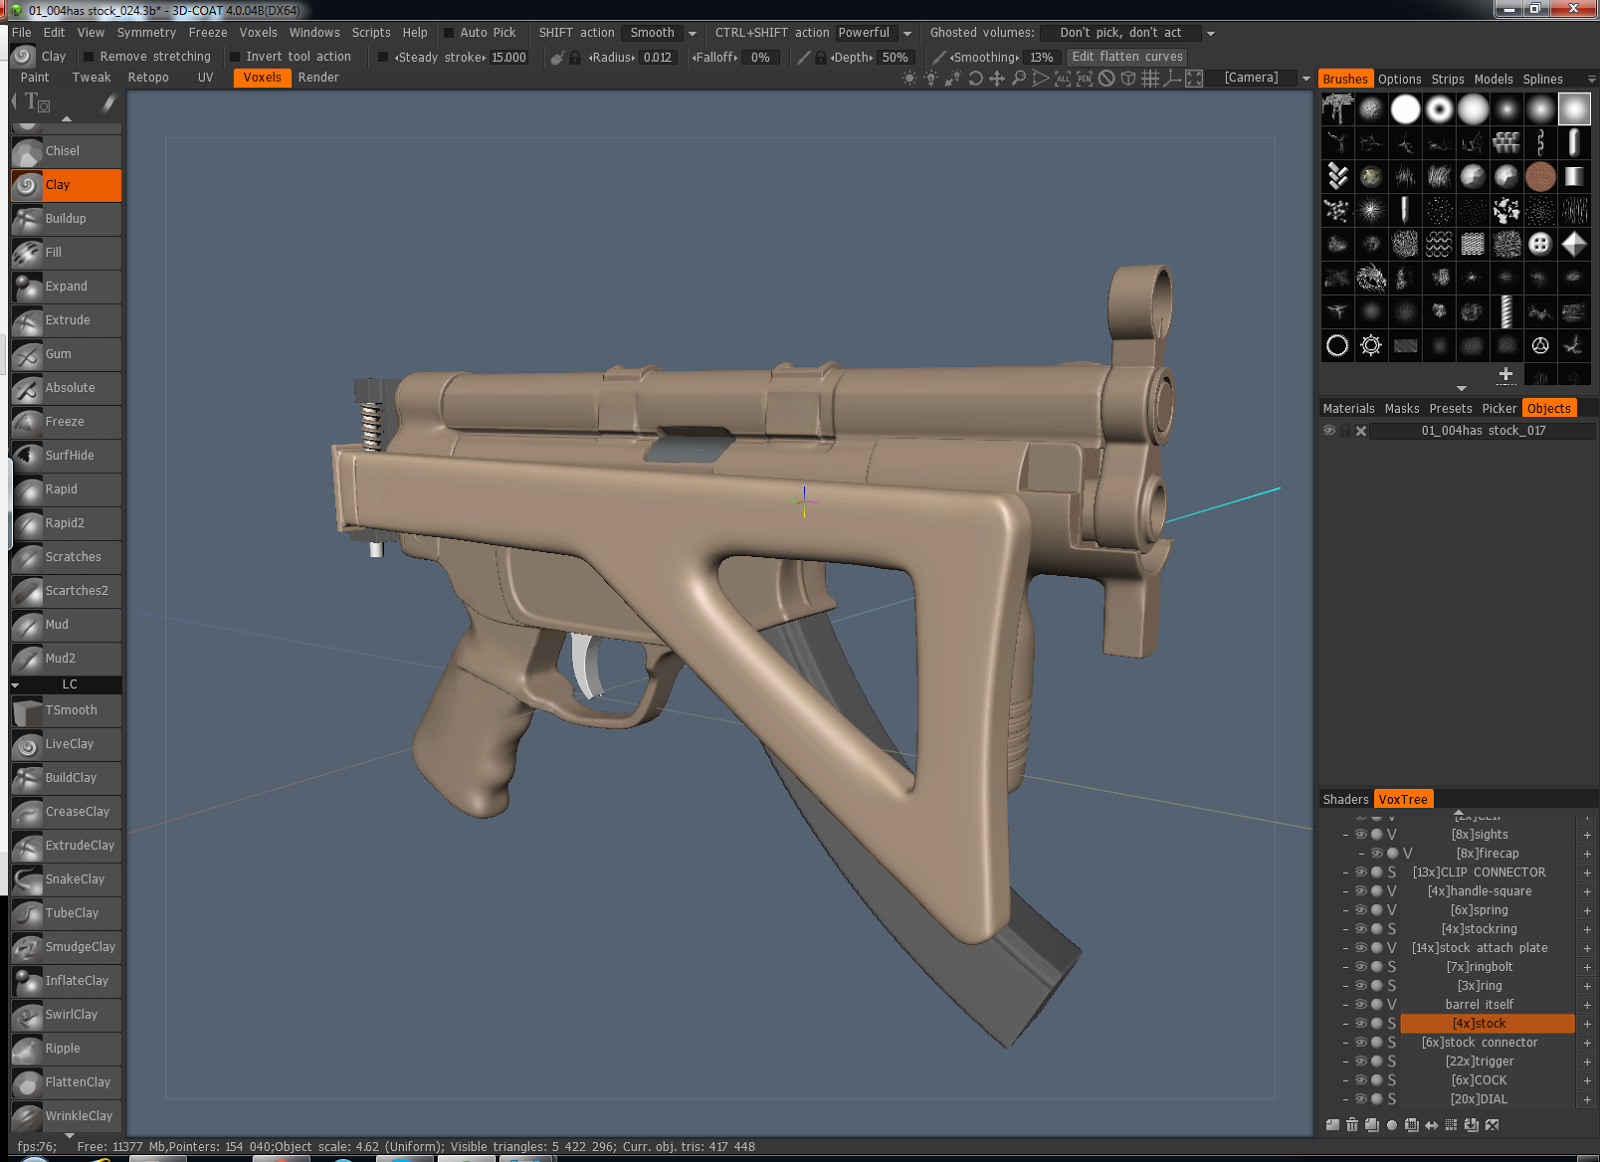
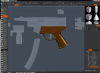
Alot of Progress made today on the MP5.
The top cocking bolt barrel needs refining.
Next is non symmetric detail, bolts and switches plus a firing trigger then to the next stage.


-
1
-
-
Fair play, even if you just use 3D Coat for its uv and paint room and enjoy it.
3d-Coats UV unwrapping and Retopology tools are what really impressed me the first time I used it after using programs such as Z-Brush and most recent Mudbox.
Then I found the Paint room and that blew me away again and after that I found the Voxel and surface tools pretty damn versatile and on par with Mudbox.
the only thing I miss from mudbox is you could create details on layers within 1 mesh. (But saying that it was so glitchy sometimes they would disappear or just fuckup).
Its nice that people are recognizing the uv and paint room on its own merits aside from the sculpting.
I actually enjoy uv unwrapping now, I never thought I would ever say that. lol
-
wow, that 3d printed part looks great. Im still trying to find a 3D piece of mine that I want to use as my first printed job but I think im gonna try and get something printed this week after seeing that post. i know shapeways do reasonable costs but I might try and search a local company in Montreal.
The character at the top with the life preserver, how many separate pieces is that and whats the polycount?
cheers Matt
-
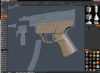
Hey esteemed creators,
Ive just started on some new pieces so have some screen grabies and also had a question/observations.
My brief is to create a collection of gun pieces that can then be combined to create many guns.
I learnt 2 new things whilst browsing video tutorials that im definitely gonna repeat in my tutorials.
1. Reshaping mesh in surfaces mode with the MOVE tool and then hitting Enter rebuilds the mesh and polycount to adjust. which is good.
But. Cutting a hard edge in surface mode never stays sharp as you are still required to hit enter and thus you loose it or you have to resample up and guess as best as you can.
biggest issue : When using Live Clay to make some high details, after hitting Enter they're lost and approximated.
You cannot merge surface meshes together in Surface Mode unless you hit enter before hand to recompute the mesh.
2. In Voxel mode you can use the proxy visualization to down res a model and perform a smooth at a lower level before returning to its actual resolution to make smoothing easier.
3. Theres one last one, I love the clean mesh tool - effecting the detail amount dial and using reduce but mainly average is really helpful.


-
1
-
-
So here is Part 2
Its basic retopo modelling and a quick paint job.
Tutorial Part2 (HTML 5 Player)
Only problem was the framerate dropped to 3fps. I need to fix the problem before I create the next tutorial.
Glad you guys enjoyed part1, part2 is probably pretty common to most of yall.
-
1
-
-
Definitely easier the 2nd time I shot it and not being shy to do 2 or 3 takes.
Its a good sense of accomplishment one I finished it and share it.
Right going back - occasionally the sketch tool can glitch but switching to another voxel tool then coming back to the sketch tool will fix that.
Once your back on the sketch tool you should be able to swap in the new stencils you want and hit Enter to commit the changes to the second object.
If you're still having issues hit me up on skype (using share screen) and I dont mind going through it with you
mistah_bipmatt


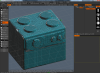
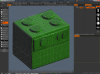
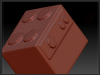
Autopo - help needed I dont seem to be getting any good results. (file attached)
in General 3DCoat
Posted
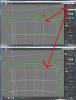
That did improve the result, its closer to Zbrush, but can we do better?
This tech a few years ago just didnt exist and its a great auto retopo tool and still a very close mesh that resembles an ingame mesh but it there any other way i can get a closer result to the zbrush model or maybe even better?
I want to retain the hard edges and closed loops around the main edges so I can collapse the edges after and clean it up.