


carrots
-
Posts
85 -
Joined
-
Last visited
Content Type
Forums
Calendar
Gallery
Posts posted by carrots
-
-
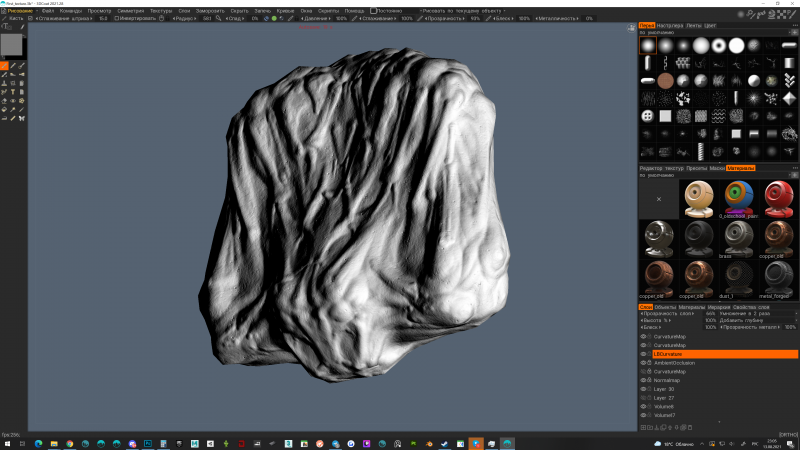
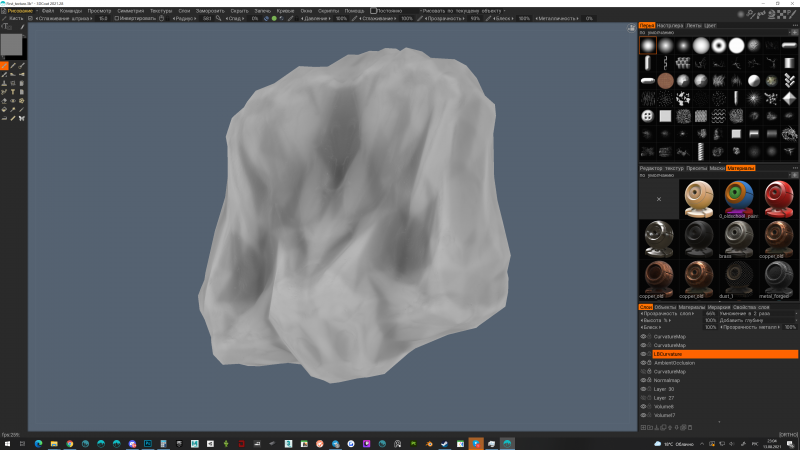
Ймовірно у вас полігони не зєднані між собою, не мають спільних вертексів.
Аби виправити цю проблему ви можете використати наступну фунцію:в кімнаті ретопології 3DCoat "Weld Vertices"
в Maya "Edit Mesh->Merge"
в Blender "Mesh->Clean Up->Merge By Distance" -
Yes, in the near future USD export will appear in the beta version of 3DCoat, we already have a closed alpha version. In the future, we plan to expand support for USD
-
 2
2
-
 1
1
-
-
On 8/10/2021 at 9:48 AM, Daffyd said:
Hey ho,
found some issues:
QuickAccess
Add preset to QuickAccess slots doesnt work. After choosing the Slot X Nothing happens to the Quick Panel
I am only able to add the Default Tools in QuickAccess
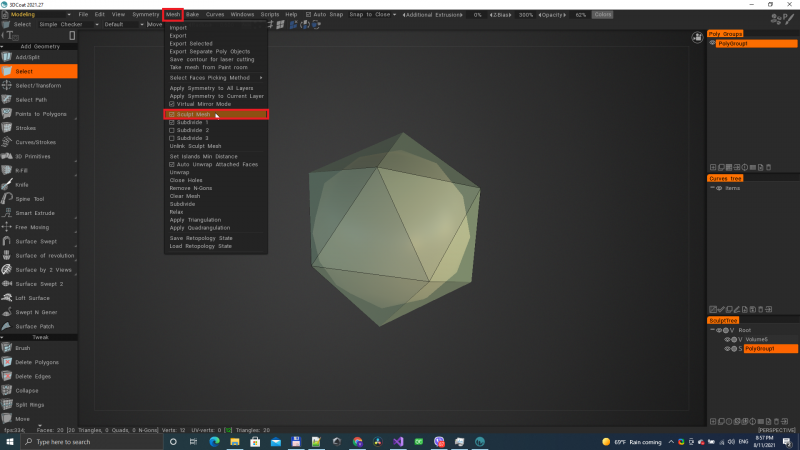
Modeling unlinked Sculpt Mesh issue 2021.25:1 create a Primitive (PolyGroup1),
2 mesh -> sculpt mesh -> unlink -> PolyGroup1_unlinked is created
3 create new PolyGroup2
4 do the same like PolyGroup1 -> only PolyGroup1 creates copies of itself or nothing happens but every time PolyGroup2_unlinked never will be created
In another project, all previous unlinked sculpt meshes disappear as soon as I create a new one. Unfortunately, I cannot reproduce that. And it's not undo-able.But important is, this bug makes the Modeling-Sculpt Mesh Feature unusable

Unlink Sculpt Mesh has been fixed, you can try the fix in the next nightly build
-
1
-
3
-
-
1 hour ago, Daffyd said:
Hi I want to make sure that my post has not been overlooked. I think it's a very serious problem that can break projects.
Hi! Thanks for the message, we didn't miss it. Were busy with other urgent tasks. We will fix this bug shortly.
-
1
-
-
1 hour ago, Arvart said:
Also on meshes without split normals it don't looks like local curvature.
thanks, in the next build it will be fixed
-
1
-
-
1 hour ago, insignet said:
If I create a polygon model in the model workspace, I should be able to render that model in the render workspace? The conversion of a polygon model to a surface/voxel model is an unnecessary step? Something like 'Show model in Render Room' ?
the best way to do this is to enable option "Sculpt Mesh"
-
2
-
-
On 4/5/2021 at 2:29 PM, artofcharly said:
Hi, dear developers.
I noticed a strange issue with Renderman.
Tried to render a simple head and the 3D-Coat was Freezed.
Installed the latest version.
Video with an issue ->
Steps:
- Open 3dcoat
- Select voxel 3d head
- Go to RenderRoom
- Select Renderman
- Click Render Preview
How to fix this?
Thank you and have a great day
Best regards,
Andrew.Fixed, in the next build will work
-
2
-
-
https://drive.google.com/file/d/1SbKvtZqCRKrMQN97uVTvz6Tyb3YI-Vq3/view?usp=sharing
Try copying this file to the folder where 3DCoat is installed
C:\Program Files\3DCoat-V2021.XX -
On 11/19/2019 at 10:59 PM, Mihu83 said:
I have a problem with some of my custom shaders - in Sculpt room viewport everything looks fine, but in Render room I get filled with black look, something like silhouette.
Any idea where the problem lays or some workaround?
Just replace these attachments in your shaders in the folder "MyDocuments\3D-CoatV49\Shaders\PbrShaders\#A Stuart Folder\A Base Shader."
Your shadel comes from very old templates, you need to replace the mcubes.glsl and mcubes.hlsl files with new ones
-
1
-
-
3 minutes ago, insignet said:
I've been looking at the rendering also. I was very excited about the render, it is odd the way it saves the render ATM. When you save your render, it seems that you are saving your output, but you are creating a folder to place it in. Anyway... only BETA so it'll get some polish soon.
In the version of 3D Coat 4.9.09, which you can already download on the forum, the render results should be saved normally
-
1
-
-
1 minute ago, Kargall said:
Hello,
I'm trying to render in 3D Coat but it does not happen.
Nothing in the files
I have to miss something, but what?
What is your version of 3d coat?
-
1
-
-
11 hours ago, Ascensi said:
I discovered EXACTLY what is creating the spikes - Adding a baked AO layer!! disabling visibility on the AO layer doesn't solve it, the AO layer had to be deleted and then from scratch the depth is normal across the seams painting over them!!
1. new project dialogue choose PPP mode
2. choose your sphere example or an iso mesh (the problem will exist for any model but just choose the sphere for quick test)
3.set to new UVs, subdivision to the max, full smoothing and 16k resolution
4.When the project loads bake an AO layer with default settings-this works fine but if you try anti-aliasing at 4x or x16 it will crash.. first bake with default and set blending to modulate2x so you can see the uv seam artifact areas.
5. To paint use a material that has 8k or 16k scanned textures with it's depth map added to the normal map spot.. it probably doesn't matter about texture resolution but for the sake of following steps I've been working with try downloading a free light colored 8k texture from https://www.rd-textures.com/product-category/freebie/?topCat=88 Destructed floor or concrete should be fine and easier to see the problem. If painting the surface doesn't displace then the 8k depth.tif file may need to be opened in photoshop and saved out overwritten with tif with the color profile checked.
6.When you make the material use the 8 k textures with the 8k tif file added to the normal slot. Set the size of all the texture s scale to 10% unlock the depth and set to .5 or .2 . The Depth texture set at a depth of 200%. This kind of setting is tweaked differently for each texture.
7.paint to the surface where the seams are shown with black artifacts, the black artifacts are shown here.. it should be completely white but that's only part of the problem.
8. after painting the surface, examine closely the edges, you should see spikes appear at the seam areas and realize the texture/depth isn't meant to have spikes, examine the depth map if you need to evaluate further. It's not a stage/window glitch.. you can disable and enable "show displaced mesh" under view, the spikes still remain and even remain after exporting the textures and setting them up in another program.
Expected problems
1.default AO settings with modulate2x (or set to emissive) will expose artifact areas with 16k project settings
2. you should find that baking with anti-aliasing is not stable and crashes 3DCoat
3. most critical is the observation of the spikes along the seams, the spikes are not part of the displacement map/textures, try using your own textures for comparison.
Maybe the problem is the AO layer not overlapping on the UV on a model with subdivision - it's not snug along the edges completely.. Maybe it's a matter of padding level & subdivision.
Thank!
16k AO bug fixed. Please try this:
https://drive.google.com/open?id=1H8NjQmenwLlShe6rMkzk0rQophydTDnBFor the test, please copy these files to folder C:\Program Files\3DCoat-V4.9.09, and run 3DCoatDX64.exe
-
8 minutes ago, yoohasz said:
Can anyone confirm that rendered images aren't written to the hard drive in version 4.9.0.7 OS: win10 pro. All I get is an empty folder here: "C:\Users\xxx\Documents\3D-CoatV49\RenderedImages\emptyfolder" that I named by hand - thinking I was naming my image. Please confirm. I would actually like to render stuff in 3DCoat.
Thank you for message!
Yes, this error appeared in version 4.9.07 and will be fixed in the next update.
Now you can overwrite these files in the folder where you installed 3DCoat, and writing to the file will work again
https://www.google.com/url?q=https://drive.google.com/open?id%3D1WIBsLjKVFX46n1ewIVMIvbuNHIj229b1&sa=D&source=hangouts&ust=1573065649213000&usg=AFQjCNEy-D8HmFrVydTi5n5rKrXJZzpEUQ
By default, you need to copy these files to the folder:
C:\Program Files\3DCoat-V4.9.07-
1
-
-
10 hours ago, 3D_COAT_user said:
What could be the reason that my Ambient Occlusion map is black? https://dl.dropbox.com/s/bxmxt5tx5amz9vg/Ambient_Oclusion.mp4?dl=0
Do you have such a problem with all models, or just this one?
-
9 hours ago, 3D_COAT_user said:
What could be the reason that my Ambient Occlusion map is black? https://dl.dropbox.com/s/bxmxt5tx5amz9vg/Ambient_Oclusion.mp4?dl=0
Please tell me which version of 3D Coat you have and which video card you are using?
For a similar model, AO should have been calculated in about 2 seconds.
Please send the Log file to me after calculating the AO from C:\Users\UserName\OneDrive\Documents\3D-CoatV49\Log.txt -
7 hours ago, Carlosan said:
Moving Proxy Visualization to the bottom of the Sculpt Tree, any chance ?
Are you sure it will be better?
All the same, if the ProxySlider and the object tree are on different tabs it allows you to better customize the interface, you can hide the ProxySlider, but leave the object tree.-
1
-
-
5 hours ago, Thomas P. said:
So I made sure the Sculpt Layer feature is activate in the preferences and such. It does only seem to work when the object is set to "Surface" mode? Is that by design (limitation) or am I missing something?
Yes, sculpting works only in surface mode, just like painting on vertexes, voxel mode now technically does not allow sculpting layers.
-
1
-
-
8 hours ago, Carlosan said:
Depth pass is calculated according to the fog settings.
Now I understand that this is not clear, it is probably better to make it just normalized-
1
-
-
23 minutes ago, Carlosan said:
- Adjust Contrast = 0-100 only works if doble click, but it is not working if we drag values using LMB. Which light parameter is contrast ? Means Decay Rate ?
- Environment Texture used to illuminate the scene: on Paint Workspace (as example) user cant control the visibility/opacity of the environment textures in the background of the viewport but Without impact on the lighting of the scene.
- Environment Exposure: missed. The exposure value (EV) is a number that represents a fixed scene luminance. This setting allows to offset the default luminance value. User cant control it currently.
Thank you, yes, this is a bug, I have not noticed this before.
I will fix it in the next build. -
10 minutes ago, AbnRanger said:
In the new render engine work, it would be great to have EMISSIVE materials/shaders to be light sources...like it is with the Renderman integration
Yes, we are working on it.
-
1
-
-
4 minutes ago, Carlosan said:
@carrots Thx for your reply
This change does not apply to the contrast of the brightness of reflections,
Which changes are you thinking to perform to solve this issue ? Any plans ?
Please look this example using Silver Metal SmartMaterial over the basic sphere on Paint Room.
Highlights on any Environment panorama maps are overexposed, reflections over every mesh make it impossible to see details.
Alternatively, you can simply use a softer panorama.
Well, there’s also a good idea as an option, we can make it so that in the render settings you can replace the selected shader settings, this will allow you to make different presets with the most suitable shaders for sculpting, texturing, final render and quickly switch between them.Alternatively, in the future we can do additional gamma settings in the render preset.
-
3 hours ago, Carlosan said:
Hi
11. The light sources from the panorama now have a different density depending on the brightness, which allows you to quickly get a good result and clear, detailed shadows that convey the shape of the light source, glow from the sun, etc. (the custom panoramas need to be reimported that the light sources recalculated correctly)
Still brightness is very hard (screen capture from Paint Room).
Render room values exposure/environment light = 100 make it impossible to work. (Sculpt shader used for this test is metal)
This change does not apply to the contrast of the brightness of reflections, they are strictly balanced according to the PBR standard, GGX, pxrDisney, Marmoset, etc.
This change affects the speed of rendering and the quality of the shadows.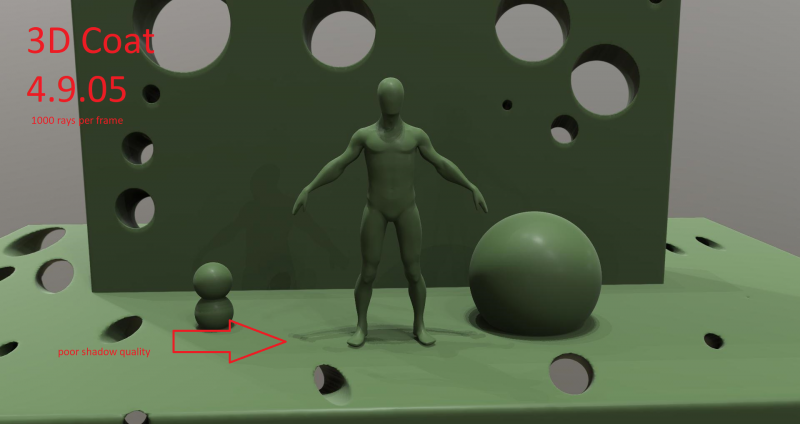
-
1
-
-
27 minutes ago, stusutcliffe said:
I just did a quick test with some fresh models , it rendered not too badly but minus shadows ( not ticked off in the options so should appear)
I think I am narrowing the problem down to my own edited shaders, the default ones seem to work though Ive not been through them all.
I think I will hang on for the next beta and if the probs persist I wil sort out a scene for investigative purposes.
I will go back to .2 for my impending client job. If I get some free time I will play a bit more with it. Thanks
Try this shader, seems to be the main culprit, it light grey but appear black in the render.
Thank you very much, I realized what the problem is.
I'll think about how to make the old shaders render normally too. -
12 minutes ago, stusutcliffe said:
Hi,
Most of my shaders behave strangely in .6 plus the real time renderer is weird and indescribable..the nice render was in the .2 beta.
Graphics card is gtx1050 ti
The bottom image does look like its got a toon shader on it dosnt it, its not supposed to is there a special setting I might have activated by mistake?
Why have you posted those toon shaders ?
4 minutes ago, stusutcliffe said:The renderer seems to be applying the new silhouette option to objects randomly. Even when the check box is set to zero.
Very strange.
Unfortunately, I can not repeat your problem on my tests.
In the next version, the render will work more smoothly, slow down less.
Please send screenshots of the entire screen so that I can see what your settings are.
If it’s not difficult for you, you can send me your project so that I can render it with your settings and identify the problem


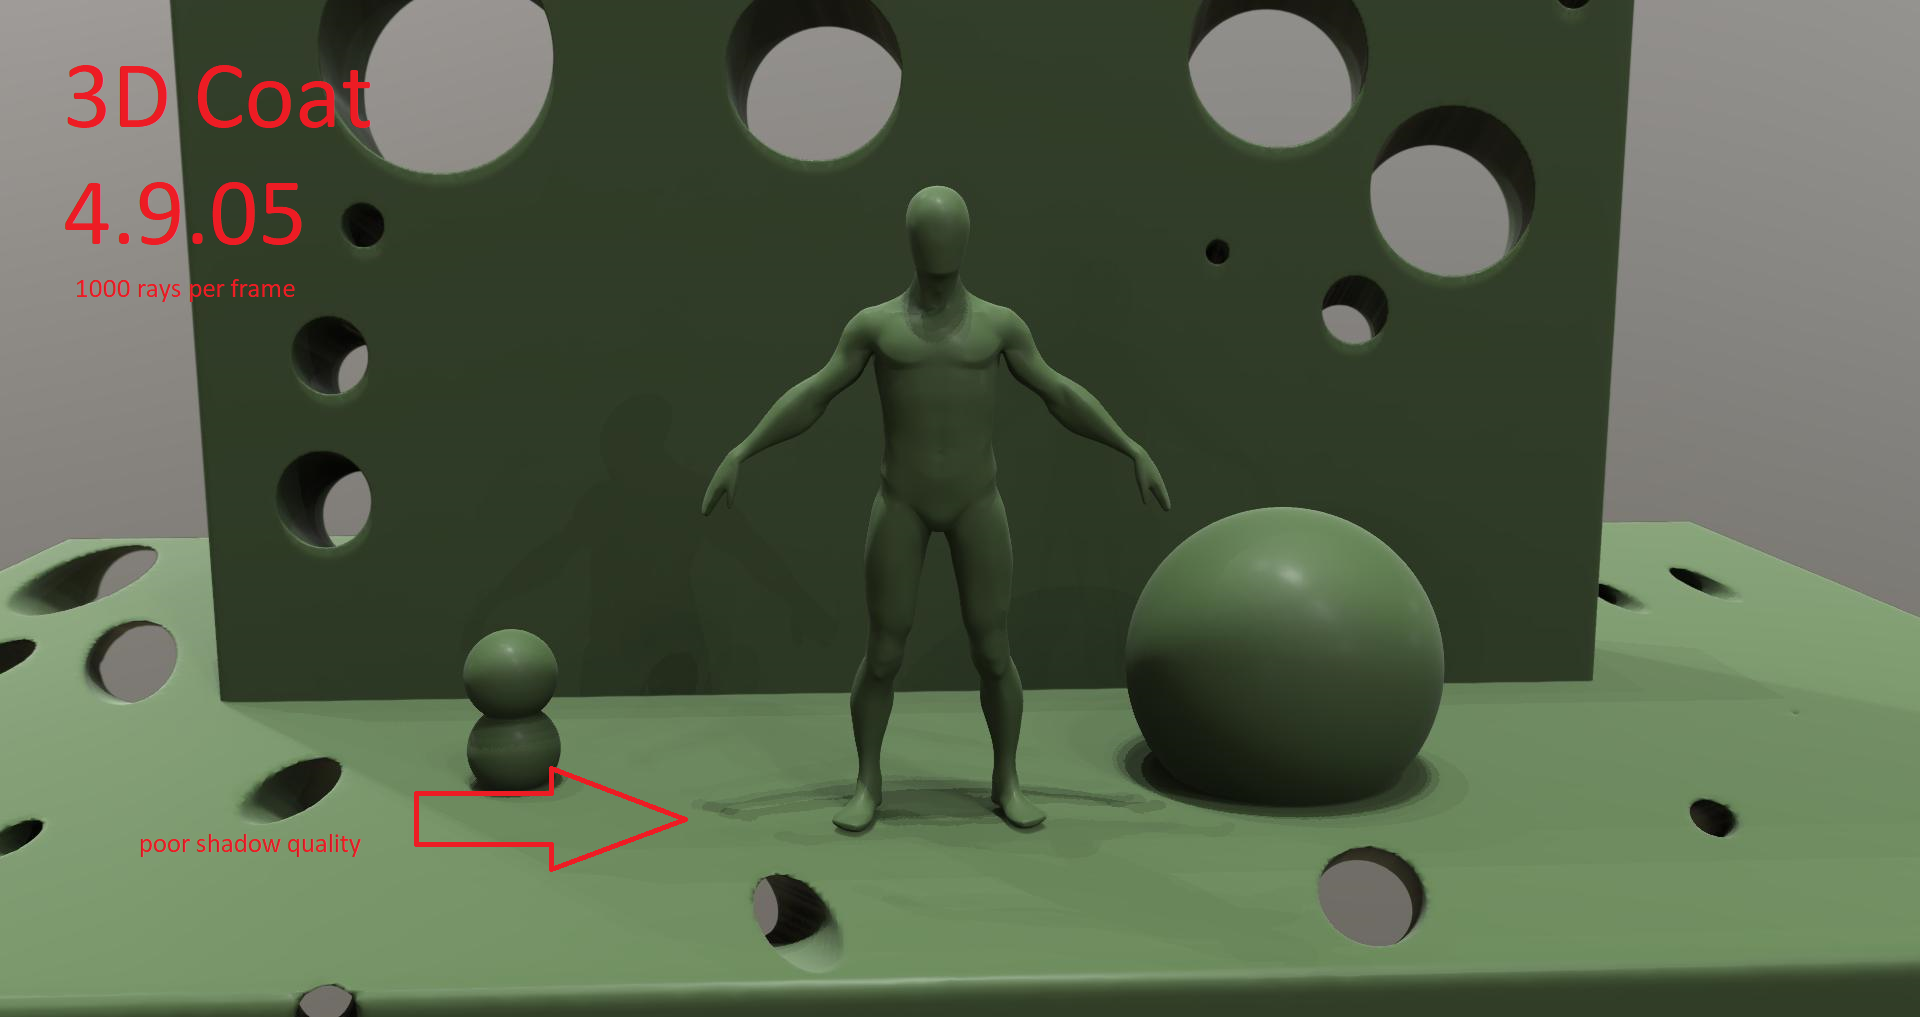
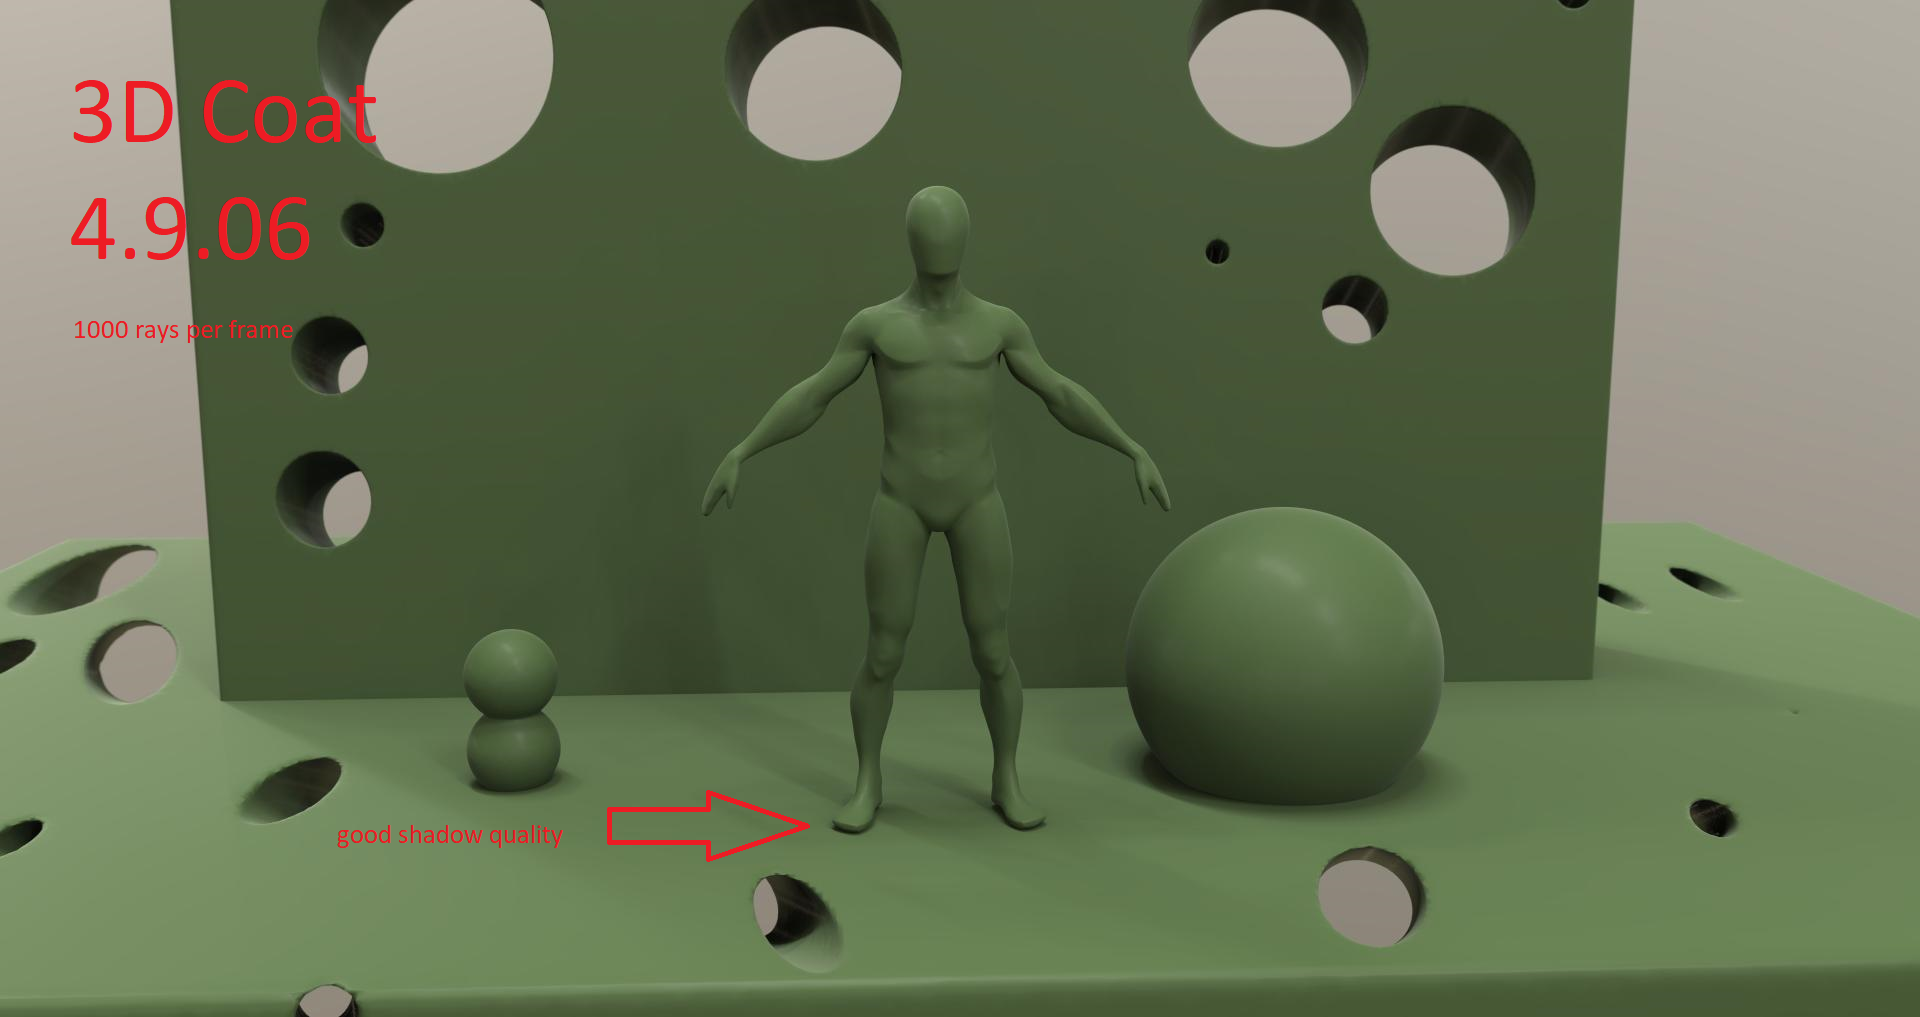
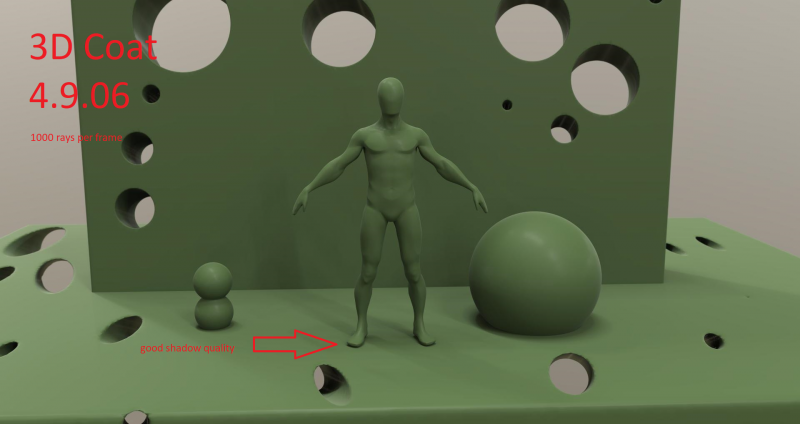
3DCoat 2024 development thread
in New Releases, Bugs Reports & Development Discussion
Posted
Hello, thanks for reporting the bug! Please send me a link to that file, I will try to fix the error as soon as possible!