

artofcharly
-
Posts
255 -
Joined
-
Last visited
Content Type
Forums
Calendar
Gallery
Posts posted by artofcharly
-
-
5 hours ago, AbnRanger said:
They are currently working on a GPU brush engine and a nodal interface for Smart Materials.
Hi, Abn
Thank you for the answer. And this GPU-brush will give this opportunity? =) To blend colors and blur between them without limits? -
Hi, dear developers. Any news? =)
@Andrew Shpagin ?-
 1
1
-
-
Hi, dear developers
Any news?
-
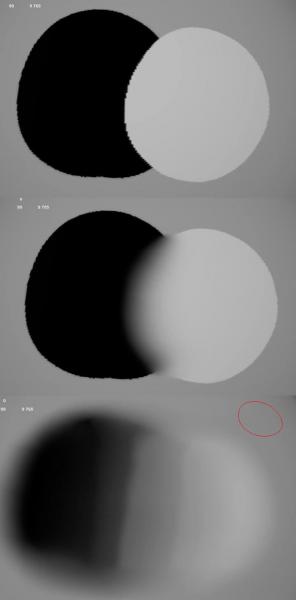
Hope the developers will fix Blur brush =)
And in the future we can do this =)
-
3
-
-
18 hours ago, sprayer said:
@artofcharly you can blur with shift, if you want more blur just increase radius of brush. There is also coloring tool with more smoothing on painted pixels
Hm. So I tried to increase the Radius and this didn't help... =(
Video:
-
Hi, dear developers.
Recently on Feb 21,2021 I recorded this video for Alexander and Stanislav and now they advised to throw it here, because this is a better place =)The main task, I have asked for a long time to add, is to make it possible to infinitely blur strokes to blend tones, as in Maya. Why am I not doing this in Maya? Because there are still problems with UDIM unwraps, and yet it's more convenient for me to draw masks and do texturing in 3D-Coat.
Thank you and have a great day
Best regards,
Andrew.
-
On 4/9/2021 at 5:17 AM, carrots said:
Fixed, in the next build will work
Awesome! thank you! Now everything is ok. But the another question is - when IPR will work?
-
Hi, dear developers.
I noticed a strange issue with Renderman.
Tried to render a simple head and the 3D-Coat was Freezed.
Installed the latest version.
Video with an issue ->
Steps:
- Open 3dcoat
- Select voxel 3d head
- Go to RenderRoom
- Select Renderman
- Click Render Preview
How to fix this?
Thank you and have a great day
Best regards,
Andrew. -
Yeah! Congrats to everyone!
-
-
21 hours ago, Andrew Shpagin said:
Smart pinch short demonstration:
Awesome!
-
Yeah! Congrats to all with this awesome version!
-
1
-
-
Another part
In this part - I continue to show - how to sculpt details for the displacement map in 3D Coat, as well as how to work with different tools.
Video content:
0:01 - Intro
0:05 - Message about subtitles
0:10 - Greeting and about what this lesson will be
0:26 - Actions for the channel growing
0:38 - Building decor by using curves and profiles in 3D-Coat.
6:41 - Creating columns under the window.
8:43 - Sculpting coat of arms and decor for it
12:03 - Creating a pipe
12:33 - Adding Damage to the all parts of a Model
21:00 - Export ID and Displacement by using "Export Depth Along Y"
22:01 - What will the next lesson be about?
22:10 - Forrender Renderfarm
22:20 - Info partners
22:24 - The ending
22:41 - Preview of other lessons and playlists.
If you like this video:
► Click on the “Thumb up”
► Subscribe to the channel to avoid missing new releases
► Share with friends - do not be greedy =) After all, they also want to get this knowledge =)
Enjoy watching!
Best regards, Andrew Krivulya aka Charly.-
1
-
-
Sculpting windows in 3D Coat for displacement maps in Quixel Mixer.
In this video, I continue to show how to sculpt details for a displacement map in 3D Coat, as well as how to work with the new Curves tool.
Video content:0:01 - Intro
0:08 - Forrender.com Render Farm
0:17 - Info Partners
0:21 - Subtitle Information
0:25 - Greetings and info about the lesson content
1:00 - Using primitives in 3D Coat to create other window details.
1:26 - Cutoff tool to trim the shape.
2:16 - VoxHide.
4:58 - PoseTool
6:58 - Creating a primitive for the profile of the curve.
10:07 - Ending
10:26 - Preview of other lessons and playlists.
If you like this video:
► Click on the “Thumb up”
► Subscribe to the channel to avoid missing new releases
► Share with friends - do not be greedy =) After all, they also want to get this knowledge =)
Enjoy watching!
Best regards, Andrew Krivulya aka Charly-
1
-
-
Creating a monster in 3D-Coat and rendering in Corona Renderer - without UV and retopology. Part 2.
Video Content:
0:01 - Intro
0:18 - InfoPartners
0:22 - Important information about turning on of subtitles.
0:29 - Information having an impact on the development of the channel and the output of the following lessons.
0:45 - Continuing to edit the proportions and details of the monster by using the different brushes.
3:03 - Use the Pose tool to correct proportions.
3:19 - Creating a mask and adding details to the base layer by using the Clay brush.
4:00 AM - Adding parts with the Draw brush.
5:25 - Using the Pose Tool to correct a pose.
8:45 - CutOff-brush to remove unwanted parts.
10:10 - I make special masks with the help of Freeze, in order not to touch the separate parts during the editing of the geometry.
10:26 - Continuing to work with the Pose and Move Tool.
10:59 - I draw additional tentacles in voxel mode with the Sphere brush. Also, again - I use Freeze and CutOff.
11:30 Paint texture in Paint-Room and export to FBX.
11:39 - Import models in 3Ds Max.
11:56 - Creating CoronaSkinMtl and configuring VertexColor.
13:43 - Lighting setup in Corona Renderer.
14:15 - The ending.14:31 - The ending. Video preview of other lessons. A subscription button.
If you like this video:
► Click on the “Thumb up”
► Subscribe to the channel to avoid missing new releases
► Share with friends - do not be greedy =) After all, they also want to get this knowledge =)
Enjoy watching!
Best regards, Andrew Krivulya aka Charly.-
1
-
-
In this video, we’ll continue the discussion about creating a special EXR file for exporting to Quixel Mixer and getting a brush for a sculpture from it. And also I'll demonstrate a complex asset, on which we will work in the following parts.
Video content:00:00 - 00:30 - Intro
00:30 - 2:00 - Export EXR file from the 3D-Coat to create a brush in Quixel Mixer.
2:00 - 2:25 - Import a file to create a brush.
2:25 - 7:36 - Add content from the Quixel Mixer library. Mix by masks.
7:36 - 9:00 - Demonstration of complex asset, which we will create further.
9:00 - 10:21 - Creating a primitive and trimming it with CutOff tool in 3D-Coat.
10:21 - 10:54 - The ending. Video preview of other lessons.
If you like this video:
► Click on the “Thumb up”
► Subscribe to the channel to avoid missing new releases
► Share with friends - do not be greedy =) After all, they also want to get this knowledge =)
Enjoy watching!
Best regards, Andrew Krivulya aka Charly.-
1
-
-
In this video we will talk about how to paint a model in 3D-Coat by using PBR and then render it in V-Ray - without UV and retopology. And also at the end of the video there will be a Making of bonus with Polybrush and in the next part - a render in Corona Renderer.
Video content:00:00 - 00:18 - Intro
00:18 - 1:09 - A greeting and a few words about the topic of the lesson. Where to download the latest version of 3D-Coat with the ability to sculpt on layers.
1:09 - 4:01 - 3D-Coat launching. Sculpting on layers in the Paint-room. Drawing PBR-materials. Drawing matte and glossy surface.
4:01 - 7:17 - Export to 3dsmax without UV and retopology. Configure V-Ray Dome. Adaptive dome. Customize materials and apply all PBR properties by using VertexColor maps. Create a V-Ray Blend Mtl for mixing properties of several materials.
7:17 - 8:00 - Information about the bonus making of.
8:00 - 9:30 - Sculpt a basic form in Polybrush. Drawing tentacles in 3D-space by using a special plane. Using the Quick Remesh modifier.
9:30 - 10:56 - Detailing the model in 3D-Coat. Brushes - Polish, Move and Clay.
10:56 - 11:29 - The ending. Video preview of other lessons. A subscription button, as well as a button for support on Patreon.
If you like this video:
► Click on the “Thumb up”
► Subscribe to the channel to avoid missing new releases
► Share with friends - do not be greedy =) After all, they also want to get this knowledge =)
Enjoy watching!
Best regards, Andrew Krivulya aka Charly.Production Music courtesy of Epidemic Sound" www.epidemicsound.com
-
1
-
-
In this video, I show speedsculpting and texturing a monster in 3D-Coat and Zbrush.
Video content:
00:00 - 00:24 - Intro
00:24 - 00:28 - Basemesh in Zbrush.
00:28 - 1:12 - Detailing in 3D-Coat by using 2D-Paint, LC Crease. Adding fangs to Zbrush using ChiselCreature. Sculpting helmet by using a Live Boolean in Zbrush.
1:12 - 1:57 - Texturing in 3D-Coat. Sculpting tongue and bloody mass. Render in Renderman 21.
1:57 - 2:13 - The ending. Video preview of other lessons. A subscription button, as well as a button for support on Patreon.
If you like this video:
► Click on the “Thumb up”
► Subscribe to the channel to avoid missing new releases
► Share with friends - do not be greedy =) After all, they also want to get this knowledge =)
Enjoy watching!
Best regards, Andrew Krivulya aka Charly.-
1
-
-
In this video, I show the sculpting process of the surrealistic world in 3D-Coat and render it in the Renderman 21. I've recorded this video a year ago. Then just added Renderman to 3D-Coat and I've set the task to create such a composition in 1 hour in order to understand the render and some 3D-Coat tools for quick speedsculpt in space.
Video content:00:00 - 00:35 - Intro
00:35 - 00:47 - Demonstration of the final result.
00:47 - 2:52 - Creating a primitive and cutting a shape by using CutOff tool. Search for shapes by using 2D-Paint.
2:52 - 3:54 - Adding another primitive and modeling water surface. Applying of the water shader. Use Noise for easy detailing.
3:54 - 6:31 - Clouds sculpting. Using Noise tool for details.
6:31 - 7:48 - Test render in Renderman 21. Adding details.
7:48 - 9:10 - Final render and post production in Photoshop.
9:10 - 9:50 - Final result.
9:50 - 10:05 - The ending. Video preview of other lessons. A subscription button, as well as a button for support on Patreon.
If you like this video:
► Click on the “Thumb up”
► Subscribe to the channel to avoid missing new releases
► Share with friends - do not be greedy =) After all, they also want to get this knowledge =)
Enjoy watching!
Best regards, Andrew Krivulya aka Charly.Production Music courtesy of Epidemic Sound" www.epidemicsound.com
-
1
-
-
In this video, I show my first sketch. which was made on April 5, 2017 by using a new at that time tool in voxel mode - 2D Paint. This tool allows you to sculpt directly in 3D-space. It's very funny! And of course - then I've tested the new Renderman 21, which was first integrated into the 3D-Coat 4.26 version. I spent exactly 1 hour for creating this sketch.Enjoy watching!
Video content:00:00 - 00:18 - Intro
00:18 - 00:48 - Demonstration of the final result.
00:48 - 1:20 - Creating a platform by using a primitive. Use a 2D-Paint brush to sketch a water splashes.
1:20 - 4:13 - Creating a monster's body by using the same tool. Adding another water splashes
4:13 - 8:47 - Setting the view for the render. Application Renderman Shaders and continue the detailing. Test renders in Renderman 21. Change HDRi. Setting Dof and lighting. Adding small drops.
8:47 - 9:49 - The final render. Postprocessing in Photoshop. Demonstration of the final result.
9:49 - 10:05 - The ending. Video preview of other lessons. A subscription button, as well as a button for support on Patreon.
If you like this video:
► Click on the “Thumb up”
► Subscribe to the channel to avoid missing new releases
► Share with friends - do not be greedy =) After all, they also want to get this knowledge =)
Enjoy watching!
Best regards, Andrew Krivulya aka Charly.-
3
-
-
-
In this video we will talk about the sculpt brush creation in the 3D-coat for the Quixel Mixer.
Video content:
00:00 - 00:18 - Intro
00:18 - 1:40 - Making a Box and turning it into a tile. Cloning a tile and creating a composition.
1:40 - 4:42 - Change the grid resolution for each tile. Tile damage with tools - Cut Off, Vox Extrude, Spikes, Split.
4:42 - 7:05 - Turning a layer into voxels and detailing by using 2DPaint, PinchEdges, Polish.
7:05 - 9:31 - Adding an armature with Curves tool.
5:47 - 6:18 - The ending. Video preview of other lessons. A subscription button, as well as a button for support on Patreon.
If you like this video:
► Click on the “Thumb up”
► Subscribe to the channel to avoid missing new releases
► Share with friends - do not be greedy =) After all, they also want to get this knowledge =)
Enjoy watching!
Best regards, Andrew Krivulya aka Charly.-
1
-
-
On 11/28/2018 at 12:40 PM, Carlosan said:
3D4Shoes is a branch from 3D-Coat build specially for a client needs.
But the link was removed... where do you found it ?
Hm =) I've downloaded the stable 4.28A and then clicked on the 4.28SL link under the main link =)) And then I've started to install the 3DCoat and saw 3D4Shoes =))) Then clicked again on the SL link and horrayy =) I've downloaded SL version =) ahahah =)
-
Hm, what the difference between 3D4Shoes and 3D-Coat? =)
-
1
-


Painting improvements
in Feature requests
Posted
So, should I create a separated topic for my task? =)