


philnolan3d
-
Posts
6,955 -
Joined
-
Last visited
Content Type
Forums
Calendar
Gallery
Posts posted by philnolan3d
-
-
I got a 3D printer a few weeks ago and today put up a video on printing an orc sculpture I did in 3D-Coat from start to finish.
-
 1
1
-
-
I sculpted this project in 3DC years ago and now lost all the original files, but I do have the exported medium res mesh and the textures. I want to get the high res mesh for 3D printing. I've got it loaded into 3DC's paint room with the normal maps. Is there any way I can export a high res mesh that includes the normal map details? Or even better if I could send it to the Sculpt room with all the normal map details. Thanks.

-
I have not tried printing anything I've scanned yet but it's all polygons so I don't see it being any different. As for scanning the die cast cars it is difficult to scan shiny things however you do things to make it less shiny when you scan. Aside from painting them the common option is spraying it with dry shampoo. It's cheap, you can get a can at the dollar store, and it cleans off easily with water or even just wiping with a tissue or your fingers.
-
How did you know the company's name? Do you just recognize the toy?
-
Since I have a 3D printer now I thought it would be fun to make an action figure, using 3D-Coat of course, with the Splits & Joints tool. So I was looking around YouTube for videos on the subject and I came across this episode of How It's Made where they show a dinosaur toy being made and they're using 3D-Coat.
-
5
-
-
Oh yeah, still liking it. I'll be posting a new video soon. I figured out settings that work for the Anycubic Resin. Basically the default settings except using 18 seconds exposure time instead of the default 8. This makes for very long print times. I've had a few prints take over 14 hours. I ordered some new resin from Siraya Tech that's supposed to be very good and fast so I'm hoping it will be as fast as the original resin that came with the printer. That will be coming on Thursday.
My big tip if you get it is to make sure the screws are very tight on the vat that you pour the resin into. Mine kept leaking small amounts of resin, which would get between the vat and the LCD screen and cure directly on the LCD screen. I ended up having to take it apart and remove the screen so I could gently pick away at the resin with a knife. After I got it all off I get perfect prints now.
As for the software I found a free slicer called ChiTuBox that you can use for all but the last step. So I use that for arranging my models in the build space, adding supports, hollowing it out, and adding drainage holes, then saving it as an STL and loading that into the Longer 3D slider where I can slice and save the final file for the printer. All that only takes a few minutes.
-
I can't say if the Surface will work but I also have the x360 and I'm also very happy with it. I find it just as good or better than the surface and at a cheaper price.
-
Yes, that's no problem.
-
When you purchase it is yours to keep, only pay more if you decide to upgrade later on. Hope than answers the question.
-
 1
1
-
-
It's a great machine, simple to use. The slicer software less so but it works. My big problem now is that I ran out of the resin it comes with so I got a bottle of Anycubic brand resin and it needs different settings but I haven't quite figured out what they are yet so every print with the new resin fails.
If you do decide to get one consider using my one of my links in the video description.
")
-
This commercial came out 6 years ago. I think it was well done for the time. I'm sure her heirs were involved, otherwise Dove would be sued like crazy.
-
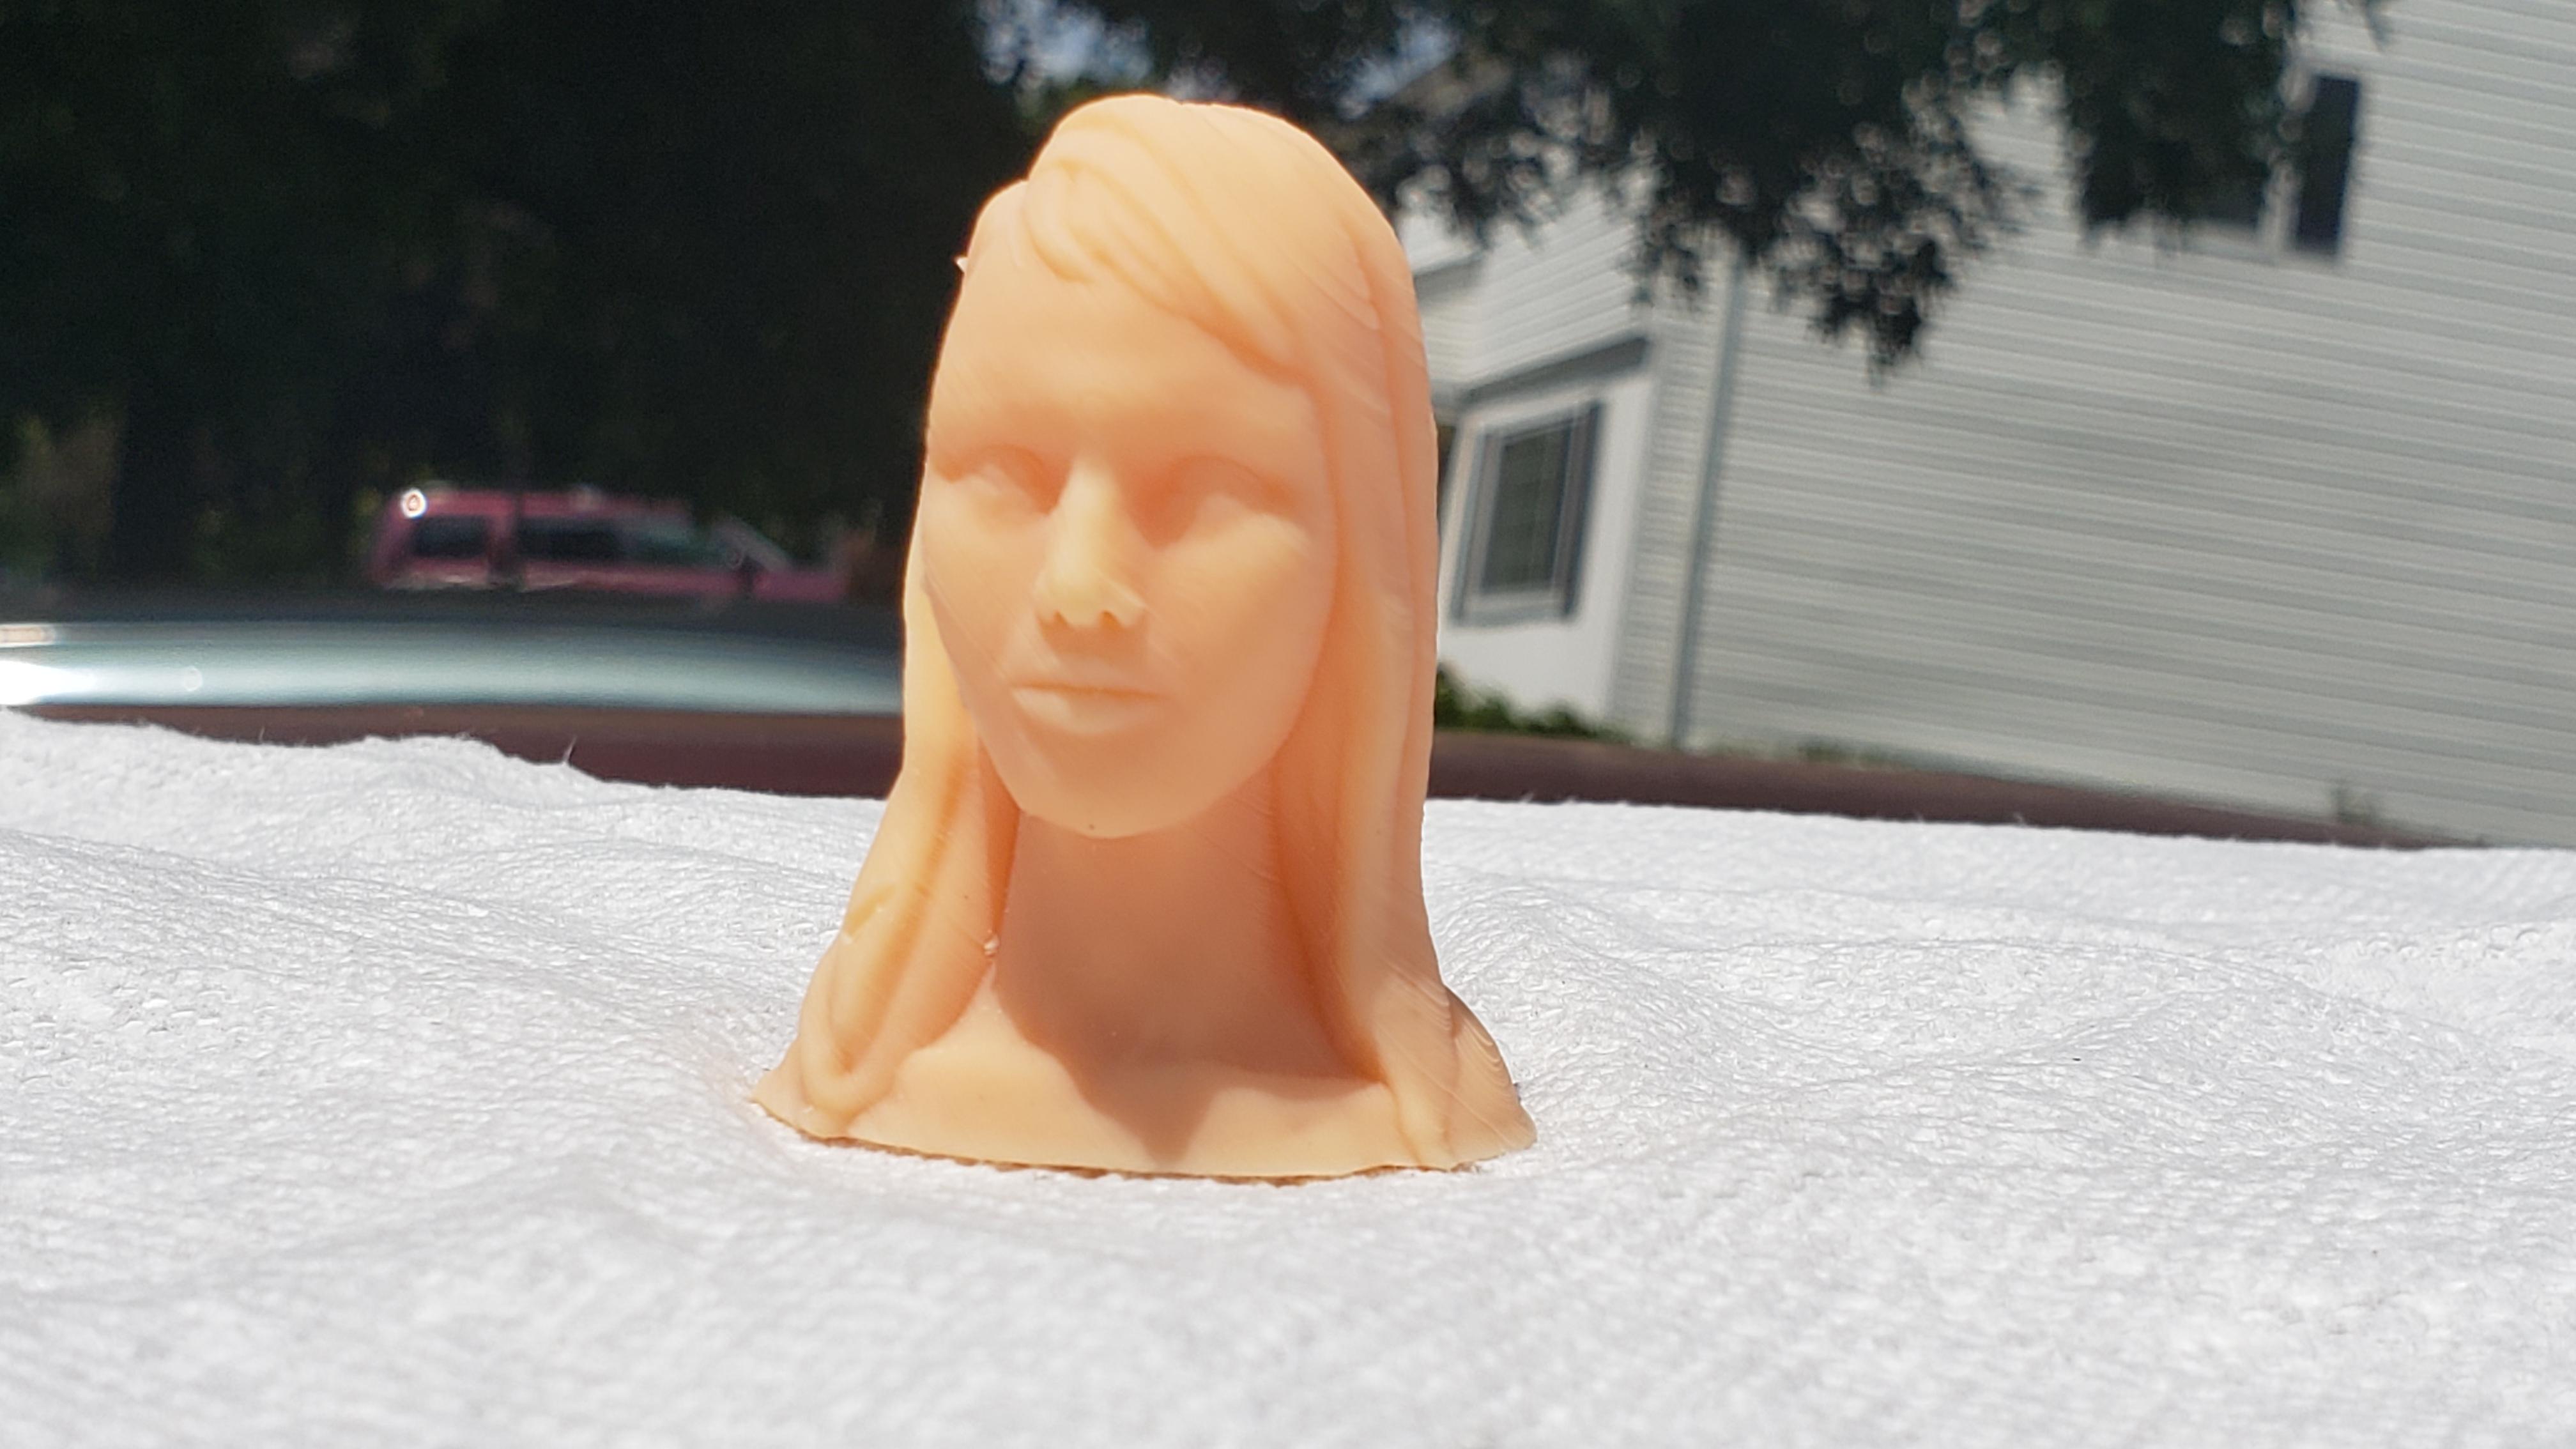
I just got a 3D printer recently and I've been having a lot of fun with it. It's an Orange 10 by Longer 3D. It's an MSLA type, meaning it uses liquid resin instead of plastic filament. That gives it much higher detail. Best part is it's only $229.
Here's one of my early prints, sculpted in 3D-Coat of course.
And an unboxing video.
-
1
-
-
Yes, Points and Faces is my favorite tool in Retopo but it can be quite frustrating to work with.
-
15 hours ago, Carlosan said:
Try changing minimal length. Hope it help.
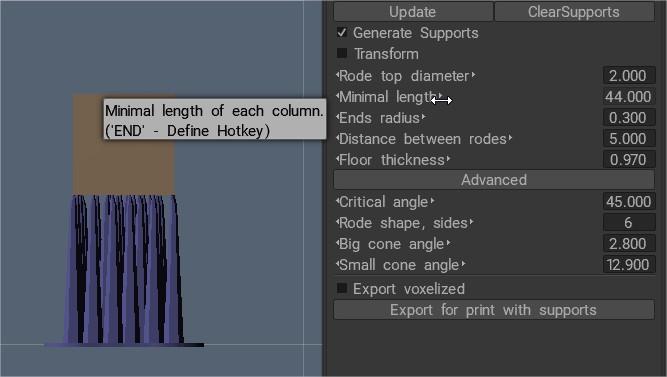
Thanks I didn't expect that would do it based on the name.
-
I just finished my print a few minutes ago (7 hours long!) but since it was super tiny I just scaled it up manually in the slicer. I wasn't too concerned with exact sizes for this one so I just eye balled it. It would be nice for something that I do need to be exact size though.
-
Honestly I'm trying to figure this out in the full 3DC myself. I just got a 3D printer (Longer3D Orange10) and used the 3DC measure tool to scale my model to 3" tall. When I imported it to the printer software it was really tiny, only a few millimeters.
-
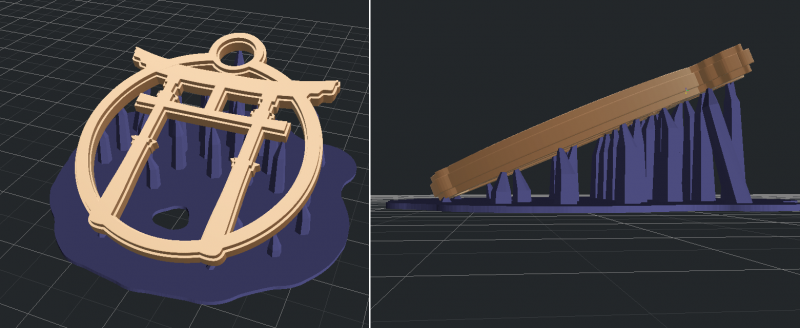
Is there a way to increase the distance between the object and the floor when using Supports? Right now it attaches the floor to the object and is very difficult to cut away from the printed object. I tried raising my object up before creating supports but it just attaches to the same spot anyway.
-
Oh the regular brush in retopo. You have to hold shift for smooth. I just spent the last 2 days in there and it seemed normal. I'm not sure the Brush tool ever had an intensuty in the Retopo room. Unless I'm misunderstanding.
-
I was just using Smooth in Surface mode and it was fine. Have you tried the different pressure sensitivity options in the E panel (press E on your keyboard)?
-
Hi Michel, welcome. I hope you have fun learning 3DC.
-
Well you never know. Flipped Normals just released this pack of skin brushes. They don't advertise 3D-Coat on the page for some reason but I was talking to them on Twitter and they said they should work great in 3DC too.
They're not free but there's a 25%off code: SKIN25
https://flippednormals.com/downloads/flippednormals-skin-kit/
-
2
-
-
11 hours ago, Carlosan said:
Hello
3DCoat is not compatible con Intel HD Graphics. Sorry.
I don't know, I use 3D-Coat quite a bit with my laptop which has "Intel UHD Graphics 620" as the gpu. Maybe it's the UHD.
-
Oh I see. I wouldn't decimate, you would end up with all triangles. It might take some time but you could just delete every other edge. You can hold shift with Delete Edges to select the whole edge loop. Usually for a character you want to keep the poly count low in order to have better deformations (bending).
-
I understand what you're trying to do, mirroring the UVs, I know a lot of game designers do it. I've never done it for my own projects though so I can't help with that.
On a side note though. I wonder if there's a reason why the clothes have SO many polys. Unless there's a special reason I would probably have a quarter of the poly count on the clothes.


Meshroom: Free photogrammetry
in CG & Hardware Discussion
Posted
I'll have to give it a try. I didn't care for the quality of Meshroom in the past.