


Richard A.
-
Posts
132 -
Joined
-
Last visited
Content Type
Forums
Calendar
Gallery
Posts posted by Richard A.
-
-
Thank you. Got it!

-
OK, where oh where do I install this or how do I do that? I looked all over my hard drive for a folder to just drop this into and I looked for a way to import it to add it to this hidden library and can not find it.
Thank you
-
Thank you VERY MUCH!

-
Hi,
I'm trying to take care of some seams on my model but the lighting is just not even enough so I can't see well enough under the jaw line or behind the ears. I need a quick and dirty way to set up even light, no colors like tan or gold, to light up my work area to get this done!
Thanks so much!
Richard
-
Hi,
Don't care if it's a pay for or free but looking for a character creation tutorial that focuses on texture painting, mainly skin.
Thank you,
Richard -
Hi,
Just watched this interesting video on YouTube about Texel Density. Does 3DCoat have tools like this as well?
The video was instruction for Maya which is WAY out of my price range so just wondering.
Thanks so much
Richard
-
Thanks so much! :-)
-
 1
1
-
-
OK, WEIRD. It's now working. It asks me for the UV map and it applies it.
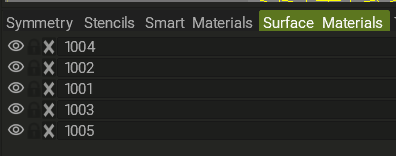
By the way, yesterday when I was relearning my way around 3DCoat I was renaming the UV tiles so I wasn't having to go to the UV room and figure out which was which, since there are 5 UV's turns out 1001 is the Head but my old brain can't remember that kind of thing. So when I was done renaming them in the paint room the figure had a moving uv pattern dancing on the figure and no matter what I tried I couldn't get paint or the maps to apply. IT was quite strange. Can you explain to me what you think may have happened and why I got that "moving uv pattern" on the figure? AND if it happens again how to fix it?
Thanks so much
Richard
-
Sadly it's not mine to share, it's a product that comes with Poser 11, L'Homme. So if by chance you have that program you can help a bit more with practical knowledge to share with me. I think I tried to drag and drop the Face onto the face of the figure and nothing happened, no pop up or anything....
-
I did that with no issue but then how do I apply that to the figure? I have no idea how to go there. I was hoping it would be as easy as when the texture map was imported to just drag and drop it onto the body part it corresponds with. Apparently not! LOL
-
OK, not understanding that. There are UV's on the model, of course. It's a model that was created by another person but they are there, there are 5 UV's total: Head, Limbs, Torso, Eyelashes/Eyebrows and Eyes
-
Hi,
OLD Newbie question. I have a 3D human figure that I created maps for in another program but want to import and apply without having to repaint them on using projection or what have you.
Like in the Sculpt layers palette I have the head selected, so I can turn that off and on so I ASSUME that it's what the program is looking at. I go to Texture>Import>Color/Albedo Map and it appears in the Layers palette and now what? I've looked at all the areas I think I need to look in to apply it to the figure's head but can't find that.
Please advise.
Thank you,
Richard

-
Most of the figures out there for DAZ Studio and Poser (human figures) are all using UDIM. So programs like this, Blender and even ZBrush are hopefully ALL going to support import and export of this much used way of UV mapping!
-
Padding should only be set to about 8, that's all you really need. It's just a "bleed" to make sure you don't end up with seams when you load and render your item in DAZ Studio or Poser.
-
Ah, OK. Thank you
-
Hi,
Just downloaded the newest version of 3DCoat but instead of asking if I want to upgrade my current version it's wanting to install to a whole new directory folder. I can't remember if that's the norm for 3DCoat. If so I'm good to go but if there is a way to force it to upgrade to the current 3D Coat folder please let me know.
Thanks
Richard -
Hi,
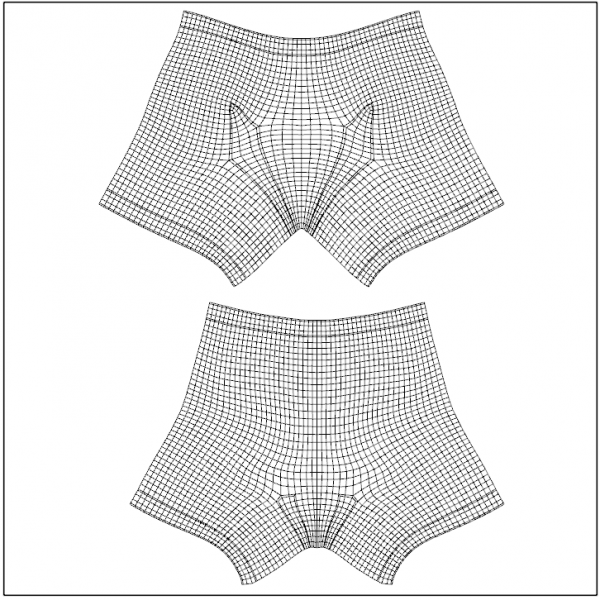
Say I have a pair of shorts I've modeled and then I UV them but the uv's turn out with curves at the top where the waistband would be and the bottom where the shorts "cuff" area would be. Is there a way to have 3DCoat make both the bottom and top straight so texturing with with seamless tiles looks correct?
Thanks so much
Richard
-
Not sure as I don't know the program well enough to evaluate what tools I need to complete this. I did try the Copy/Paste tool and found it worked OK but still not going to be acceptable to put this product in the store at Renderosity as there are still noticeable seams when I conform the genital prop to the Genesis 8 Male body. So I've sent this off to a friend to look over since she's more of an expert than I am about this stuff.
I will check this out though, the description looks like something I can make use of if not for this for other operations!
-
Is there a work flow or a video showing this?
Here is my work flow. I have a model and another model (the Genitals) exported as one but not conformed as when the gens are conformed it actually hides part of the main torso's geometry. So in order to keep the full maps for the torso from the figure in place I have to do it that way. So what I need to do is to have the skin and what hairy bits from the torso transfered to the gens so when they are conformed to the figure they are seamless.
Hopefully that makes more sense. It's too bad most forums don't allow nudity as I would post images to show the blatant differences between my attempts in Photoshop, which are not a good match... :-(
-
Hi,
Old newbie here..... I need a tutorial on how to paint over seams. I have a character I'm working on for DAZ Studio. So the male character has genitals that can be brought in. I have that object mapped but the pubic area of at the top of the object needs to match the Torso texture. I did just an OK job in Photoshop and it was suggested that I blend the materials in a 3D paint program or that part of the product won't be acceptable for the store when it's ready to be released.
So far I have the Genesis 8 Male with it's genital prop conformed, exported at the lowest resolution from DAZ Studio as an obj file.
I've also got the figures imported into 3D Coat and the needed diffuse maps applied to the figures.
I've got the file saved as a 3D Coat project file.
I did try to figure it out myself but I made a mess of things so I'm reaching out for a, hopefully, video tutoral on painting over seams and blending maps to look seamless.
Thanks so much
Richard
-
Cool video. Learned some stuff. Thank you.
Thanks Michael for the email. Sent you another for more clarification on some other bits I downloaded with my purchase.
-
OK, learned something from the video tutorial, thanks very much but my question would be to be able to just go and blur out specific areas, like is there a blur or smooth texture brush? I've got a few areas that I didn't see in DAZ Studio when rendering but see clearly in 3DC around the ears where the textures are not blended nicely and wanted to blur/blend those out a little bit into the face and ears areas but then I need to know how to use the materials brush to put back in needed detail that will be lost. I looked over some of the other tutorials but they are pretty old so the tools are showing up as different and didn't find on on a blur or smoothing brush....
-
Oh goodie, I love video tutorials.
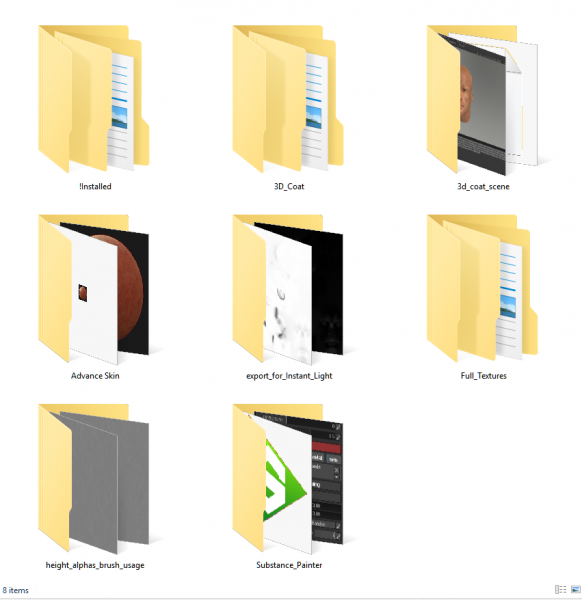
OH and I got both of the skin packs. UH, there are ALLOT of files and folders I have NO IDEA where to install any of this and the person that made these didn't include a readme with instructions!

See the image screenshot. Ignore the "!Installed and Substance Painter" folders one has the ZIPS inside and the other is for Substance Painter, which I have too but I'd rather concentrate on 3DCoat. There is one for Quixel too, which I have as well but can't figure out which folder those files are in!

-
Thanks. I'll for sure get these but still need help understanding how to adjust what I have as the skin from this other merchant has all the tiles for various parts of the body like eyelids, ears and other delicate skin areas of the body so it would be nice to know how to adjust these within 3DL to get them lightened or darkened up, change the hue a bit and saturation where needed. Any help with that?
Thanks for the link!


Bug in the painting room?
in General 3DCoat
Posted
Hi,
3D Coat seems to stop cooperating after a short while. Regardless if I'm using the clone tool to paint over seams or it's the brush tool.
My steps.
1) Working with a 3D model that has multiple skin maps
2) Select the Clone Brush
3) Hold down Ctrl and click on the area I want to be the guide and transfer of material
4) Stamp or brush over the intended area to fix or blend out better (I'm trying to correct some seams on top of the head where the Torso and Head maps meet)
5) Release the brush, nothing happens.
All the steps were tried multiple times using the brush tool with the color picker using a skin tone that matched the texture maps. Nada happens there either.
So not sure what's going on here. Am I missing a step or what's happening?
Thanks for the help!