Search the Community
Showing results for tags 'microvertex'.
-
Hi everyone, this is a WIP and not (yet) official guide, I'm working on a tutorial that might be clear-cut method from start to finish. You can leave a comment if I'm missing something, or point out an error. Some information is entirely my own understanding, some may have been used from your own posts etc Subheading: PaintRoom --> Retopo Room --> Bake to MicroVertex --> Bake Displacement to Lowpoly mesh This Article discusses the the complete workflow(s) from model creation to Baking both Material maps and mesh of your Highly detailed Per Pixel Painting, Microvertex and Ptex Projects using Smart Materials that utilize displacement maps. 1. Displacement Topology - Preparing your model: Voxel meshes are ideal for displacement due to uniform faces that prevent painted textures on the surface from stretching and other glitches. It's also very important that your models don't contain hard edges otherwise faces will likely mix into each other creating distortion. If you need high performance in your 3D application, tris are best for game engines due to efficiency, performance and file size but Micro Vertex working with tries can create artifacts. Using Quads with Microvertex maybe more ideal to paint characters and in general quads are preferred for smoother surfaces and better deformations for animations. For Film & Game Engine Optimization that uses Automatic Frustum & Occlusion culling, plan your model. Large objects such as cliffs or walls can hide/disable other parts or areas not seen by the camera or animation viewport, so it's ideal to slice the model in such a way as allowing parts to be automatically hidden to speed up Renders and Game Performance while making visible and focusing only on what the camera actually sees. There is an essential rule of mesh resolution that needs to be followed and that is that your lowpoly model needs enough resolution initially to be subdivided from. The reason is that your model could likely be full of cracks in other programs when displacement maps are applied, it doesn't have enough actual geometry to deform (even with tessellation) You will see that smooth mesh by subdivision helps but may not fix the problem, the model needs enough resolution from the beginning of the paint job. There are a few methods of preparing your model for painting and we have it numbered from best to least under: Displacement Topology -Preparing your model, UV Mapping, Painting and Baking the Mesh. (1) Per-Pixel-Painting Topology: Ideal for landscapes -use meshes with tries (can be set upon import) Import a low poly mesh, in the menu set to "Triangulate" if using quads, set UV to "keep UV" , Subdivision can either be 0 of you want to use tessellation instead while painting (faster but lower smooth quality) or use "subdivide" (higher quality but slower to paint) If you use Subdivide 3DCoat may automatically choose a medium setting which may be sufficient. You can always add tessellation to each of your paint objects (models) later. Choose "full smoothing" if you want accuracy using Smart materials that use height maps. (2) Ptex Topology Method Topology: Ideal for Characters using quads. Upon New Ptex project topology, import model, choose" Auto-Retopo with Ptex". -It will do the the retopology for you and then send you directly to Ptex painting. (3) Micro Vertex Topology Topology- Ideal if you have to use models with quads for quality Character deformations in animations. -unless it's best and safe to convert them to tris upon import and simply export the maps but the maps might have to be exported for quads. UV Mapping: Manual UV tip: Best approach to avoid glitches is to cut UVs in a grid with straight lines, Voxel topology makes areas to cut easier to identify. Cutting into grids has equal/balanced pull on the vertices in all directions. To get more detail especially with landscapes that don't need organized UV islands, aim for islands to be square or rectangular and aligned vertical or horizontal. The more UV space filled in the better. Automatic UV Method: (1) Using Per-Pixel-Painting Mode: (Community input required for the general consensus of the best UV creation in 3DCoat -ideally with parameters that are used in the manual UV creation process) (2) Using Ptex Method Mode: The Ptex Paint method provides automatic UV mapping upon export. (3) Using Micro Vertex Mode: (Community input required for the general consensus of the best UV creation in 3DCoat -ideally with parameters that are used in the manual UV creation process) Painting Tip: When painting displacement closer to less rounded edges, reduce Depth value to approximately10 or lower, paint and test, undo, reduce or raise value, paint and test etc. Some Smart Materials contain AO, after selecting one that has AO maps you will be asked if you want to generate an AO layer because the smart material requires it. This is optional, It might be better to keep your project light, and bake AO at the end of your painting but painting with AO can help you see details better and know what you're getting right away. You can create and edit your smart materials to fine tune it. Learn about creating Smart Materials Here (You can create Smart Materials in any existing or empty project) (1) Per-Pixel-Painting: is currently the Best Method to paint Smart Materials using displacement, to understand why, visit this link (2) Ptex Painting: Since Ptex and Smart Materials have been made compatible with each other, more investigation is needed to determine if it's more advantageous over Per-Pixel-Painting but at this time it uses Quads but can it be exported to tries and still look good? (Community input required for this for the general consensus) (3) Micro Vertex Painting: Since Micro Vertex and Smart Materials have been made compatible with each other fairly recently more community input is required to determine the benefits. *Micro Vertex is compatible with creating displacement maps and "in theory" is compatible with Vector Displacement Smart Materials which should open the door to paint complete whole Colorful photo-scanned models but Smart Materials may or may not yet have added Vector Displacement Map Compatibility. A Smart Material with Vector maps maybe the first of its kind to produce Vector Displacement and Color at the same time. Baking Displacement to low poly to reduce the need for high tessellation in other 3D applications -WIP This wasn't the workflow in the past. Generally Displacement maps are created from the differences between the original and the high poly version (which is what you want) however, this is just for creating the correct displacement maps. During your painting with displacement maps used in your Smart Material, as it changes the vertex positions in the high poly it also changes some in the low poly. Bake To Hi Poly Mesh (1) Using Per-Pixel-Painting Mode: bake the displacement into a newly created high poly mesh added to a layer in the paint room using "Bake sculpt mesh onto paint room mesh" (Top Menu Under Bake) Exporting Textures: Normally when exporting textures with subdivision levels, layer o must first be selected. The (1) Using Per-Pixel-Painting Workflow: (2) Using Ptex Method Workflow: (3) Using Micro Vertex Workflow: Bake Displacement -To-Lowpoly Mesh: (1) IF you're using "Per-Pixel-Painting" send to: Retopo Room, choose "bake into scene Microvertex" then bake sculpted mesh to sub-D (you set it with option menu when bake) + displace applied mesh in paint room as polygon group name layer. (real deform high polygon mesh) (2) IF you're using "Ptex Painting" send to: The Ptex Paint method provides automatic UV mapping upon export. (3) Send Micro Vertex to: Different Displacement painting methods and evolution - what you need to know before you decide your workflow: https://3dcoat.com/wiki/index.php?title=3.1_Per_Pixel_vs_Microvertex Methods of Setting up Displacement in external applications Using traditional Methods - Adding extra geometry to instruct the shader or the program to add more vertex points and positions 1. Tessellation - Set tessellation level only as high as the details need to be. Tessellation can come in two common forms; 1.Distance-based that offers Level of detail (LOD) on the model the closer it is to the camera and 2.Full tessellation (currently used in 3DCoat) 2. Smooth mesh By Subdivision - Subdivision like full tessellation offers no ability for LOD, meaning it's going to reduce performance but like tessellation you can increase or decrease levels. It's the best visually and if tessellation doesn't close cracks due to lack of geometry, smooth mesh by subdivision might fix that. This mode is also incompatible with some GPU Renderers like Iray and will greatly slow it down. Your application may let you combine both methods; "Smoot Mesh By Subdivision" and "Tessellation." Generally using Level 1 of "Smooth Mesh By Subdivision" and "Tessellation" level between 1-2 gives optimal results for rendering. Emerging No Extra Geometry Methods 1. Screen Space Displacement mapping (SSDM) - Some initial experiments from developers have shown real-time game play of 500-1000+ FPS in Unity from the developer "Oddity Interactive" (Using the performance heavy photo-scanned RD-Textures was more in the 400 FPS range) Another Example
- 1 reply
-
- 5
-

-

-
- per pixel painting
- displacement workflow
- (and 10 more)
-
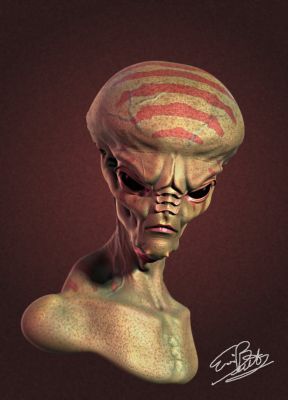
From the album: Ebitz Gallery
This piece was done for the 3D community challenge that I had hosted.© 2013
- 2 comments
-
- 1
-

-
- 3D coat
- microvertex
-
(and 2 more)
Tagged with:


