


Forums
-
Development
-

- 843
- posts
-

- 3D LATTICE VOXEL STRUCTURES FOR ANY 3D MODEL - TUTORIAL.
- By webmaster,
-

- 50.2k
- posts
-

- 3DCoat 2026 GPUPPP Development
- By Laticis,
-
- 3.5k
- posts
-

- 610
- posts
-

- NCCA Graphics Library (NGL)
- By Carlosan,
-
-
General
-

- 71.6k
- posts
-
- 13.6k
- posts
-
- Carbon Game Engine Open Sourced
- By Carlosan,
-
-
Tutorials, Tips and Tricks
-
- 960
- posts
-
- How to export 3DCoat UVs to Zbrush
- By Carlosan,
-
- 405
- posts
-
- 699
- posts
-
- Splitter Tool
- By Carlosan,
-
- 262
- posts
-

- Retopo - How do you select cluster of different coloured regions?
- By DustyShinigami,
-
- 318
- posts
-
- Texturing with nodes
- By Carlosan,
-
- 550
- posts
-
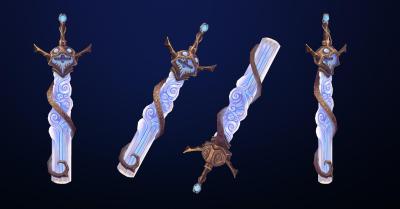
- Hand Painting Swords | Mila
- By Carlosan,
-
- 56
- posts
-
- 163
- posts
-
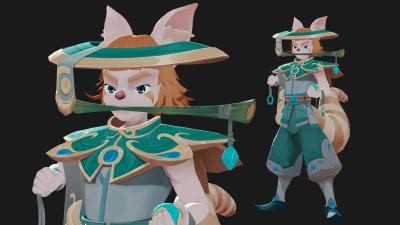
- Concept Art Timelapse | Dao Vi
- By Carlosan,
-
-
Artwork
-
- 17.3k
- posts
-

- Sky Patrol Flying Car
- By kenmo,
-
- 3k
- posts
-
- 2026 REALLUSION 3D CHARACTER CONTEST
- By Carlosan,
-

-
Market
-
Who's Online 3 Members, 0 Anonymous, 374 Guests (See full list)
- Mihu83
- Carlosan
- dfh 234f
-
Topics
-
Retopo - How do you select cluster of different coloured regions?
By DustyShinigami, in Retopology, UVs & Baking
- retopology
- uv islands
- (and 1 more)
- 2 replies
- 57 views
-
3DCoat Textura 2026 only install has missing top menu
By mxhunterx, in New Releases, Bugs Reports & Development Discussion
- 6 replies
- 168 views
-
3dcoat textura Weird effect when grouping layers
By Fabian3d, in New Releases, Bugs Reports & Development Discussion
- 3 replies
- 129 views
-
[Bug] Weird Pixilation on model after importing for per pixel painting
By TJTASSIE, in SOS! If you need urgent help for 3DCoat
- 8 replies
- 249 views
-
- 2 replies
- 81 views
-
Missing top menu and unresponsive startup window in Textura 2026.12 and 2026.11
By SamuelS, in New Releases, Bugs Reports & Development Discussion
- 12 replies
- 300 views
-
Question: How to Import Quick Access Tools from 3DCoat 2025 to 2026
By Julian, in Questions & Answers
- Has best answer
- 0 votes
- 5 answers
-


-
Posts
-
By Laticis · Posted
Hi, Just an FYI I have been testing workflows in 3DCoat for texturing 8K terrains....regarding the performance of 3DCoat2026-12 on my older system with a 2080ti GPU....I've uninstalled it and reverted back to 3DCoat2024-13. It seems to handle things much better. I'll be testing 2025-17 tomorrow.... I could not see or feel any performance improvements with 3DC2026 -

By wendallhitherd · Posted
api bug with scaling objects: """ On a mirrored instance (negative-scale / flipped transform): Object has a negative determinant / reflected axis in the matrix. GetScaling() returns positive components only. SetScaling(GetScaling() * k) (or any SetScaling with those values) drops the mirror and/or corrupts the intended transform, while editing the 3×3 directly by k preserves the flip. """ basically, if you try to use the api builtins to set scale half and set scale double, it will corrupt the matrices, ignore the scale sign, and return mangled transforms. Expected behavior is that a round trip scale 0.5 and scale 2x restores original object scale / position including instance flips -

By TJTASSIE · Posted
Good to know. Thanks. My UV is packed so tight it would be difficult to separate the offending faces. I will wait for an official fix and work in 2024 for now. -
By Carlosan · Posted
Edit > Relocate 3DCoat's Data is available in your version ? -

By MarkC · Posted
Is the user folder saved somewhere different than 2025 on Mac? My 2025 install (and all others) creates a 3DCoat folder in my documents. 2026 did the same, but is extremely small. Usually the folder is about 15GB, 2026.11 is 579MB. Also can I still migrate my 2025 Alphas/Smart Materials to 2026. -
By DustyShinigami · Posted
Awesome. Thank you. Although, I could have sworn when I tried selecting things in the UV Preview window, it wouldn't select anything. Or just everything instead of individual shells. But that's sorted it. -
By Dmitriy Nos · Posted
@DustyShinigamiYou can do this in the UV preview window. Click on the UV island and delete it. -
By DustyShinigami · Posted
Hi. How exactly can you select a specific coloured cluster of faces? What I mean is, I've added UV seams, so areas are separated into different colours - green for the front faces of the mesh, purple for edges on top, bottom, and the sides, and yellow for the inside faces - and I want to select just the front and edge regions so I can delete them. But using the Select tool, double clicking on any coloured region just selects everything. I've tried Unwrapping it all to see if I can select the Shells in the UV Preview window, but I'm not having any luck with that either. Thanks -
By Carlosan · Posted
Julian post above the right answer Press CTRL-F or use Popups->Search in UI to find and execute any accessible item in UI in the current room. -
-
By Carlosan · Posted
Hi Yes, is a bad link. here is the current access https://3dcoat.com/documentation/manual/workspaces-rooms/retopology/autoretopo/baking-guide/ -

By hyburn · Posted
Attention: Dev team First I'd like to say "well done", this software is amazing. Bug, I get a 403 error when trying to access the "Read the Auto-Retopology Guide" Access to www.christoph-werner.de was denied You don't have the user rights to view this page. -

By mxhunterx · Posted
I think I will just wait for that update fix instead of trying to use it now with this workaround. Reinstalling 3d coat means having to redo all the customization and reupload all the custom stencils and smart materials. I'm sure the node system is great, but I'll have to test it out later when 2026 version is more stable. -

By Jota · Posted
I am having the same issue, in a model that has symmetrical UVs. If I recalculate UVs for the full model (now each side has their own UV island, no overlap), the glitch disappears. I have a workaround though: If I select half of my model (X symmetry) UVs and move them one UV tile (in Blender: I "G + X" with Control to eg Right side, you will see an UI like "D: 0.0000 (0.0000) Along X", make it to be 1.0000). In this way: - No glitch - Model still has UV symmetrical, officially they are in another UDIM, but doesnt matter as I won't use this model. If I would perform some sculpt or change, I could transfer UVs from the original model as they would share same topology. -

By carrots · Posted
Just copy qa.xml from Documents\3DCoat\qa.xml to Documents\3DCoat2026\qa.xml -

By Julian · Posted
Go to Edit -> Preferences -> Theme -> Check "No search in space panel" -
By carrots · Posted
1. I found an issue with layer grouping; I'll fix it soon. 2. Since 3DCoat 2026 includes many fundamental changes, we have added `3DCoatGL64Legacy.exe` to every installation—including 3DCoat Textura 2026. This executable runs per-pixel UV texturing on the legacy engine, ensuring identical results when loading projects from previous versions. 3. You can keep both versions of 3DCoat completely isolated from each other: simply copy `doc_folder.txt` into the folder where 3DCoat Textura 2026 is installed. This will create a separate folder in your Documents directory named `3DCoatTextura2026`, allowing versions 2025 and 2026 to run without any conflicts. You can also specify a different folder name inside `doc_folder.txt` if you prefer a different naming convention for the Documents folder. I plan to adjust the default folder in the Documents folder to `3DCoatTextura2026` in future versions; this should help resolve version conflicts, including issues where menus disappear. doc_folder.txt -

By Akyuu · Posted
I also have the same bug, basically when grouping layers the colors become all wrong as seen in their third picture in the link, it also gets worse the more levels the group stack has (basically gets darker) happens on a clean new project on default boot too, in both textura and full 3dcoat, does not happens in 2026-01 ish or some older versions -

By Vu.nguyen · Posted
Excuse me, Could you show me how to disable auto active search text label when pressing spacebar? I can not find it :( -

By bewilder · Posted
I overlooked this other thread before posting here. I followed what was done there, installed 3DCoat, ran once. Started Textura and the menu is there! Then uninstalled 3DCoat.
-