


AbnRanger
-
Posts
8,239 -
Joined
-
Last visited
Content Type
Forums
Calendar
Gallery
Posts posted by AbnRanger
-
-
11 hours ago, rocthered said:
Uh I see. I will never figure it out on my own. .
Thanks a lot! I will give it a try.
What I would try to do is save a Neutral pose of your character, in both the Retopo Workspace (Low Poly baking target/retopo mesh) and in the Sculpt Workspace (Surface mode). Then, for every Morph Target/Shape Key create a new duplicate (in both workspaces). I will try to record a video showing these steps, soon.
-
On 9/8/2022 at 3:55 PM, Tieguaili3D said:
so you enjoy not being able to see what you're doing when you have "conform retopo mesh" active? all you can see is the badword overlay, try doing any kind of detailed work with that thing active. as for "you never need to use a low poly mesh to make large changes" yes you do, try making a nice smooth proportional edit to a character mesh with any tool, try making those kinds of edits without killing any details you have at higher levels, don't lean on videos with a mesh barely out of the blockout stage that does nothing other than twiddle the thumbs, you also haven't addressed the fact that smoothing, moving, and otherwise making large edits to your model royally fucks up the topology of your retopo mesh with conform active, making conforming your model pointless in the first place. You also completely miss the point of multires sculpting, no one is gonna boolean a new arm onto their character while they're detailing it, that's what you do in the blockout not when you're refining and detailing, the whole point of using a basemesh and multires is to skip the blockout, you already know you're making a human so you bring in your human basemesh to work on it so "oh i can boolean my basemesh and not lose my layers" is a pointless argument, ifyou're into the multires stage you're past the point of needing to boolean and your retopo model isn't gonna conform to that boolean anyway, so again completely pointless.
There is no reason to argue, here. I am not a newby. I know what 3DCoat can and cannot do, as I have been using it for about 15yrs. I am simply explaining how CONFORM RETOPO works. If you want to have the Retopo Mesh hidden, you can send a request to support@pilgway.com to request an option for the user to hide it, but currently it is shown because some user requested it to be that way. There is no need to take offense. I am simply telling you how it works.
After some testing, it doesn't seem to work as well as it once did, and there are certainly a few things Andrew needs to take a look at. As I was saying with GBBall, there already is some crude TurboSmooth functionality in the Retopo/Modeling workspace, called LIVESMOOTH. It's in the MESH menu, and it will make the edits to the Retopo mesh reflect in the Sculpt workspace...a reverse effect of CONFORM RETOPO, effectively. Maybe Andrew can use that as a basis for Subdivision level quad sculpting, because I can now see that it could be beneficial, if it works well.
Conform Retopo needs some work, because just simple sculpting brush edits make the Retopo mesh noisey. It should not behave this way. The way Conform Retopo works is that 3DCoat waits for the user to release pressure from their stylus and then it tries to snap the retopo mesh. I think that needs to change. It needs to be simultaneous, so there is no pause at the end of a stroke or edit. 3DCoat can make large edits with the Move tool, easily, on a Model with 10 mill polys or less, but the performance lag is that secondary calculation (snapping the Retopo mesh to the Sculpt mesh). I will ask Andrew to look into this thread and see what he can do.
-
 1
1
-
-
13 hours ago, Tieguaili3D said:
well you missed every point i made by a country mile.
to your point 2: you do need to reduce that far if you want to maintain a nice clean surface without spending extra time cleaning it manually, and as you saw to not even get close to as low as a subdivision-ready basemesh on the larger areas you completely destroy everything else.
as for point 3: of course i hid it, i don't want that overlay getting in the way of my sculpting, the whole point of hiding it was to get rid of the distracting and obstructive overlay, how else are you meant to remove it?
the conform doesn't even conform properly anyway, why would you want to extend the reach of a function that doesn't even operate properly? and why on earth would we yet another type of arbitrarily separated mesh? i don't even know why we have paint, retopo, and sculpt meshes separated for absolutely no good reason since the only thing that limits what tools you're allowed to use on an object is what category you import it under, and before you say "well if you try to use a high poly mesh in the sculpt room you'll crash" it'd be easy enough to just have a warning popup like every other program does when you're trying to do something taxing, and like 3d coat already does when you're about to do something taxing elsewhere. This ridiculous decimation workflow doesn't solve a single issue that zbrush has, in zbrush if you don't want to use subdivisions you can just use dynamesh, you can freely, quickly, and fluidly switch between dynamesh, scutlpris, and subdivisions at any point, but i'm gonna leave that alone cause otherwise i'm gonna derail going into the other massive issue 3d coat has.
No, you do not need to reduce the proxy mesh that low. And no, it will not "destroy everything else" if you step down in resolution just one or two levels. I have been using 3DCoat since it's earliest days. I know how these things work. You absolutely do not need to reduce the Proxy resolution that much unless you simply want to leave the object visible in the scene. The resolution does NOT have to match the poly count of the original low poly base mesh. Perhaps that is what you were used to in another app, but that is not necessary in 3DCoat.
3DCoat's Multi-Res workflow most certainly does solve problems ZBrush has. For one thing, if you try to use Dynamesh or Sculptris Pro with SubD levels and/or Sculpt layers, you lose them. Period. In 3DCoat, you NEVER, EVER have to worry about losing SubD levels, because this approach will take your model however it is, at any point in time, and allow you to step down to a lower resolution level to work, yet without having to lose any detail (3DCOAT keeps the small details from the original Sculpt Tree layer, when the user uncaches/restores it). It's simply a different approach to the same task, and it has absolutely has it's own unique benefits.
The other problem it solves is booleans. 3DCoat will allow the user to work with Sculpt Layers and keep them intact, if they should decide at some point to perform a boolean operation (maybe adding some horns or scales, from the SCULPT MODELS or SPLINES pallet, as an example). This is simply not possible in ZBrush.
Creating some sculpt layers or morphs in ZBrush and you suddenly decide you want to dynamically add some resolution (via Sculptris Pro) in a certain area, like the face region for example? You can't. Not without breaking/losing your Sculpt Layers and SubD levels. As I said, 3DCoat solves issues like this, and it will even create a new Sculpt Layer for the user, containing the edits made to the proxy, when they uncache the Sculpt Tree layer.
As for hiding the Retopo Mesh, when using CONFORM RETOPO....it won't work if you hide it. This is not a bug. It's visible so the user can see both being transformed simultaneously. You may not prefer this approach, but that doesn't make it inferior to ZBrush's way of handling things. I just personally think 3DCoat's solution is more convenient (I was the one who requested of Andrew to add the CONFORM RETOPO feature)...because you can literally bring in a low poly base mesh (with the intention of baking all the details onto it, after all the sculpting work is done), with UV's already done, and never have to worry about losing it, even after working with remeshing tools like Dynamesh and/or Sculptris Pro. The edits you showed in ZBrush, you can easily do on the same model in 3DCoat, even if it has 10 million polys...without breaking a sweat. Just try it. Try making the same edits without a lower res proxy and try it with a proxy reduced/decimated just one level. You might be surprised how well it works.
-
On 9/5/2022 at 12:56 AM, Elemeno said:

remeshing a sphere gives some weird artifacts

To be honest, I would suggest using a much smoother version (lower resolution duplicate of the voxel object) of any Sculpt object that has a lot of sculpting details. The reason is, those tiny little bumps and cracks make the Autopo algorithm think it has to create a lot of extra geometry, when you normally want it to be relatively simple topology and not so cluttered (normal/displacement maps can recreate those details in the low poly baking target). Granted, those holes are a concern, but I find they rarely occur. If they are not so rare for you, please notify support@pilgway.com so Andrew can resolve it.
-
On 7/30/2022 at 3:55 AM, Kaen said:
I'm trying to use the Vox Clay tool and just a round brush, But it only gives a square?
I tried other brushes and it does the same thing. I tried the same thing on 3DCoat v4 and it doesn't do that there.
Is this a bug or have I done something wrong? All I have done is installed the software and went to start using it.
Hopefully I'm posting in the right place and I apologize if I haven't posted in the right spot.
Edit: Really need to get this working right or work out if I have done something wrong as I need to use this program for school. And am missing classes because of this issue. Teachers are using 3DCoat V4 which none of us can get and the school is unable to give to us either.
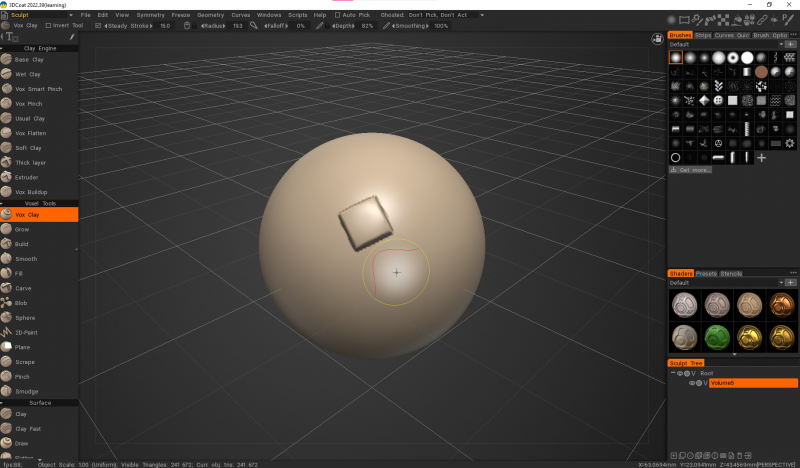
The default Clay Engine brushes use a default alpha, so check USE CURRENT ALPHA to enable usage of different custom brush alphas. You can find this option at the bottom of the MODIFIERS section of the Tool Panel
-
On 8/25/2022 at 4:26 PM, gbball said:
@Andrew Shpagin I think the biggest difference is that in Zbrush or Blender, is that once you have a finished sculpt, whether you used Dynamesh or Scuptris or something, you can still keep sculpting afterwards. So the Dynamesh/Scuptris is for the blockout...then once you have your finalized quad mesh, you can step up or down on the quad mesh to add more details and at that point, the linkage between the low poly mesh and the high poly mesh works both ways, where changes to the high poly mesh affect the low poly one, and vice versa. I know 3D Coat has it's own way of handling this with cached geometry and decimation, which is fine...but that doesn't change the fact that voxel and surface sculpts are still more geared towards blockouts/preliminary sculpts as opposed to finalized sculpts and meshes as I'll outline below.
In 3D Coat the blocking out stage in voxels and surface sculpts is very good. But once you retopo or autotopo, it becomes cumbersome to make sculpt-like wholesale changes to the mesh because you're using the modeling or retopo room tools...further, there is only a one way linkage between the high poly sculpt and the optimized retopo mesh and it works from Sculpt -> Retopo mesh. In my opinion, being able to control high poly sculpts with low poly geometry is more valuable...and if you think about it, the main selling point of a sculpting application...being able to move millions of polygons with a brush stroke or using a move tool. Wouldn't it be incredibly useful to manipulate a sculpt mesh by moving a single low poly face, edge or vertex? Or even better dictating an edge loop and extrusion to create a ridge where you want it? This workflow doesn't currently exist because changes I make to a retopo mesh have zero bearing on what happens to the sculpt.
One solution would be 3 types of sculpt meshes in the sculpt room. 1. Voxels - 2. Surface - 3. Quad/Ngon with non-destructive subdivision stepping for detail sculpting after retopology.
Moving from a Voxel or Sculpt mesh to a Quad/Ngon mesh would trigger an autotopo command and moving from a Quad/Ngon mesh to voxel/surface mode would either be a destructive step or it would cache the Quad/Ngon mesh and run the conform to retopo
For early blockouts Voxels, Surface sculpts, Dynamesh, Sculptris are all great options...but when you want to finalize something and eventually bake, having a clean retopoed mesh where you can dictate the edgeflow is more ideal.
3 shortcomings with Surface sculpting when finalizing a sculpt.
1. Not always able to work on a uniform mesh since it works best when dynamic remeshing is enabled. As a result some areas of the mesh are low poly and trianagulated, while others are highly detailed. Getting the whole mesh to be the same density is a destructive step that requires going back to Voxels and returning to surface mode... Doing this will inevitably erode any small details you might have had, or worse merge together overlapping geometry. It's the equivalent of Dynameshing in Zbrush...good for a block out, but not optimal for the final stages of a sculpt as compared to a subdiv sculpt where topology conformity is moreso forced and automatic when you add subdivisions.
2. Baking becomes problematic when you have self intersecting geometry - Baking from a high poly subdivision level to it's base level would solve this...it would also provide perfect displacement maps, which has also been cited as an issue by some before.
3. Bringing an existing mesh into this space is a destructive step, where vertex order, UV information, and topology are lost.
So while I can bring my mesh into both the retopo space and the sculpt space, I will be limited in terms of having things like topology adjustments on the retopo mesh being reflected on the sculpt mesh.
@AbnRanger I don't mean any disrespect, but I've noticed over the years, you've consistently touted the alternate methods 3D Coat has for sculpting and dealing with high poly/low polygon stepping during sculpting whenever this particular request is made. However, I've outlined this issues as I see them and I think it does a disservice to the development of the application to stand in opposition to requests for workflow improvements that would be so beneficial to so many. We all love 3D Coat here and we all respect the hard work and innovation from the dev team. So I am sensitive in terms of feature and workflow requests. However, for the furthering of the app, I think it would be helpful if you got behind these kinds of requests for progress, especially when it's been made consistently by so many for so long. Hopefully I've outlined why it would be beneficial.
We can have differing opinions about the application without being offended. I certainly respect yours, Anton's and others, but I also still think 3DCoat's approach doesn't quite get the credit it deserves. It solves some of the problems Zbrush still has. I am personally concerned that it could overcomplicate things by adding yet a third type of sculpting mesh and expect all 3 to work together well. But, I am open to changes if they can help.
"In 3D Coat the blocking out stage in voxels and surface sculpts is very good. But once you retopo or autotopo, it becomes cumbersome to make sculpt-like wholesale changes to the mesh because you're using the modeling or retopo room tools...further, there is only a one way linkage between the high poly sculpt and the optimized retopo mesh and it works from Sculpt -> Retopo mesh. In my opinion, being able to control high poly sculpts with low poly geometry is more valuable...and if you think about it, the main selling point of a sculpting application...being able to move millions of polygons with a brush stroke or using a move tool. Wouldn't it be incredibly useful to manipulate a sculpt mesh by moving a single low poly face, edge or vertex? Or even better dictating an edge loop and extrusion to create a ridge where you want it? This workflow doesn't currently exist because changes I make to a retopo mesh have zero bearing on what happens to the sculpt."
3DCoat already has the ability to modify the Retopo/Modeling mesh and have the changes reflected in the Sculpt mesh, on the fly. It's called "Live Smooth." It's sort of like CONFORM RETOPO MESH, but in reverse. Currently, I don't think there is a way to link Live Smooth with an already existing Sculpt object (only one that gets created), but surely that can be enabled by Alexander. I would like to see Andrew bring the Soft Selection tools from the old TWEAK room, into the RETOPO/MODELING rooms, because that is a MUST HAVE for any serious poly-modeling toolset. Once that is done, He could conceivably add the ability to conform in either direction + add SubD levels to the Retopo/Model and enable Sculpting tools to work with them, much the same way the Surface brushes work in Voxel mode.
-
 1
1
-
-
On 8/27/2022 at 6:28 AM, Tieguaili3D said:
in the first video you can see the lumpy surface you get when subdividing a low poly mesh, that makes sculpting cleanly an issue, you can also see the random distortions in the "conformed" low poly when smoothing, and the fact that you can't control where the low poly goes when you're working on the high poly. Last part of the video you can see the absolute mess you end up with when using the decimate and reduce functions to get something "low res" to work on, and you can also see that even at 64x decimation the result is both less detailed and higher resolution than the proper low poly mesh (this is also why it's completely pointless trying to bring in a pre-subdivided mesh from another program).
In the second video you once again see how the auto-triangulation makes an unusable mess of your high poly when subdivided, and shows how if you don't want a distracting and obstructive hologram of your low poly on top of your work the low poly no longer conforms, so you're stuck working with the UV shells and wireframe obstructing your view.
Third video is just a comparison with zbrush, it's faster to start working since you can just import and get working rather than import your low poly as a retopo mesh, move into the sculpt room, copy your retopo mesh into the sculpt room, then start to work. It also shows how using a proper multires system allows for the export of displacement and normal maps from those subdivision levels.
Using 3d coat you have 2 otpions for "multires" sculpting and 0 options for effective multires sculpting:
1) you can import your low poly as a retopo mesh, go to sculpt room, copy your retopo mesh into the sculpt room, start working with a horrible mess caused by the decimation that doesn't even get you close to the detail preservation or resolution that you get from an actual low poly.2) subdivide your low poly in blender, export, import your low poly to 3d coat as a retopo mesh, go to sculpt room and import your high poly as a sculpt mesh, start working with a horrible mess caused by the decimation that doesn't even get you close to the detail preservation or resolution that you get from an actual low poly.
using blender or zbrush you have 1 option for effective multires sculpting:
blender: import your low poly, add multires modifier, sculpt, generate normal and displacement maps from your subdivsion levels.
zbrush: import your low poly, sculpt, generate normal and displacement maps from subdivision levels.
@AbnRangerhopefully this makes it clear as to why we need proper subdivision levels and quad meshes rather than a hacky workaround.
An additional note that is worth remembering is, you virtually NEVER need to decimate or reduce your model to such extremes. 3DCoat can easily handle the task you were doing (tweaking proportions with the MOVE tool) without needing to step down to a lower resolution level...unless you are working on a super dense mesh of 20 million polygons or more. Even then, you only need to step down one or two levels...not 8 or 10. Those extreme levels of reduction and decimation are generally for saving the maximum amount of memory and GPU usage. It's helpful when you are building a big scene, and want to use proxies to populate the scene while being light on the system as you work. I will record something soon to show what I mean.
-
On 8/27/2022 at 6:28 AM, Tieguaili3D said:
in the first video you can see the lumpy surface you get when subdividing a low poly mesh, that makes sculpting cleanly an issue, you can also see the random distortions in the "conformed" low poly when smoothing, and the fact that you can't control where the low poly goes when you're working on the high poly. Last part of the video you can see the absolute mess you end up with when using the decimate and reduce functions to get something "low res" to work on, and you can also see that even at 64x decimation the result is both less detailed and higher resolution than the proper low poly mesh (this is also why it's completely pointless trying to bring in a pre-subdivided mesh from another program).
In the second video you once again see how the auto-triangulation makes an unusable mess of your high poly when subdivided, and shows how if you don't want a distracting and obstructive hologram of your low poly on top of your work the low poly no longer conforms, so you're stuck working with the UV shells and wireframe obstructing your view.
Third video is just a comparison with zbrush, it's faster to start working since you can just import and get working rather than import your low poly as a retopo mesh, move into the sculpt room, copy your retopo mesh into the sculpt room, then start to work. It also shows how using a proper multires system allows for the export of displacement and normal maps from those subdivision levels.
Using 3d coat you have 2 otpions for "multires" sculpting and 0 options for effective multires sculpting:
1) you can import your low poly as a retopo mesh, go to sculpt room, copy your retopo mesh into the sculpt room, start working with a horrible mess caused by the decimation that doesn't even get you close to the detail preservation or resolution that you get from an actual low poly.2) subdivide your low poly in blender, export, import your low poly to 3d coat as a retopo mesh, go to sculpt room and import your high poly as a sculpt mesh, start working with a horrible mess caused by the decimation that doesn't even get you close to the detail preservation or resolution that you get from an actual low poly.
using blender or zbrush you have 1 option for effective multires sculpting:
blender: import your low poly, add multires modifier, sculpt, generate normal and displacement maps from your subdivsion levels.
zbrush: import your low poly, sculpt, generate normal and displacement maps from subdivision levels.
@AbnRangerhopefully this makes it clear as to why we need proper subdivision levels and quad meshes rather than a hacky workaround.
Sorry for the delay in answering...was on vacation. Here is my reply to the issues you have with how 3DCoat handles things, currently...
1) When you send a copy of the Retopo Mesh to the Sculpt room, you have better options than what you tried in the videos. I think that is the source of your frustration. You could (in the Sculpt Room) try the IMPORT tool in the OBJECTS section of the Tool Panel. Click the PICK FROM RETOPO button > click SUBDIVIDE button as many times as is needed to get a decent base level of resolution for sculpting. Once you commit the object to a Sculpt Tree layer (hitting the ENTER key or APPLY button), you can either try to start sculpting from the mesh, like it is (it will have the same topology as the Retopo mesh, but with triangles). This may not always give good results, when trying to sculpt in 3DCoat. So, the best thing to do would perhaps be to hit the ENTER key, straight away (assuming the layer is in Surface mode. This is the equivalent to using Dynamesh in ZBrush. It creates a very evenly spaced polygonal mesh, which usually works best in most sculpting situations, in 3DCoat....at least until you are working in the advanced/detail stages.
2) You do not need to work from a "Horrible Decimated Base Mesh"...ever. This is not a good example to use. There is never a need to decimate the model as low as you have it, in order to perform such operations as using the POSE, TRANSFORM or MOVE tool.
3) In your 2nd video, you hid the Retopo Mesh, and therefore it did not conform it to the Sculpt mesh. This is not a problem with the Software. This is not having a full understanding of the toolset, or a simple mistake (forgot to unhide the "Polygroups/Retopo mesh"?).
-
2 hours ago, Elemeno said:
can we get a remesher for surface sculpting???
You can remesh at any time by hitting the ENTER key, or you could RMB the Sculpt Tree layer > Auto Retopo. Once you have an acceptable Retopo mesh you can go to the Sculpt Room > GEOMETRY menu > Retopo Mesh to Sculpt Mesh.
-
9 hours ago, Silas Merlin said:
I do not have "Restore default" in RMB menu for the tool. only a thing called "restore default ordering"

Good catch. It seems most of the Legacy voxel tools/brushes are missing this option.
-
On 9/1/2022 at 10:27 AM, Silas Merlin said:
It is frustrating that the sphere tool does not remember its settings.
Can you RMB click the tool button and choose RESTORE DEFAULT?
-
12 hours ago, Elemeno said:
same system as zspheres...
blocking out
or even like the system that dust3d usesOne already exists. It is the Curves tool, at the top of the CURVES section of the Tool Panel (Sculpt Room).
-
24 minutes ago, ArtaWorks said:
Much needed feature. There is no way to go up and down in detail levels on thin pieces like let's say clothing. Reduce and decimate is janky for that. I believe it works best for Voxels, it's not made for non-manifold surfaces.
Decimate is the better option for thin meshes, and if it is "janky," try using less decimation (if the original model is 1 mill polys, try 250-500k rather than 50k).
-
14 minutes ago, Carlosan said:
The question is not if we can, but how.
How many steps do we need to perform the same operation?
How should i train my mind to understand -and remember the same steps- if it is already trained in a different type of workflow already used by most other contenders ?If we talk about effectiveness in performing problem<->solving operations, economy of motion is the key to offer elegant solutions.
Since time is money, anything outside this axiom is perceived (by the users) as outdated and cumbersome....my 2 ctns
True. I always felt (since ZB 4) that ZBrush artists might stick with a SubD workflow initially, but then use Dynamesh and Sculptris Pro at later stages...much like many 3DCoat users might use Voxels initially, but then switch to Surface mode and use the dynamic Subdivision functionality.
It is not my intention to step on any toes. I just think Andrew has already tried to address the needs discussed here, but using a different approach. I would be curious to see a workflow in ZBrush that allows users to keep their SubD levels intact and keep their original mesh with UV's still intact, after using tools like Dynamesh, Sculptris Pro and ZRemesher. I like 3DCoat's way of handling things, better, but I am open to be persuaded otherwise, if someone is willing to show me.
-
5 hours ago, Tieguaili3D said:
...you can't drop to a lower subdivision to make larger proportional changes then back up to a higher level to make detail changes, and you can't leverage the multiple subdivision levels to keep you surfaces exactly as they should be much easier than if you're always working at maximum polycount.
You can't? Would you please screen record an example of what you mean...after first watching the following videos?
-
On 8/24/2022 at 9:46 AM, AntonTenitsky said:
Subdvisional sculpting / muti-res sculpting has been a feature of every major 3D software out there. It allows for bottom-top approach like bringng a low-poly quad model with UV and sculpting on subdivided model keeping the UVs present and keeping original mesh intact.
It's the way every normal production sculpting is done and it's always been strange that 3D Coat didn't have that ability.
I understand this rationale, but I have a few points to submit for consideration...
1) The ability to import a base low poly mesh, with UV's left intact, already exists in 3DCoat. 3DCoat just separates this into a separate workspace (Retopo). Yes, it is implemented in a much different way than ZBrush and Mudbox, but it actually works and quite well in my opinion. I find 3DCoat's approach to be a LOT less hassle and it seems much more efficient than ZBrush's.
2) SubD levels/Sculpt Layers/Morphs in ZBrush ALWAYS get nixed when artists use Dynamesh and/or Sculptris Pro. 3DCoat doesn't make users jump through so many hoops and it doesn't break Sculpt Layers when dynamic subdivision is applied to a model, or booleans.
In these kinds of conversations, perceived weaknesses of 3DCoat's SubD/Multi-Res implementation are often mentioned without acknowledging the benefits it actually offers....benefits that nobody else does (offer). The frequent breaking of ZB Sculpt Layers and SubD levels never gets mentioned. Yes, I understand that stepping down to a lower res proxy (especially Decimation) in 3DCoat can take longer than stepping down to a lower SubD level in ZBrush, but in my opinion that is a very small price to pay in return for the other unique benefits it brings to the table, especially when you consider 3DCoat will add changes made to a proxy to a new Sculpt Layer. That is pretty freaking amazing...but nobody ever mentions these things.
Anton, could you perhaps record an example of the SubD workflow you want to see implemented in 3DCoat, using ZBrush...including regular usage of Dynamesh, Sculptris Pro, Sculpt Layers, Morphs and ZRemesher in the process, while keeping your original low poly SubD, UV'ed mesh intact after all the subsequent edits? I can thereafter, record a video showing how I would try to currently handle this workflow in 3DCoat, and maybe offer Andrew some ideas in the process? Sound reasonable?
On 8/24/2022 at 10:15 AM, Tieguaili3D said:...To anyone suggesting that the "conform retopo mesh" checkbox is an alternative it really isn't, the low poly gets completely destroyed at the most minor edits leaving you with more cleanup at the end than a full retopo....
I would beg to differ. Can you please record an example of a simple edit taking a lot of tweaking to the base (Retopo) mesh? I am the one who requested CONFORM RETOPO meshes from Andrew, to alleviate the issues mentioned in this thread. Including CONFORM RETOPO usage with Brushes. It has always worked well for me.
-
2 hours ago, DaveGr said:
Thanks so much for your assistance with my question - exactly what I needed.
You are very welcome. I hope all goes well in your workflow.
-
6 hours ago, DaveGr said:
I upgraded from Version 4.9 to 2022 about a week back, and have created a model in the modelling that I would like to texture in the paint room.
However, I can't seem to find any workflow tips or tutorials for transferring the model to the paint room for texturing and export.
Any assistance in that regard would be much appreciated.
Thank you all.
")
If you created a model in the Modeling room, just go to the BAKE Menu and choose which option is best suited for you. This will send a copy of the visible mesh(es) to the Paint Workspace. But first, you need to decide what you want to do about UV's. Do you want to AUTO-UV during the baking process? That is the default option if you have not created any UV's in the Modeling workspace (it has a set of UV tools that are identical to those in the UV room...which is specifically for Paint Room objects). If you have created UV's in the Modeling workspace, then KEEP UV's will be the default option in the BAKING (Import) dialog.
Once the baking is done, your new Paint Object is waiting in the Paint Workspace, ready for you to proceed with texture painting.
-
4 minutes ago, Elemeno said:
import as a voxel can cause thin areas of the mesh to be destroyed ...
Yes, but a user can opt to have 3DCoat create a shell, during import. This would give it a specified degree of thickness, to overcome this problem.
-
1
-
-
3 hours ago, Ctc_nick said:
Hi!
How many polygons does your mesh have? I would definitely start in the sculpt room with import. In Sculpt Room you can work on parts of dense meshes without single poly editing. good for scans. In the adjust section there are good tools for cleaning and repair. You might also voxelise parts to get rid of really bad knots in the mesh.
You could also reduce the polycount before using 3dcoat and split up the dense mesh. In my last scan I only used 12 million polys for a small figure which is not much but working on my 'old' computer. Here is a cool workflow from realitycapture to 3dcoat:
I hope it helps!
Yeah, I would definitely try to import it into the Sculpt room as a Voxel Object, first, to do all of the worst parts of a scan cleanup. Then, the FILL tool could be used to quickly fill all those holes.
-
1
-
-
16 hours ago, Patxito said:
Thank you so much for your explanation. I tested zbrush time ago and I liked it a lot too, but I have not made a direct comparison, I will make it. In zbrush I like the performance with many millions of polygons, the fact that you can work with different levels of subdivisions, the polygroups, layers, masks, proyecting details into a good topology... I though those would be things that I would miss in 3D coat. But the true is that at least with the tests that I made in 3D coat I was not missing any of those, I found other ways of making the things that I needed. But I didn't try any detailed character sculpt. In my little experience and watching others working, I think both are close in organic sculpting, maybe zbrush is a little superior in few things and works better with millions of polys, but I don't want to make sculpts with every wrinkle, or skin por.
For hard surface and environments I find that 3D coat is way better, at least I work very comfortable with it, is more easy to use and also faster for many things, I like so much to use stencils with build tool and then make cuts. And also the voxel hide.
1- I like voxels too, in zbrush you need to remesh all the time and you lose details, then you need to make a proyection, wasting extra time, but you can also use sculptrix. About the brushes, I tried some in zbrush, and are awesome. I didnt test 3D coat brushes enough to make a decent comparison, but the ones that I tried worked pretty good.
2- I have not tested this, just some basic materials that comes with 3D coat. I was using mostly the sculpt room, so I have not idea about how good can this be, I just know the basics of texturing in blender.
3- Layers, other thing that I had not idea about it in 3D coat. This sounds great. I though that this was something pretty good in zbrush that I would miss in 3D coat, looks like I was wrong. I've watched those texturing videos of 3D coat and it looks awesome.
4- "High End texture painting and high end sculpting, retopo and UV editing tools in a single app". This is too good, have to say, I didn't use it yet the texture paint, retopo (just via decimation) or UV editing.
Again, thank you so much for your explanation. I feel like if I am already in love with this software, I will be more in the future when I learn to use those features.
I think I will definetly buy 3D coat, I'll keep waitting if someone sell me his license, if not I think I will keep practicing with the learning license and wait till black friday sales.
You are very welcome. I think many people underestimate 3DCoat's ability to handle extreme levels of detail when sculpting, and they also overlook the fact that once the high poly mesh/Voxel details is baked to a Retopo mesh, they can use the Paint tools in the paint room, to add insane levels of normal/displacement map via the DEPTH channel. This would be one of 3DCoat's answers to ZBrush's HD Geometry. The Rhino models (done by Flavio Rygaard) in the recent promo videos show how crazy the polycounts can get in the Sculpt Room (Surface mode), if the user has a fairly robust system (if your system can play modern video games very well, it will likely perform very well in 3DCoat. 64 GB+ RAM and perhaps a GTX 1070 or better, would be recommended for really large scenes).
As for Subdivisions, 3DCoat has it's own way of handling SubD levels. It's not the same, but it is more flexible and forgiving and can be used at any time. Dynamesh and Sculptris Pro will break SubD levels, but 3DCoat doesn't care what you do to a mesh...you can ALWAYS step down to a lower resolution level and have the work done at that level transferred back to the original level.
Regarding Poly Groups, there is some level of equivalency in 3DCoat. For example, with the Pose tool, you can select any part of an object and create "PolyGroup" selections.
3DCoat's MASKING tool, in the Sculpt Workspace, is called the FREEZE tool. You can save it and reload a selection at any point, but you can also convert a freeze selection to a Pose Tool Selection and Polygroup selection (stored in a paint layer). You can see this at work in the above video.
-
2
-
-
These are all some videos that show a few of the features mentioned, plus Smart Retopo
-
2
-
-
-
56 minutes ago, Patxito said:
Hi everyone.
I am pretty close of buying 3D Coat, but I still have some doubts, there are other great options. I would like to read about your experience all this time using the software, pros and cons, and any useful thing that you can tell me. What can I get with this software that I can't get in other, or what can I get with other softwares that I cannot in 3D coat?
I want to use if for concept art, for environments and characters, so it is not necesary to have perfect topology. I think the auto retopo of 3D coat is good enough.
I want it mostly for sculpting, for now I texture and render in blender wich is fine for me. I has been testing 3D coat for a while, I really like how easy to use it is and how fast you can make things with it, I like the stencils, the UI, the voxel hide, the cut tool, the 2d paint tool, pose tool... I think this software have everything I need, but maybe it doesn't?. Maybe I am falling in love too fast? What can you tell me? should I go ahead and take it?
Thank you.
I am not sure how much of a hassle it is to download and use the 14 day Maxon One (have to do this to try ZBrush) trial, but you could test the sculpting brush feel and performance in both apps...in a side by side comparison, using like brushes on the same exact mesh. What I would suggest is starting with the Human bust model in 3DCoat, do a 30 minute sculpt of the same (target) character/person. Like a game character or celebrity, etc. Then try to do a high detail pass for about 15 minutes in each app. This should give you an idea just how close, if not better in some situations, 3DCoat is to ZBrush (who set the bar pretty high for any competitor). Export a copy of the original bust mesh, from 3DCoat, and use that in ZB.
In my own tests, I found that yes, ZB is very smooth and has a very nice feel to it...but when I ran the same tests in 3DCoat, with Clay brushes comparable to what are standard in ZB, it was pretty freaking close...almost to the point that you could barely tell a difference. I think the new brush engine in 3DCoat (mainly in Surface mode) was developed to give users more customization abilities than even ZB has, especially with the way you can stack modifiers.
Where 3DCoat really stands apart from other apps, is:
1) Voxels...ZB still does not have anything like it. Using a hotkey to remesh the object is not the same as working with Voxels, and with the new Clay Engine in Voxel mode, it is very close to the same type of feel and performance as the Clay Brushes in ZB....especially the WET CLAY brush. It's very nice to work with. The FILL brush in 3DCoat is superior to that in either Surface mode or in ZBrush.
2) You can PBR texture paint and sculpt (especially when using Smart Materials), simultaneously, in 3DCoat. So, for example, if you have a Smart Material for a Cobblestone texture, you can paint + sculpt an object with it, using a single click (the FILL tool in the Paint tools) or brushstroke. Nothing like it in ZB
3) Sculpt Layers...they are much more flexible and powerful in 3DCoat, because it is integrated with the Paint tools/layers and doesn't break or have the limitations ZB has. For example, if you are painting/sculpting the same cobblestone bridge or path and suddenly decide you need more texture resolution in a certain area, in 3DCoat, it is not a problem to apply more dynamic resolution in the areas of need...even after you have done a lot of texture work. It does not have the severe limitations ZB has, and there are no separate tools for Layers and Morphs. It's all integrated together in 3DCoat. If you want to dial back some layer depth, you can just scrub the DEPTH slider for that layer.
If you want to apply a Boolean to an object after having done a lot of sculpting and texture painting work, that too, is not a problem in 3DCoat. The sculpt layer information will only be erased where the boolean intersection is, and not the entire object. All the sculpt layer information will be intact everywhere else. These things are not possible in ZB.
4) High End texture painting and high end sculpting, retopo and UV editing tools in a single app. Nobody else offers this, and there are Paint features/modes that are not found in other apps. Vertex Paint, VerTextures/Factures and now Voxel Paint (totally new to not only 3DCoat, but the entire industry) allow artists to achieve high level texture painting without Retopo baking meshes or UV's...and a new Simplified exporter to UE5, Blender and other major apps. This gives the user the opportunity to decimate the high poly mesh + Auto UV it, and have 3DCoat bake the details and textures to this lower poly mesh...all as an option.
-
1
-


what is your experience with 3D coat?
in General 3DCoat
Posted
This is the case with virtually any paid software, where (during the Maintenance period) you get to use the last available update (perpetually, on a perpetual license) before the period expires. Just yesterday, I upgraded Camtasia from 2020 to 2022. It comes with a year of "maintenance" and I know upfront that it will not get any free updates or upgrades past Sept 12 2023. Why would your experience change for the worse? You received exactly what you paid for, right?