


L'Ancien Regime
-
Posts
2,189 -
Joined
-
Last visited
Content Type
Forums
Calendar
Gallery
Posts posted by L'Ancien Regime
-
-
A circular gradient may occlude more than necessary. I was thinking of a narrow gradient around the periphery of the plane or visible parts thereof.
hmm...not sure how to do that...just hand paint it with a spray brush?
-
Hi! Yes this is something for Vladimir, I don't believe we can do such a thing as admins. Sorry.

Thanks.
Not a big deal.
I'll have to live with it.
-
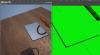
A 'dusty material' controlled with an alpha channel so that only the edges of the mirror appear occluded.

Like an alpha that's a circular gradient?
I was thinking of doing this tutorial on how to put dust on glass;
http://www.thegnomonworkshop.com/store/products/tutorials/jen_series/


-
drapery...
Go to museums,
DaVinci is my favorite.
Please don't spend your time on tricks, they don't exist. Observe, is the only you can do.
Voxels study. Based on DaVinci's drawings.

Did you actually do this Michalis? That is unreal.
Do you have any more of these in your archives?
I think we'd all love to see them. Share with us..
-
Hi, I was sending a PM to Digman yesterday and double posted it. So I messed up deleting one fo the duplicates and deleted a whole long set of communications with Digman that was full of excellent illustrated instructions on mess and texture extraction.
http://3d-coat.com/forum/index.php?app=core&module=usercp&tab=core&area=notificationlog
Is there any way it can be retrieved?
If not thanks anyway..
-
 :clapping:
-
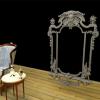
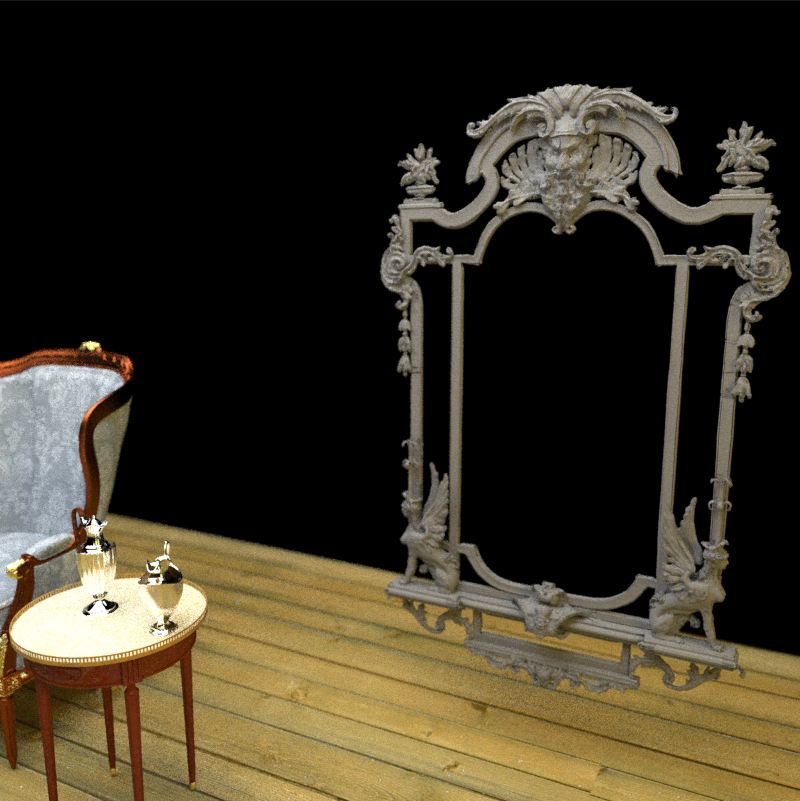
A gorgeous ensemble, sparkling new. Ambient Occlusion with a tarnished gold color and something to attenuate the perfection of the mirror (as per your suggestions) will make something of museum quality.
As I said I think I can make pretty good tarnish bloom between the glass and the mirror silver coat but irregular dust on the mirror..how to do that?
-
Almost there. Tomorrow will be Photoshop texture painting day..

-
I met a traveller from an antique land
Who said: `Two vast and trunkless legs of stone
Stand in the desert... Near them, on the sand,
Half sunk, a shattered visage lies, whose frown,
And wrinkled lip, and sneer of cold command,
Tell that its sculptor well those passions read
Which yet survive, stamped on these lifeless things,
The hand that mocked them and the heart that fed.
And on the pedestal these words appear --
"My name is Ozymandias, king of kings:
Look on my works, ye Mighty, and despair!"
Nothing beside remains. Round the decay
Of that colossal wreck, boundless and bare
The lone and level sands stretch far away.' [1]
-
Just the ornamental displacement texturing is left though I've been expermenting with creating bloom effects to create a layer on top of the mirror silver (under the glass) to emulate the leakage of air and moisture between the glass and the silver leaf to create a tarnish bloom effect....It's an antique mirror so it might be cool to age the mirror somewhat. A bump layer for tiny scratches and wood grain might help to age the frame too..
-
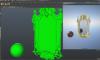
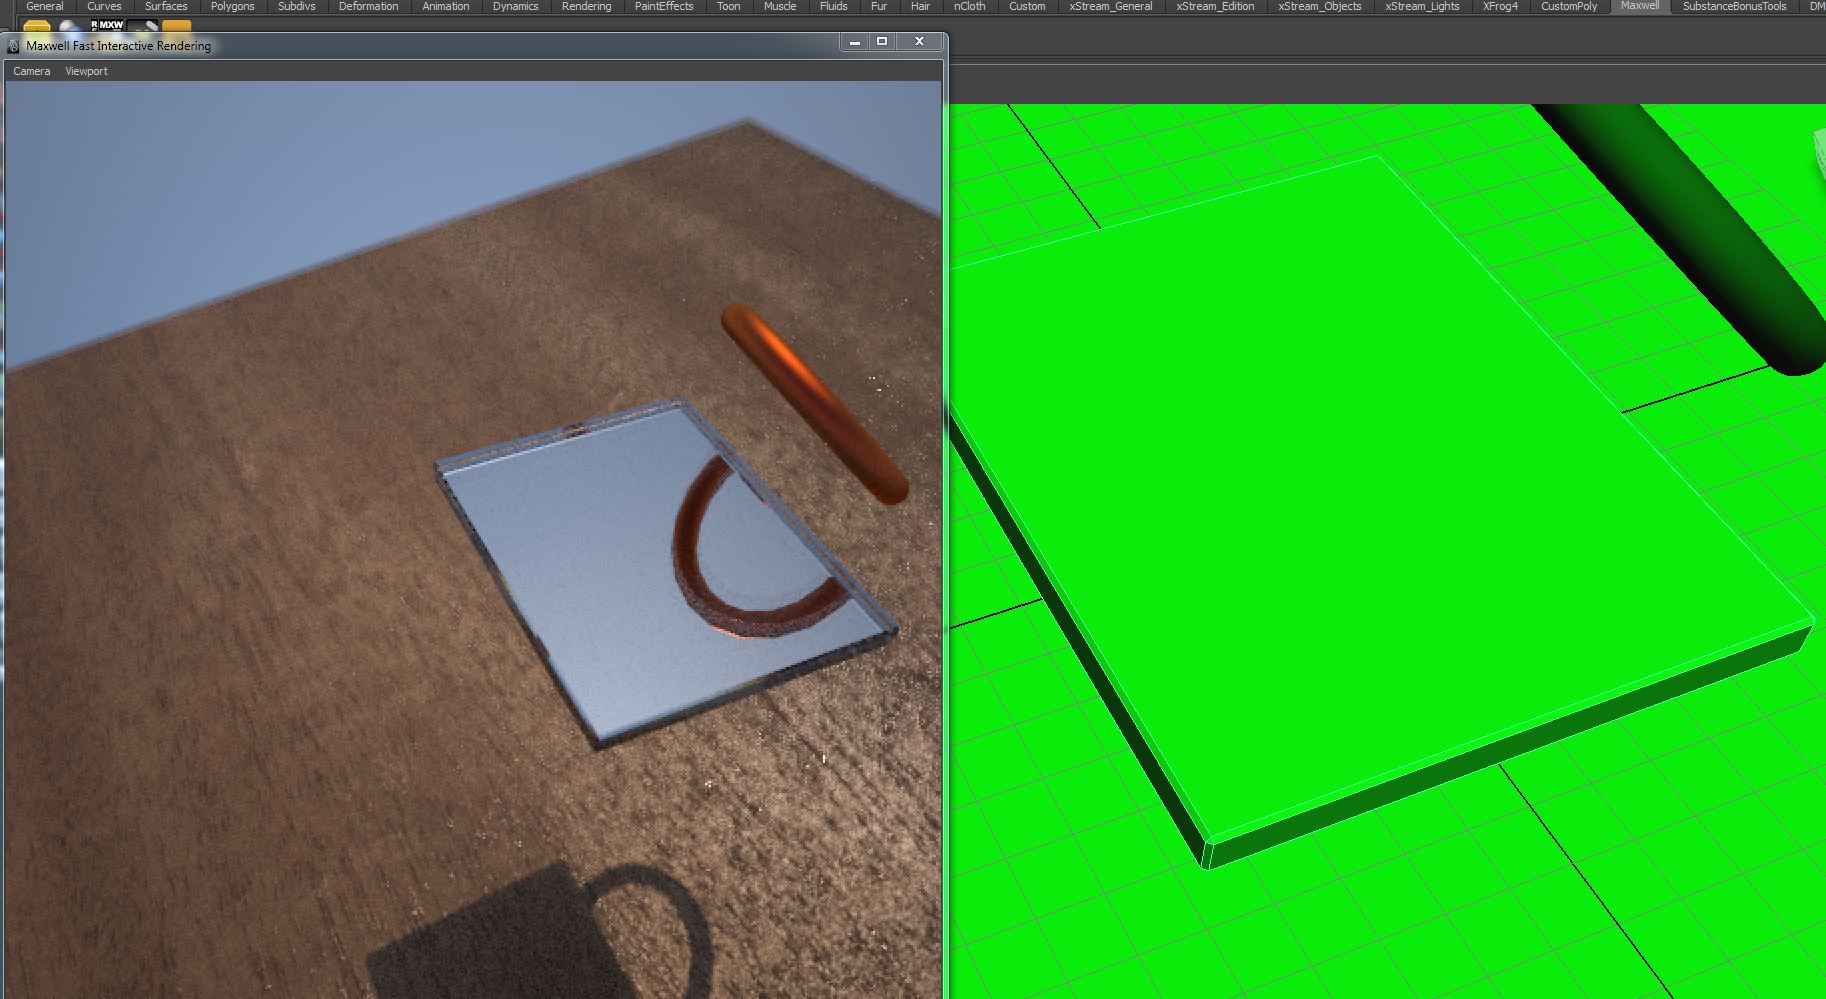
I was worried I'd have trouble making a realistic mirror with a piece of glass with silver on the back but it turned out to be a piece of cake. I did a little experiment last night and after some futtering around I was able to
1. assign glass shader to a bevelled polygonal slab
2. separate the back face from the beveled slab and extract it
3. assign a 1% roughness silver colored shader to the extracted face..
4. just for good measure I flipped the normal for the extracted silver face so it was facing into the glass slab. That might have been superfluous though since it's still two sided for now..I'm going to try making it one sided to save render time on all those back side reflections taking place..
-
geothefaust: There are tons of em if you just google, the highres ones @ blueprints.com cost money, i think. I mostly used a tons of photo references in addition.
L'Ancien Regime: I understand how you feel about the tutorials. There has been demand and some plans to do more of them but I dont know the details. The forums of planetside.co.uk are full of clipfiles, scenes and other information. Pretty much everything you can think of can be found there. That's the place I gained my information..
BeatKitano: That logo is actually from the default brush set that comes with 3D coat
thanks
-
Digman, I started reading your instructions on Thursday afternoon and I have to admit it was some heavy reading. (Where do you get all this stuff? I sure couldn't find it in the manual or the videos). But I kept on plowing away and after many false steps and mistakes and having to go back over and over again like an idiot I finally got it (at 4:00AM here! Time for bed)
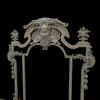
It's totally different this way. All the distortions that were tearing the hard edged frame apart are gone now and the physical forms are much smoother. And the face of the man at the top of the frame isn't such an evil psychophath anymore. Tomorrow I'm going to try the Displacement Map option...
Thank you so much.

-
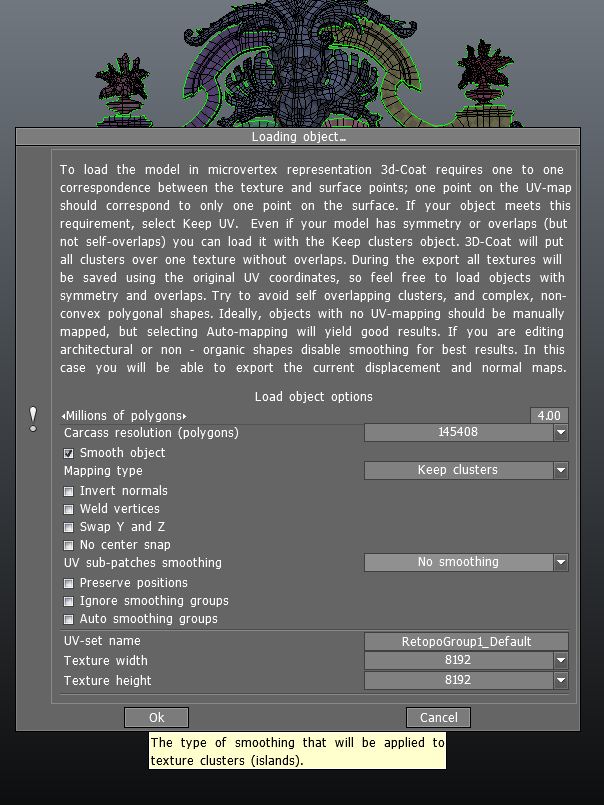
Wow, I LOWERED the resolution and it worked much better. This is great Digman.

-
OK I got a slightly different Loading Object menu than yours with "merge into scene (microverts)", but here's how I set it up
-
I hate this 10 minute rule editing rule...
In the retopo room you should have your voxel model ( high res) and your retopo mesh (Low res) together already. You now will just have to merge into the paint room.
It would be better if 3DCoat would say merge into the paint room instead of merge into scene or the other ways it says it for baking a normal map, ptex etc.
They all mean merging (baking) into the paint room.
Also if it was not clear the first picture in my post was from the paint room on exporting of course I saved the low polygon model aready. There is another way to export the maps out of the paint room once the merging is done.
It is under the file menu in the paint room, "export model.
There you can export the low polygon model, save it and then the options will come for you to export all your maps.
Keep at you will get there...
Thank you so much digman. You're a fantastic teacher. And yeah the 10 edit rule sucks..
-
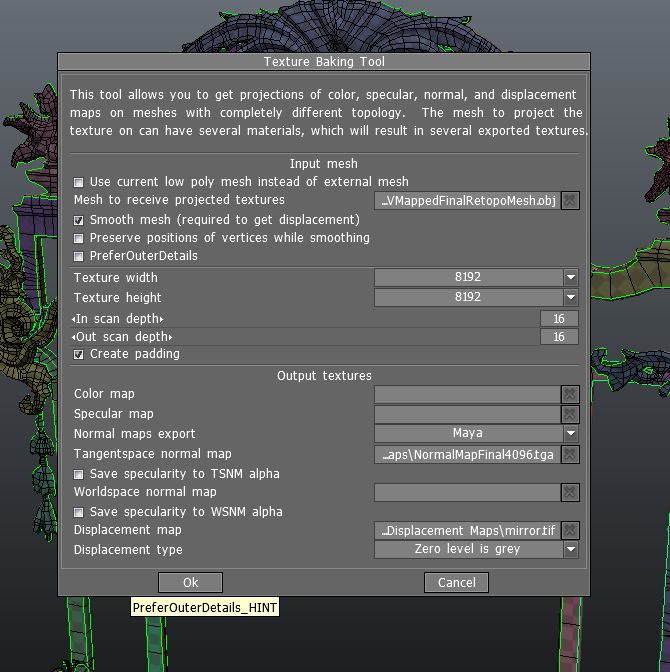
Thanks for the advice. I need it right now. I'm baking my textures directly from the Retopo Room. When I turn on the Paint Room it's empty. I'm not sure how to set up to bake from the retopo room since if I just bring the saved .obj poly mesh in there I won't have the underlying voxel sculpture to bake out. Sorry but this is arcane knowledge to me and the video tutorials I've gone through are leaving me in the dark on this. When I try using the menu you're using to bake out the normal map and displacement map I can't even figure out any way to select the mesh I'm working on; All it allows me to choose are two irrelevant old meshes.
I've been baking out from this Texture Baking Tool only...so how do I extract all this to the Paint Room so I can do it your way? There's still artifacts around the side of his nose and on the lower platform on the right hand side to the left of the sphynx...a weird black slash in the surface that doesn't appear to have any cause in the mesh when I examine it in Maya or in 3d Coat
I've selected padding but there's no box for choosing the padding setting. The voxel mesh is at 39 million triangles.
Correction; "I'm not sure how to set up to bake from the PAINT room..."
-
Edit: I combined two post...
First, glad ya almost done and it's really looking good...
Question, are you baking from the retopo room?
No need to bake again if you are in paint room after you merge for normal map or displacement map. Export the maps from the texture menu in the Paint Room.
Also I found at least 1 carcass subdivision level when merging seems to produce the best Normal and Displacement maps. Experiment to see what works best for you.
Is it possible that Maya is pushing the displacement map to far creating the problems? I know that Maya should have some adjustments there.
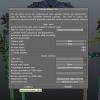
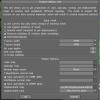
What is your padding setting for exporting, I use about 4 pixels sometimes more but never the 64 that is the default.
What is your mesh resolution in millions set at when merging. It should be least 8 million since you are producing higher resolution maps.
See the picture to read the tool tip in yellow.
Forget got to mention make sure "always make padding" is selected in the preferences section.
I use one carcass subdivision when merging for Normal maps most of the time. Displacement maps can be varied.
Thanks for the advice. I need it right now. I'm baking my textures directly from the Retopo Room. When I turn on the Paint Room it's empty. I'm not sure how to set up to bake from the retopo room since if I just bring the saved .obj poly mesh in there I won't have the underlying voxel sculpture to bake out. Sorry but this is arcane knowledge to me and the video tutorials I've gone through are leaving me in the dark on this. When I try using the menu you're using to bake out the normal map and displacement map I can't even figure out any way to select the mesh I'm working on; All it allows me to choose are two irrelevant old meshes.
I've been baking out from this Texture Baking Tool only...so how do I extract all this to the Paint Room so I can do it your way? There's still artifacts around the side of his nose and on the lower platform on the right hand side to the left of the sphynx...a weird black slash in the surface that doesn't appear to have any cause in the mesh when I examine it in Maya or in 3d Coat
I've selected padding but there's no box for choosing the padding setting. The voxel mesh is at 39 million triangles.
-
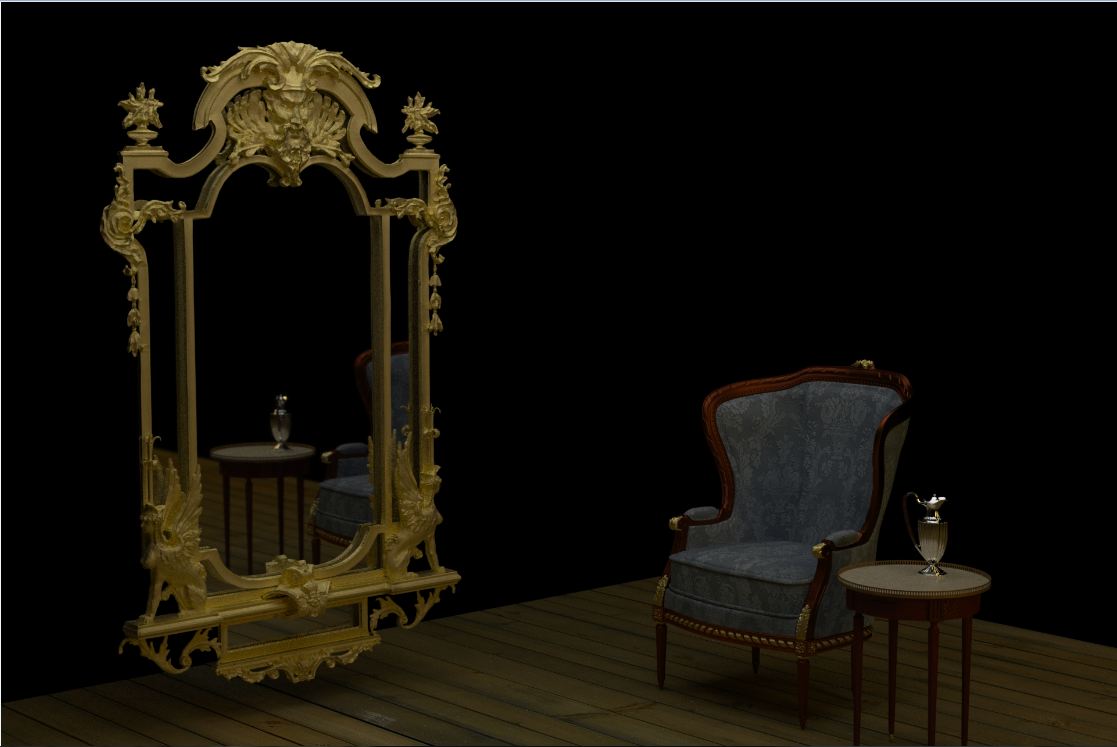
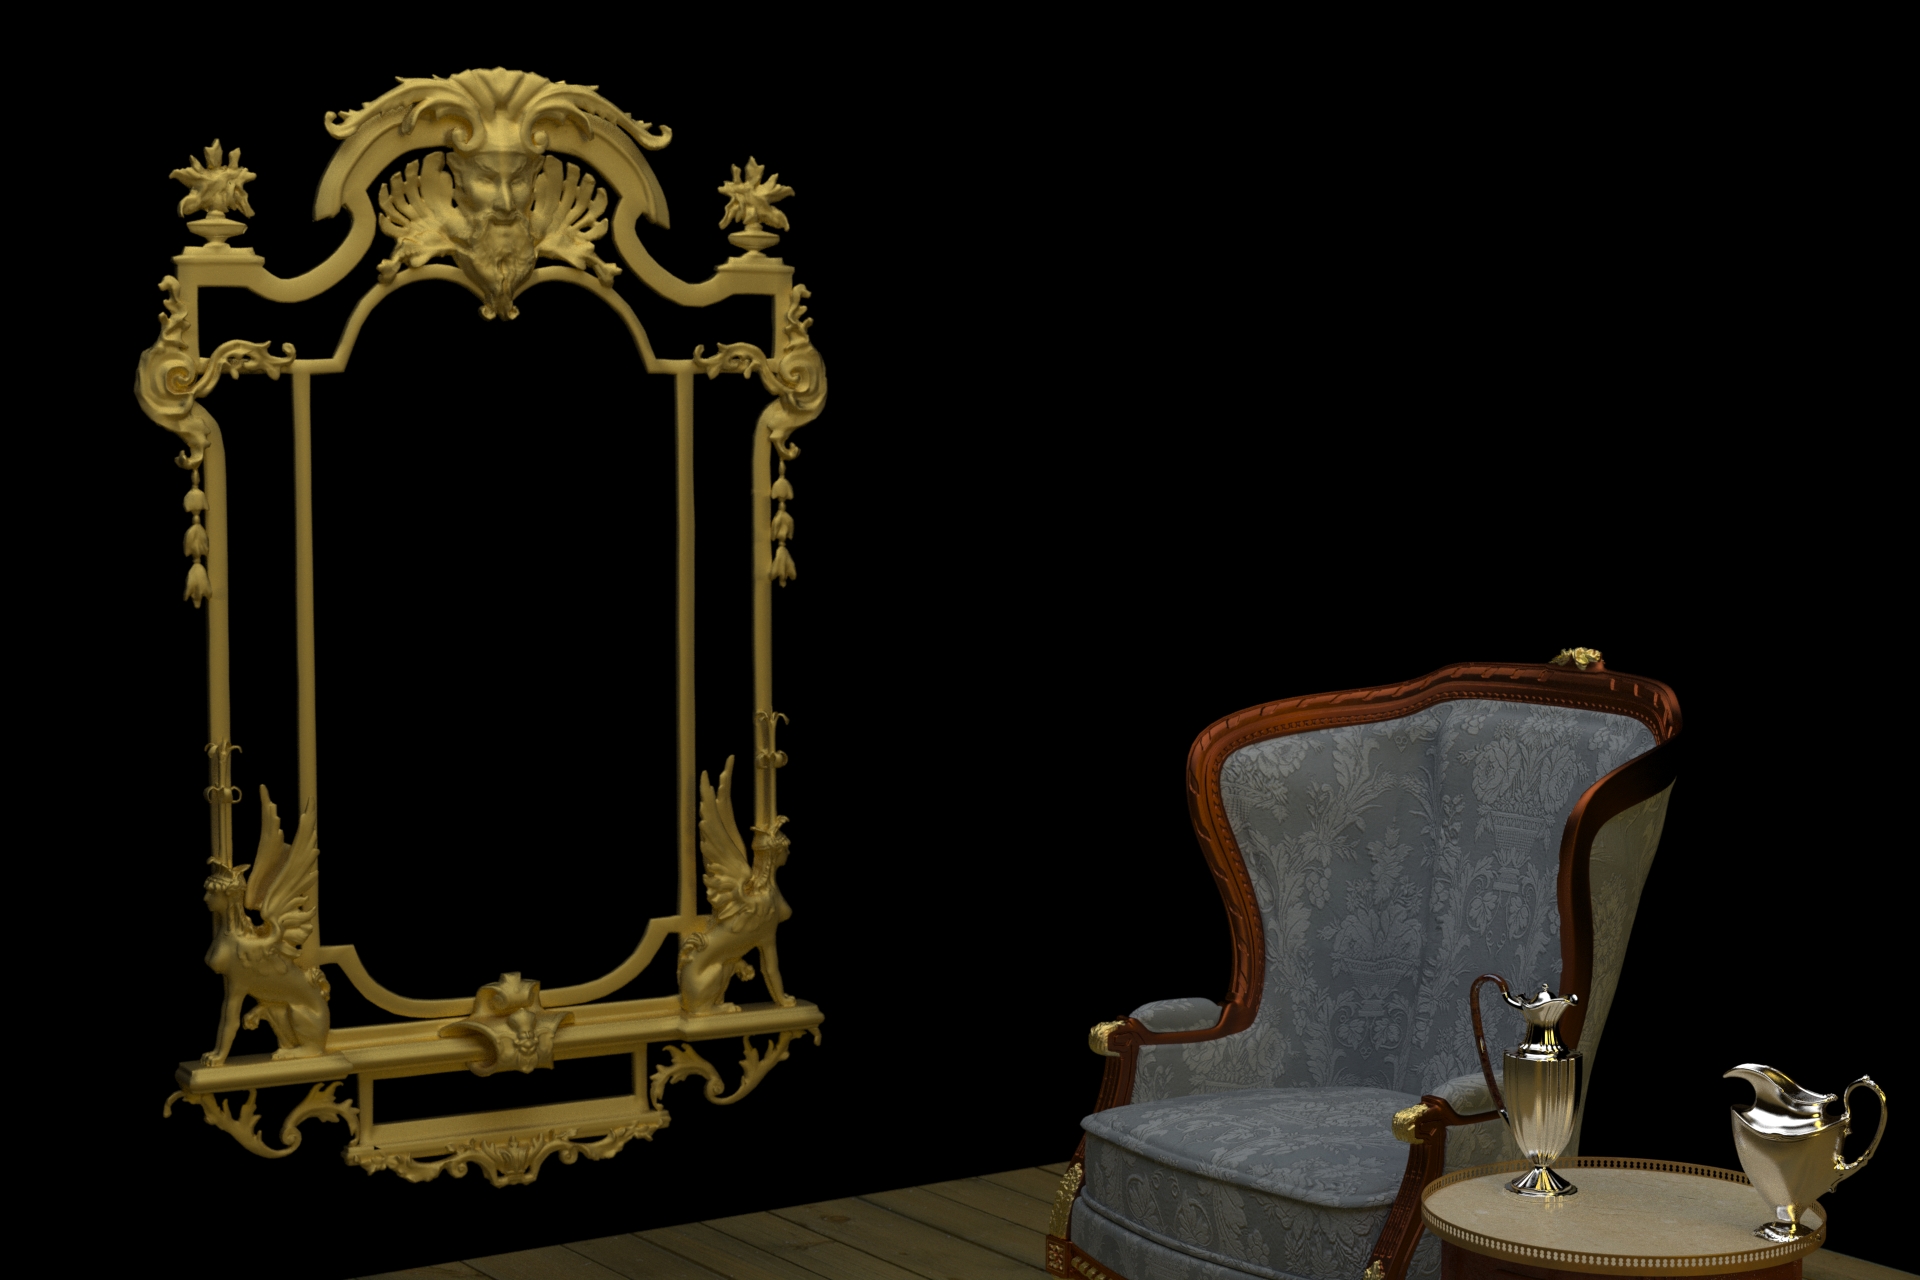
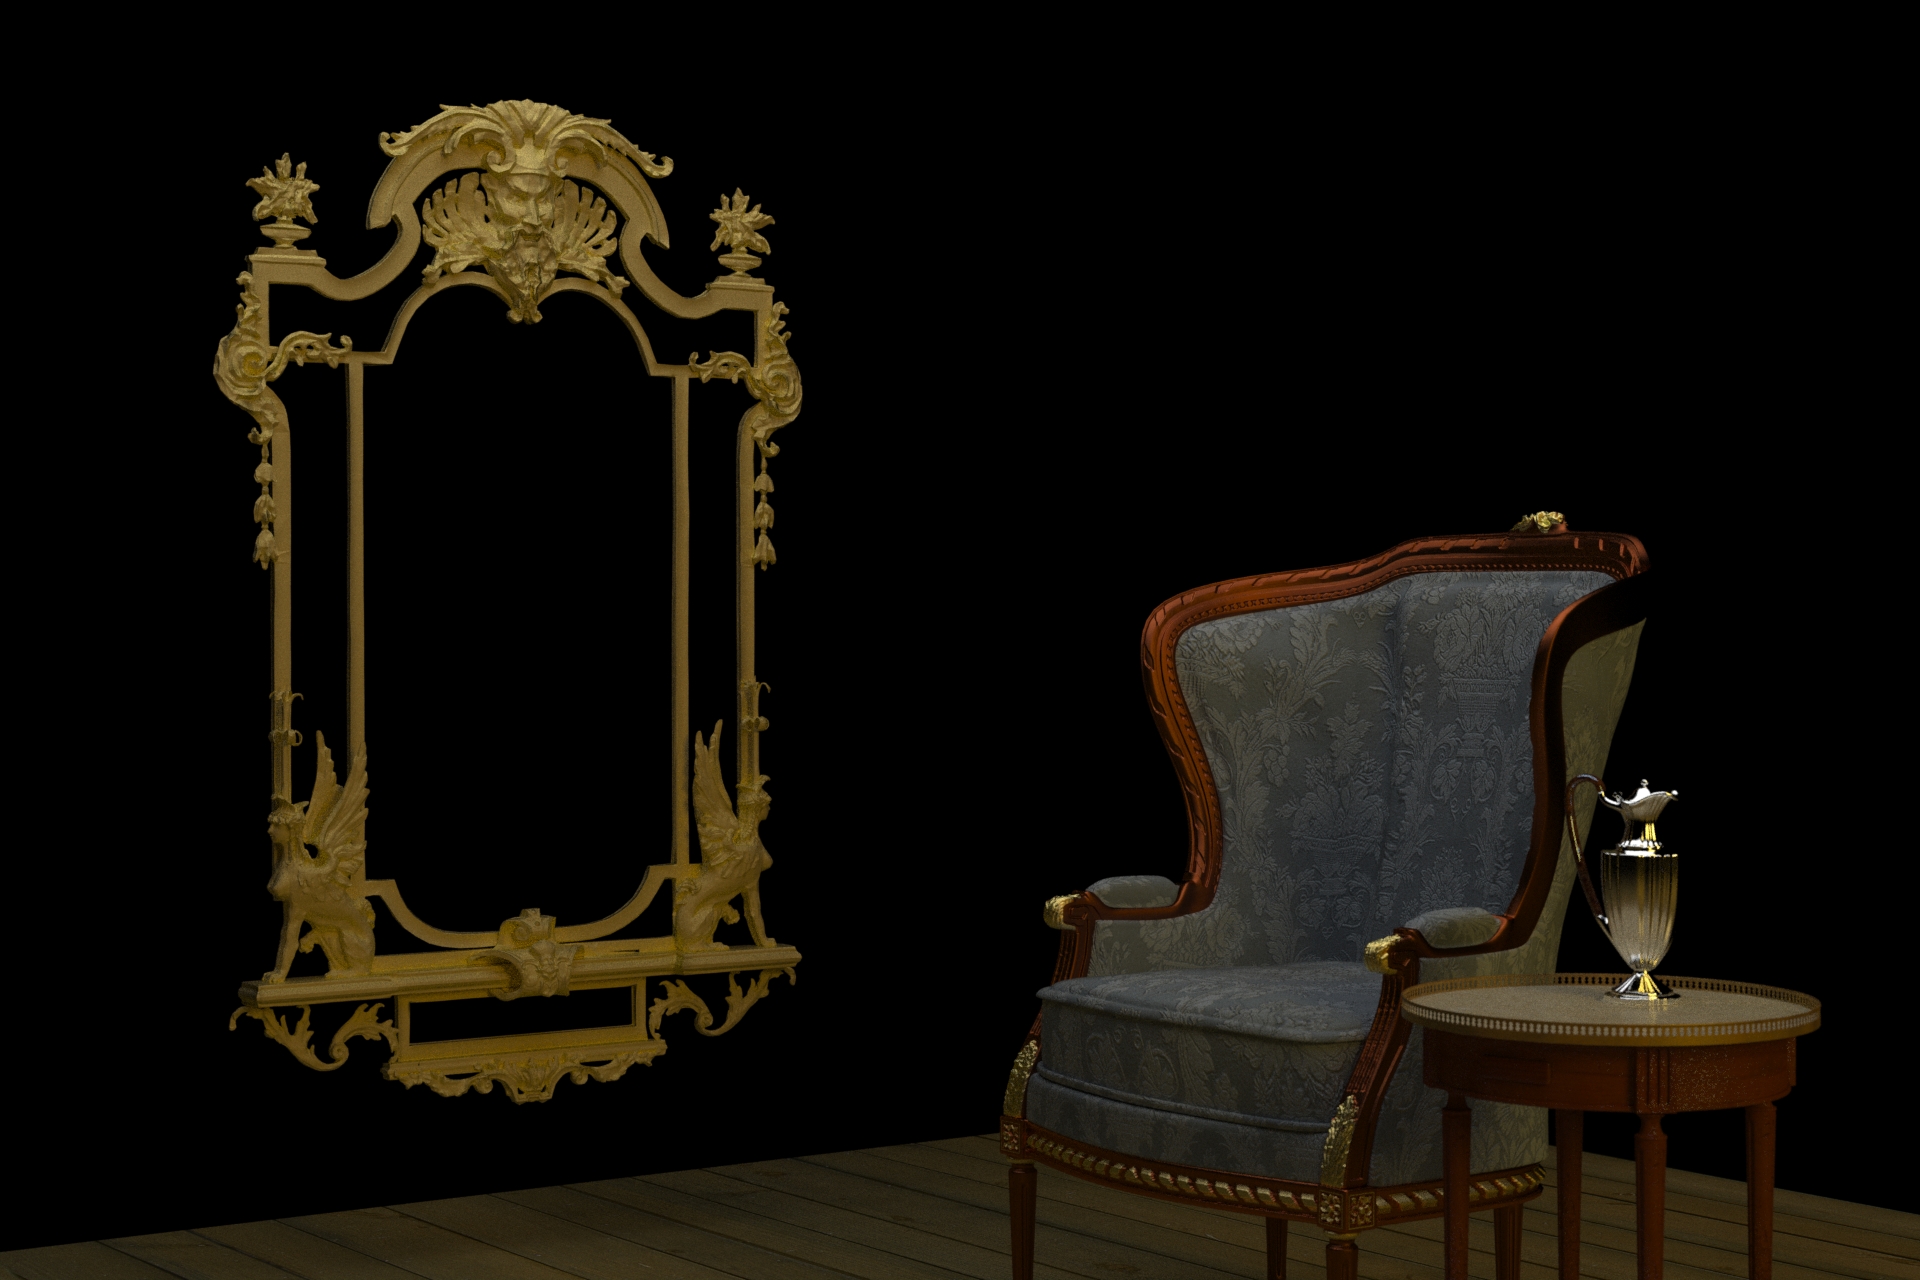
So all the problems with decay of the surface were the result of a stupid little mistake as usual. I'd checked the normals before exporting the frame from Maya to Maxwell but when I brought the frame into the Maxwell scene it was huge. Maxwell has a clumsy interface and when I scaled the frame down I accidentally went too far and flipped it upside down and inside out. I rectified that and then after some experimentation I ditched the baked out Displacement Map from 3d Coat and just went with the baked out Normal Map. The Displacement Map was distorting the hard edge frame too much and it was bringing in some artifacts on the sculpted details like the face at the top of the frame..the Normal Map is more than enough to smooth things out and recreate the detailed shape of the original Voxel sculpture.
This is just as well since Maxwell only allows one displacement map per shader. I'll use that displacement map to hand paint the repetitive geometrical ornaments of the frame shafts in Photoshop in greyscale instead.
The gold is the IOR gold at 90% roughness.

-
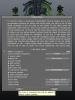
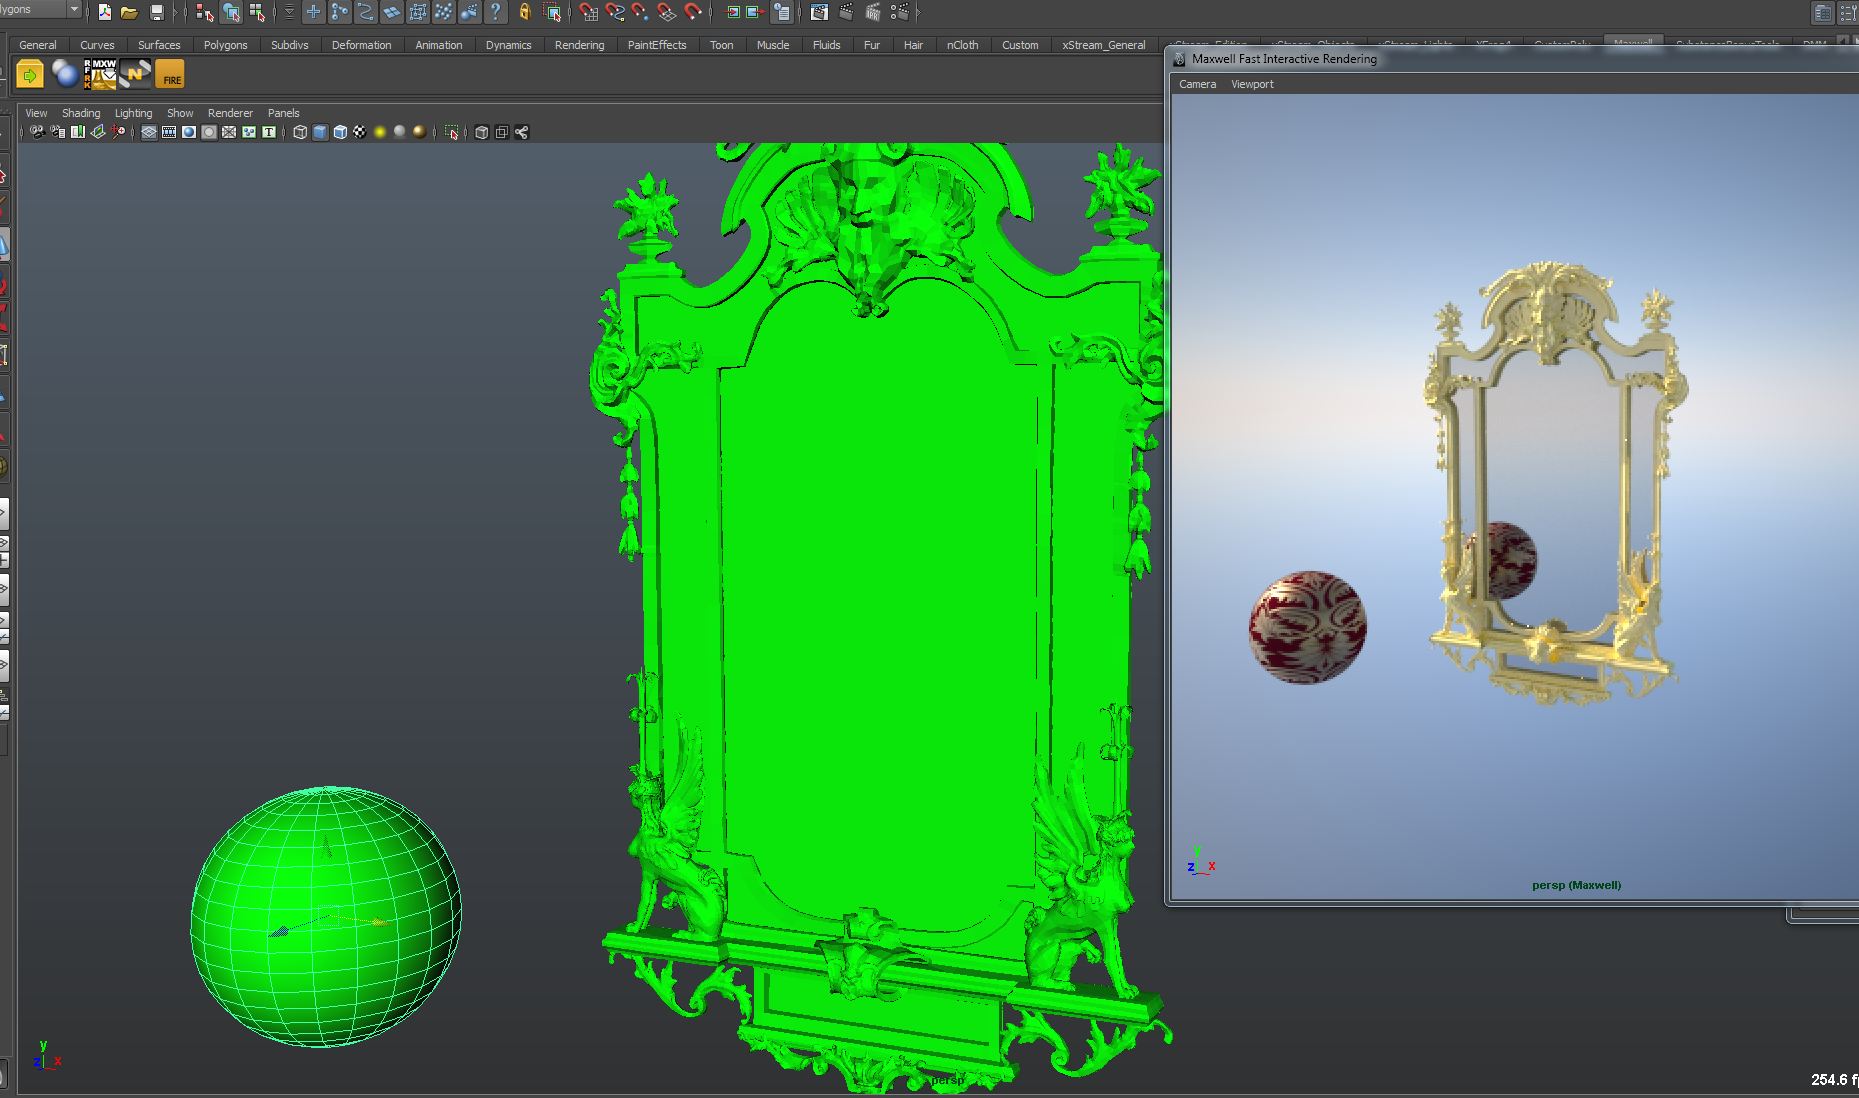
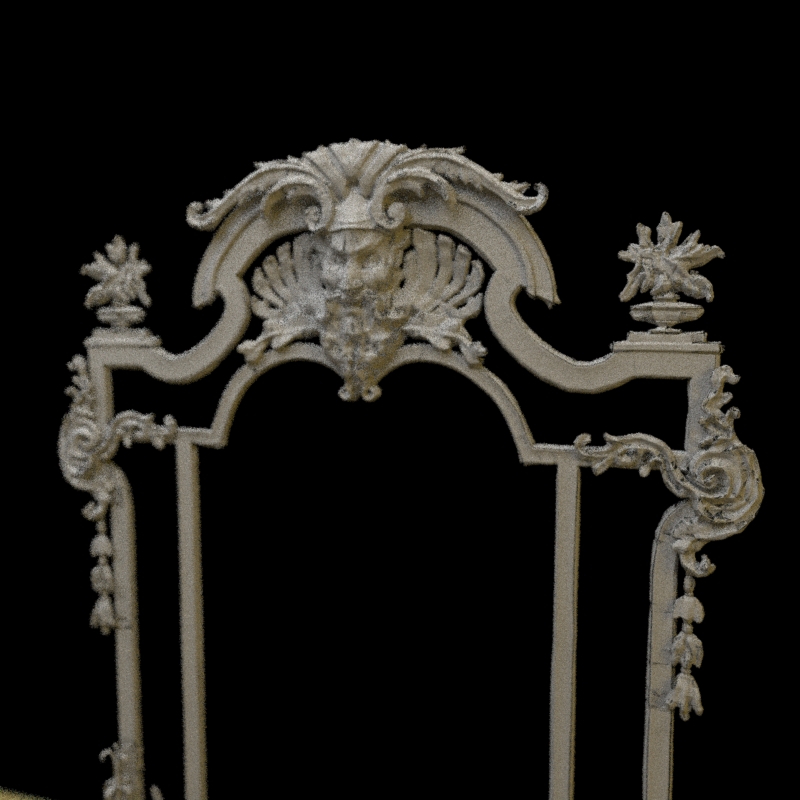
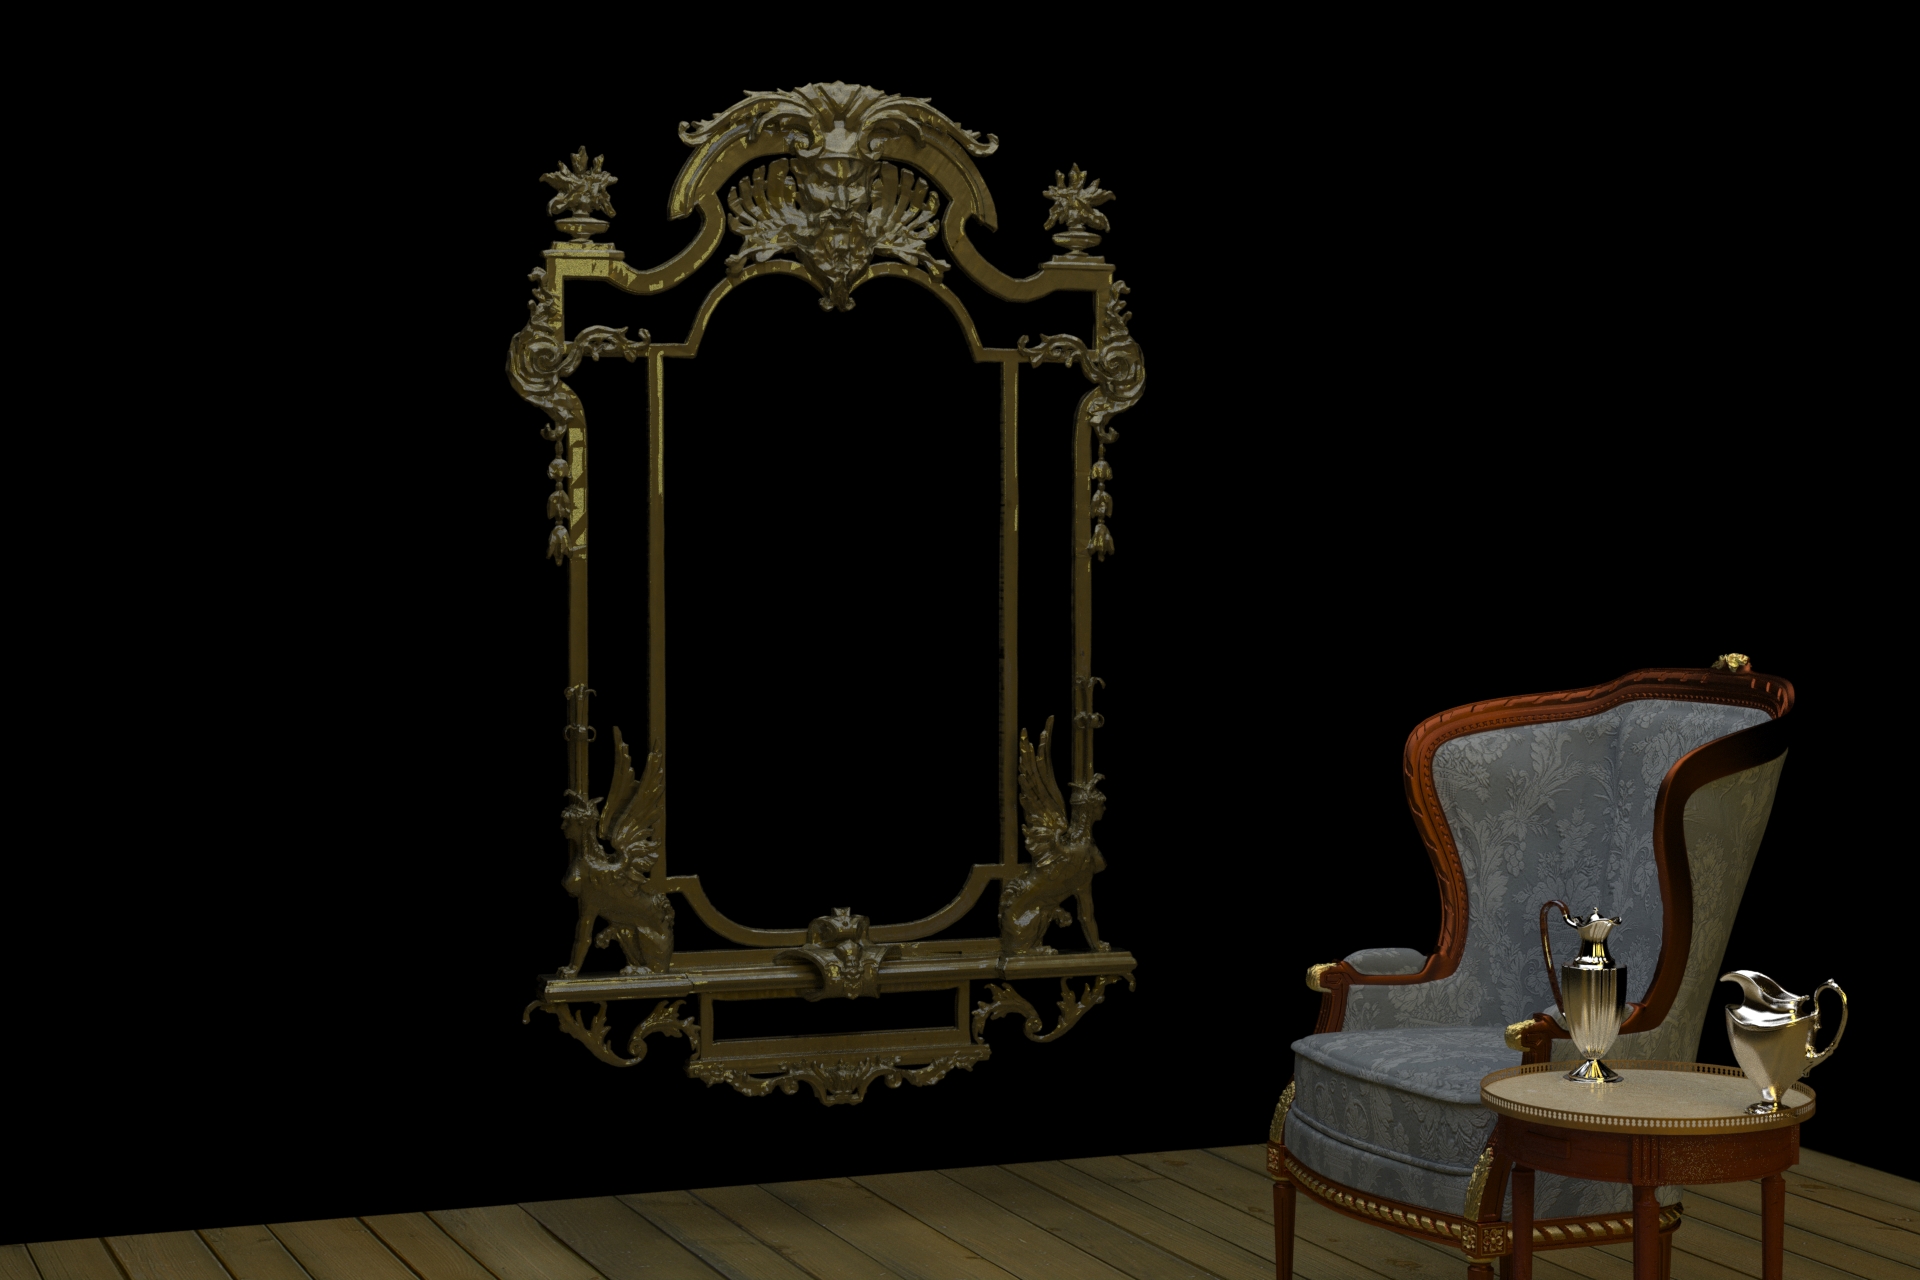
I'm having a lot of trouble making the displacement and normal maps work properly. Either they work and the surface seems to crumble and decay from their excesses (the black and white picture) or they don't work and I'm left with a fairly harsh polygonal mesh finish...(the color shot)
I'm wondering if the mathematical complexity of the full object isn't working against me here. maybe I should just go back and work on retopologizing the individual elements then parenting them together for the render...
These are full 8096 x 8096 texture files..

-
Well I got that worked out...now to get down to some serious texturing and redo it in a higher res version with all holes closed. There's some kind of decay going on in the skin if you look closely...
-
When I hit OK no displacement or normal map gets produced.
How do I do this?
-
OK, finished UV mapping and I've been able to export the UV mapped .obj to Maya...now I need to bake out Displacement and Normal Maps. I've set everything up in the Texture Baking Tool but I don't know how to get it to bake out the maps. Anyone? I can't seem to find any tutorials on this...the ones that are up are pre autopo .

-
Please check the first entry in this thread to get the latest manual update. It is complete (as of June 12th, 2011), but will be updated one more time before the next major release of 3D-Coat (which will contain the LiveClay additions and Applinks).
Greg Smith
Thanks for all the hard work you put into it. Much appreciated

Request to Forum Admin.
in CG & Hardware Discussion
Posted
Cancel the request. Digman's sending me all the stuff I lost..
Thx