

Malo
-
Posts
1,139 -
Joined
-
Last visited
Content Type
Forums
Calendar
Gallery
Everything posted by Malo
-
Hi at all. After several testings with the new PBR Materials, i feel something wents wrong if you have to change some colors, roughness and metalness on your existing models. In Substance Painter there is an easy way to do that job. It is called Fill Layer. I have created a little Video about the Problems and how it works in Substance Painter. Problems: 100% Roughness and Metallness In 3d Coat you have always to work with 100% Roughness and Metalness, if you want be able to change these values on the fly. That means, if you fill your object with 50% Roughness, you where not be able to go above 50% in the layer. If you need 75% or 100% you have to fill the complede layer new. Same with Metalness. HUE, Saturation and Brighness The next big problem is the color change. Hue, Saturation and Brighness did not realy work in realtime. On the other side there is no Color palette or something like that, it is always trial and error to find the correct color. Tiling If you want to change the tiling of your Material, you have to delete the layer befor, because 3d coat where not be able to delete the old material and replace it with a new one. If you dont delete it, you have both tilings, old and new, in your current layer. Solution Fill Layer In Substance Painter there is an option for it, it is called Fill Layer. This layer stores the material infos and let you modifiy it on the fly in a non destructive way. You are not be able to paint on it, because it is only for the used material itself. Something similar would be nice for 3d Coat. Long story short Feel free to add you +1 here if you think a Fill Layer would be a good idea. Mantis http://3d-coat.com/mantis/view.php?id=1736 Trello https://trello.com/c/ghjYS3DG/312-fill-layer-for-paint-room Cheers Malo
-

V4.5 BETA (experimental)
Malo replied to Andrew Shpagin's topic in New Releases, Bugs Reports & Development Discussion
Thats exaclty what i mean, with trial and error. Sure it is possible to change the color, normal, roughness and metalness but it is not realy comfortable. Anyway. Could anybody confirm that the Filloptions in the PBR Material uses Cube Projection if you set it to UV Mapping. Looks like the UV-Mapping option gets ignored. -
V4.5 BETA (experimental)
Malo replied to Andrew Shpagin's topic in New Releases, Bugs Reports & Development Discussion
I dont like the painting in Painter, 3d Coat is much more handy, thats true. But if you want to change some colors on your model, it is always a trial and error until you get what you want or need. And i think Filllayers would be good start to work more in a non destictive way. I was hoping Andrew could give some feedback on it, if it would be possible to create something like Filllayers for 3d coat. But, maybe i should create some requests if he wont answers. -
Yes, i mean Dense Quad or Project Quads. Both makes Quads but slightly different. But i think ABN is right. Retopo would be much better for you.
-
V4.5 BETA (experimental)
Malo replied to Andrew Shpagin's topic in New Releases, Bugs Reports & Development Discussion
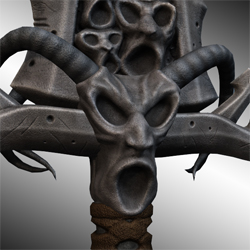
@Carlosan I dont have that Options, i only see Move and Monitor. @Jose I am on the latest Build, and if i fill a Layer with a normal material, it wont gets filled with metal. But you are right, if i use one of the preset materials, it works. Thats weird. @Polyhertz I dont know what a Solid Color is, i dont have PS. But a Fill Layer is an easy way to modify a color, without always klicking on Fill or do some experiments until you are satisfyed. Here you see a good example. All the basecolors are created with Filllayers. You see, it is non destructive and very easy to use. -
V4.5 BETA (experimental)
Malo replied to Andrew Shpagin's topic in New Releases, Bugs Reports & Development Discussion
Thanks. I did not see it. I will delete my entry. Edit: How could i close or delete it? -
1. A small stroke brings you a sharper gradient mask A long stoke brings you a more smoothes mask. If you hold STRG you could subtract unwantet areas. 2. You could modify your falloff to your wishes, for the different uses you need. And you could save and import your own ones. Most of the 3d Coat members call the PoseTool the Swiss Army Knife of Sculpting. It is realy powerfull.
-
V4.5 BETA (experimental)
Malo replied to Andrew Shpagin's topic in New Releases, Bugs Reports & Development Discussion
FillTool wont fill Metallness. Only Diffuse, Normal and Roughness gets filled. Looks like there is a bug. Feel free to add your +1 http://3d-coat.com/mantis/view.php?id=1734 -
Hold ALT while you want to move, zoom or rotate.
-
Realy nice. The last 3 pictures are a little bit dark. It is hard to see some details. What about some camoflage texturing with red and brown instead of pure red or brown?
-
Ich kann wieder Online gehen, freu Here is a little Video As far as i see, PoseTool could gets a little bit laggy if you have to much polys and radial symmetry with a lot of areas. But Cutoff works nice.
-
You have to think different. 3d coat in not a "boxmodelling" software like maya or blender. There is not realy a easy way to select verts, edges or faces and move it around. I show you how i would did it in a video as soon as i can.
-
You want to put there a chamfer(Fase) on top of it, right? Then i would prefer to select less, maybe with lasso or rectangle strokemode. Maybe it would be easier if you use CutOff for the chamfer.
-
Have you tried the Quadmesh export?
-
Yes it sucks, if you life "am Arsch der Welt". Not sure how it is called in english. It makes no difference if the gear is closed or have a hole for the axis(Übertragerwelle). You could do it in the same way, as i told.
-
Yes, but maybe you are not the only one and i am wrong. You could create a Mantis or Trello request. And see what way it goes.
-
I was thinking you want to use your gear from the images. And they looks very open to me, not closed. If you import a object like this into Voxel Room, it gets closed, sure, but maybe in a ugly way. I cant show you some pictures or video, i still cant go online at home. If you have time, i could explain it more detailed. But for now 1. bring your object to VoxelRoom. 2. enable radial symmetry with 8 areas. (one for each tooth) 3. adjus symmetry, maybe your object is not at center or something like that. 4. use posetool with one of the first stroke modes from E-Panel. 5. make a line from the top of the tooth to the bottom. you will see a masked area with gradient. or maybe from bottom to top, i am not sure, i cant test it right now. 6. align the gizmo to the correct space in room, that you could easier move it around. 7. move the gizmo 8. if movement look weird, restart at the point 5. (new line, align gizmo, move gizmo) 9. and so on, until you are happy. That should be it.
-
You dont have to rebild it. You could do it in retopo room. Select what you want and use the transform tool. In Surface and Voxel Room you should first close your object to a volume. And then you could use the radial symmetry and GrabTool or PoseTool to deform your Geartooth.
-
As far as i know, there is no automasking. You have to do it by painting.
-
But what neccessary Tools wont use Alphas? Could you explain, please?
-
You could freeze it with FreezeTool or use Radial Symmetry.
-
There is a Noise Generator in Surface Mode, but it have not the power of the generator like in Zbrush.
-
No, there is no indicator. And i think we dont need an indicator. I dont see a reason for it. Sure some tools, cant us a different brush alpha like CutOff or CleanTool, but makes no difference if you change that, the default one is enough. Or miss i something?
-
You dont need this options anymore. It is now based on the Symmetry itself. That means, if you have X Mirror On, autopo use automaticly X Mirror. Same should work with other axis and Radial stuff, but i dont have test everything. About your missing Retopo. Did you have checked if it is the same problem as i told you a few weeks ago?
-
V4.5 BETA (experimental)
Malo replied to Andrew Shpagin's topic in New Releases, Bugs Reports & Development Discussion
@Andrew What did you think about Fill Layers like in Substance Painter? Would it be possible to store the Material in a layer that we could change and modify it on the fly?
