


ScrotieFlapWack
-
Posts
118 -
Joined
-
Last visited
Content Type
Forums
Calendar
Gallery
Everything posted by ScrotieFlapWack
-
One quick question. What would be the best way to create the edges you see on the bottom of this tin toy. They snake out from the base and have a really nice curved effect but I don't know the best way to go about it. Same goes for the nice curve on the top of the roof of the toy. Ahh the joys of still being a 3DC noob haha!
-
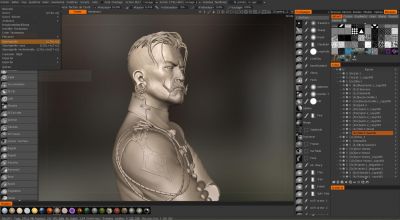
I've found some time to start this challenge, I've been blocking out my basic shapes. Once I have that I'll be adding in the little details like at the bottom of my reference image the edges snake off from the base shape, there is holes and clips for the box area where the conductor sits and the top roof has a nice curved shape. All hail the pose tool xD
-

Baking Normal Maps - High to Low with external models
ScrotieFlapWack replied to sazberryftw's topic in General 3DCoat
What I would recommend doing is renaming your voxel object layer(s) to whatever your object is let's say you are making a brick then rename the layer your high poly object is on to 'Brick'. Then rename your 'RetopoGroup1' to 'Brick' then go to the top menu and select 'Retopo' and there should be an option that is called 'Check corresponding names' (or something like that), click that option and if it comes back saying that everything is good then you are ready to bake, your objects and layers are all set correctly, you just head over the the 'Bake' tab and select 'Bake per pixel Normal' and let 3D - Coat work its magic Hope that helps. -
You can export your mesh from the paint room when in microvertex mode and import that into the voxel room and retopo and UV and bake from there. Just need to export your model after microvertex and import into the voxel room I did this workflow last night xD
-
 Amazing work. Love the level of detail on the character.
 -
There is multiple ways to get materials from 3D - Coat into UE4. I am hoping to do some video tutorials soon using 3D - Coat and getting models and materials into UE4 as it is my engine of choice and 3D - Coat is the modelling program I will be using to produce my assets. I just need to find the time. I may record myself doing the whole process from start to finish and edit it into a series I can put on Youtube, just to share the knowledge I have picked up. Will have to find the time to do it though, so don't rely on me haha
-
I think that I may actually have a go at this, I want to start of with something simple though as I don't really have much time to spend on this. Think I might go for something like this: I want to go for a used look though, rusted, battered, scratches in the paint
-
Hi, I am trying out a few new tools after checking out a sweet tutorial on Udemy for hard surface sculpting, I found out about a few tools that I never even knew about! Right now I am messing around with creating clothing and I am using the 'Vox Layer' tool to make things like sweaters and trousers (generic items of clothing) but I am running into some problems which are by the sounds of it pretty common when working with voxels. I apply my new Vox Layer and its relatively thin, I start sculpting creases and moving around the volume to get my forms but when I start getting into the detailing (I usually sculpt in Surface mode for this) I am completely destroying my volume. I know I can make the volume thicker before applying my Vox Layer but I don't really want massively thick trousers and sweaters, is there any other way to non destructively sculpt on thin volumes? If there isn't which I don't expect there is, then I guess the only answer is to make my Vox Layer relatively thick. Just a thought, can you freeze the inner shell of a new Vox Layer and sculpt on the outer surface of it, with the inside of the volume frozen could that potentially stop the issue of sculpting through the whole volume if it is really thin? Just want to add, Split and Vox Layer with the different selection modes are my favorite tools right now, you can make some sick stuff, if anyone is interested in the Udemy course I mentioned above here is the link https://www.udemy.com/3d-coat-robots 3D - Coat totally kills Zbrush for complex hard surface and organic modelling! GO 3D - COAT!!!! XD
-
I am instancing bricks around my scene to make a full wall model which I will eventually retopo and bake. I am only using one brick and instancing that so I will just retopo that one brick and UV unwrap and bake that and just save the resulting model to my 'Models' tab and use that brick to instance instead I figured if I am instancing my models around the scene why not retopo and UV and bake as I go along to keep problems like this from happening. It also gives me piece of mind when re - using these models as I know they have great topology and are as low poly as I can get them with awesome bakes I am trying to work as efficiently as possible, I am still learning modelling and I feel I am at a level where I can start to look at other workflows and incorporate those into my modelling so I am working as cleanly as possible and getting great results fast. Thanks for the suggestions guys
-
I am looking for a little bit of help. I am working with a model which I have instanced a ton of times (roughly 119 million triangles) and I am looking to retopo my model, but performance in the viewport is starting to feel a little sluggish. Is there any tips on how I can improve performance when not sculpting and just doing retopo or UV work? I have everything CUDA on at the moment and my GPU is a GTX 970 which has about 4GB of RAM and I have 16GB of RAM currently inside my PC. Don't know if you need all that info but hey Thanks, Dave.
-
I thought I would share my work and start off a little sketchbook of what I am creating. Some renders will be from 3D - Coat and some will be from UE4. Right now I am working on a stone wall for a game idea. I've sculpted my stones, next step will be to make some grout to go between them and then retopologize, UV and bake. Eventually this will be going into UE4. I'll keep updating this thread as I progress
-
Oh by the way. Just in case nobody has found these ... http://www.cgchannel.com/2012/04/download-125-custom-zbrush-and-3d-coat-brushes/ Pretty cool stuff!
-
Digman you are the 3DC guru haha. Thanks man
-
Awesome! Would I need to edit them in Photoshop to include the 'Colour', 'HeightMap', 'Specular' and 'EraserMask' layers or can they just be used straight away with no editing? Thanks.
-
Ahh it is a bug. That's ok, I can wait for it to be fixed. I guess as a work around I can try and stay away from the stamp tool. I have no idea how to report bugs but if you are having the same issue I can wait
-
I keep getting this problem when I am working in Surface mode and then change my layer back to Voxel mode (and vice versa). Parts of my model vanish. I'm not using any tools to make this happen and this is just sculpting, no work being done in the Retopo or UV room. I start with a cube and use the cut off tool then res up and just keep adding details. Then to add surface definition I change to Surface mode and start adding details on my model and then I change back to Voxel mode and this happens. The same thing happens if I go from Voxel to Surface mode too. I don't know if it is because I am increasing my resolution to a really high level or whether its a bug or known issue. 3D - Coat doesn't crash when this happens I can continue to sculpt and performance is smooth.
-
Awesome thanks Digman! One more question, do Zbrush alphas work inside 3D - Coat, or would I need to modify them in Photoshop?
-
I am struggling to find out how to make alphas for my brushes for use when sculpting in the Voxel room. I have seen an old tutorial by Javis but I don't know if this still applies. He basically shows that alphas are made of 4 layers 'Color', 'HeightMap', 'Specular' and 'EraserMask'. Does this still apply? My last question is, where do I save my alphas once I have made them in Photoshop? I see in 'My Documents' there is 2 folders '3D-CoatV3' and '3D-CoatV45'. Inside '3D-CoatV3' there is only one folder called 'Exchange'. Inside '3D-CoatV45' there is a bunch of folders. I don't know which one I should save my brush alphas to. I would like to make my own folder so I can differentiate the standard brushes from my own custom brushes. Is there a way to do this and if so where would I place that folder with the alpha files. Thanks!
-
Hi Guys, So I have really been getting in to 3D - Coat over the past week or so and I am trying to transfer some of the workflows I have learnt over the last year to 3D - Coat. One of the most useful workflows I have come across especially for environment art is this: http://pixologic.com/zclassroom/homeroom/lesson/environments-with-tate-mosesian This is a workflow that uses the 2.5D canvas in Zbrush to basically insert meshes in a tileable way to bake your maps from for simple things like floors, walls anything that is tileable really This is probably an old technique and with tools like Substance Designer on the market, kinda makes this workflow redundant, unless you have other methods. Anyway what I would like to know is how can I transfer this over to a solid workflow for 3D - Coat. I have an idea on how to do this but it is a bit of a struggle when you can't do things like focus on the canvas to see your workspace, in 3D - Coat you can't really resize your viewport to a specific size so you never really know what size you are working with, at least I don't anyway. I have messed around with defining the measurements by setting my measurements to cm for UE4 but I don't completely understand how the grid works and if you have grid snapping in 3D - Coat. My thought process for doing something similar to the above workflow from ZClassroom is to sculpt your high detailed objects (bricks, rocks, stone, whatever) and then save them as models so you can use them as presets by saving them into the model folder to use in the Voxel room. Once you have your objects you use the 'Instancer' tool and you can start laying them out around the viewport. This is where my question comes in, how can you be sure that you are working to the correct size you want your texture to be, ready for baking? I guess you can easily make modular environment parts by doing the same method as above and then going to the Retopo room and making a low poly and baking. Is there a way to know what size you are working in whilst instancing your objects? The only thing that comes to my mind is making a 1024 x 1024 plane and instancing your objects over that. I would love to hear other methods to get the same results, would be really cool to share workflows
-
This has probably been answered a million times but I am going to ask as I can't seem to find the answer on the forums (I know I am probably being stupid and not looking in the right place). I was wondering how it is possible to post bugs. I use the Steam version of 3DC (version 4.5.19) and I am running into an issue which I remember being a bug way before 4.5. Basically whenever I am in the retopo room I retopologize my model as normal and then in the same room I will start adding seams for my UV map. After adding the seams I unwrap and go into the UV room and nothing is in there, no voxels, no model. There is a layer however from the retopo room. I go to add a UV set as there is no UV sets made yet, as soon as I press the add UV set button I get a dialog box come up with a bunch of information about my computer and then I press ok and 3DC just shuts down. I was wondering what is the official way to log a bug so I could report this. Does it matter if I use the Steam version also? The current build of 3DC on Steam is one of the stable releases as far as I am aware. Thanks, Dave.
-
Just reporting back to say that the problem was actually with 'Flick's in Windows 10. If you type in the search bar 'Tablet PC Settings' then in that window go to 'Flicks' tab and turn it off that will fix the problem
-
Ahh cool I didn't know this was possible. Thanks again!
-
Hi Carlosan, Would this be the same in Windows 10, as that is what I am running at the moment on my computer
-
Hi AbnRanger thanks for sharing this massive library of brushes. I know this post is a couple of years old but are these brushes tileable? I haven't tried downloading them yet so I don't know if the links still work (currently at work, unable to try).
-
Hi Guys, So I am just getting back into 3DC after finding out about the latest version being available on Steam. I am trying to use my Wacom graphics tab to sculpt but there is a really annoying 1 second delay (possibly less) that is really noticeable and very difficult to work with. I am wondering if this is a potential bug or whether its some sort of setting within my graphics tab that I can fix. When I use my tab in Zbrush there is no delay and it works instant but in 3DC I try and sculpt with the pen and its as if my tab thinks I'm pressing down and holding, a little white circle appears next to my cursor for just a second and that happens with every touch I make. My graphics tablet is a Wacom Bamboo. I am running Windows 10, I've tried looking for the settings within Windows 10 just in case there was something there but I am having no luck finding anything. One thing to note is that when I first plugged my tab to my computer it thought I was using a touch screen device such as a touch monitor or something, I haven't changed any settings within Windows 10 so everything should be default. I also use a wireless receiver for my tab as well so I don't have a USB cable trailing around. Any help is appreciated
