


Pix Jigsaw
-
Posts
201 -
Joined
-
Last visited
Content Type
Forums
Calendar
Gallery
Everything posted by Pix Jigsaw
-
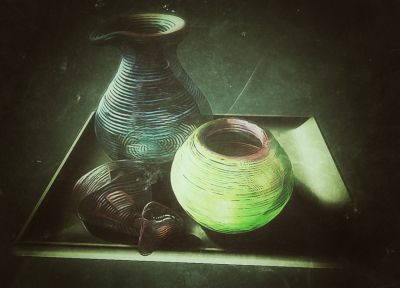
From the album: Pix Jigsaw
Modeled and painted and rendered in 3D Coat. All the shapes were formed initially with the lathe and move tools. A little post work to add some mood and interest to the render.© Pix Jigsaw
-
Haven't seen digman on for a while. I miss his comments and advice. If you have been in contact with him recently, could you drop me a note? Thanks.
-

Retopo and UV export/import within retopo room
Pix Jigsaw replied to Ruth Spacecookie Andrews's topic in General 3DCoat
I see the sense of what you are trying to do, but it seems you are swimming upstream against the 3D-Coat workflow river. The price of sculpting in the vox room free from restrictive topology constraints is that the Vox room is pretty much a UV-free zone. With the object you have, I think you could take it from retopo room to the cloth simulation. When you are done, go to the retopo room. Once there, do some manual work to conform the original flat retopo mesh to the new shape. Basically you have to bend down those three triangles in front. Merge that, bring in your already finished artwork and apply it. I'm not 100% sure that will work, but that is the direction I would explore. -
Thanks Tony. Loved that collection! Very inspiring to me.
-
Thanks alvordr. Good topic. I love the helpful community on this Forum. I love that 3D Coat lets me approach sculpting like an artist. It just feels good to use. It really interfaces well with a tablet. We spend a lot of time discussing the technical features and settings here, but at the end of the day what keeps me coming back is that pure pleasure of shaping digital clay.
-
1st Challenge: Sculpt a King's Throne!
Pix Jigsaw replied to TimmyZDesign's topic in Member Contests
Congrats Ebitz and everyone who participated. Thanks Tim for keeping everything on track. Lots of fun and I enjoyed seeing everyone's projects. -
@ Tim. AbnRanger demos how he uses the strokes tool in the video he linked to, above. It is near the end, starting at 12:58.
-
[Solved] Points and faces -- removing points
Pix Jigsaw replied to Pix Jigsaw's topic in General 3DCoat
@ D. R. Greenlaw. Glad the post was helpful for you. It was driving me nuts, too. I love the points and faces tool, but it is really easy to accidentally scatter points around. -
Great thread! I was wondering why I got the colorful selection sometimes and the faint grey others. Mystery solved.
-
Thanks Junker!
-
Also look in BeatKitano's Sketchbook WIP Gallery. July 27 post. 3rd post down. http://3d-coat.com/forum/index.php?showtopic=14846&hl=
-
1st Challenge: Sculpt a King's Throne!
Pix Jigsaw replied to TimmyZDesign's topic in Member Contests
Love to see your concepts Marc and AJZ. Marc -- way to go with the backstory! -
Nice Denis. I also appreciated the link to the concept art you posted with it.
-
It looks like the vert might be buried under the surface of the reference model (the grey part). Here are a couple things to try: 1. You could delete the polygons you are having problems with and then redo them using the quad tool. That might solve the problem. 2. You could hide the reference model and then try joining the vertices. That might work if one of the vertices is buried in the reference model.
-
That ugly fish is really turning out great! I think he looks more like this guy then Edgar G. Robinson.
-
Working on some vintage rendering looks to use when the model is complete.
-
I'm a little confused. Someone tell me if I have this right. You can export RGB Normal maps or greyscale bump maps and use them to create the appearance of geometric details on a low poly model. The greyscale bump maps can be exported by exporting a displacement map from 3D Coat. Normal maps can be exported by exporting a Normal Map from 3D Coat. Displacement maps exported from 3D Coat can also be used in a different way when exported. They can represent true geometric displacement (rather than faking it with shading). Like greyscale bump maps, they are exported from 3D Coat by using the export displacement map option. So, a displacement map exportred from 3DC can be used in two ways: true geometric displacement or bump map shading. It really depends on what the external program does with the data in the displacement map. Did I summarize that correctly?
-
I've had the program show numbers like that (and more) on occasion, without any slowdown and/or crash that I would expect. Usually when it happens I look upward, raise my hands over my head and slowly curl my fingers into fists. Then I shout, "I HAVE THE POWER!" It disturbs everyone around me, but feels great. I recommend you give it a try.
-
Got a chance to do some more work on the Banjo project. Making the tuners.
-
Keeping Origin Points and Parenting set in external tools
Pix Jigsaw replied to Gian-Reto's topic in Feature requests
Jax, 1. Don't paint your texture on the Occlusion layer, leave that for the ambient occlusion. 2. Look through the layer stack and any layer that is set to Multiply, change to Normal blend mode before exporting to Blender. That should fix your problem with having the texture so dark when it gets exported into Blender. 3. As for layer to paint on, you can use the default layer, I think. Or add one (or more) of your own layers above layer 0. Don't worry that they are below the normal and baked occlusion. -
Interesting technique designamyte. I'm inspired to use the retopo to voxel workpath more creatively. Thanks for taking the time to post it. I really liked the smooth surface you were able to get in the first part of the tutorial.
-
You've got great skills Psionic. I'm enjoying watching this model come together.
-
Put up a screen shot. I think that would help solve your problem quickly. It should show the retopo groups window, your retopo mesh with the points you want to join, and your object. Also show the circle around your cursor.
-
error when starting 3DCoat!! (0xc000007b)
Pix Jigsaw replied to chris_solo's topic in SOS! If you need urgent help for 3DCoat
I'm using 4.0.06A. CUDA DX It runs fine on my windows8 -64bit system with DX11. The file name for the version I'm using is 3d-CoatDX64C.exe. I think the C at the end of the file name tells that it is CUDA. Our systems specifications look almost identical, except I have a GTX 660ti video card. -
Do you have more than one layer of retopo mesh? It doesn't work when the points you want to join are on different layers. Copy them to the same layer and try. If the points are on the same layer, try moving the camera around so the point you are dragging to is clearly facing the camera and not hiding on the other side of a sharp edge. I find the angle you are viewing from can make a difference.
